-
微信小程序(中)
微信小程序
获取系统信息
-
wx.getSystemInfoAsync异步获取系统信息-
在页面
index.js中Page({ /** * 页面的初始数据 */ data: { }, /** * 生命周期函数--监听页面加载 */ onLoad(options) { // 异步获取系统信息 wx.getSystemInfoAsync({ // 成功 success: (result) => { console.log(result) }, // 失败 fail: (err) => console.log(err), // 成功也调用,失败也调用 complete: (info) => console.log(info) }) }, })- 1
- 2
- 3
- 4
- 5
- 6
- 7
- 8
- 9
- 10
- 11
- 12
- 13
- 14
- 15
- 16
- 17
- 18
- 19
- 20
- 21
- 22
- 23
- 24
- 25
- 26
-
这个时候会打印出一些系统信息,如果我们根据自己的手机进行真机调试就会出现:

-
-
Object wx.getSystemInfoSync()同步获取系统信息-
在页面
index.js中Page({ /** * 页面的初始数据 */ data: { }, /** * 生命周期函数--监听页面加载 */ onLoad(options) { // 同步获取系统信息 const result = wx.getSystemInfoSync() console.log(result); }, })- 1
- 2
- 3
- 4
- 5
- 6
- 7
- 8
- 9
- 10
- 11
- 12
- 13
- 14
- 15
- 16
- 17
- 18
-
这个时候打印的结果和异步获取系统信息的结果是一样的。
-
-
success回调函数参数请参考wx.getSystemInfoAsync(Object object) | 微信开放文档 (qq.com)属性 类型 默认值 必填 说明 success function 否 接口调用成功的回调函数 fail function 否 接口调用失败的回调函数 complete function 否 接口调用结束的回调函数(调用成功、失败都会执行) -
success回调函数输出打印结果的参数。属性 类型 说明 brand string 设备品牌 model string 设备型号 screenWidth number 屏幕宽度,单位 px screenHeight number 屏幕高度,单位 px
路由
-
什么是路由?
- 路由是从一个页面跳到另一个页面(类似于超链接)
-
页面目录结构:

-
在
app.json配置{ "pages": [ "pages/01/index", "pages/me/index" ], "window": { "backgroundTextStyle": "light", "navigationBarBackgroundColor": "#fff", "navigationBarTitleText": "Weixin", "navigationBarTextStyle": "black" }, "tabBar": { "custom": true, "list": [{ "pagePath": "pages/01/index", "text": "首页" }, { "pagePath": "pages/me/index", "text": "我的" }] }, "usingComponents": { "tabbar":"/custom-tab-bar/index" }, "style": "v2", "sitemapLocation": "sitemap.json" }- 1
- 2
- 3
- 4
- 5
- 6
- 7
- 8
- 9
- 10
- 11
- 12
- 13
- 14
- 15
- 16
- 17
- 18
- 19
- 20
- 21
- 22
- 23
- 24
- 25
- 26
- 27
-
在
custom-tab-bar中-
index,wxml<view class="tab-bar"> <text class="tab-bar-item {{active == 0?'active':''}}" bindtap="switchTab" data-index="0">首页</text> <text class="tab-bar-item {{active == 1?'active':''}}" bindtap="switchTab" data-index="1">我的</text> </view>- 1
- 2
- 3
- 4
-
index,wxss.tab-bar { display: flex; text-align: center; line-height: 100rpx; border-top: 1px solid #0a81d2; } .tab-bar-item { flex: 1; } .active { color: red; }- 1
- 2
- 3
- 4
- 5
- 6
- 7
- 8
- 9
- 10
- 11
- 12
-
-
wx.switchTab(Object object)跳转到tabBar页面,并关闭其他所有非tabBar页面-
在
index.js// custom-tab-bar/index.js Component({ /** * 组件的属性列表 */ properties: { }, /** * 组件的初始数据 */ data: { active: 0 }, /** * 组件的方法列表 */ methods: { /** * tabbar 切换 */ switchTab(e) { // 取出传的参数 const { index } = e.currentTarget.dataset this.setData({ active: index }) // 跳转至 TabBar 页面 const URL = index == 0 ? '/pages/01/index' : '/pages/me/index' wx.switchTab({ url: URL, }) } } })- 1
- 2
- 3
- 4
- 5
- 6
- 7
- 8
- 9
- 10
- 11
- 12
- 13
- 14
- 15
- 16
- 17
- 18
- 19
- 20
- 21
- 22
- 23
- 24
- 25
- 26
- 27
- 28
- 29
- 30
- 31
- 32
- 33
- 34
- 35
- 36
- 37
- 38
- 39
-
页面效果展示

-
-
wx.redirectTo(Object object)关闭当前页面,跳转到应用内的某个页面。但是不允许跳转到tabbar页面。-
新建了一个详情页面
detail
-
在
app.json中{ "pages": [ "pages/01/index", "pages/me/index", "pages/detail/index" ], "window": { "backgroundTextStyle": "light", "navigationBarBackgroundColor": "#fff", "navigationBarTitleText": "Weixin", "navigationBarTextStyle": "black" }, "tabBar": { "custom": true, "list": [{ "pagePath": "pages/01/index", "text": "首页" }, { "pagePath": "pages/me/index", "text": "我的" }] }, "usingComponents": { "tabbar":"/custom-tab-bar/index" }, "style": "v2", "sitemapLocation": "sitemap.json" }- 1
- 2
- 3
- 4
- 5
- 6
- 7
- 8
- 9
- 10
- 11
- 12
- 13
- 14
- 15
- 16
- 17
- 18
- 19
- 20
- 21
- 22
- 23
- 24
- 25
- 26
- 27
- 28
-
在页面
01中的index.wxml中<!-- 点击按钮跳转详情页面 --> <button bindtap="lickDetail">查看详情信息</button>- 1
- 2
-
在页面
01中的index.js中 -
这里的页面跳转是可以携带参数的
-
接收是在
detail页面的index.js中的页面加载函数onLoad// pages/01/index.js Page({ /** * 页面的初始数据 */ data: { }, /** * 生命周期函数--监听页面加载 */ onLoad(options) { }, onShow: function () { this.getTabBar().setData({ active: 0 }) }, /** * 跳转详情页面 */ lickDetail () { /** * 关闭当前页面(销毁),重新打开一个非 TabBar 页面 */ wx.redirectTo({ // 这里不能跳转到 tabbar 页面 url: '/pages/detail/index?id=10&name="张三"', }) } })- 1
- 2
- 3
- 4
- 5
- 6
- 7
- 8
- 9
- 10
- 11
- 12
- 13
- 14
- 15
- 16
- 17
- 18
- 19
- 20
- 21
- 22
- 23
- 24
- 25
- 26
- 27
- 28
- 29
- 30
- 31
- 32
- 33
- 34
-
在页面
detail中的index.js中// pages/detail/index.js Page({ /** * 页面的初始数据 */ data: { }, /** * 生命周期函数--监听页面加载 */ onLoad(options) { const {id,name} = options console.log(id,name); }, })- 1
- 2
- 3
- 4
- 5
- 6
- 7
- 8
- 9
- 10
- 11
- 12
- 13
- 14
- 15
- 16
- 17
- 18
-
页面效果展示


-
控制台打印结果

-
-
wx.navigateTo(Object object)保留当前页面,跳转到应用内的某个页面。但是不能跳到tabbar页面。使用wx.navigateBack可以返回到原页面。小程序中页面栈最多十层。-
在页面
01中的index.js中 -
这里也是可以传值的,和
wx.redirectTo传值方式是一样的 -
跳转到详情页是可以通过
wx.navgateBack返回的// pages/01/index.js Page({ /** * 页面的初始数据 */ data: { }, /** * 生命周期函数--监听页面加载 */ onLoad(options) { }, onShow: function () { this.getTabBar().setData({ active: 0 }) }, /** * 跳转详情页面 */ lickDetail () { /** * 保留当前页面 跳转到另一个页面 */ wx.navigateTo({ url: '/pages/detail/index?id=2&name="李四"', success:(res) => console.log(res) }) } })- 1
- 2
- 3
- 4
- 5
- 6
- 7
- 8
- 9
- 10
- 11
- 12
- 13
- 14
- 15
- 16
- 17
- 18
- 19
- 20
- 21
- 22
- 23
- 24
- 25
- 26
- 27
- 28
- 29
- 30
- 31
- 32
- 33
- 34
-
在页面
detail中的index.wxml中// 点击按钮返回 <button bindtap="back">返回</button>- 1
- 2
-
在页面
detail中的index.js中// pages/detail/index.js Page({ /** * 页面的初始数据 */ data: { }, back() { // delta 代表返的数量 是number值 wx.navigateBack({delta:0}) }, /** * 生命周期函数--监听页面加载 */ onLoad(options) { const {id,name} = options console.log(id,name); }, })- 1
- 2
- 3
- 4
- 5
- 6
- 7
- 8
- 9
- 10
- 11
- 12
- 13
- 14
- 15
- 16
- 17
- 18
- 19
- 20
- 21
-
页面效果展示

-
获取个人信息
-
wx.getUserProfile(Object object) -
获取用户信息。页面产生点击事件(例如
button上bindtap的回调中)后才可调用,每次请求都会弹出授权窗口,用户同意后返回userInfo。属性 类型 默认值 必填 说明 lang string en 否 显示用户信息的语言 desc string 否 声明获取用户个人信息后的用途,不超过 30 个字符 success function 否 接口调用成功的回调函数 fail function 否 接口调用失败的回调函数 complete function 否 接口调用结束的回调函数(调用成功、失败都会执行) -
在页面
01中的index.wxml中// 点击按钮 获取用户信息 <button type="primary" bindtap="getUserProfile">获取用户信息</button>- 1
- 2
-
在页面
01中的index.js中// pages/01/index.js Page({ /** * 页面的初始数据 */ data: { }, /** * 生命周期函数--监听页面加载 */ onLoad(options) { }, onShow: function () { this.getTabBar().setData({ active: 0 }) }, /** * 获取用户信息 */ getUserProfile() { // 获取用户信息 wx.getUserProfile({ desc: '用于注册用户', // 描述信息,后期将会显示在用户界面上 success:({userInfo}) => console.log(userInfo), fail:(err) => console.log(err) }) } })- 1
- 2
- 3
- 4
- 5
- 6
- 7
- 8
- 9
- 10
- 11
- 12
- 13
- 14
- 15
- 16
- 17
- 18
- 19
- 20
- 21
- 22
- 23
- 24
- 25
- 26
- 27
- 28
- 29
- 30
- 31
- 32
-
页面效果展示

-
控制台打印结果

缓存
- 用户信息缓存,只需要获取一次用户信息,不需要一直获取用户信息,给用户造成不好的体验。
同步缓存
-
wx.setStorageSync(string key, any data)同步设置缓存- string key
- 本地缓存中指定的 key
- any data
- 需要存储的内容。只支持原生类型、Date、及能够通过
JSON.stringify序列化的对象。
-
同步缓存后,获取信息时使用同步获取缓存和异步获取缓存都是可以的
-
wx.getStorageSync(string key)同步获取缓存 -
wx.getStorage(Object object)异步获取缓存属性 类型 默认值 必填 说明 key string 是 本地缓存中指定的 key success function 否 接口调用成功的回调函数 fail function 否 接口调用失败的回调函数 complete function 否 接口调用结束的回调函数(调用成功、失败都会执行) -
在页面
01中的index.wxml中<button type="primary" bindtap="getUserProfile">获取用户信息</button>- 1
-
在页面
01中的index.js中// pages/01/index.js Page({ /** * 页面的初始数据 */ data: { }, /** * 生命周期函数--监听页面加载 */ onLoad(options) { }, onShow: function () { }, /** * 获取用户信息 */ getUserProfile() { // 获取用户信息 wx.getUserProfile({ desc: '用于注册用户', // 描述信息,后期将会显示在用户界面上 success: ({ userInfo }) => { // console.log(userInfo) // 缓存用户的信息 this.saveUserInfo(userInfo) }, fail: (err) => console.log(err) }) }, /** * 报错用户信息 */ saveUserInfo(userInfo) { // console.log(userInfo); 同步缓存用户信息 wx.setStorageSync('userInfo', userInfo) // 获取缓存中的用户信息(同步) // const userInfoStorage = wx.getStorageSync('userInfo') // console.log(userInfoStorage); // 获取缓存中的用户信息(异步) wx.getStorage({ key: 'userInfo', success: ({data}) => console.log(data) }) } })- 1
- 2
- 3
- 4
- 5
- 6
- 7
- 8
- 9
- 10
- 11
- 12
- 13
- 14
- 15
- 16
- 17
- 18
- 19
- 20
- 21
- 22
- 23
- 24
- 25
- 26
- 27
- 28
- 29
- 30
- 31
- 32
- 33
- 34
- 35
- 36
- 37
- 38
- 39
- 40
- 41
- 42
- 43
- 44
- 45
- 46
- 47
- 48
- 49
- 50
- 51
- 52
- 53
-
页面效果展示
-
控制台打印结果

异步缓存
-
wx.setStorage(Object object)异步设置缓存属性 类型 默认值 必填 说明 key string 是 本地缓存中指定的 key data any 是 需要存储的内容,只支持原生类型、Date、及能够通过 JSON.stringify序列化的对象success function 否 接口调用成功的回调函数 fail function 否 接口调用失败的回调函数 complete function 否 接口调用结束的回调函数(调用成功、失败都会执行) -
在页面
01中的index.wxml中<button type="primary" bindtap="getUserProfile">获取用户信息</button>- 1
-
在页面
01中的index.js中// pages/01/index.js Page({ /** * 页面的初始数据 */ data: { }, /** * 生命周期函数--监听页面加载 */ onLoad(options) { }, onShow: function () { }, /** * 获取用户信息 */ getUserProfile() { // 获取用户信息 wx.getUserProfile({ desc: '用于注册用户', // 描述信息,后期将会显示在用户界面上 success: ({ userInfo }) => { // console.log(userInfo) // 缓存用户的信息 this.saveUserInfo(userInfo) }, fail: (err) => console.log(err) }) }, /** * 报错用户信息 */ saveUserInfo(userInfo) { // console.log(userInfo); // 异步缓存用户信息 wx.setStorage({ key: 'userInfo', // 数据 data: userInfo }) // 获取缓存中的用户信息(同步) // const userInfoStorage = wx.getStorageSync('userInfo') // console.log(userInfoStorage); // 获取缓存中的用户信息(异步) wx.getStorage({ key: 'userInfo', success: ({data}) => console.log(data) }) } })- 1
- 2
- 3
- 4
- 5
- 6
- 7
- 8
- 9
- 10
- 11
- 12
- 13
- 14
- 15
- 16
- 17
- 18
- 19
- 20
- 21
- 22
- 23
- 24
- 25
- 26
- 27
- 28
- 29
- 30
- 31
- 32
- 33
- 34
- 35
- 36
- 37
- 38
- 39
- 40
- 41
- 42
- 43
- 44
- 45
- 46
- 47
- 48
- 49
- 50
- 51
- 52
- 53
- 54
- 55
- 56
- 57
-
页面展示效果和控制台打印结果和同步缓存是一样的
wx.showToast(Object object)-
显示消息提示框
属性 类型 默认值 必填 说明 title string 是 提示的内容 icon string success 否 图标 duration number 1500 否 显示的延迟时间 mask boolean false 否 是否显示透明蒙层,防止触摸穿透 -
在页面
01中的index.wxml中<button bindtap="showToast">显示toast</button>- 1
-
在页面
01中的index.js中// pages/01/index.js Page({ /** * 页面的初始数据 */ data: { }, /** * 显示 Toast */ showToast() { wx.showToast({ title: '提示信息', // success 显示成功图标 // error 显示失败图标 // loading 显示加载图标 // none 不显示图标 icon:'success', duration:5000, // 延迟时间 mask:true, // 当你点击按钮时 出现提示 但是这个时候还可以点击这个页面的其他按钮 // 设置 mask:true 就不可以点击了 }) } })- 1
- 2
- 3
- 4
- 5
- 6
- 7
- 8
- 9
- 10
- 11
- 12
- 13
- 14
- 15
- 16
- 17
- 18
- 19
- 20
- 21
- 22
- 23
- 24
- 25
- 26
-
页面效果展示

wx.showModal(Object object)-
显示模态对话框
属性 类型 默认值 必填 说明 title string 否 提示的标题 content string 否 提示的内容 showCancel boolean true 否 是否显示取消按钮 cancelText string 取消 否 取消按钮的文字,最多 4 个字符 cancelColor string #000 否 取消按钮的文字颜色,必须是 16 进制的颜色字符串 confirmText string 确定 否 确定按钮的文字,最多 4 个字符 editable boolean false 否 是否显示输入框 success function 否 接口调用成功的回调函数 fail function 否 接口调用失败的回调函数 -
在页面
01中的index.wxml中<button bindtap="showModal">显示modal</button>- 1
-
在页面
01中的index.js中Page({ /** * 页面的初始数据 */ data: { }, /** * 生命周期函数--监听页面加载 */ onLoad(options) { }, showModal(){ wx.showModal({ title:'标题', content:'提示的内容', showCancel:true, // 是否显示取消按钮 cancelText:'取消', // 自定义取消按钮文字 cancelColor:'#05d7fe', // 取消按钮的文字颜色 confirmText:'确认', // 确认按钮的文字 // editable:true // 是否显示输入框 success:(res) => console.log(res) // 点击确认的回调函数 }) } })- 1
- 2
- 3
- 4
- 5
- 6
- 7
- 8
- 9
- 10
- 11
- 12
- 13
- 14
- 15
- 16
- 17
- 18
- 19
- 20
- 21
- 22
- 23
- 24
- 25
- 26
- 27
-
页面效果展示

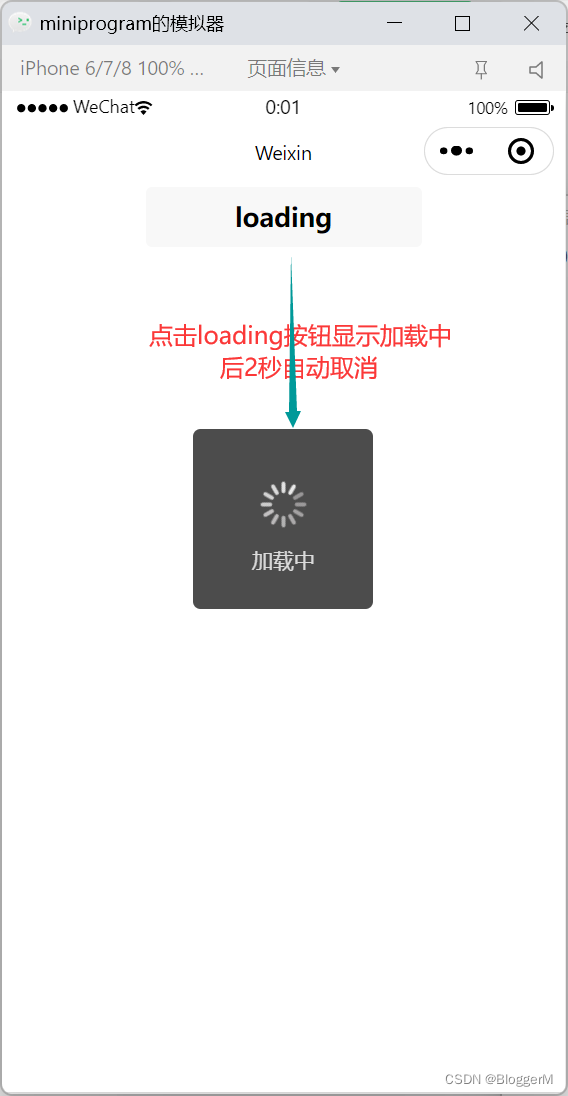
wx.showLoading(Object object)-
显示
loading提示框。需主动调用wx.hideLoading才能关闭提示框属性 类型 默认值 必填 说明 title string 否 提示的内容 mask boolean false 否 是否显示透明蒙层,防止触摸穿透 success function 否 接口调用成功的回调函数 -
在页面
01中的index.wxml中<button bindtap="showLoading">loading</button>- 1
-
在页面
01中的index.js中Page({ /** * 页面的初始数据 */ data: { }, /** * 生命周期函数--监听页面加载 */ onLoad(options) { }, /** * 显示加载 */ showLoading() { // 显示Loading wx.showLoading({ title:'加载中', }) // 隐藏Loading setTimeout(()=>{ wx.hideLoading() },2000) } })- 1
- 2
- 3
- 4
- 5
- 6
- 7
- 8
- 9
- 10
- 11
- 12
- 13
- 14
- 15
- 16
- 17
- 18
- 19
- 20
- 21
- 22
- 23
- 24
- 25
- 26
- 27
- 28
- 29
-
页面效果展示
wx.request(Object object)-
发起
HTTPS网络请求 -
在页面
01中的index.wxml中<button bindtap="getGoods">获取商品数据</button>- 1
-
在页面
01中的index.js中Page({ /** * 页面的初始数据 */ data: { }, /** * 生命周期函数--监听页面加载 */ onLoad(options) { }, /** * 获取商品数据 */ getGoods() { wx.request({ url: 'http://localhost:3000/home/queryGoods', // 请求地址 method:'GET', // 请求方式 header:{ 'content-type':'application/json' }, timeout:5000, // 超时时间 success:(res) => console.log(res.data) }) } })- 1
- 2
- 3
- 4
- 5
- 6
- 7
- 8
- 9
- 10
- 11
- 12
- 13
- 14
- 15
- 16
- 17
- 18
- 19
- 20
- 21
- 22
- 23
- 24
- 25
- 26
- 27
- 28
- 29
-
这样在真实的实战项目是不可行的,不利于维护。
- 当你一个项目有很多上百个数据请求时,你肯定不能这么写上百个
- 当你的数据请求地址发生改变时,你不可能一一去修改
- 所有这个时候我们需要封装一个便于维护使用的数据网络请求
- 博客:
https://blog.csdn.net/HTML_Z/article/details/124722286
-
控制台数据打印结果

-
-
相关阅读:
Zabbix“专家坐诊”第208期问答汇总
【vue】使用无障碍工具条(详细)
100天精通Python(数据分析篇)——第66天:Pandas透视表基础+实战案例(pivot_table函数)
Pycharm 常用快捷键
解决ios 调用微信JSSDK 签名失败
怎么用excel管理固定资产
提前尝鲜,Android 13首个Beta发布
图片系列(6)不同版本上 Bitmap 内存分配与回收原理对比
ElasticSearch系列-简介与安装详解
光伏拉晶厂RFID智能化生产工序管理
- 原文地址:https://blog.csdn.net/HTML_Z/article/details/124775388