-
liunx CentOs7安装MQTT服务器(mosquitto)
查找 mosquitto 软件包
yum list all | grep mosquitto
出现以上两个即可进行安装,如果没有出现则需要安装EPEL软件库。
yum install https://dl.fedoraproject.org/pub/epel/epel-release-latest-7.noarch.rpm查看 mosquitto 信息
yum info mosquitto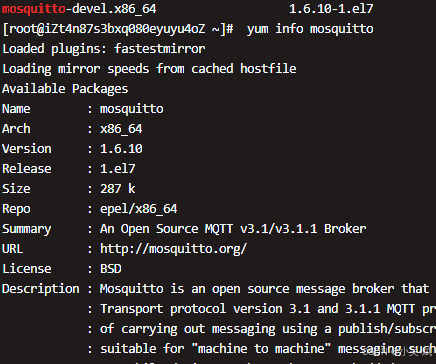
安装 mosquitto 软件包
# 安装mosquitto
 yum install mosquitto
 # 查看安装结果
yum list installed | grep mosquitto

## 测试mosquitto服务是否正常
# 打开第一个窗口启动服务
mosquitto
# 打开第二窗口,执行"mosquitto_sub -t  主题名称",执行后会一直闪烁,继续下一步
mosquitto_sub -t /test/mqtt
# 打开第三个窗口,向主题发布消息"mosquitto_pub -t 主题名称 -m 消息内容"
mosquitto_pub -t /test/mqtt -m "hello xiaowu"


配置开机自启
# 查看软件开机自启情况
systemctl list-unit-files | grep mosquitto

# 使mosquitto开机自启,并再次查看自启情况
systemctl enable mosquitto
配置mosquitto文件和账号密码
1. 修改配置文件,编辑 /etc/mosquitto/mosquitto.conf 文件
# 编辑 /etc/mosquitto/mosquitto.conf 文件
vim /etc/mosquitto/mosquitto.conf


# 设置不允许匿名登录
allow_anonymous false
# 设置账户密码文件位置绝对路径为/etc/mosquitto/pwfile.example
password_file /etc/mosquitto/pwfile.conf
# 监听1883端口
listener 1883
2. 添加账号和密码
# 可以不使用pwfile.example文件,使用-c会清空密码文件,重新插入用户,最后一位是用户名
mosquitto_passwd -c /etc/mosquitto/pwfile.conf mosquitto
# 不使用-c表示追加用户,最后一位是用户名
mosquitto_passwd -c /etc/mosquitto/pwfile.conf mosquitto
启动服务
service mosquitto start
# 其他命令
systemctl start mosquitto     # 启动 Mosquitto 服务
systemctl stop mosquitto      # 停止 Mosquitto 服务
systemctl restart mosquitto   # 重新启动 Mosquitto 服务
systemctl status mosquitto    #检查服务器状态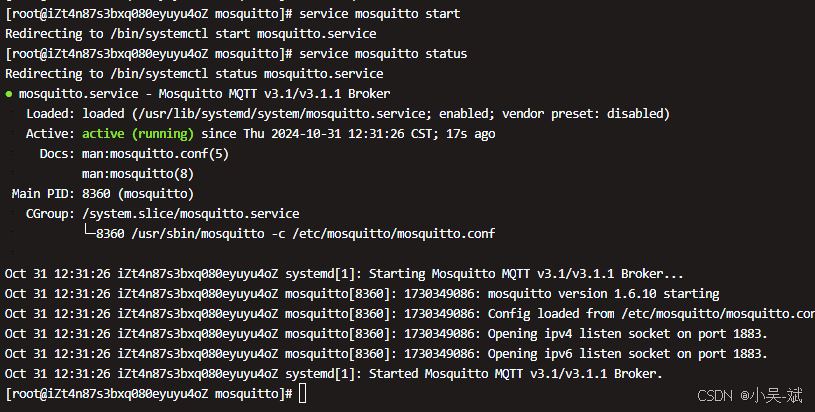
测试mosquitto服务是否正常

-
相关阅读:
2021icpc南京 D
go开发之个人微信的开发
产品设计的六大要素
大模型引领未来:探索其在多个领域的深度应用与无限可能【第二章、金融领域:大模型重塑金融生态】
【秋招面经】海能达前端题目总结
Apollo与TypeScript:强大类型检查在前端开发中的应用
uniapp 跨端兼容 条件编译
Day9:面试必考选择题目
关于[git reset]
无代码数据导出入门教程
- 原文地址:https://blog.csdn.net/qq_23564667/article/details/143391611