〇、前言
本文通过将 arco 框架的前端项目,部署至 CentOS 7,并访问同服务器的 WebAPI 接口,来简单演示一下,如何将前端项目发布至 Linux 系统。
关于 ASP.NET WebAPI 发布至 Linux 的步骤,可以参考博主过往文章: https://www.cnblogs.com/hnzhengfy/p/18384107/webapi_centos 。
一、简单创建一个前端项目,基于 Arco Design Vue
1.1 环境准备和项目创建
首先是要提前安装好 nodejs,注意版本会有影响,本文推荐直接安装 18.20.0 版本,下文 1.2 中问题汇总再详解。
下载地址可使用阿里云镜像地址: https://mirrors.aliyun.com/nodejs-release/ 。
然后安装 arco cli :
npm i -g arco-cli
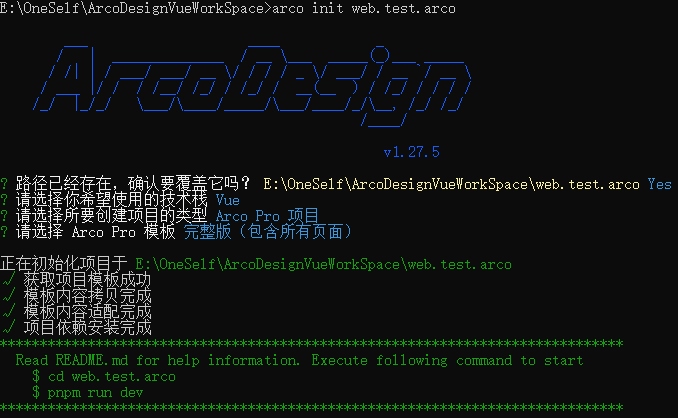
上述环境准备好后,就可以进行项目的初始化了。如下:
// 初始化示例项目 E:\OneSelf\ArcoDesignVueWorkSpace>npm init web.test.arco ___ ____ _ / | ______________ / __ \___ _____(_)___ _____ / /| | / ___/ ___/ __ \/ / / / _ \/ ___/ / __ `/ __ \ / ___ |/ / / /__/ /_/ / /_/ / __(__ ) / /_/ / / / / /_/ |_/_/ \___/\____/_____/\___/____/_/\__, /_/ /_/ /____/ v1.27.5 ? 路径已经存在,确认要覆盖它吗? E:\OneSelf\ArcoDesignVueWorkSpace\web.test.arco Yes ? 请选择你希望使用的技术栈 Vue ? 请选择所要创建项目的类型 Arco Pro 项目 ? 请选择 Arco Pro 模板 完整版(包含所有页面) 正在初始化项目于 E:\OneSelf\ArcoDesignVueWorkSpace\web.test.arco √ 获取项目模板成功 √ 模板内容拷贝完成 √ 模板内容适配完成 √ 项目依赖安装完成 ****************************************************************************** Read README.md for help information. Execute following command to start $ cd web.test.arco $ pnpm run dev ******************************************************************************

最后,直接运行项目:
E:\OneSelf\ArcoDesignVueWorkSpace\web.test.arco>npm run dev > arco-design-pro-vue@1.0.0 dev > vite --config ./config/vite.config.dev.ts VITE v3.2.10 ready in 2940 ms ➜ Local: http://localhost:5173/ ➜ Network: use --host to expose
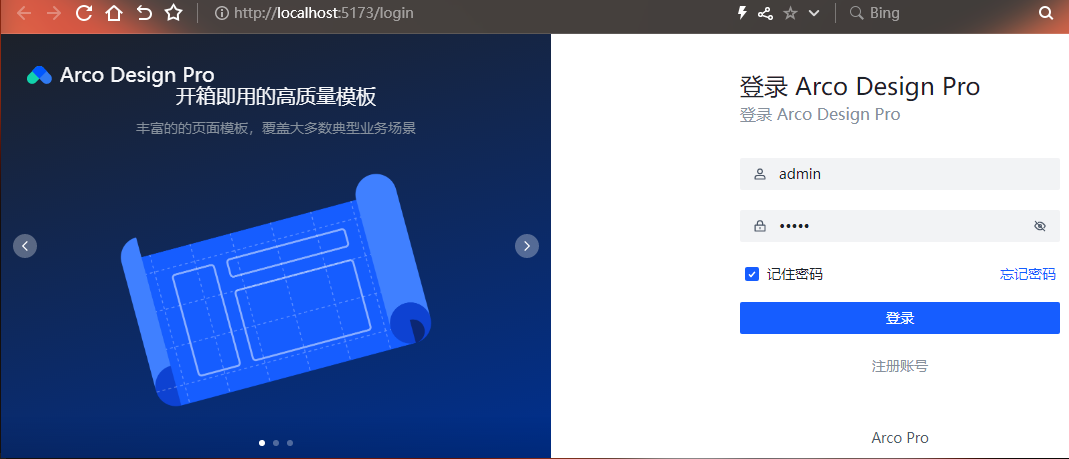
通过地址 http://localhost:5173/ 进行访问,直接登录后即可查看示例页面:

最后,可以通过命令 npm run build 将示例项目打包,备用。
1.2 遇到的问题
1.2.1 初始化失败【Error: spawnSync npm.cmd EINVAL】
// 报错详情: errno: -4071, code: 'EINVAL', syscall: 'spawnSync npm.cmd', path: 'npm.cmd', arco design 初始化项目时报错:× 模板内容拷贝失败 Error: spawnSync npm.cmd EINVAL
原因是 child_process.spawn 有漏洞 (CVE-2024-27980)-(HIGH),调用要加 { shell: true }。2024.4.10 node 修复了这个漏洞,代码执行就报错了。cli 下载 arco-design-pro-vue 执行到 .arco-cli\init.js 就出现 spawn 报错。
解决办法:使用 18.20.2,20.12.2,21.17.3 之前的版本就可以了。我用 18.20.0 版本就可以了。各版本阿里云下载地址:https://mirrors.aliyun.com/nodejs-release/
参考:https://github.com/arco-design/arco-cli/issues/92
1.2.2 镜像地址证书过期
// 错误提示: request to https://registry.npm.taobao.org/axios failed,reason: certificate has expired
更新镜像地址即可。
// 先备份 npm 配置,可以防止在更换过程中出现意外导致配置丢失 npm config get > npm_config.txt npm config set registry https://registry.npmmirror.com npm install --save-dev @arco-design/web-vue npm i -g arco-cli
1.2.3 项目依赖安失败
// 报错详情: × 项目依赖安失败,你可以稍后尝试手动安装项目依赖 Error: Command 「yarn 」 executed failed: warning ..\package.json: No license field warning gifsicle > bin-build > tempfile > uuid@3.4.0: Please upgrade to version 7 or higher. 。。。
解决方案:
- 打开命令行,切换到项目目录,例如:cd your_project_directory。
- 运行以下命令来清除之前的依赖缓存:yarn cache clean。
- 更新项目的依赖包:yarn upgrade。
- 重新安装项目依赖:yarn install。
二、Nginx 安装和配置
安装步骤详见博主过往文章(Nginx的安装和测试:https://www.cnblogs.com/hnzhengfy/p/Nginx.html#_label3),本文不在赘述。
配置文件位置:/usr/local/nginx/conf 中的 nginx.conf。
执行程序位置:/usr/local/nginx/sbin 中的 nginx。
2.1 Nginx 文件配置
先将打包好的前端测试文件,上传到 Linux 中,本文示例是复制到 /home/web.arco 文件夹。
配置大概思路:
- 在前端项目中,其实是分两种请求的,一种是页面加载,另一种是访问后端接口进行数据操作。
- 如何区分这两种操作?那就只能通过请求路径了,给接口请求的路径统一加个标记,比如 /apiarco。
- 然后,这个路径中的标记在后端接口中又是没有的,那就需要在 Nginx 中做下替换,即 URL 重写。
- 经过重写后的请求,就会直接到达候选 api 服务,当然后端也有必要配置允许跨域访问。
如下 Nginx 配置文件中的 server 模块:
server { listen 8001; listen [::]:8001; server_name _; root /home/web.arco; # 设置服务器的根目录为 /home/web.arco location / { root /home/web.arco; index index.html index.htm; # 尝试按照顺序查找 index.html 或 index.htm 文件 try_files $uri $uri/ /index.html; # 如果找不到这些文件,它将返回 /index.html } # /apiarco 路径中包含此标识,进行特殊处理 location /apiarco { proxy_pass http://localhost:5000/; # 将请求代理到本地的 5000 端口,就是 api 接口地址 rewrite ^/apiarco/(.*)$ /$1 break; # URL 重写为去掉 /apiarco 前缀 } error_page 500 502 503 504 /50x.html; location = /50x.html { root html; } }
当同时部署多个前端服务时,可以再配置一个 server 节点,例如:
server { listen 8002; listen [::]:8002; server_name _; root /home/web.arco.new; location / { root /home/web.arco.new; index index.html index.htm; try_files $uri $uri/ /index.html; } location /apiarconew { proxy_pass http://localhost:5000/; rewrite ^/apiarconew/(.*)$ /$1 break; } error_page 500 502 503 504 /50x.html; location = /50x.html { root html; } }
