最新内容优先发布于个人博客:小虎技术分享站,随后逐步搬运到博客园。
创作不易,如果觉得有用请在Github上为博主点亮一颗小星星吧!
目的#
之前在阿里云ECS 99元/年的活动实例上搭建了一个测试用的MINIO服务,以前都是直接当基础设施来使用的,这次准备自己学一下S3兼容API相关的对象存储开发,因此有了这个小工具。目前仅包含上传功能,后续计划开发一个类似图床的对象存储应用。
完整代码托管于Github:mrchipset/simple-wpf
包含的小知识点#
- 通过AWSSDK使用S3 API
- 通过App.config对服务器的Endpoint和AccessKey进行设置
- 使用异步的方法响应按钮事件
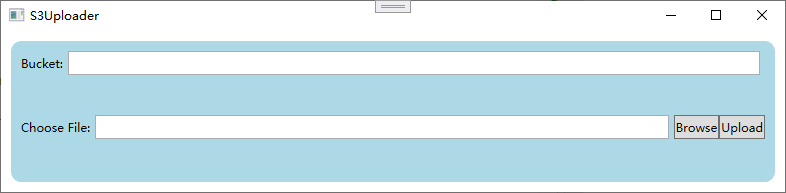
小工具的界面可以实现简单地选择文件上传到桶存储中。
实现过程#
- 创建一个WPF项目,并完成如上图的布局
- 在项目中添加用户配置文件 App.config来保存服务调用的地址和访问密钥等信息
<configuration>
	<appSettings>
		<add key="endpoint" value="YOUR_S3_ENDPOINT_URL"/>
		<add key="accessKey" value="YOUR_ACCESS_KEY"/>
		<add key="secretKey" value="YOUR_SECRET_KEY"/>
	appSettings>
configuration>
编写一个方法,在程序启动的时候导入连接参数配置
private void loadConfiguration()
{
    NameValueCollection appConfig = ConfigurationManager.AppSettings;
    if (string.IsNullOrEmpty(appConfig["endpoint"]))
    {
        ConfigurationManager.AppSettings.Set("endpoint", "endpoint");
        MessageBox.Show(this, "Endpoint is not set in the App.Config", "Error", MessageBoxButton.OK, MessageBoxImage.Error);
        this.Close();
        return;
    }

    if (string.IsNullOrEmpty(appConfig["accessKey"]))
    {
        MessageBox.Show(this, "AccessKey is not set in the App.Config", "Error", MessageBoxButton.OK, MessageBoxImage.Error);
        this.Close();
        return;
    }

    if (string.IsNullOrEmpty(appConfig["secretKey"]))
    {
        MessageBox.Show(this, "SecretKey is not set in the App.Config", "Error", MessageBoxButton.OK, MessageBoxImage.Error);
        this.Close();
        return;
    }

    _endpoint = appConfig["endpoint"];
    _accessKey = appConfig["accessKey"];
    _secretKey = appConfig["secretKey"];
}
- 为按钮添加响应处理函数
由于上传需要一定的时间来完成,因此我们用async关键字修饰上传按钮的点击事件处理函数,这样即时在上传过程中UI界面的操作也不会卡顿。函数原型如下,如果对C#的异步操作不是很熟悉的同学可以参考这篇博文:C# 使用基本的async/await实现异步
private async void uploadBtn_Click(object sender, RoutedEventArgs e)
{
    StringBuilder sb = new StringBuilder();
    sb.AppendLine($"Bucket: {Bucket}");
    sb.AppendLine($"File: {UploadFile}");
    statusTxtBlk.Text = sb.ToString();
    var ret = await UploadFileAsync();
    if (ret)
    {
        statusTxtBlk.Text = "Upload Successfully!";
    }
}
- 编写上传函数
现在到了本文最关键的一步,编写S3 Object上传接口。其实S3的接口都替我们封装好了,只需要按照官方demo的流程进行调用即可。
先创建凭据对象和配置对象,然后创建客户端对象和上传请求,即可用客户端对象的上传方法进行上传。服务函数的完整代码如下:
 private async Task<bool> UploadFileAsync()
 {
     var credentials = new BasicAWSCredentials(_accessKey, _secretKey);

     var clientConfig = new AmazonS3Config
     {
         ForcePathStyle = true,
         ServiceURL = _endpoint,
     };

     bool ret = true;
     using (var client = new AmazonS3Client(credentials, clientConfig))
     {
         try
         {
             var putRequest = new PutObjectRequest
             {
                 BucketName = _bucket,
                 FilePath = UploadFile
             };
             var response = await client.PutObjectAsync(putRequest);
         }
         catch(FileNotFoundException e)
         {
             ret = false;
             this.Dispatcher.Invoke(new Action(() => this.statusTxtBlk.Text = e.Message));
         }
         catch (AmazonS3Exception e)
         {
             ret = false;
             if (e.ErrorCode != null &&
                 (e.ErrorCode.Equals("InvalidAccessKeyId") ||
             e.ErrorCode.Equals("InvalidSecurity")))
             {
                 this.Dispatcher.Invoke(new Action(() => this.statusTxtBlk.Text = "Please check the provided AWS Credentials"));
             } else
             {
                 this.Dispatcher.Invoke(new Action(() => this.statusTxtBlk.Text = $"An error occurred with the message '{e.Message}' when writing an object"));
             }
         }
     }
     return ret;
 }
注意
MINIO 在使用S3函数时必须要在AmazonS3Config 中设置ForcePathStyle 为True 。
最终实现的效果