-
uniapp实现可拖动悬浮按钮(最新版2024-7月)
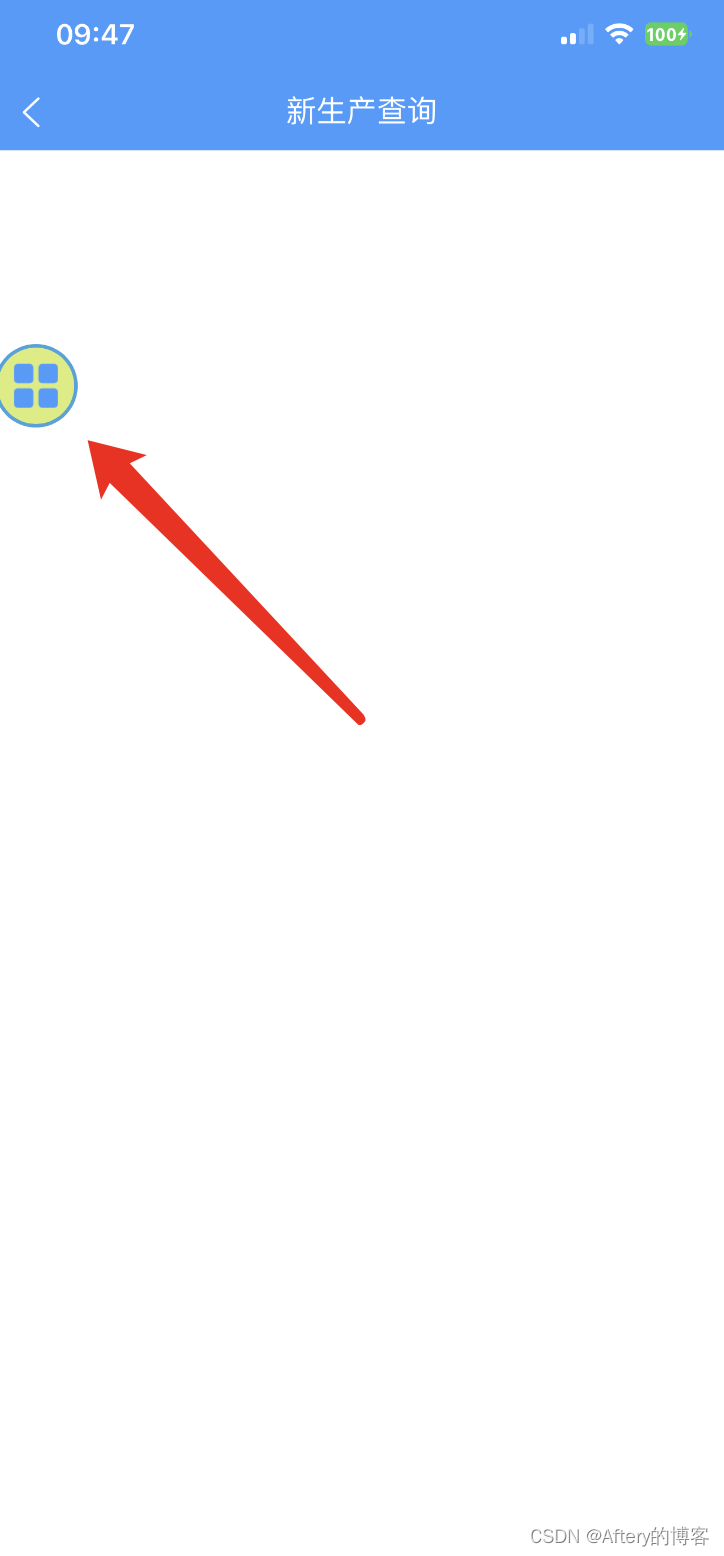
此章主要介绍如何使用uniapp跨平台开发,实现悬浮按钮,移动端经常会有所这样的需求,那么功能如下:
1.圆圈悬浮球,上下左右靠边显示
2.可以界面任何拖动,不会超出界面
3.单击悬浮球的点击事件效果:

代码如下:(复制粘贴就可运行看效果,小白也不用担心)
<template>
	<view class="content">
		<movable-area class="movableArea">
			<movable-view class="movableView"
				:position="position"
				:x="x"
				:y="y"
				:direction="direction"
				:damping="damping"
				@change="onChange"
				@tap="onTap"
				@touchend="onTouchend">
				<image src="../../static/homeShow.png" mode="widthFix" class="iconImage"></image>
			</movable-view>
		</movable-area>
	</view>
</template>

<script>
	export default {
		data() {
			return {
				x: 0,
				y: 0,
				x1: 0,
				x2: 0,
				y1: 0,
				y2: 0,
				move: {
					x: 0,
					y: 0
				}
			};
		},
		props: {
			damping: {
				type: Number,
				default: 10
			},
			direction: {
				type: String,
				default: "all"
			},
			position: {
				type: Number,
				default: 4
			}
		},
		mounted() {
			uni.getSystemInfo({
				success: (res) => {
					this.x1 = 0;
					this.x2 = parseInt(res.windowWidth) - 50;
					this.y1 = 0;
					this.y2 = parseInt(res.windowHeight) - 20;
					setTimeout(() => {
						if (this.position == 1 || this.position == 2) this.y = parseInt(this.y2 * 0.2);
						if (this.position == 3 || this.position == 4) this.y = parseInt(this.y2 * 0.8);
						if (this.position == 1 || this.position == 3) this.x = parseInt(this.x1);
						if (this.position == 2 || this.position == 4) this.x = parseInt(this.x2);
						this.move.x = this.x;
						this.move.y = this.y;
					}, 1000)
				}
			})
		},
		methods: {
			onChange(e) {
				if (e.detail.source === "touch") {
					this.move.x = e.detail.x;
					this.move.y = e.detail.y;
				}
			},
			onTap(e) {
				console.log("Tap event");
				// 在这里处理单击事件的逻辑
				// 例如打开链接、执行动作等
			},
			onTouchend() {
				this.x = this.move.x;
				this.y = this.move.y;
				setTimeout(() => {
					if (this.move.x < this.x2 / 2) this.x = this.x1;
					else this.x = this.x2;
					console.log("yuan" + this.x, this.y)
				}, 100)
			},
			onLoad: function(e) {

			}
		},
	};
</script>

<style scoped>
	.content {
		position: relative;
		height: 100vh;
	}

	.movableArea {
		position: fixed;
		top: 0;
		left: 0;
		width: 100%;
		height: 100%;
		pointer-events: none;
		z-index: 999;
	}

	.movableView {
		pointer-events: auto;
		width: 60rpx;
		height: 60rpx;
		padding: 10rpx;
		border-radius: 100%;
		border: 2px solid #33A3DC;
		background-color: #DAEE78;
	}

	.iconImage {
		display: block;
		width: 60rpx;
		height: 60rpx;
	}

	.contact {
		width: 50px;
		height: 50px;
		overflow: hidden;
		position: absolute;
		left: 0px;
		top: 0px;
		border-radius: 100%;
		opacity: 0;
	}
</style>
综合如上,此功能就实现了,在移动端运行就可以看到悬浮球功能任意拖动;感谢您的阅读,希望有所帮助!
-
相关阅读:
安装配置 zookeeper(单机版)
属性和特征的区别
Form组件
Azure DevOps (六) 通过FTP上传流水线制品到Linux服务器
计算机网络---应用层概述
如何处理前端本地存储和缓存?
【SQL性能优化】索引的使用原则:如何通过索引让SQL查询效率最大化?(优)
Linux查看哪些进程占用的系统 buffer/cache 较高 (hcache,lsof)命令
如何为你的WSL2更换最新的6.5.7kernel
Codeforces Round 592 (Div 2)(A - G)
- 原文地址:https://blog.csdn.net/qq_37523448/article/details/140092906