-
Android Compose 一:基础控件
Flutter 与 Compose 组件辣么像,难道是同一个google团队整的;也未深究,只是猜测。
创建项目
需要使用新版本Android studio,忽略步骤…
项目目录

MainActivity说明
1 系统默认页面
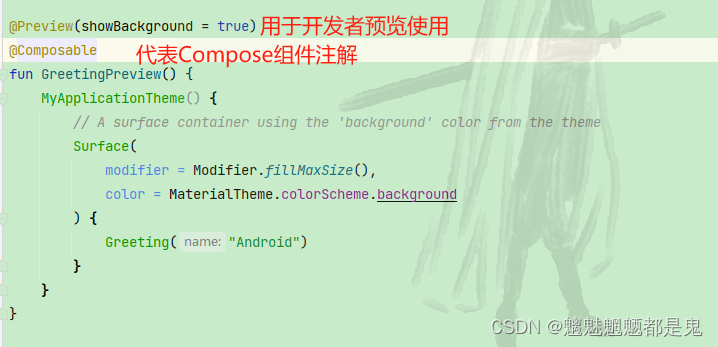
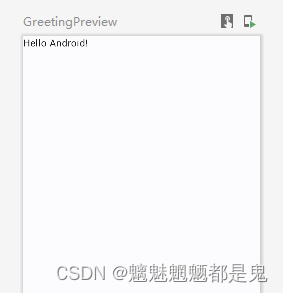
@Preview 修饰的方法,只用来供开发者预览使用,删除不影响运行
@Composable 修饰的方法 只能被@Composable修饰的方法调用预览效果
2 MyApplicationTheme 说明
MyApplicationTheme 对应的时 ui.theme 中的Theme.kt中的 MyApplicationTheme ; ctrl+左键点过去
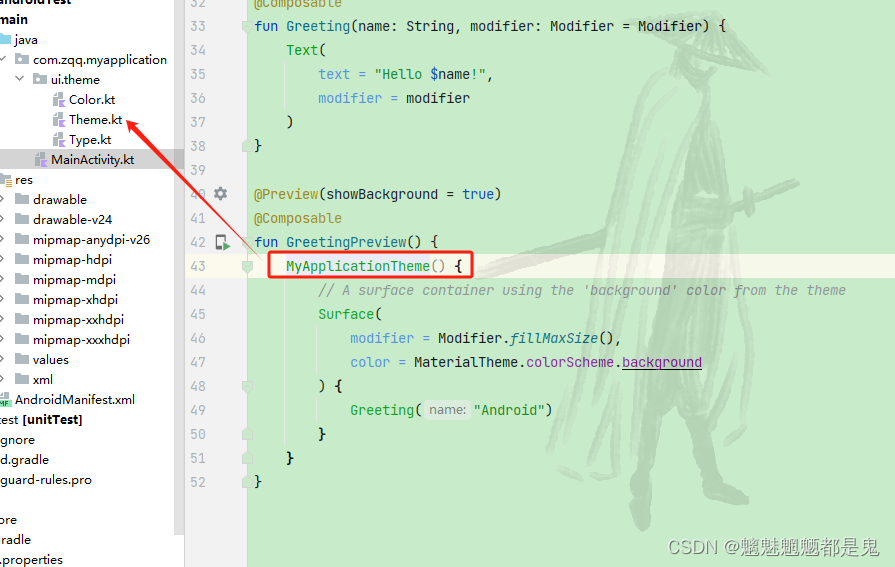
下面看代码@Composable fun MyApplicationTheme( darkTheme: Boolean = isSystemInDarkTheme(), // Dynamic color is available on Android 12+ dynamicColor: Boolean = true, content: @Composable () -> Unit ) {咋看这这么像flutter 万物皆组件嘞;咱也不懂,咱也不敢吭;
- 同样MyApplicationTheme 是被@Composable注解修饰
darkTheme: Boolean = isSystemInDarkTheme(), //判断是否是暗黑主题
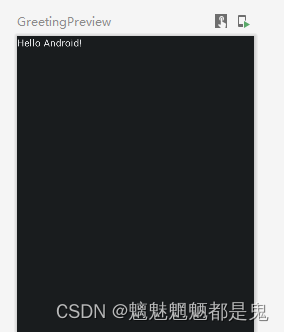
那么我们把它写死成ture;
预览结果 变黑啦
dynamicColor: Boolean = false, //动态颜色
暂未发现有啥变化

代码里判断了支持动态颜色,调用了/** * Creates a light dynamic color scheme. * * Use this function to create a color scheme based off the system wallpaper. If the developer * changes the wallpaper this color scheme will change accordingly. This dynamic scheme is a * light theme variant. * * @param context The context required to get system resource data. */ @RequiresApi(Build.VERSION_CODES.S) fun dynamicLightColorScheme(context: Context): ColorScheme { val tonalPalette = dynamicTonalPalette(context) return lightColorScheme( primary = tonalPalette.primary40, onPrimary = tonalPalette.primary100, primaryContainer = tonalPalette.primary90, onPrimaryContainer = tonalPalette.primary10, inversePrimary = tonalPalette.primary80, secondary = tonalPalette.secondary40, onSecondary = tonalPalette.secondary100, secondaryContainer = tonalPalette.secondary90, onSecondaryContainer = tonalPalette.secondary10, tertiary = tonalPalette.tertiary40, onTertiary = tonalPalette.tertiary100, tertiaryContainer = tonalPalette.tertiary90, onTertiaryContainer = tonalPalette.tertiary10, background = tonalPalette.neutral99, onBackground = tonalPalette.neutral10, surface = tonalPalette.neutral99, onSurface = tonalPalette.neutral10, surfaceVariant = tonalPalette.neutralVariant90, onSurfaceVariant = tonalPalette.neutralVariant30, inverseSurface = tonalPalette.neutral20, inverseOnSurface = tonalPalette.neutral95, outline = tonalPalette.neutralVariant50, ) }content: @Composable () -> Unit 页面布局内容@Composable修饰的组件
content 应该就是Surface,kotlin 最后一个参数如果是lambda表达式,那么lambda表达式可以放在外边
@Preview(showBackground = true)
@Composable
fun GreetingPreview() {
    MyApplicationTheme(
        content = {
            Surface(
                modifier = Modifier.fillMaxSize(),
                color = MaterialTheme.colorScheme.background
            ) {
                Greeting("Android")
            }
        }
    )
}
即
@Preview(showBackground = true)
@Composable
fun GreetingPreview() {
    MyApplicationTheme(){
        Surface(
            modifier = Modifier.fillMaxSize(),
            color = MaterialTheme.colorScheme.background
        ) {
            Greeting("Android")
        }
    }
}
MyApplicationTheme 方法的实现代码分析
 val colorScheme = when {
        dynamicColor && Build.VERSION.SDK_INT >= Build.VERSION_CODES.S -> {     //这就是动态颜色
            val context = LocalContext.current
            if (darkTheme) dynamicDarkColorScheme(context) else dynamicLightColorScheme(context)
        }

        darkTheme -> DarkColorScheme
        else -> LightColorScheme
    }
    val view = LocalView.current
    if (!view.isInEditMode) {     //这个就是判断 是否在编辑模式  然后设置了状态栏的颜色
        SideEffect {
            val window = (view.context as Activity).window
            window.statusBarColor = colorScheme.primary.toArgb()
            WindowCompat.getInsetsController(window, view).isAppearanceLightStatusBars = darkTheme  //这一样也是设置状态栏的颜色  大概意思就是看翻译
        }
    }

    MaterialTheme(
        colorScheme = colorScheme,    //设置主题颜色   ui.theme.Color
        typography = Typography,   // ui.theme.Type
        content = content
    )
view.isInEditMode 注释的翻译

WindowCompat.getInsetsController(window, view).isAppearanceLightStatusBars = darkTheme

通过以上的分析,我们或许可以实现 多主题的功能 用来更改app的主题颜色 字体显示大小(比如老年模式)等功能 //TODO 后续尝试
基础组件
组件一般都包含Modifier的参数
@Composable
fun Greeting(name: String, modifier: Modifier = Modifier) {
    Text(
        text = "Hello $name!",
        modifier = Modifier.padding()
    )
}
方法参数有个 modifier: Modifier = Modifier ctrl+左键 点
发现是Modifier.kt 的对象// The companion object implements `Modifier` so that it may be used as the start of a // modifier extension factory expression. companion object : Modifier { override funfoldIn(initial: R, operation: (R, Element) -> R): R = initial override fun foldOut(initial: R, operation: (Element, R) -> R): R = initial override fun any(predicate: (Element) -> Boolean): Boolean = false override fun all(predicate: (Element) -> Boolean): Boolean = true override infix fun then(other: Modifier): Modifier = other override fun toString() = "Modifier" } 使用Modifier都是使用 此伴生对象;是所有链式调用的起点
打个断点看看

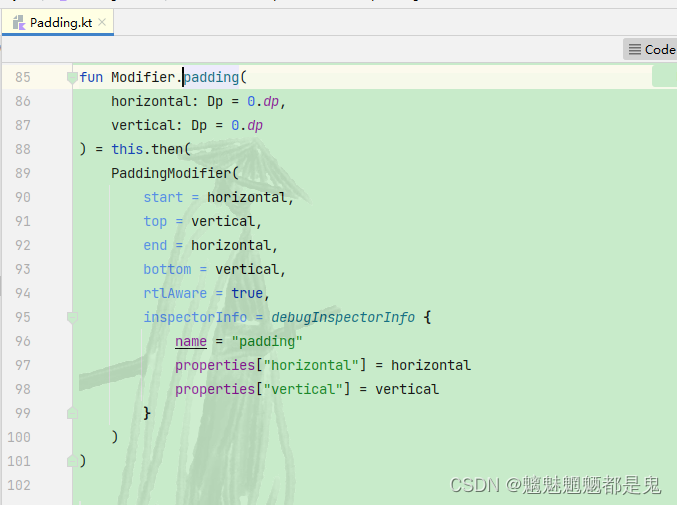
例如我们写了如下代码Text( text = "Hello $name!", modifier = Modifier.padding(20.dp) )调用的是Padding.kt的 其实使用的是 PaddingModifier
@Stable
fun Modifier.padding(all: Dp) =
    this.then(
        PaddingModifier(
            start = all,
            top = all,
            end = all,
            bottom = all,
            rtlAware = true,
            inspectorInfo = debugInspectorInfo {
                name = "padding"
                value = all
            }
        )
    )
PaddingModifier 其实实现LayoutModifier
private class PaddingModifier(
    val start: Dp = 0.dp,
    val top: Dp = 0.dp,
    val end: Dp = 0.dp,
    val bottom: Dp = 0.dp,
    val rtlAware: Boolean,
    inspectorInfo: InspectorInfo.() -> Unit
) : LayoutModifier, InspectorValueInfo(inspectorInfo) {
LayoutModifier
@JvmDefaultWithCompatibility interface LayoutModifier : Modifier.Element {Modifier.Element
@JvmDefaultWithCompatibility interface Element : Modifier { override funfoldIn(initial: R, operation: (R, Element) -> R): R = operation(initial, this) override fun foldOut(initial: R, operation: (Element, R) -> R): R = operation(this, initial) override fun any(predicate: (Element) -> Boolean): Boolean = predicate(this) override fun all(predicate: (Element) -> Boolean): Boolean = predicate(this) } Modifier 是个接口 实现如下
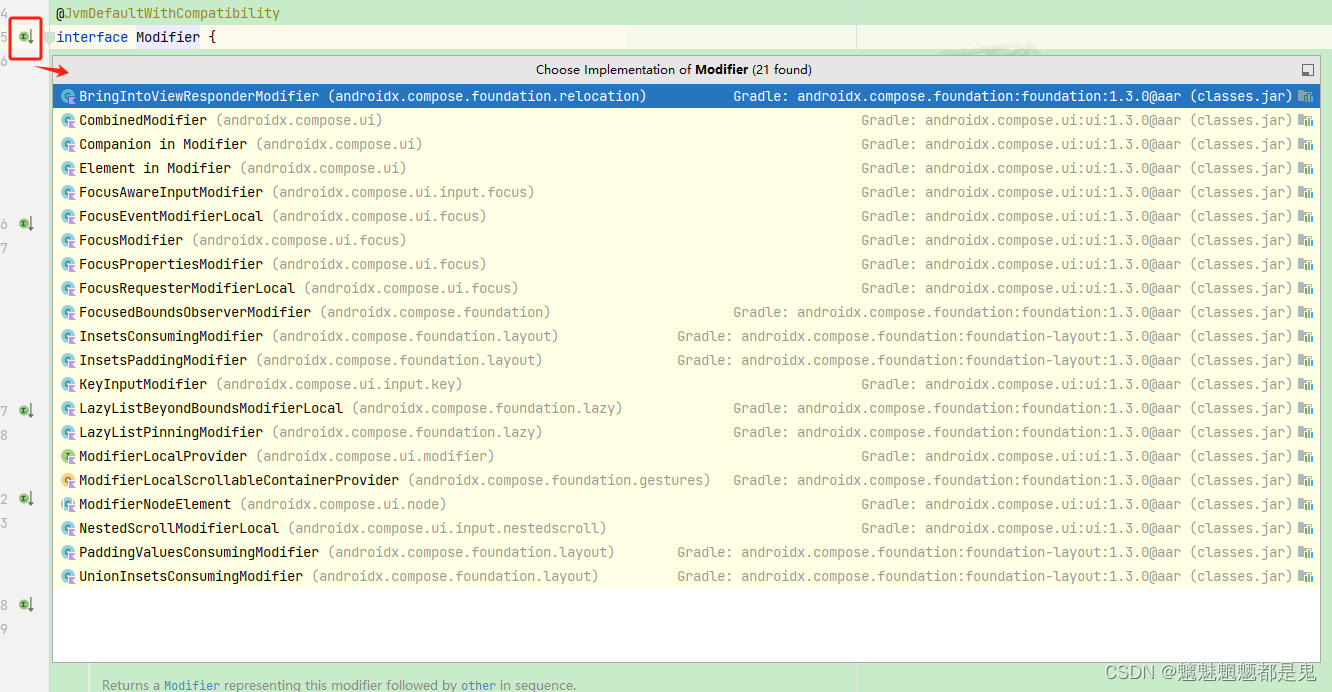
Modifier 可用来设置形状,大小,位置,边距,透明度,点击 等
例如 Text的modifier可以设置如下
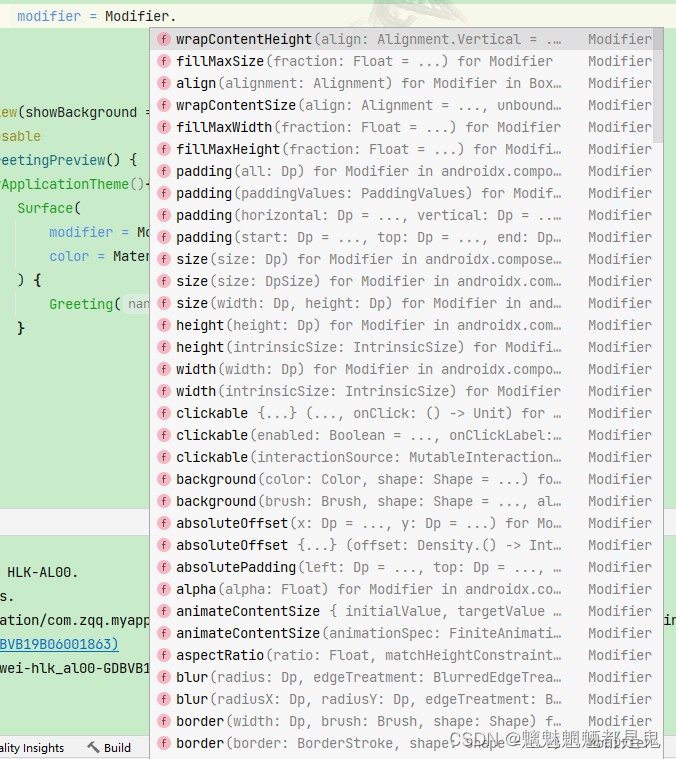
modifier = Modifier.padding()
Padding.kt Modifer的扩展方法
Text 文本
@Composable
fun Greeting(name: String, modifier: Modifier = Modifier) {
    Text(
        text = "Hello $name!",
        modifier = modifier
    )
}
Image 图片
 Image(
            painter = painterResource(id = R.drawable.img_lufei),  //资源
            contentDescription = "",   //描述
           modifier = Modifier.size(80.dp).clip(CircleShape),  //大小 形状
            contentScale = ContentScale.Crop  //渲染方式
        )
Spacer 空白
 Text(text = "Hello $name!")
            Spacer(modifier = Modifier.padding(20.dp))
            Text(text = "Hello llo lo $name!")
Column 横布局
 Column(
            modifier = Modifier.padding(10.dp)
        ) {
            Text(text = "Hello $name!")
            Spacer(modifier = Modifier.padding(20.dp))
            Text(text = "Hello llo lo $name!")
        }
Row 竖布局
Row(
        modifier = Modifier.wrapContentHeight(align = Alignment.CenterVertically)
    ) {
        Image(
            painter = painterResource(id = R.drawable.img_lufei),
            contentDescription = "",
            modifier = Modifier.size(80.dp).clip(CircleShape),
            contentScale = ContentScale.Crop
        )

        Column(
            modifier = Modifier.padding(10.dp)
        ) {
            Text(text = "Hello $name!")
            Spacer(modifier = Modifier.padding(20.dp))
            Text(text = "Hello llo lo $name!")
        }
    }
效果

其他布局用到时详解
接下来的问题
- 布局的对齐方式 在父布局中的位置 父布局控制子布局的位置
-
相关阅读:
堆排序(Heap Sort)
网络安全(黑客)自学
Xubuntu22.04之连接filco蓝牙键盘
Android app专项测试之耗电量测试
base64.c
NeuroImage:通信辅助技术削弱了脑间同步?看来维系情感还得面对面互动才行...
mybatis拦截器实现数据脱敏&拦截器使用
【Datawhale AI 夏令营】讯飞“基于术语词典干预的机器翻译挑战赛”
库中如何实现vector
Html和Markdown中的空格,  ;     以及   ‌ ‍
- 原文地址:https://blog.csdn.net/weixin_41648633/article/details/138563002
