-
想要成为CSS大师?这些技巧是你必须知道的!
前言
CSS 是网页设计中不可或缺的一部分,掌握一些实用的 CSS 技巧,可以让你在设计中展现出更多的创意和个性。本文将介绍一些 CSS 技巧,帮助你提升自己的技能,成为一个真正的 CSS 大师。
1. 改变 input 自动填充的背景颜色
这段
CSS代码是用来控制浏览器自动填充表单时的样式。当浏览器自动填充表单时,会出现一个预览框,这个预览框的样式可以通过CSS来控制。其中input:-internal-autofill-previewed和input:-internal-autofill-selected是CSS选择器,用来选择浏览器自动填充表单时的预览框和已选中的表单项。-webkit-text-fill-color是一个CSS属性,用来设置文本颜色。在这里,它被设置为黑色,以覆盖浏览器自动填充表单时默认的文本颜色。另外,transition是CSS属性,用来设置CSS属性的过渡效果。在这里,它被用来设置背景颜色的过渡效果,当背景颜色发生变化时,过渡效果会在0.5秒内完成,这样可以使过渡效果更加平滑。input:-internal-autofill-previewed, input:-internal-autofill-selected { -webkit-text-fill-color: black; transition: background-color 1000s ease-out 0.5s; }- 1
- 2
- 3
- 4
- 5
实现效果

2. 首字母操作
:first-letter伪元素用于选择元素的第一个字母,并对其应用样式。它允许你对文本的首字母进行特殊的样式处理,比如改变字体大小、颜色、行高等。使用:first-letter伪元素时,你可以为选中的首字母应用各种样式属性,例如font-size、color、line-height、text-transform等。这些样式属性将只应用于首字母,而不会影响其他文本。DOCTYPE html> <html> <head> <style> p:first-letter { font-size: 200%; color: rgb(37, 109, 243); } style> head> <body> <p>Stop thinking too much, it's alright not to know all the answers.p> body> html>- 1
- 2
- 3
- 4
- 5
- 6
- 7
- 8
- 9
- 10
- 11
- 12
- 13
- 14
- 15
- 16
- 17
实现效果

3. 控制文本大小写转换
text-transform是一个CSS属性,用于控制文本的大小写转换。它可以改变文本的大小写形式,包括转换为大写、小写、首字母大写或不进行任何转换。属性 描述 none 默认值,文本不进行任何转换,保持原样。 uppercase 将文本转换为大写形式。 capitalize 将每个单词的首字母转换为大写形式。 lowercase 将文本转换为小写形式。 DOCTYPE html> <html> <head> <style> p { font-size: 30px; color: rgb(37, 109, 243); } p:nth-child(1) { text-transform: uppercase; } p:nth-child(2) { text-transform: capitalize; } p:nth-child(3) { text-transform: lowercase; } style> head> <body> <p>Stop thinking too much, it's alright not to know all the answers.p> <p>Stop thinking too much, it's alright not to know all the answers.p> <p>Stop thinking too much, it's alright not to know all the answers.p> body> html>- 1
- 2
- 3
- 4
- 5
- 6
- 7
- 8
- 9
- 10
- 11
- 12
- 13
- 14
- 15
- 16
- 17
- 18
- 19
- 20
- 21
- 22
- 23
- 24
- 25
- 26
- 27
- 28
- 29
- 30
- 31
实现效果

4. :where() 简化代码
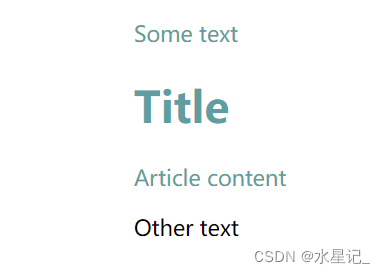
where()是一个CSS伪类函数,用于选择匹配指定条件的元素。它可以在选择器中使用,以便更精确地选择元素。where()函数接受一个条件表达式作为参数,该表达式描述了要选择的元素的条件。如果元素满足条件,则将应用选择器的规则。where()函数是一个比较新的CSS功能,目前还没有得到广泛支持。因此,在使用时需要谨慎考虑浏览器的兼容性。DOCTYPE html> <html> <head> <style> .box :where(div, .title, #only) { color: cadetblue; } style> head> <body> <div class="box"> <div>Some textdiv> <h1 class="title">Titleh1> <p id="only">Article contentp> <span>Other textspan> div> body> html>- 1
- 2
- 3
- 4
- 5
- 6
- 7
- 8
- 9
- 10
- 11
- 12
- 13
- 14
- 15
- 16
- 17
- 18
- 19
- 20
- 21
- 22
实现效果
5. 透明图片阴影
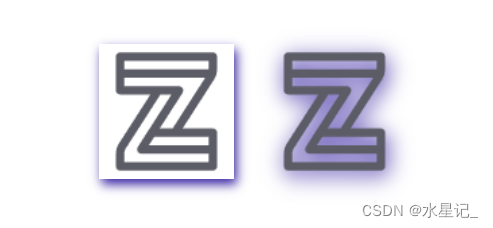
box-shadow和filter: drop-shadow属性都可以用于为元素添加阴影和投影效果,但有一些区别:box-shadow属性是一个独立的属性,可以直接应用于元素,而filter: drop-shadow属性是CSS滤镜的一部分,需要使用filter属性来应用;box-shadow属性可以同时指定水平和垂直偏移量,模糊半径和扩展半径,而filter: drop-shadow属性只能指定水平和垂直偏移量以及模糊半径;box-shadow属性可以在元素的边界之外创建阴影,而filter: drop-shadow属性只会在元素内部创建投影。
DOCTYPE html> <html> <head> <style> .boxShadow { box-shadow: 2px 4px 8px #3723a1; } .dropShadow { filter: drop-shadow(2px 4px 8px #3723a1); } style> head> <body> <div> <img class="boxShadow" src="./assets/z.png" alt=""> <img class="dropShadow" src="./assets/z.png" alt=""> div> body> html>- 1
- 2
- 3
- 4
- 5
- 6
- 7
- 8
- 9
- 10
- 11
- 12
- 13
- 14
- 15
- 16
- 17
- 18
- 19
- 20
- 21
- 22
- 23
实现效果
6. 自定义光标
cursor属性用于指定鼠标指针在元素上的样式。通过设置cursor属性,可以改变鼠标指针的外观,以提供更好的用户体验。属性 描述 auto 浏览器自动选择合适的鼠标指针样式。 default 默认的鼠标指针样式,通常是一个箭头。 pointer 表示链接的鼠标指针样式,通常是一个手指。 text 表示可编辑文本的鼠标指针样式,通常是一个竖线。 move 表示可移动的鼠标指针样式,通常是一个十字箭头。 wait 表示等待的鼠标指针样式,通常是一个钟表或旋转的圆圈。 help 表示帮助的鼠标指针样式,通常是一个问号。 not-allowed 表示禁止操作的鼠标指针样式,通常是一个圆圈内有一个斜线。 DOCTYPE html> <html> <head> <style> html { cursor: url('./assets/gb.png'), auto; } style> head> <body> <div class="box">Stop thinking too much, it's alright not to know all the answers.div> body> html>- 1
- 2
- 3
- 4
- 5
- 6
- 7
- 8
- 9
- 10
- 11
- 12
- 13
- 14
- 15
- 16
实现效果

7. 文字描边
-webkit-text-stroke是一个CSS属性,用于在Webkit浏览器(如Chrome和Safari)中设置文字的描边效果。它可以让文字具有边框样式,类似于文字的描边效果DOCTYPE html> <html> <head> <style> .box { color: transparent; -webkit-text-stroke: 1px cadetblue; } style> head> <body> <div class="box">Stop thinking too much, it's alright not to know all the answers.div> body> html>- 1
- 2
- 3
- 4
- 5
- 6
- 7
- 8
- 9
- 10
- 11
- 12
- 13
- 14
- 15
- 16
- 17
实现效果

8. 渐变阴影
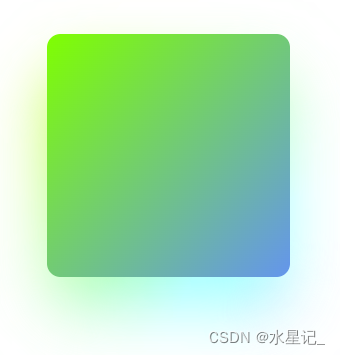
代码中使用了
CSS变量--gradual来定义渐变背景,颜色从chartreuse到cornflowerblue。通过.box类选择器,将渐变背景应用于盒子。使用.box::after伪元素选择器,创建了一个与盒子相同大小的伪元素,并为其应用了相同的渐变背景和边框半径。通过模糊滤镜和位移缩放,给伪元素添加了模糊效果。最后,将伪元素的z-index设置为-1,使其位于盒子内容的下方。DOCTYPE html> <html> <head> <style> :root { --gradual: linear-gradient(to bottom right, chartreuse, cornflowerblue); } .box { height: 180px; width: 180px; background-image: var(--gradual); border-radius: 10px; position: relative; } .box::after { content: ""; position: absolute; inset: 0; background-image: var(--gradual); border-radius: inherit; filter: blur(25px) brightness(1.5); transform: translateY(15%) scale(0.95); z-index: -1; } style> head> <body> <div class="box">div> body> html>- 1
- 2
- 3
- 4
- 5
- 6
- 7
- 8
- 9
- 10
- 11
- 12
- 13
- 14
- 15
- 16
- 17
- 18
- 19
- 20
- 21
- 22
- 23
- 24
- 25
- 26
- 27
- 28
- 29
- 30
- 31
- 32
- 33
- 34
- 35
实现效果
9. 控制单词间距
word-spacing是一个CSS属性,用于控制文本中单词之间的间距。它可以应用于任何具有文本内容的HTML元素。具体来说,word-spacing属性定义了单词之间的额外间距,可以通过指定一个长度值或百分比值来设置。默认情况下,单词之间没有额外的间距。DOCTYPE html> <html> <head> <style> p { word-spacing: 20px; } style> head> <body> <p>This is a sample paragraph with word-spacing applied.p> body> html>- 1
- 2
- 3
- 4
- 5
- 6
- 7
- 8
- 9
- 10
- 11
- 12
- 13
- 14
- 15
- 16
实现效果

10. 图像填充文本
background-size属性用于设置背景图像的大小。将值设置为cover表示图像将被缩放以填充整个文本区域,保持其纵横比。background-repeat属性用于设置图像的重复方式。将值设置为repeat表示图像将在文本区域内重复平铺,以填充整个区域。通过将这两个属性添加到包含文本的元素的CSS样式中,你可以实现图像内容的均匀填充效果。DOCTYPE html> <html> <head> <style> .text-image { font-size: 50px; font-weight: bold; background-image: url('./assets/fgh.png'); -webkit-background-clip: text; background-clip: text; color: transparent; } style> head> <body> <h1 class="text-image">Hello, World!h1> body> html>- 1
- 2
- 3
- 4
- 5
- 6
- 7
- 8
- 9
- 10
- 11
- 12
- 13
- 14
- 15
- 16
- 17
- 18
- 19
- 20
- 21
实现效果

11. :paused 伪类
在
CSS中,:paused伪类用于选择处于暂停状态的动画或过渡效果。它可以与animation和transition属性一起使用。当动画或过渡效果被暂停时,元素会被匹配到:paused伪类。这使得你可以为暂停状态下的元素应用特定的样式。DOCTYPE html> <html> <head> <style> .box { width: 200px; height: 200px; background-color: darkcyan; animation: myAnimation 3s infinite; } .box:paused { background-color: blue; } @keyframes myAnimation { 0% { transform: scale(0.5); } 50% { transform: scale(1); } 100% { transform: scale(0.5); } } style> head> <body> <div class="box">div> <button onclick="pauseAnimation()">暂停button> <button onclick="resumeAnimation()">恢复button> <script> function pauseAnimation() { var box = document.querySelector('.box'); box.style.animationPlayState = 'paused'; } function resumeAnimation() { var box = document.querySelector('.box'); box.style.animationPlayState = 'running'; } script> body> html>- 1
- 2
- 3
- 4
- 5
- 6
- 7
- 8
- 9
- 10
- 11
- 12
- 13
- 14
- 15
- 16
- 17
- 18
- 19
- 20
- 21
- 22
- 23
- 24
- 25
- 26
- 27
- 28
- 29
- 30
- 31
- 32
- 33
- 34
- 35
- 36
- 37
- 38
- 39
- 40
- 41
- 42
- 43
- 44
- 45
- 46
- 47
- 48
- 49
- 50
- 51
- 52
实现效果

12. 强调文本
text-emphasis属性是CSS3中新增的一个文本强调效果属性,用于为文本添加各种强调效果,包括点、圆圈、双线、波浪线等。DOCTYPE html> <html> <head> <style> p { width: 100px; text-align: center; border-radius: 4px; padding: 10px; background: rgb(239, 240, 224); text-emphasis: "⏰"; } style> head> <body> <p>文本强调p> body> html>- 1
- 2
- 3
- 4
- 5
- 6
- 7
- 8
- 9
- 10
- 11
- 12
- 13
- 14
- 15
- 16
- 17
- 18
- 19
- 20
- 21
实现效果

13. 指定文本的书写模式
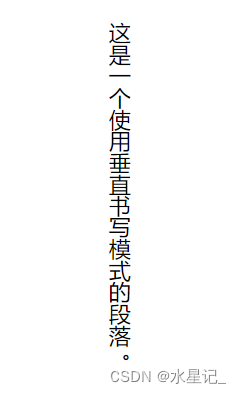
writing-mode是一个CSS属性,用于指定文本的书写模式。它决定了文本是水平书写还是垂直书写,以及文本的方向。属性 描述 horizontal-tb 默认值,表示水平书写模式,从左到右,从上到下。 vertical-rl 表示垂直书写模式,从右到左,从上到下。 vertical-lr 表示垂直书写模式,从左到右,从上到下。 sideways-rl 表示垂直书写模式,从上到下,从右到左。 sideways-lr 表示垂直书写模式,从上到下,从左到右。 通过设置不同的
writing-mode值,可以实现不同的文本布局效果。例如,如果将writing-mode设置为vertical-rl,则文本会以垂直方向从右到左书写。DOCTYPE html> <html> <head> <style> p { writing-mode: vertical-rl; } style> head> <body> <p>这是一个使用垂直书写模式的段落。p> body> html>- 1
- 2
- 3
- 4
- 5
- 6
- 7
- 8
- 9
- 10
- 11
- 12
- 13
- 14
- 15
- 16
实现效果
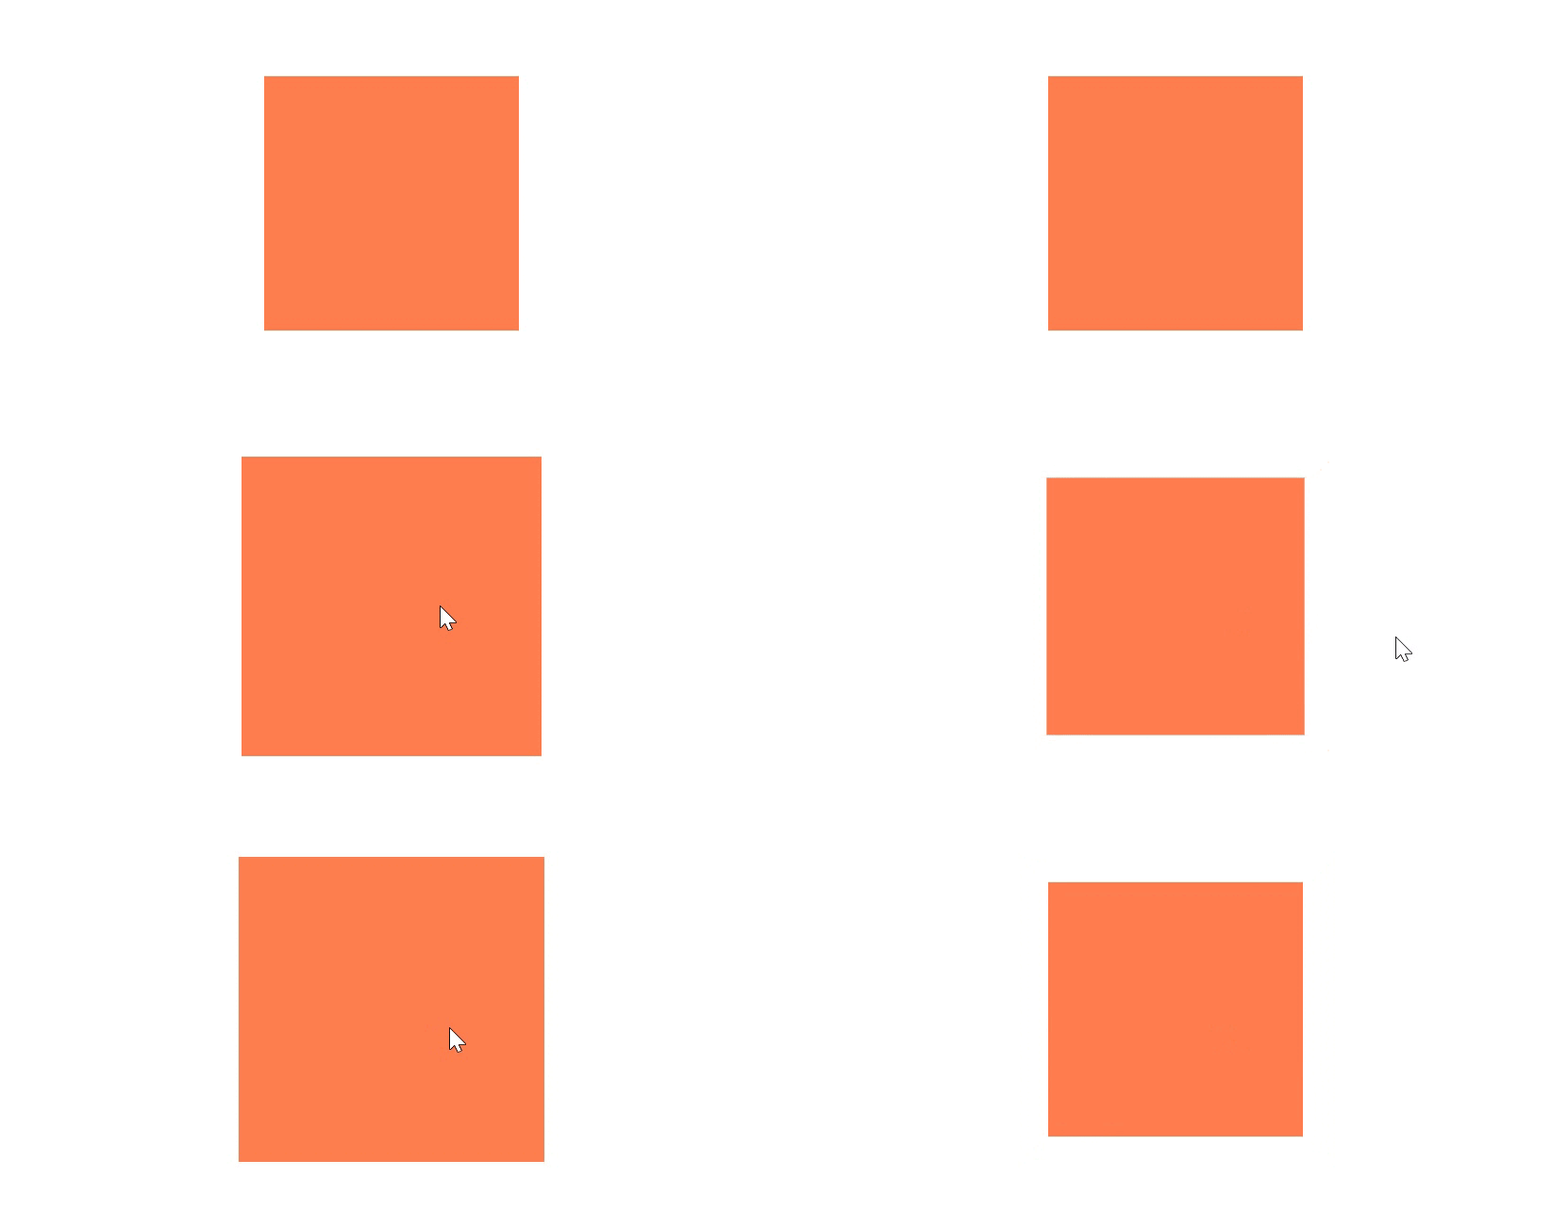
14. 悬停效果
:hover是CSS中的一个伪类,用于选择元素在鼠标悬停时的状态。当鼠标悬停在一个元素上时,你可以通过应用:hover伪类来改变该元素的样式。DOCTYPE html> <html> <head> <style> .box { width: 200px; height: 200px; background-color: coral; transition: transform 0.3s ease; } .box:hover { transform: scale(1.2); } style> head> <body> <div class="box">div> body> html>- 1
- 2
- 3
- 4
- 5
- 6
- 7
- 8
- 9
- 10
- 11
- 12
- 13
- 14
- 15
- 16
- 17
- 18
- 19
- 20
- 21
- 22
- 23
实现效果
15. 剪切元素
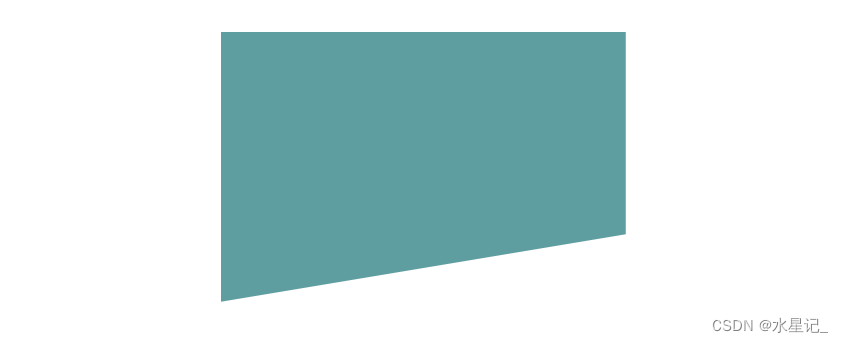
clip-path是一个CSS属性,用于剪切元素的可见区域,以实现各种形状的裁剪效果。它可以通过不同的值来定义剪切路径,包括基本形状、SVG路径和CSS函数。DOCTYPE html> <html> <head> <style> .clipped { width: 300px; height: 200px; background-color: cadetblue; clip-path: polygon(0 0, 100% 0, 100% 75%, 0 100%); } style> head> <body> <div class="clipped">div> body> html>- 1
- 2
- 3
- 4
- 5
- 6
- 7
- 8
- 9
- 10
- 11
- 12
- 13
- 14
- 15
- 16
- 17
- 18
- 19
实现效果
16. 检测属性是否支持
CSS3引入了@supports规则,它允许我们在样式表中根据属性的支持情况来应用不同的样式。- 1
- 2
- 3
- 4
- 5
- 6
- 7
- 8
- 9
- 10
- 11
- 12
- 13
- 14
在上面的示例中,如果浏览器支持
display: flex,则.container元素将使用flex布局;如果不支持,将使用block布局。@supports规则还支持逻辑运算符,例如and、or和not,以及多个属性和属性值的组合。这使得我们可以更精确地检测多个属性的支持情况。需要注意的是,@supports规则在某些旧版本的浏览器中可能不被支持。因此,在使用@supports规则时,建议提供备用样式以确保在不支持规则的浏览器中也能正常显示。
17. CSS 嵌套
在
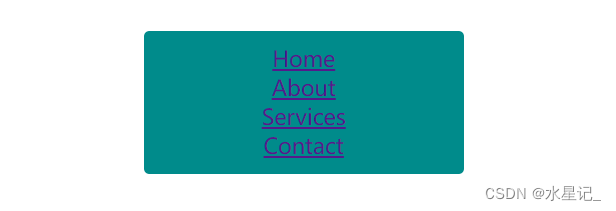
CSS中,嵌套是一种组织和编写样式的技术,它允许我们在选择器中嵌套其他选择器,以便更清晰地描述HTML结构的层次关系。通过嵌套,我们可以减少重复的代码,并更方便地管理样式。DOCTYPE html> <html> <head> <style> .navbar { background-color: darkcyan; padding: 10px; border-radius: 4px; width: 100px; text-align: center; .navList { list-style: none; margin: 0; padding: 0; li { display: inline-block; margin-right: 10px; a { color: #fff; text-decoration: none; &:hover { text-decoration: underline; } } } } } style> head> <body> <nav class="navbar"> <ul class="navList"> <li><a href="#">Homea>li> <li><a href="#">Abouta>li> <li><a href="#">Servicesa>li> <li><a href="#">Contacta>li> ul> nav> body> html>- 1
- 2
- 3
- 4
- 5
- 6
- 7
- 8
- 9
- 10
- 11
- 12
- 13
- 14
- 15
- 16
- 17
- 18
- 19
- 20
- 21
- 22
- 23
- 24
- 25
- 26
- 27
- 28
- 29
- 30
- 31
- 32
- 33
- 34
- 35
- 36
- 37
- 38
- 39
- 40
- 41
- 42
- 43
- 44
- 45
- 46
实现效果
18. clamp() 函数
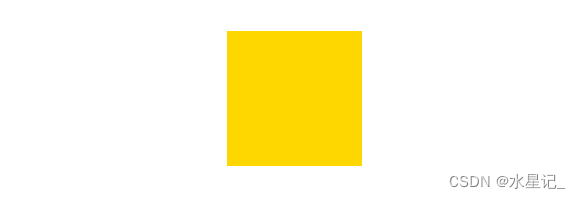
clamp()函数是CSS中的一个函数,用于限制一个值在指定的范围内。它接受三个参数:一个要限制的值,一个最小值和一个最大值。函数的返回值是在最小值和最大值之间的值。clamp(<min>, <value>, <max>)- 1
各属性值含义:
clamp()函数的工作原理如下:- 如果
- 如果
- 否则,返回
DOCTYPE html> <html> <head> <style> .box { width: clamp(100px, 50px, 400px); height: clamp(100px, 20px, 400px); background-color: gold; } style> head> <body> <div class="box">div> body> html>- 1
- 2
- 3
- 4
- 5
- 6
- 7
- 8
- 9
- 10
- 11
- 12
- 13
- 14
- 15
- 16
- 17
- 18
实现效果
19. 图文环绕
shape-outside是一个CSS属性,用于定义一个元素的形状,以便其他元素可以环绕它。这个属性通常与float属性一起使用,以实现图片或其他元素的文字环绕效果。DOCTYPE html> <html> <head> <style> .container { width: 100%; overflow: hidden; } .floatLeft { float: left; margin-right: 20px; margin-bottom: 20px; shape-outside: circle(50%); } style> head> <body> <div class="container"> <img src="./assets/yhn.png" alt="Your Image" class="floatLeft"> <p>When you are young, you may want several love experiences. But as timegoes on, you will realize that if you really love someone, the wholelife will not be enough. You need time to know, to forgive and to love.All this needs a very big mind.p> div> body> html>- 1
- 2
- 3
- 4
- 5
- 6
- 7
- 8
- 9
- 10
- 11
- 12
- 13
- 14
- 15
- 16
- 17
- 18
- 19
- 20
- 21
- 22
- 23
- 24
- 25
- 26
- 27
- 28
- 29
- 30
实现效果

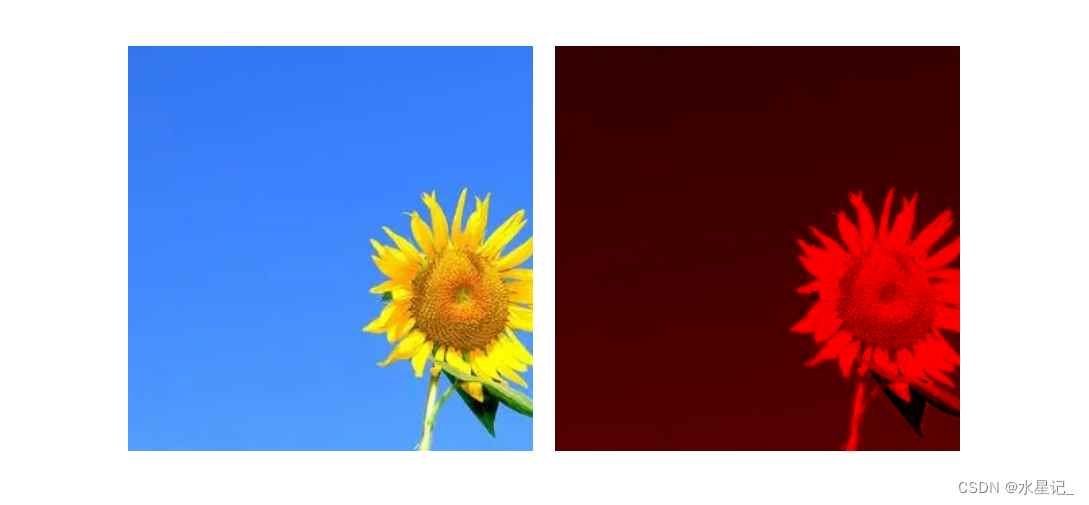
20. 背景混合模式
当使用
CSS实现背景混合模式时,你可以使用background-blend-mode属性来控制背景图像和背景颜色之间的混合效果。DOCTYPE html> <html> <head> <style> .element { display: inline-block; width: 300px; height: 300px; background-image: url('./assets/img.jpg'); } .mixture { background-color: #ff0000; background-blend-mode: multiply; } style> head> <body> <div class="element">div> <div class="element mixture">div> body> html>- 1
- 2
- 3
- 4
- 5
- 6
- 7
- 8
- 9
- 10
- 11
- 12
- 13
- 14
- 15
- 16
- 17
- 18
- 19
- 20
- 21
- 22
- 23
- 24
- 25
实现效果
21. 调整滚动条默认样式
当需要调整滚动条样式时,可以使用
CSS来实现。首先,选择要调整样式的滚动条。可以使用以下
CSS选择器来选择不同类型的滚动条:- 滚动条:
::-webkit-scrollbar - 滚动条轨道:
::-webkit-scrollbar-track - 滚动条滑块:
::-webkit-scrollbar-thumb - 滚动条角落:
::-webkit-scrollbar-corner - 滚动条按钮:
::-webkit-scrollbar-button
接下来,使用
CSS属性来调整滚动条的样式。以下是一些常用的属性:width:滚动条的宽度height:滚动条的高度background-color:滚动条的背景颜色border:滚动条的边框样式border-radius:滚动条的边框圆角box-shadow:滚动条的阴影效果color:滚动条上文本的颜色cursor:鼠标悬停在滚动条上时的光标样式
DOCTYPE html> <html> <head> <style> .scroll { width: 500px; height: 150px; border: 1px solid #ddd; padding: 10px; overflow: auto; } /* 滚动条 */ ::-webkit-scrollbar { width: 10px; background-color: #f1f1f1; } /* 滚动条轨道 */ ::-webkit-scrollbar-track { background-color: #f1f1f1; } /* 滚动条滑块 */ ::-webkit-scrollbar-thumb { background-color: #888; border-radius: 5px; } /* 滚动条角落 */ ::-webkit-scrollbar-corner { background-color: #f1f1f1; } /* 滚动条按钮 */ ::-webkit-scrollbar-button { display: none; } style> head> <body> <div class="scroll"> 内容...... div> body> html>- 1
- 2
- 3
- 4
- 5
- 6
- 7
- 8
- 9
- 10
- 11
- 12
- 13
- 14
- 15
- 16
- 17
- 18
- 19
- 20
- 21
- 22
- 23
- 24
- 25
- 26
- 27
- 28
- 29
- 30
- 31
- 32
- 33
- 34
- 35
- 36
- 37
- 38
- 39
- 40
- 41
- 42
- 43
- 44
- 45
- 46
- 47
- 48
- 49
实现效果

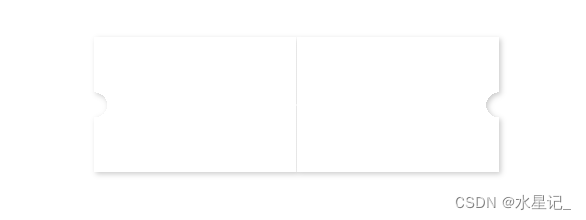
22. 卡券效果
要实现卡券效果,可以使用
CSS来创建一个具有特殊样式的卡片。DOCTYPE html> <html> <head> <style> .coupon { width: 300px; height: 100px; margin: 50px auto; text-align: center; position: relative; background: radial-gradient(circle at right bottom, transparent 10px, #ffffff 0) top right /50% 51px no-repeat, radial-gradient(circle at left bottom, transparent 10px, #ffffff 0) top left / 50% 51px no-repeat, radial-gradient(circle at right top, transparent 10px, #ffffff 0) bottom right / 50% 51px no-repeat, radial-gradient(circle at left top, transparent 10px, #ffffff 0) bottom left / 50% 51px no-repeat; filter: drop-shadow(2px 2px 2px rgba(0, 0, 0, .2)); } style> head> <body> <p class="coupon">p> body> html>- 1
- 2
- 3
- 4
- 5
- 6
- 7
- 8
- 9
- 10
- 11
- 12
- 13
- 14
- 15
- 16
- 17
- 18
- 19
- 20
- 21
- 22
- 23
- 24
- 25
实现效果
23. 表格边框合并
border-collapse是CSS中用于控制表格边框合并方式的属性。它有两个值:separate(默认值):这是border-collapse的初始值。在此模式下,相邻单元格的边框会分开显示,不会合并。每个单元格都有自己的边框;collapse:在这种模式下,相邻单元格的边框会合并为一个单一的边框。这样可以创建更紧凑和一致的表格外观。
DOCTYPE html> <html> <head> <style> table { width: 400px; height: 80px; border: 1px solid #ccc; } td { border: 1px solid #ccc; } table:nth-child(2) { border-collapse: collapse; } style> head> <body> <table> <tr> <td>单元格1td> <td>单元格2td> tr> <tr> <td>单元格3td> <td>单元格4td> tr> table> <table> <tr> <td>单元格1td> <td>单元格2td> tr> <tr> <td>单元格3td> <td>单元格4td> tr> table> body> html>- 1
- 2
- 3
- 4
- 5
- 6
- 7
- 8
- 9
- 10
- 11
- 12
- 13
- 14
- 15
- 16
- 17
- 18
- 19
- 20
- 21
- 22
- 23
- 24
- 25
- 26
- 27
- 28
- 29
- 30
- 31
- 32
- 33
- 34
- 35
- 36
- 37
- 38
- 39
- 40
- 41
- 42
- 43
- 44
- 45
实现效果

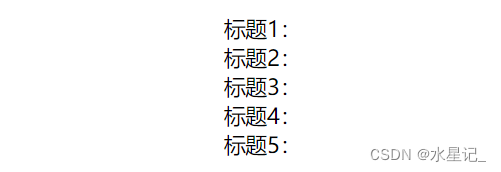
24. 隐藏文本
通过一些
CSS方法可以实现将一些文本隐藏。DOCTYPE html> <html> <head> <style> /* 完全隐藏元素,包括其文本内容和占用的空间。元素在页面上不可见,也不会占据布局空间。 */ .displayMed { display: none; } /* 隐藏元素的内容,但仍然保留其占用的空间。元素在页面上不可见,但仍然占据布局空间。 */ .visibilityMed { visibility: hidden; } /* 将元素的位置设置为绝对定位,并将其左侧移出屏幕,可以隐藏元素的文本内容。但是,这种方法可能会影响元素的布局,因为元素的位置可能会发生变化。 */ .positionMed { position: absolute; left: -9999px; } /* 将元素的字体大小设置为0,可以隐藏元素的文本内容。但是,这种方法可能会影响元素的子元素,因为子元素的字体大小也会被设置为0。 */ .fontMed { font-size: 0; } /* 将元素的透明度设置为0,可以隐藏元素的文本内容。但是,这种方法会使整个元素变为透明,包括其背景和其他样式。 */ .opacityMed { opacity: 0; } style> head> <body> <div> <span>标题1:span> <span class="displayMed">内容1span> div> <div> <span>标题2:span> <span class="visibilityMed">内容2span> div> <div> <span>标题3:span> <span class="positionMed">内容3span> div> <div> <span>标题4:span> <span class="fontMed">内容4span> div> <div> <span>标题5:span> <span class="opacityMed">内容5span> div> body> html>- 1
- 2
- 3
- 4
- 5
- 6
- 7
- 8
- 9
- 10
- 11
- 12
- 13
- 14
- 15
- 16
- 17
- 18
- 19
- 20
- 21
- 22
- 23
- 24
- 25
- 26
- 27
- 28
- 29
- 30
- 31
- 32
- 33
- 34
- 35
- 36
- 37
- 38
- 39
- 40
- 41
- 42
- 43
- 44
- 45
- 46
- 47
- 48
- 49
- 50
- 51
- 52
- 53
- 54
- 55
- 56
- 57
实现效果
25. 文字溢出显示省略号
要在文本溢出时显示省略号,可以使用
CSS的text-overflow属性和overflow属性的配合。DOCTYPE html> <html> <head> <style> .overflow { width: 200px; overflow: hidden; text-overflow: ellipsis; white-space: nowrap; } style> head> <body> <div class="overflow"> This is a long text that will be truncated with an ellipsis when it overflows. div> body> html>- 1
- 2
- 3
- 4
- 5
- 6
- 7
- 8
- 9
- 10
- 11
- 12
- 13
- 14
- 15
- 16
- 17
- 18
- 19
- 20
- 21
实现效果

26. 设置 placeholder 样式
当我们在
HTML中使用placeholder属性时,可以通过CSS来自定义其样式。DOCTYPE html> <html> <head> <style> input::placeholder { color: red; font-size: 22px; } style> head> <body> <input type="text" placeholder="请输入文字"> body> html>- 1
- 2
- 3
- 4
- 5
- 6
- 7
- 8
- 9
- 10
- 11
- 12
- 13
- 14
- 15
- 16
- 17
实现效果

27. 立体字效果
实现立体字的效果,可以使用
CSS的文本阴影和透明度属性DOCTYPE html> <html> <head> <style> h1 { text-shadow: 2px 2px 4px rgba(212, 15, 15, 0.7); color: white; opacity: 0.8; } style> head> <body> <h1>立体字效果h1> body> html>- 1
- 2
- 3
- 4
- 5
- 6
- 7
- 8
- 9
- 10
- 11
- 12
- 13
- 14
- 15
- 16
- 17
- 18
实现效果

28. 更改 input 光标颜色
caret-color是一个CSS属性,用于设置文本输入框(如input、textarea等)中光标的颜色。DOCTYPE html> <html> <head> <style> input { caret-color: red; } style> head> <body> <input type="text"> body> html>- 1
- 2
- 3
- 4
- 5
- 6
- 7
- 8
- 9
- 10
- 11
- 12
- 13
- 14
- 15
- 16
实现效果

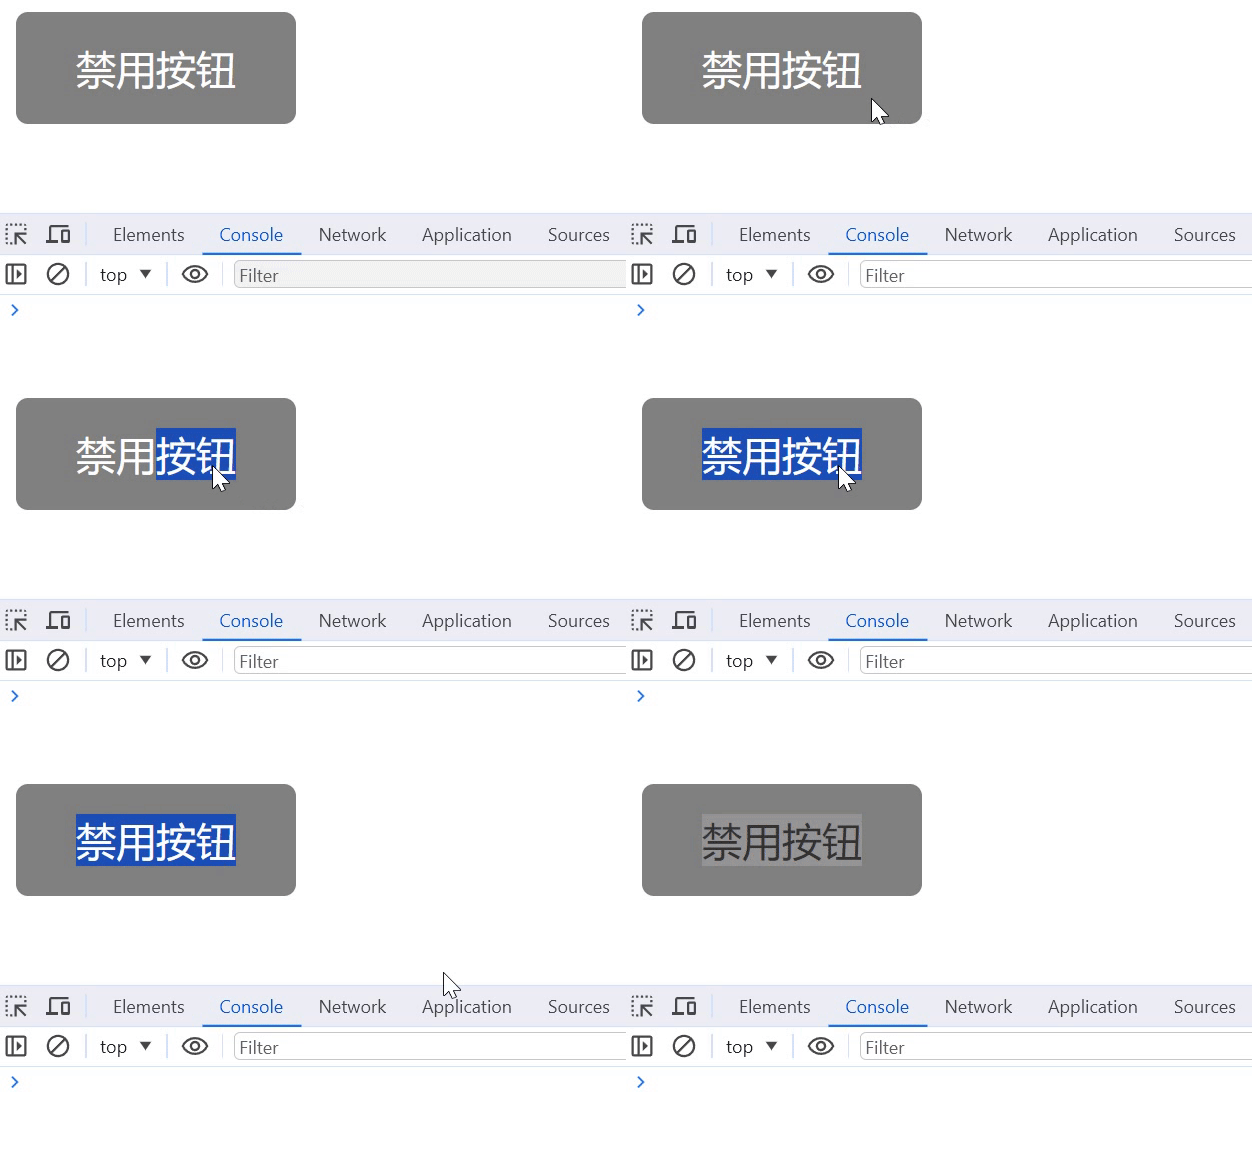
29. 鼠标事件失效
pointer-events: none和cursor: default都是CSS属性,用于控制元素的交互行为和鼠标指针的样式。pointer-events: none用于禁用元素的鼠标事件,使其无法响应鼠标的交互操作。具体来说,当一个元素的pointer-events属性设置为none时,该元素及其子元素将不会接收到鼠标事件,包括鼠标点击、鼠标移动等。这个属性通常用于创建可穿透的元素,使其下方的元素能够接收到鼠标事件。cursor: default用于设置鼠标指针在元素上的样式为默认样式。默认样式通常是一个箭头指针,表示元素没有特定的交互行为。当鼠标悬停在一个元素上时,如果该元素的cursor属性设置为default,鼠标指针将显示为箭头。DOCTYPE html> <html> <head> <style> .disabled-button { pointer-events: none; cursor: default; background-color: gray; color: white; padding: 10px 20px; border: none; border-radius: 4px; } style> <script> function handleClick() { console.log('按钮被点击了!') } script> head> <body> <button class="disabled-button" onclick="handleClick()">禁用按钮button> body> html>- 1
- 2
- 3
- 4
- 5
- 6
- 7
- 8
- 9
- 10
- 11
- 12
- 13
- 14
- 15
- 16
- 17
- 18
- 19
- 20
- 21
- 22
- 23
- 24
- 25
- 26
- 27
实现效果
30. 图片自适应
当使用
object-fit: cover属性时,可以实现图片的自适应效果,使其填充其容器,并保持其原始比例。DOCTYPE html> <html> <head> <style> .image { width: 300px; height: 200px; overflow: hidden; } .image img { width: 100%; height: 100%; object-fit: cover; } style> head> <body> <div class="image"> <img src="./assets/img.jpg" alt="Your Image"> div> body> html>- 1
- 2
- 3
- 4
- 5
- 6
- 7
- 8
- 9
- 10
- 11
- 12
- 13
- 14
- 15
- 16
- 17
- 18
- 19
- 20
- 21
- 22
- 23
- 24
- 25
- 26
实现效果
持续更新... -
相关阅读:
HarmonyOS应用API手势方法-PinchGesture
C. Water the Trees Educational Codeforces Round 126 (Rated for Div. 2)
模拟经营微信小游戏-休闲餐厅上线了
Bomb Lab!!!
代码重构:面向单元测试
C++内存管理:其四、使用链表实现简易版内存池
京东爆款架构师成长手册首发,架构师光环你也值得拥有
如何让Java项目兼容更多的客户端设备(二)
Java 类和对象
开发套件-开发换电脑
- 原文地址:https://blog.csdn.net/Shids_/article/details/134442192
