-
使用软路由(openWrt)安装openVPN搭建局域网连接
前言
我是从抖音的一位老哥的需求,得知这个openWrt的,用这个可以搭建软路由,也能和Linux系统一样执行ssh命令,也能安装openVPN,这个主要是从安装到联网到配置的详细教程
OpenWrt(说明一下什么是OpenWrt)
首先就是openWrt的官网:
https://openwrt.org/zh/start说明:
OpenWrt项目是一个针对嵌入式设备的Linux操作系统。OpenWrt不是一个单一且不可更改的固件,而是提供了具有软件包管理功能的完全可写的文件系统。这使您可以从供应商提供的应用范围和配置中解脱出来,并且让您通过使用适配任何应用的软件包来定制设备。对于开发人员来说,OpenWrt是一个无需围绕它构建完整固件就能开发应用程序的框架; 对于普通用户来说,这意味着拥有了完全定制的能力,能以意想不到的方式使用该设备。看完上面,你可能对openWrt有更好的了解了,接下来就是下载和配置了,由于我是在本地电脑上的虚拟机安装的所以连接后会出现问题,我这里先提前说一下
正文
首先就是去阿里云镜像仓库:
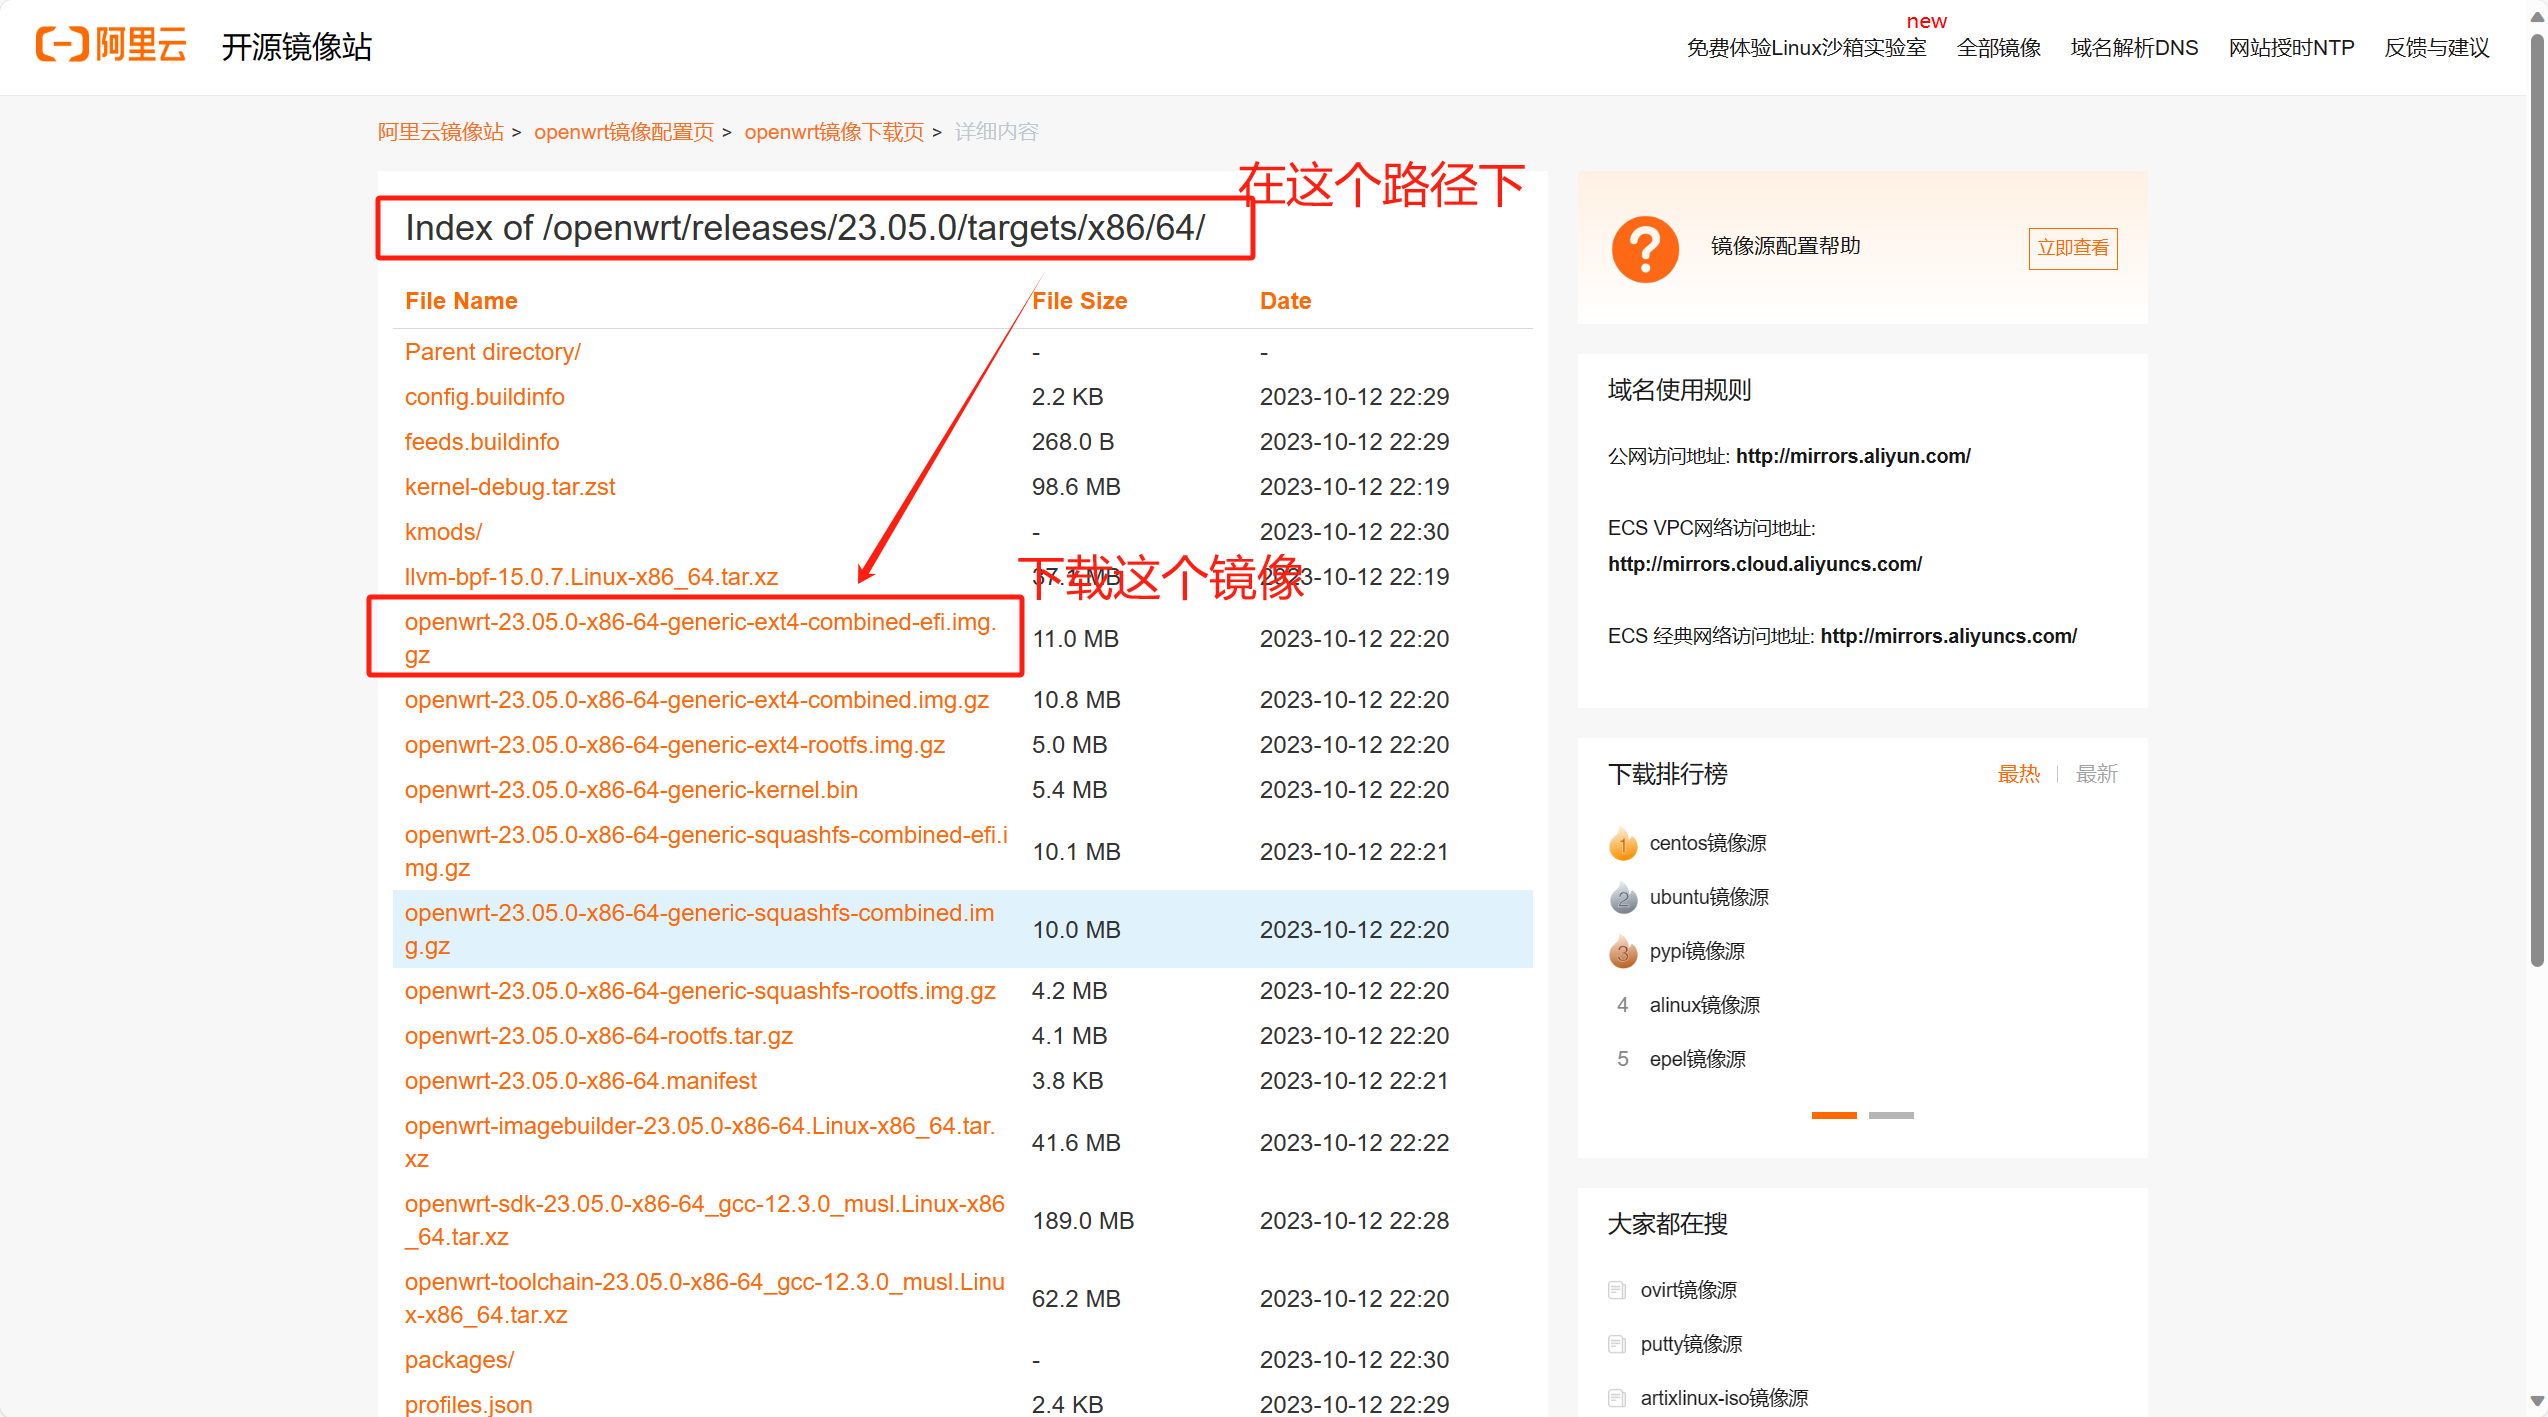
https://mirrors.aliyun.com/openwrt/releases下载我OpenWrt的镜像,我这里下载的是下面这个版本,点进去
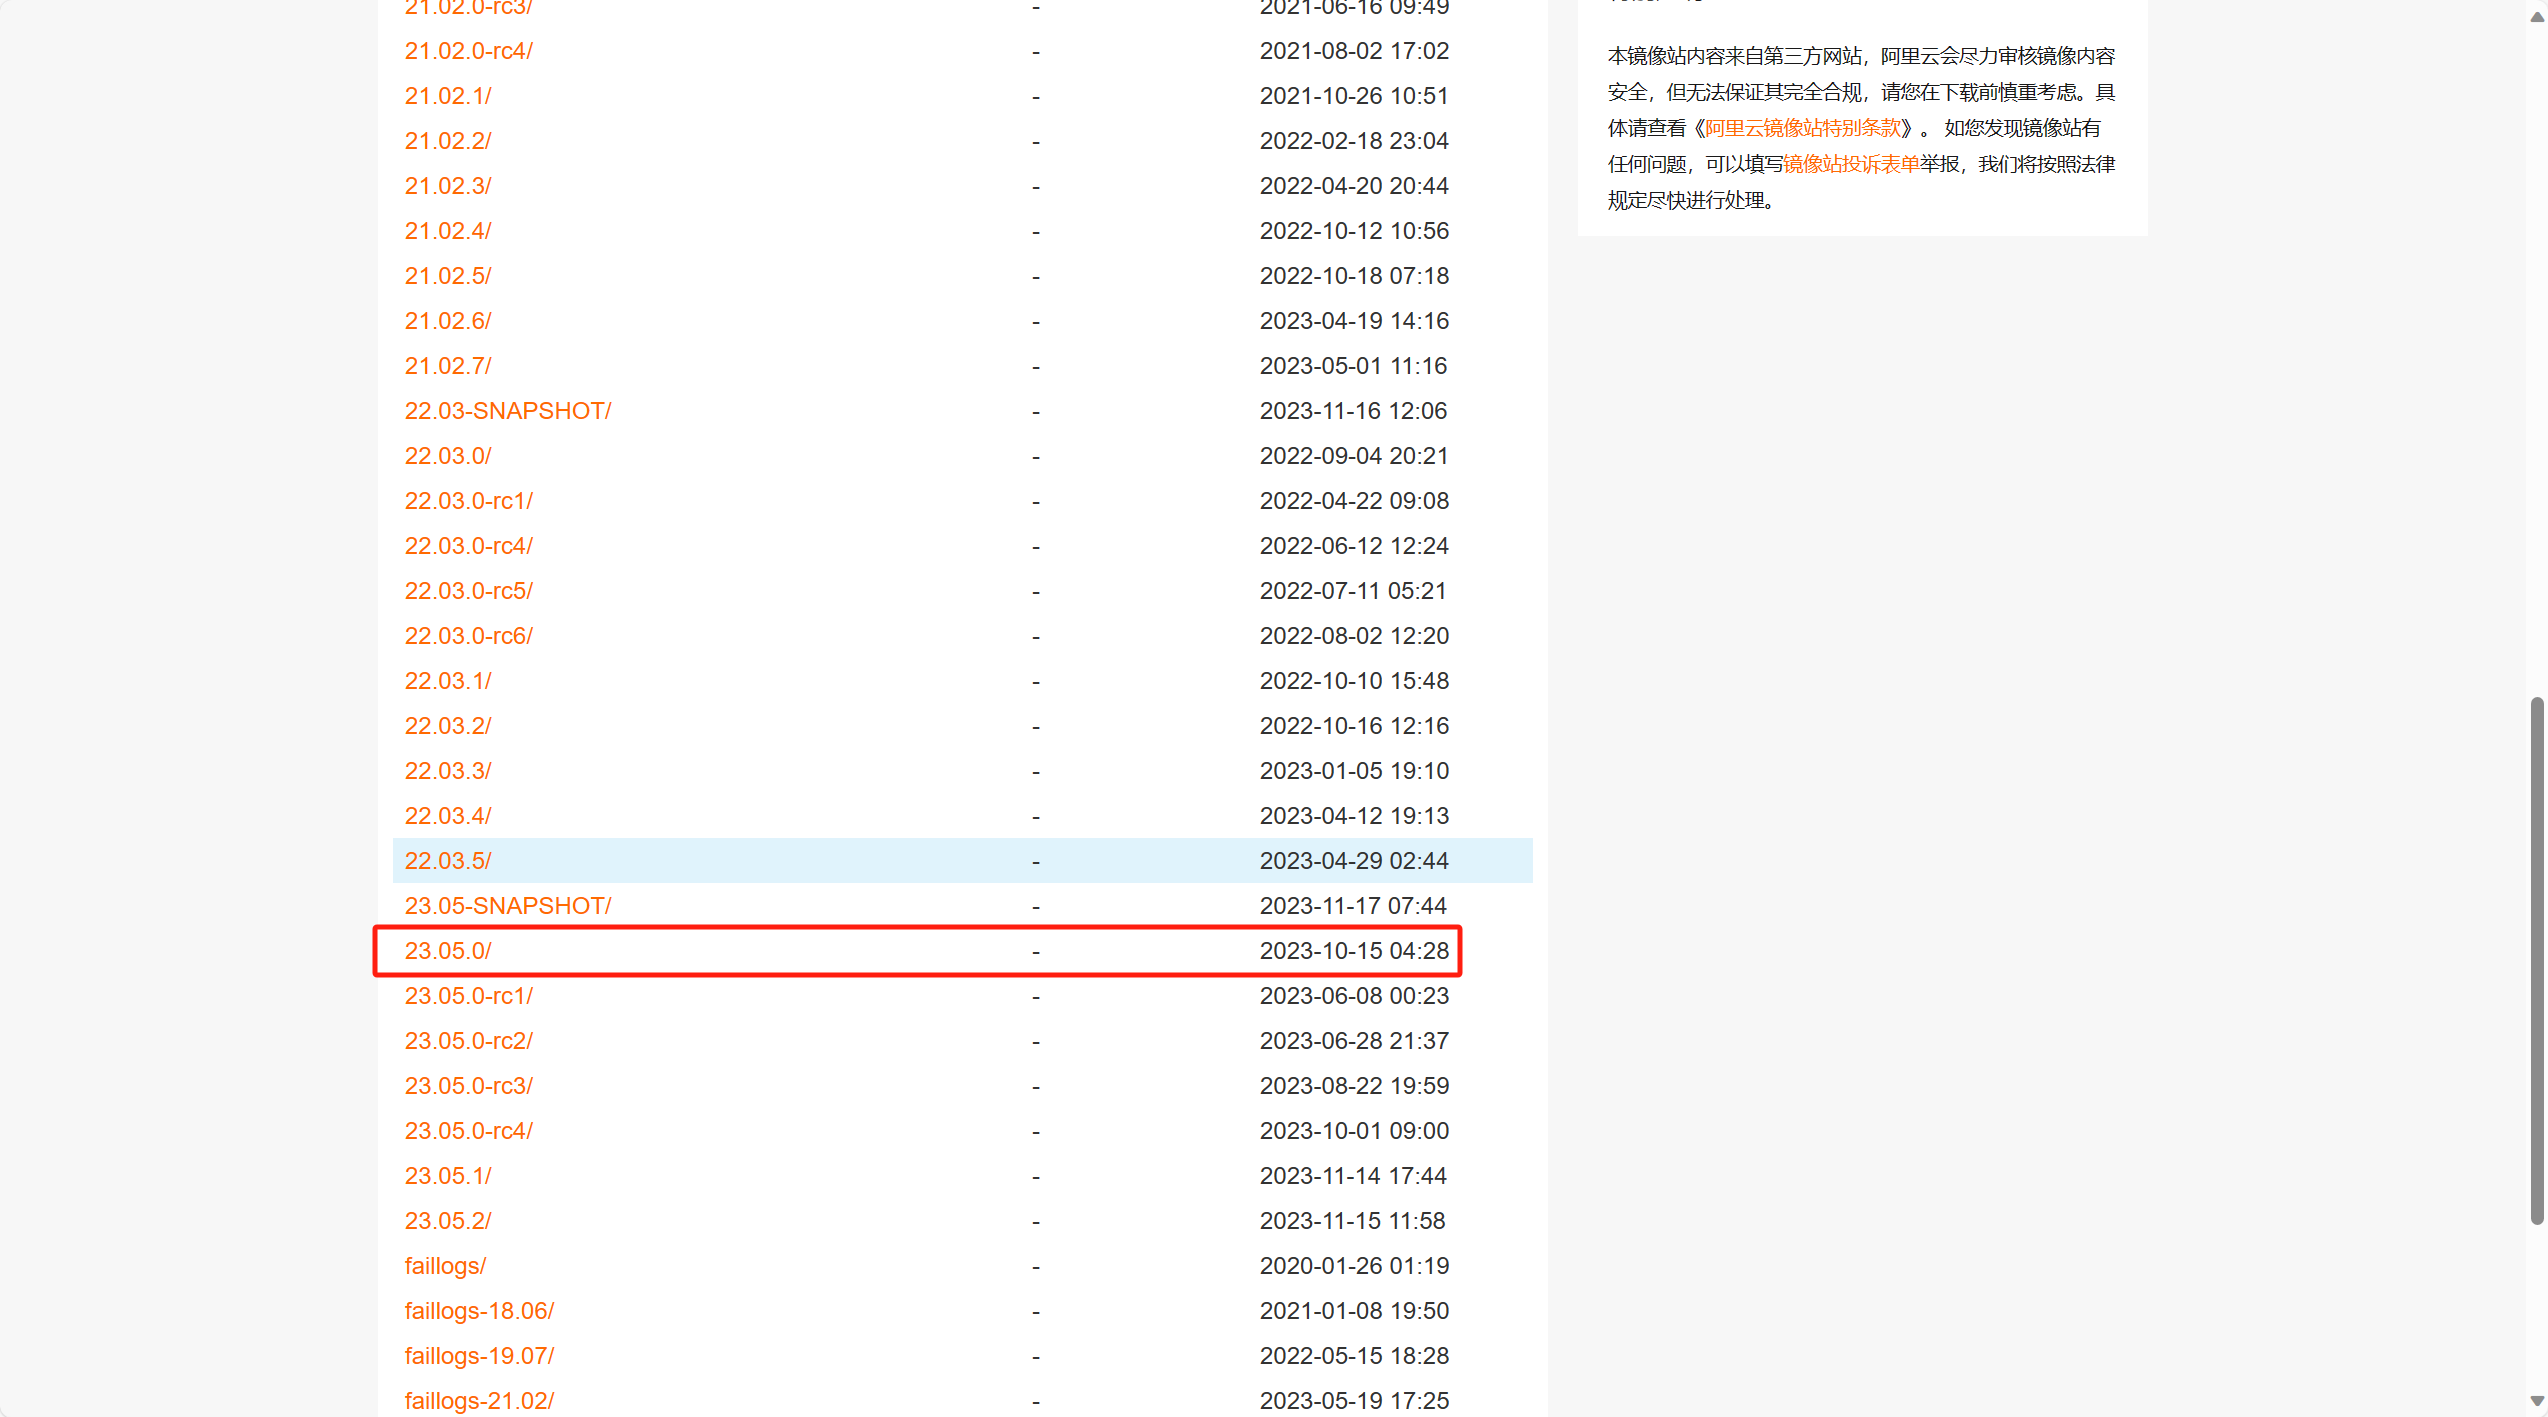
点击下载镜像
下载好后,直接解压
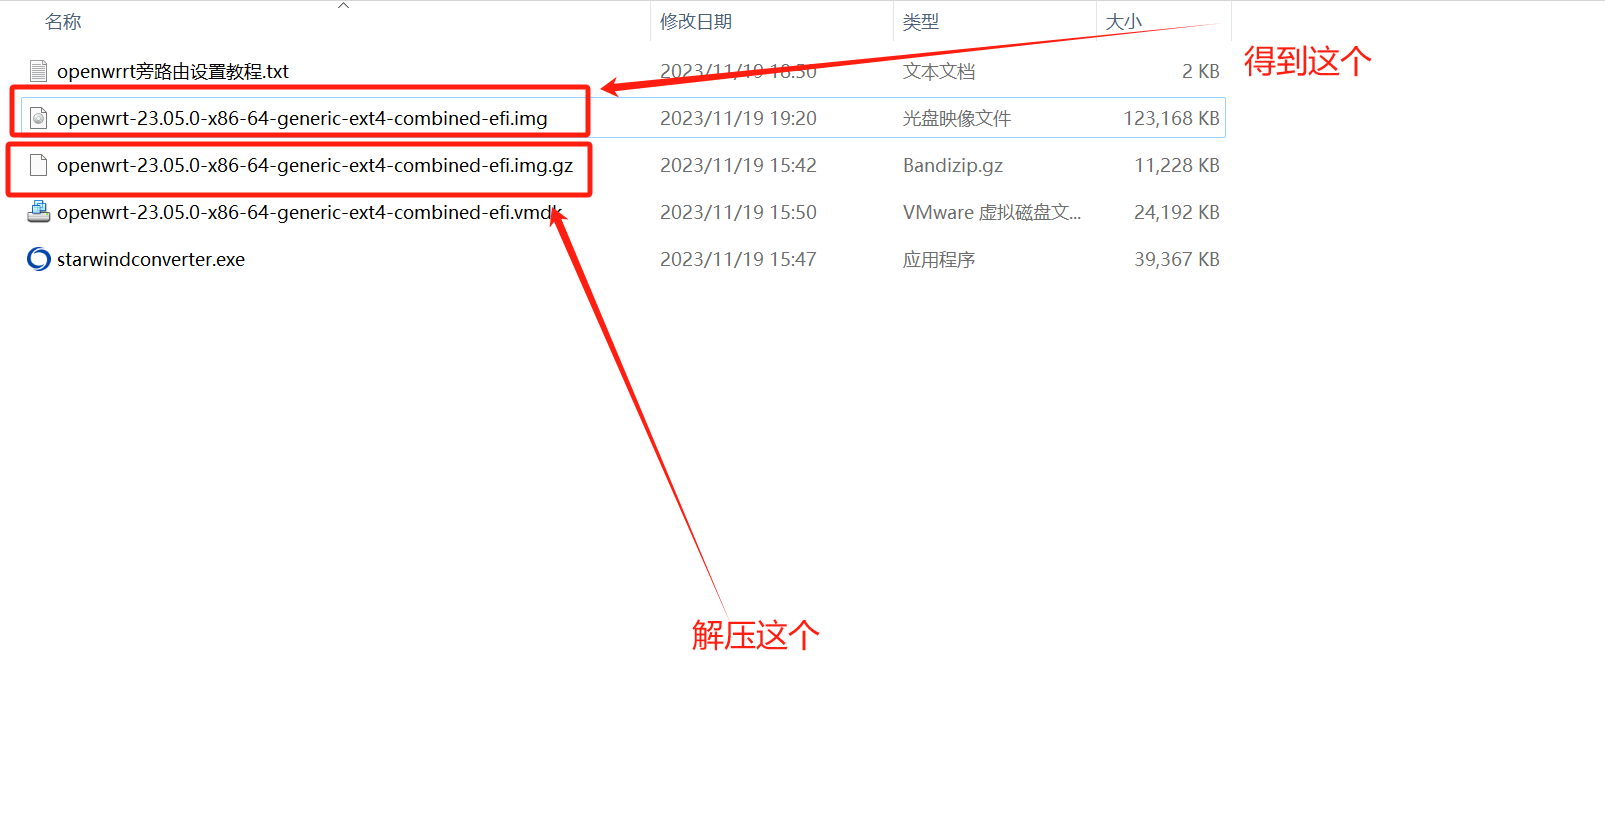
下载一个工具(StarWind V2V Image Converterhttps://www.starwindsoftware.com/tmplink/starwindconverter.exe),在windows上可以把image给转换成Vmware的存储文件,把image转换成vmdk格式
下载好后得到下面这个exe程序

点击安装,一直无脑下一步就行,接着就是打开软件,选择Local file点击下一步
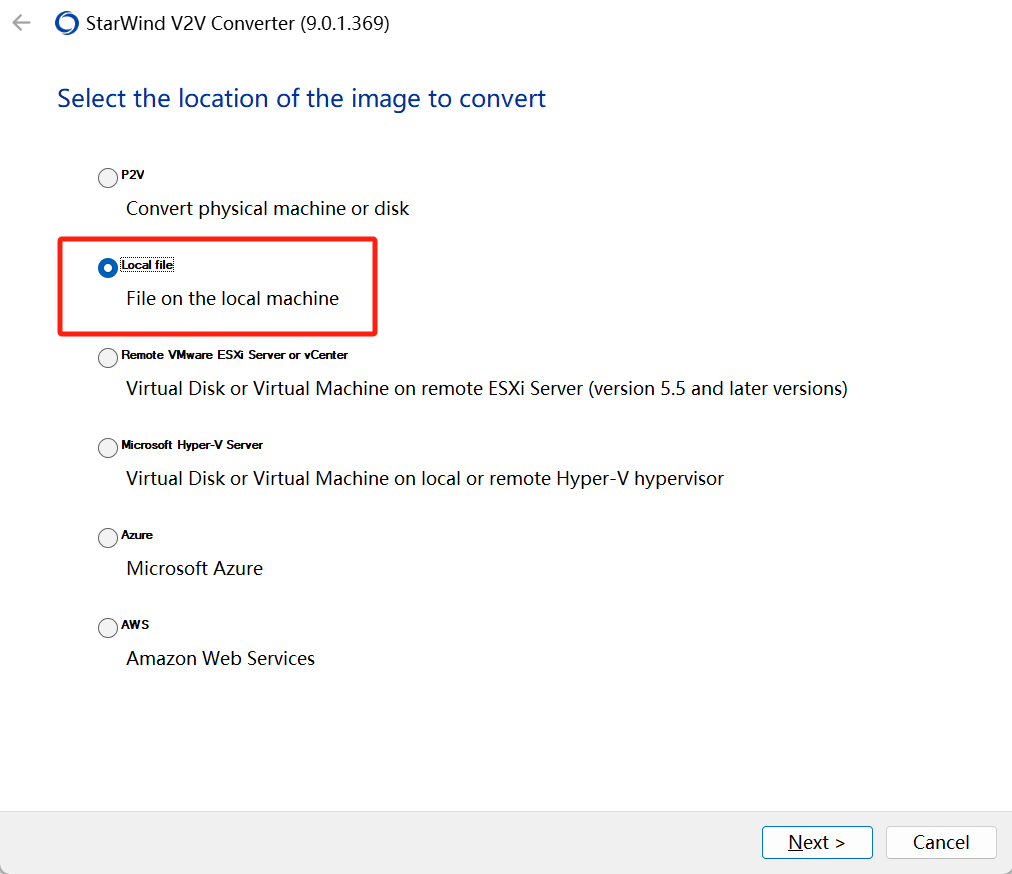
下面选择你下载好解压后的img结尾的镜像然后点击下一步

到下面接着点击下一步
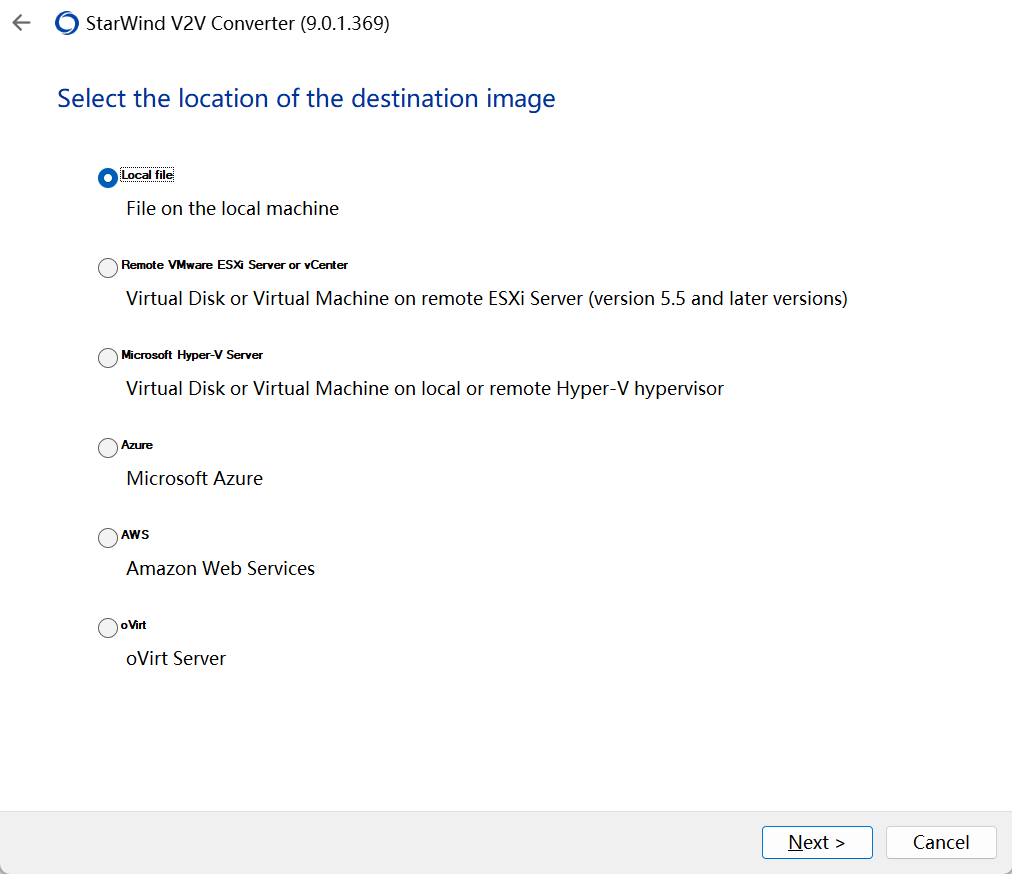
接着点击下一步

再接着点击下一步

选择生成vmdk文件的位置,默认在你镜像的那个文件夹同目录下,点击生成
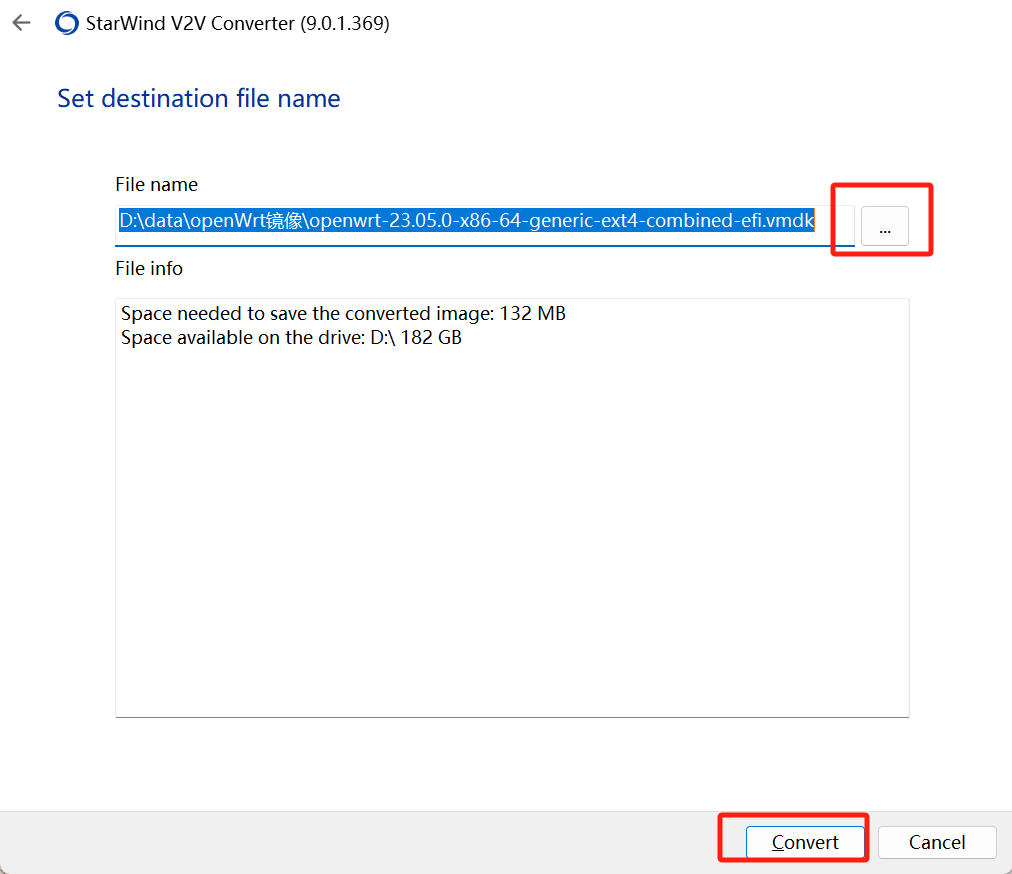
需要注意的是存放镜像和解压路径下不能含有中文,我上面的路径就是有中文,所以会报错,不过我把img镜像更换之后就可以直接转换成功了

接着就是去VMware设置安装,新建虚拟机->自定义(高级)->稍后安装操作系统,接下来就是看图片了
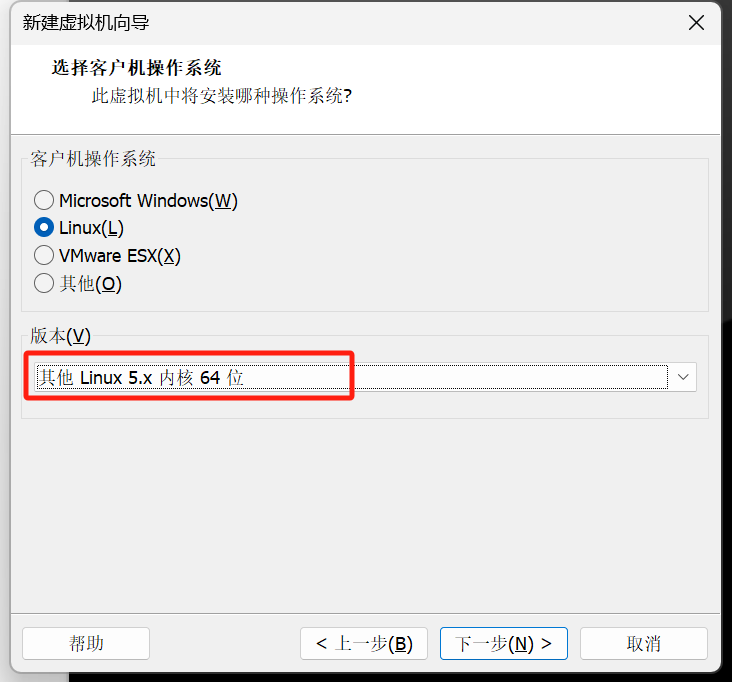
选择我们生成的磁盘文件

成功点亮,安装成功
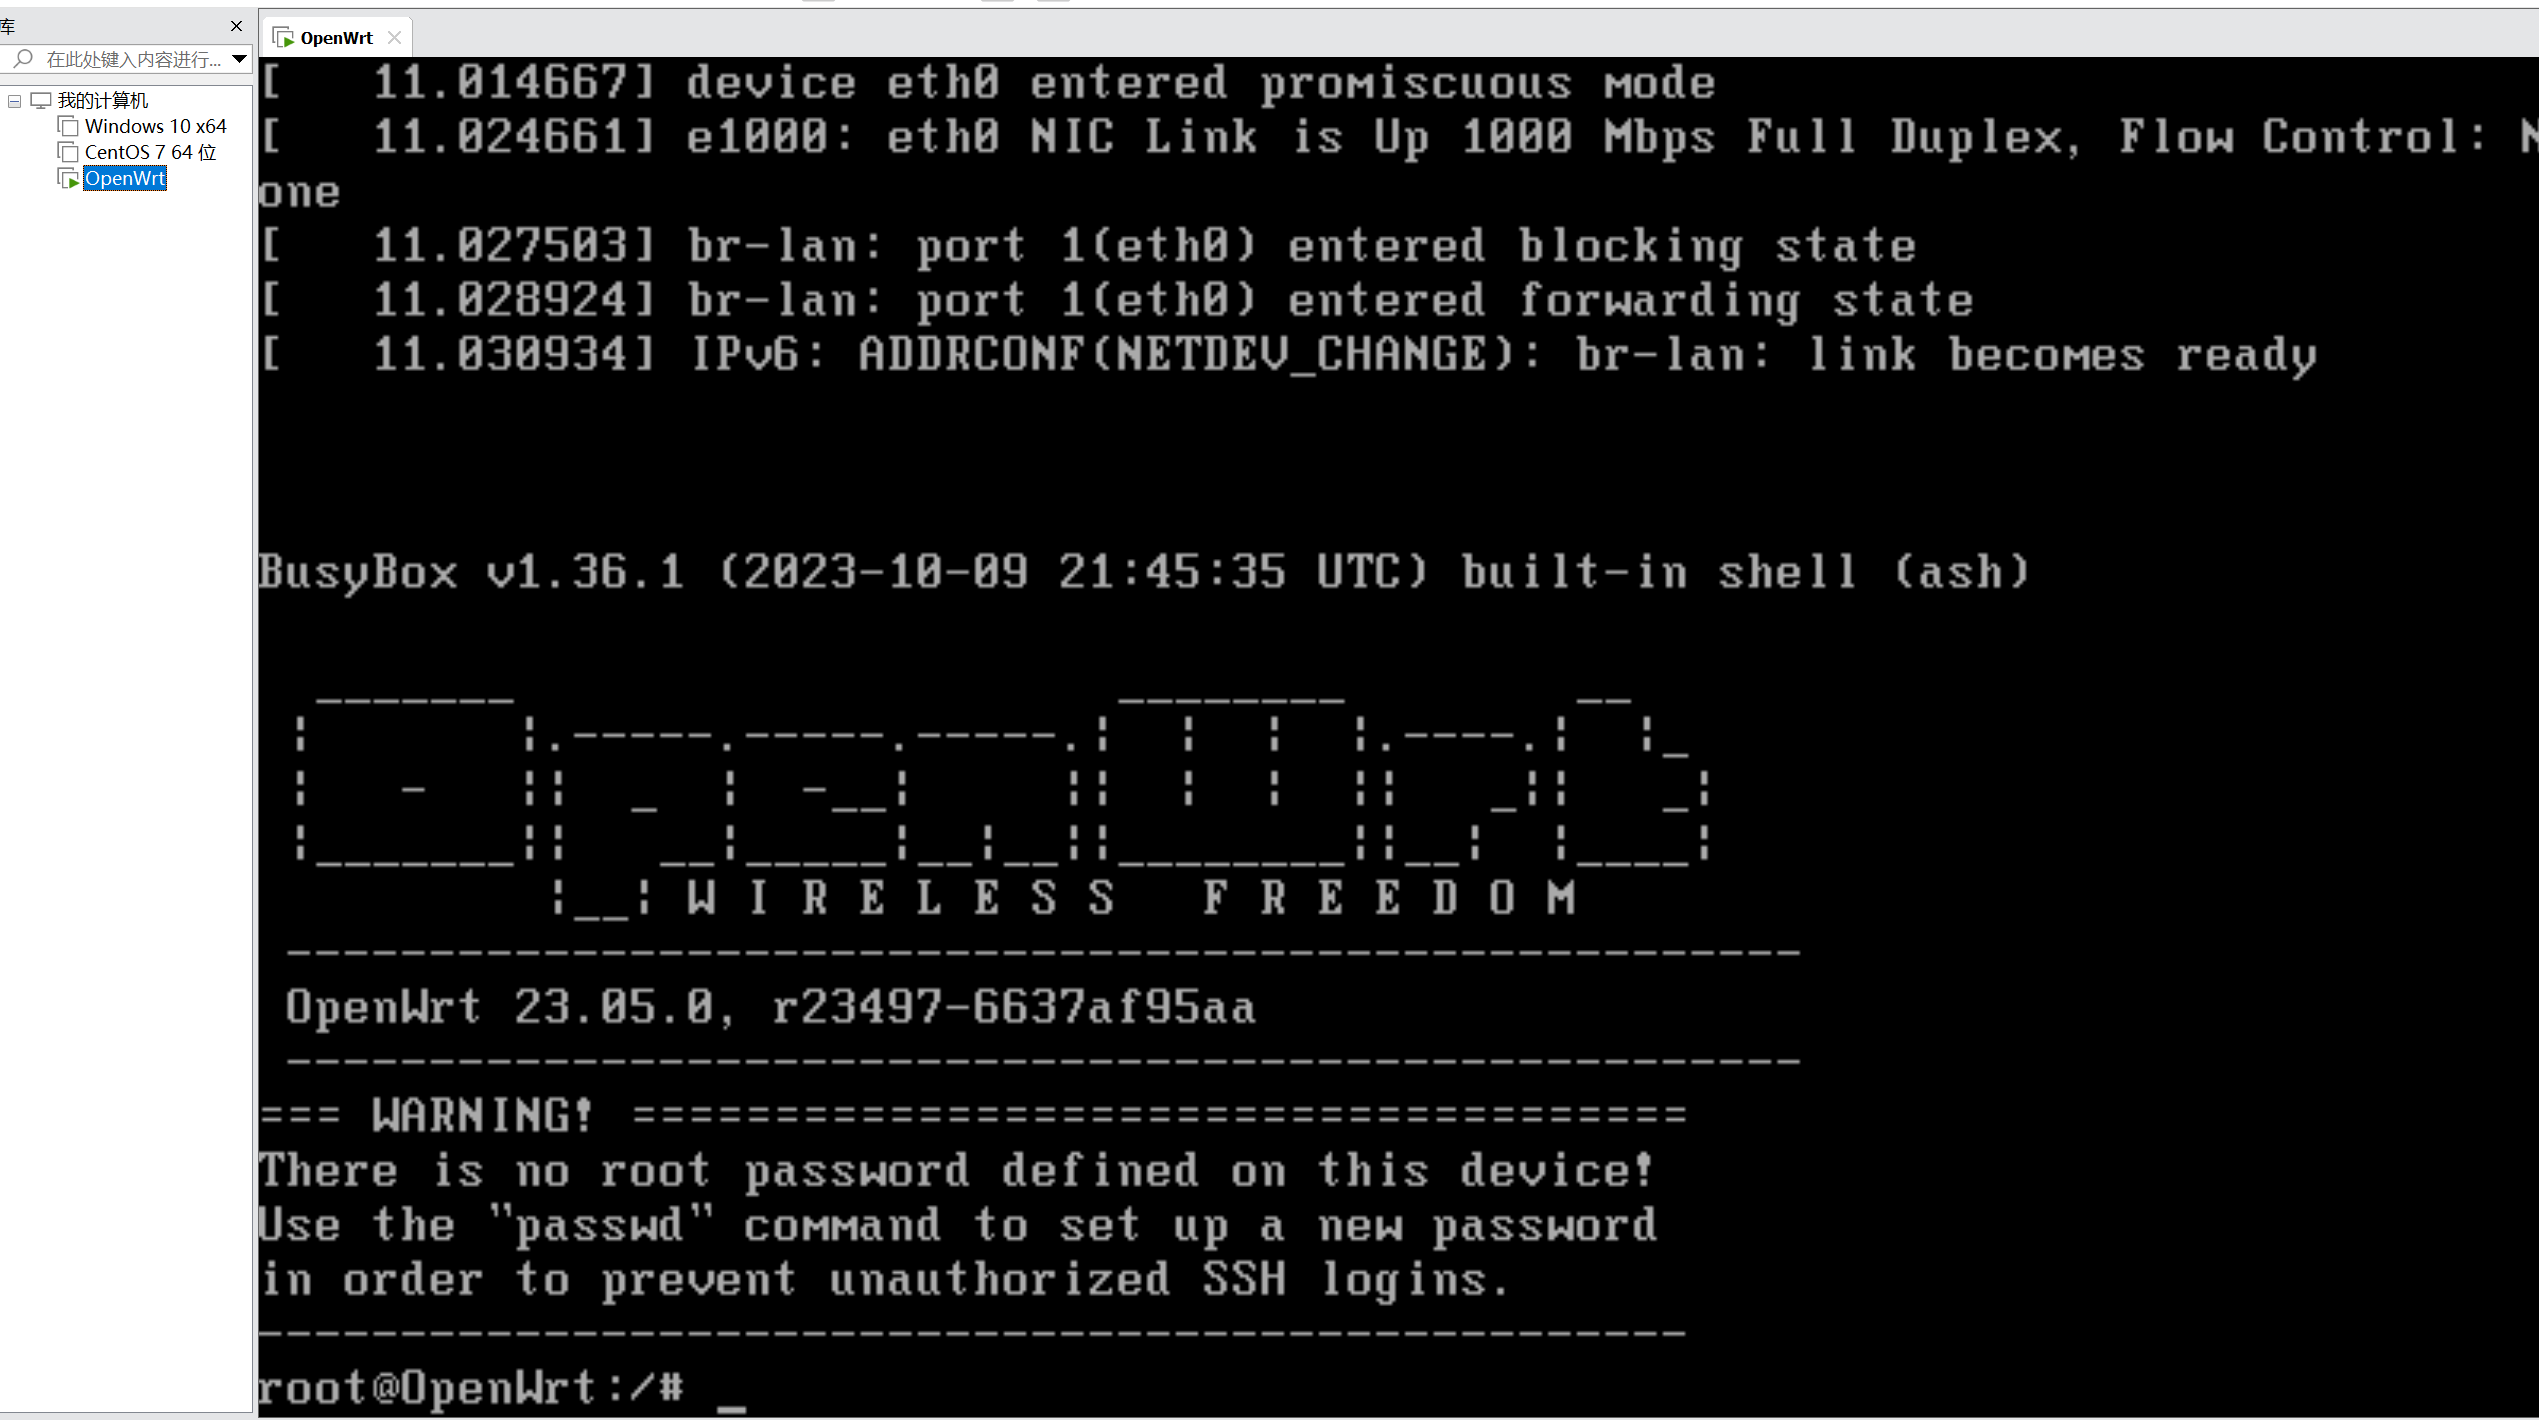
首先输入下面这个,进行修改密码
passwd- 1
如果出现下面这个说明修改密码成功,
说明一下输入密码部分不展示,也就是说你输入的密码看不到
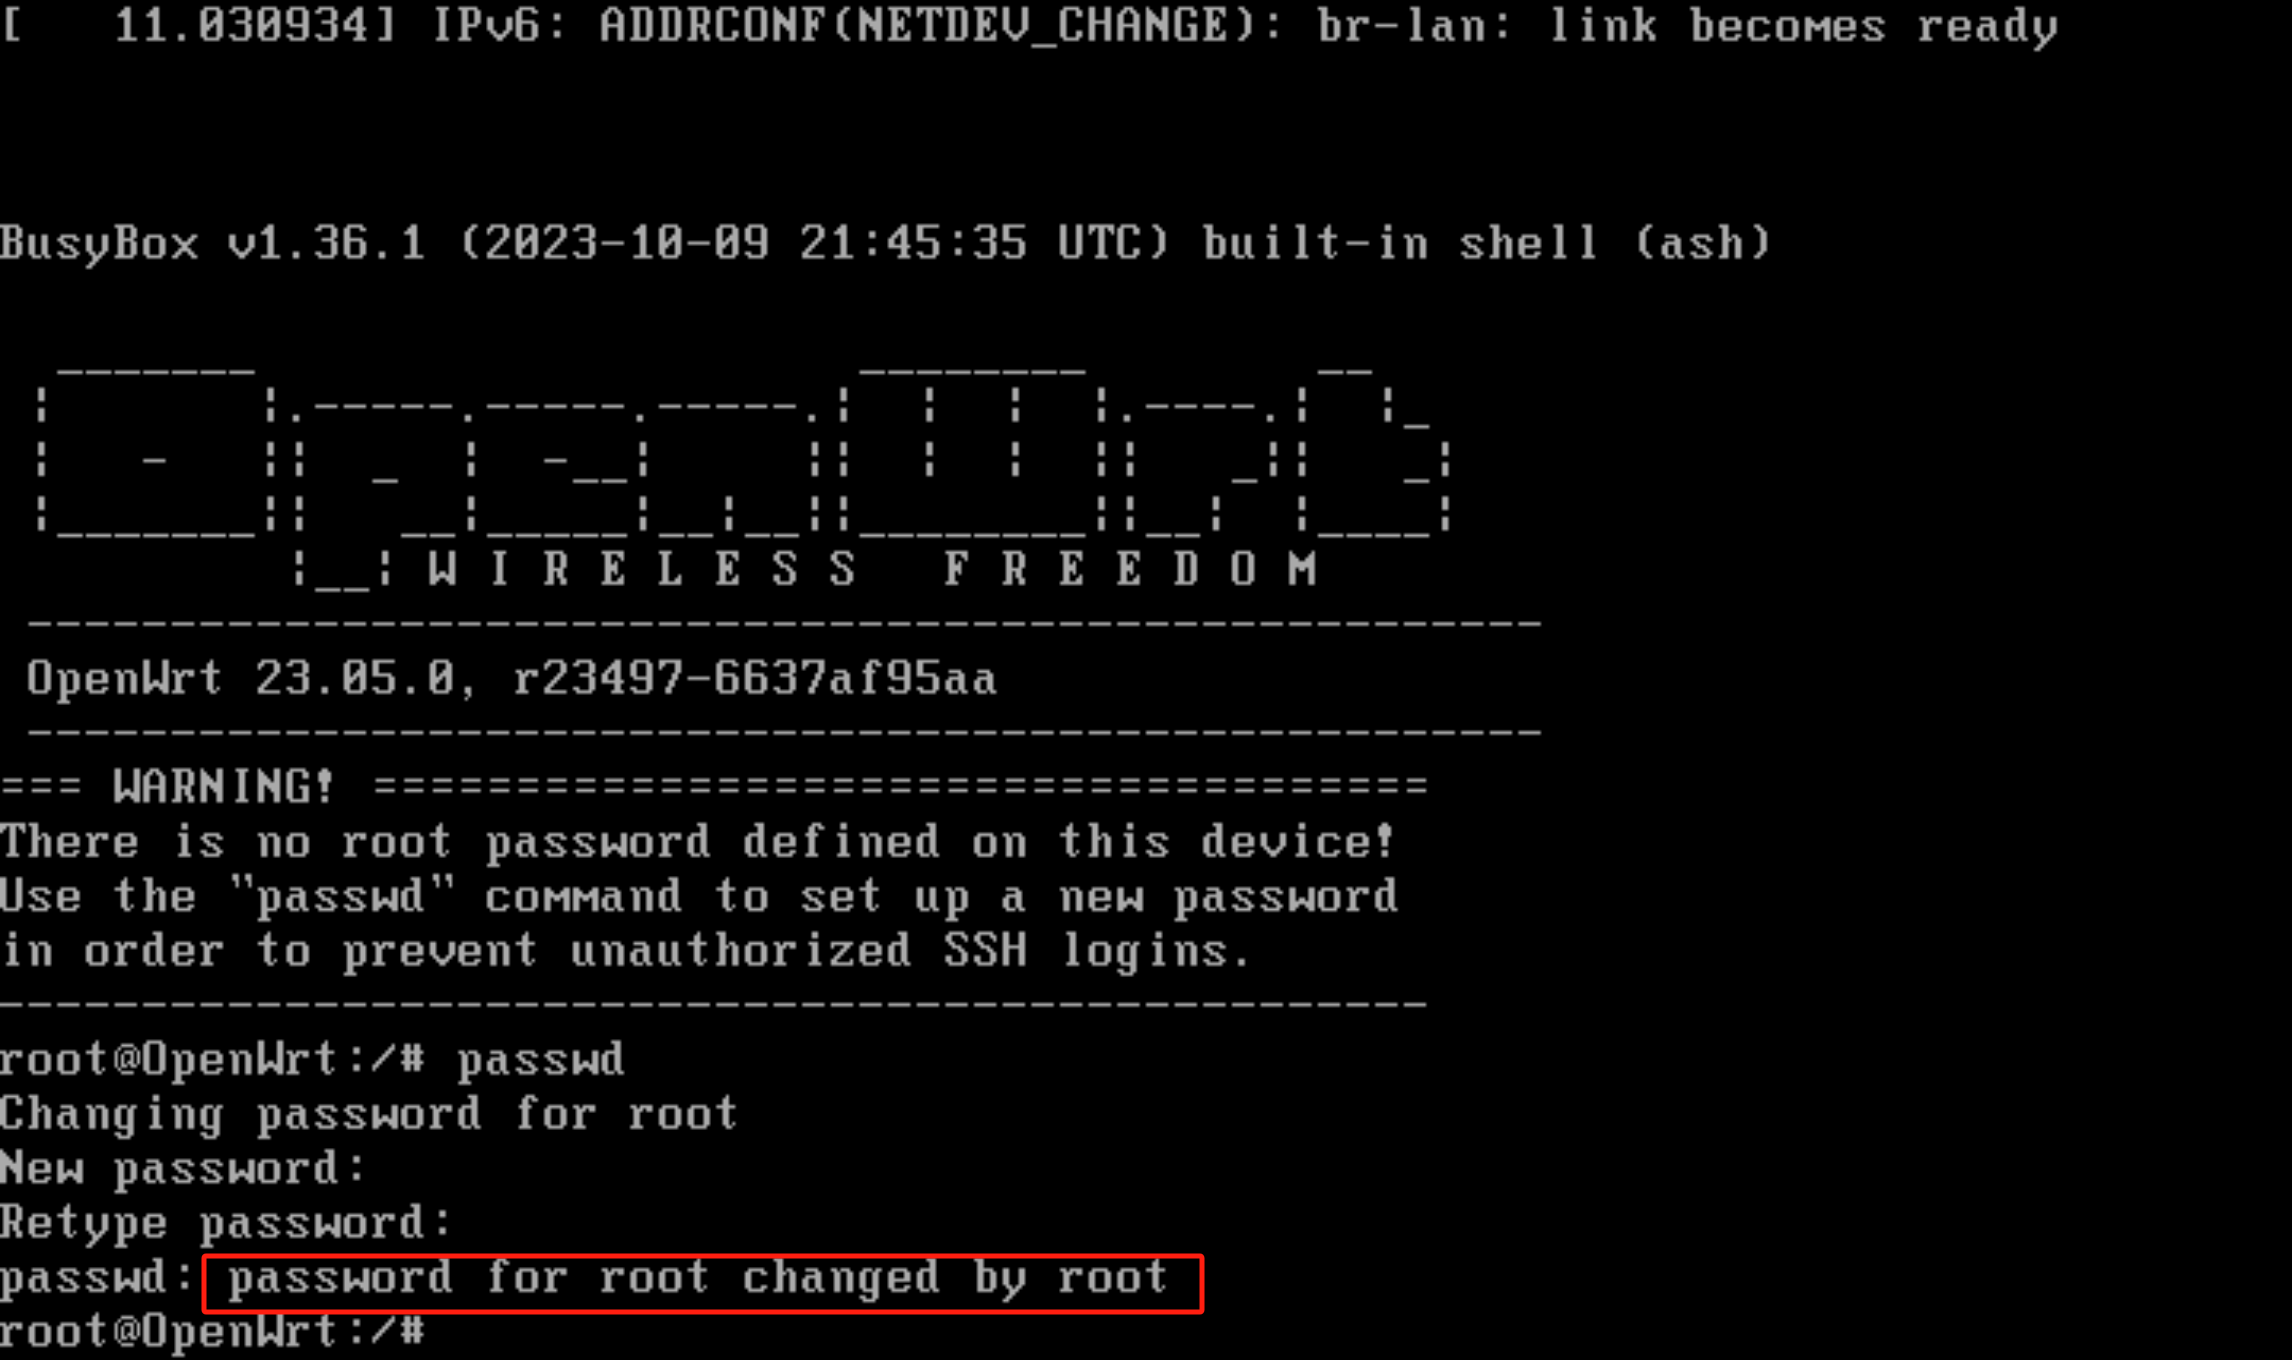
接下来就是输入下面的命令进行修改虚拟机或者你当前连接着网络的ip地址vim /etc/config/network- 1
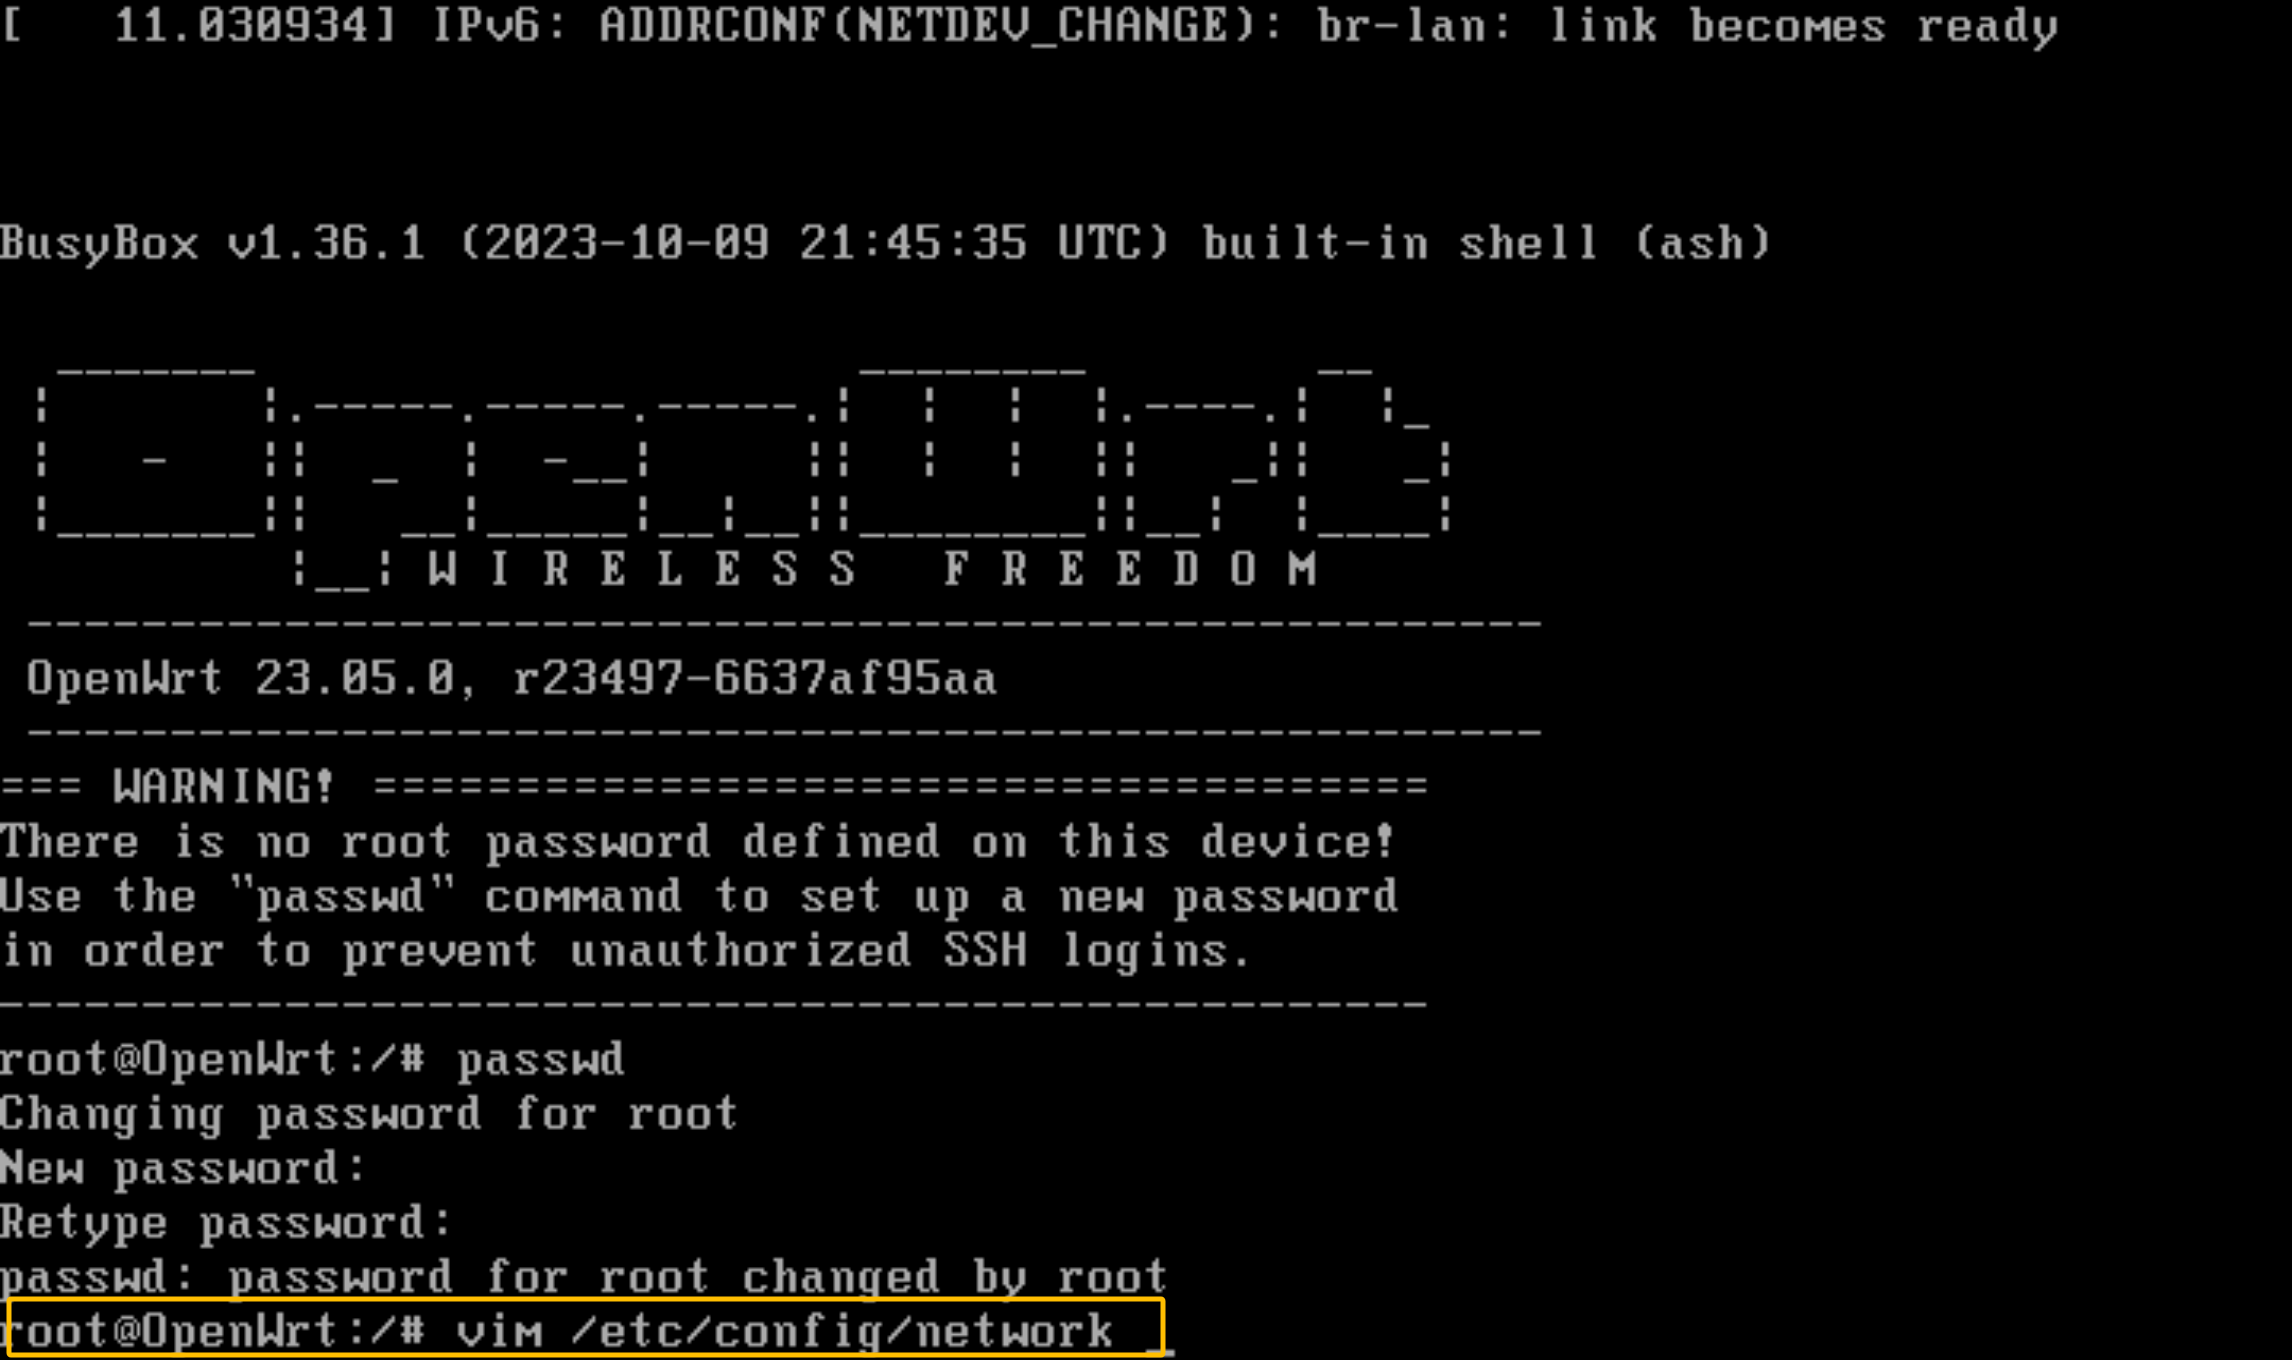
vim语法我就不赘述了,上网自己查.再修改你虚拟机所在的网段,或者连接的网线的网段,随便配置一个ip,保存退出
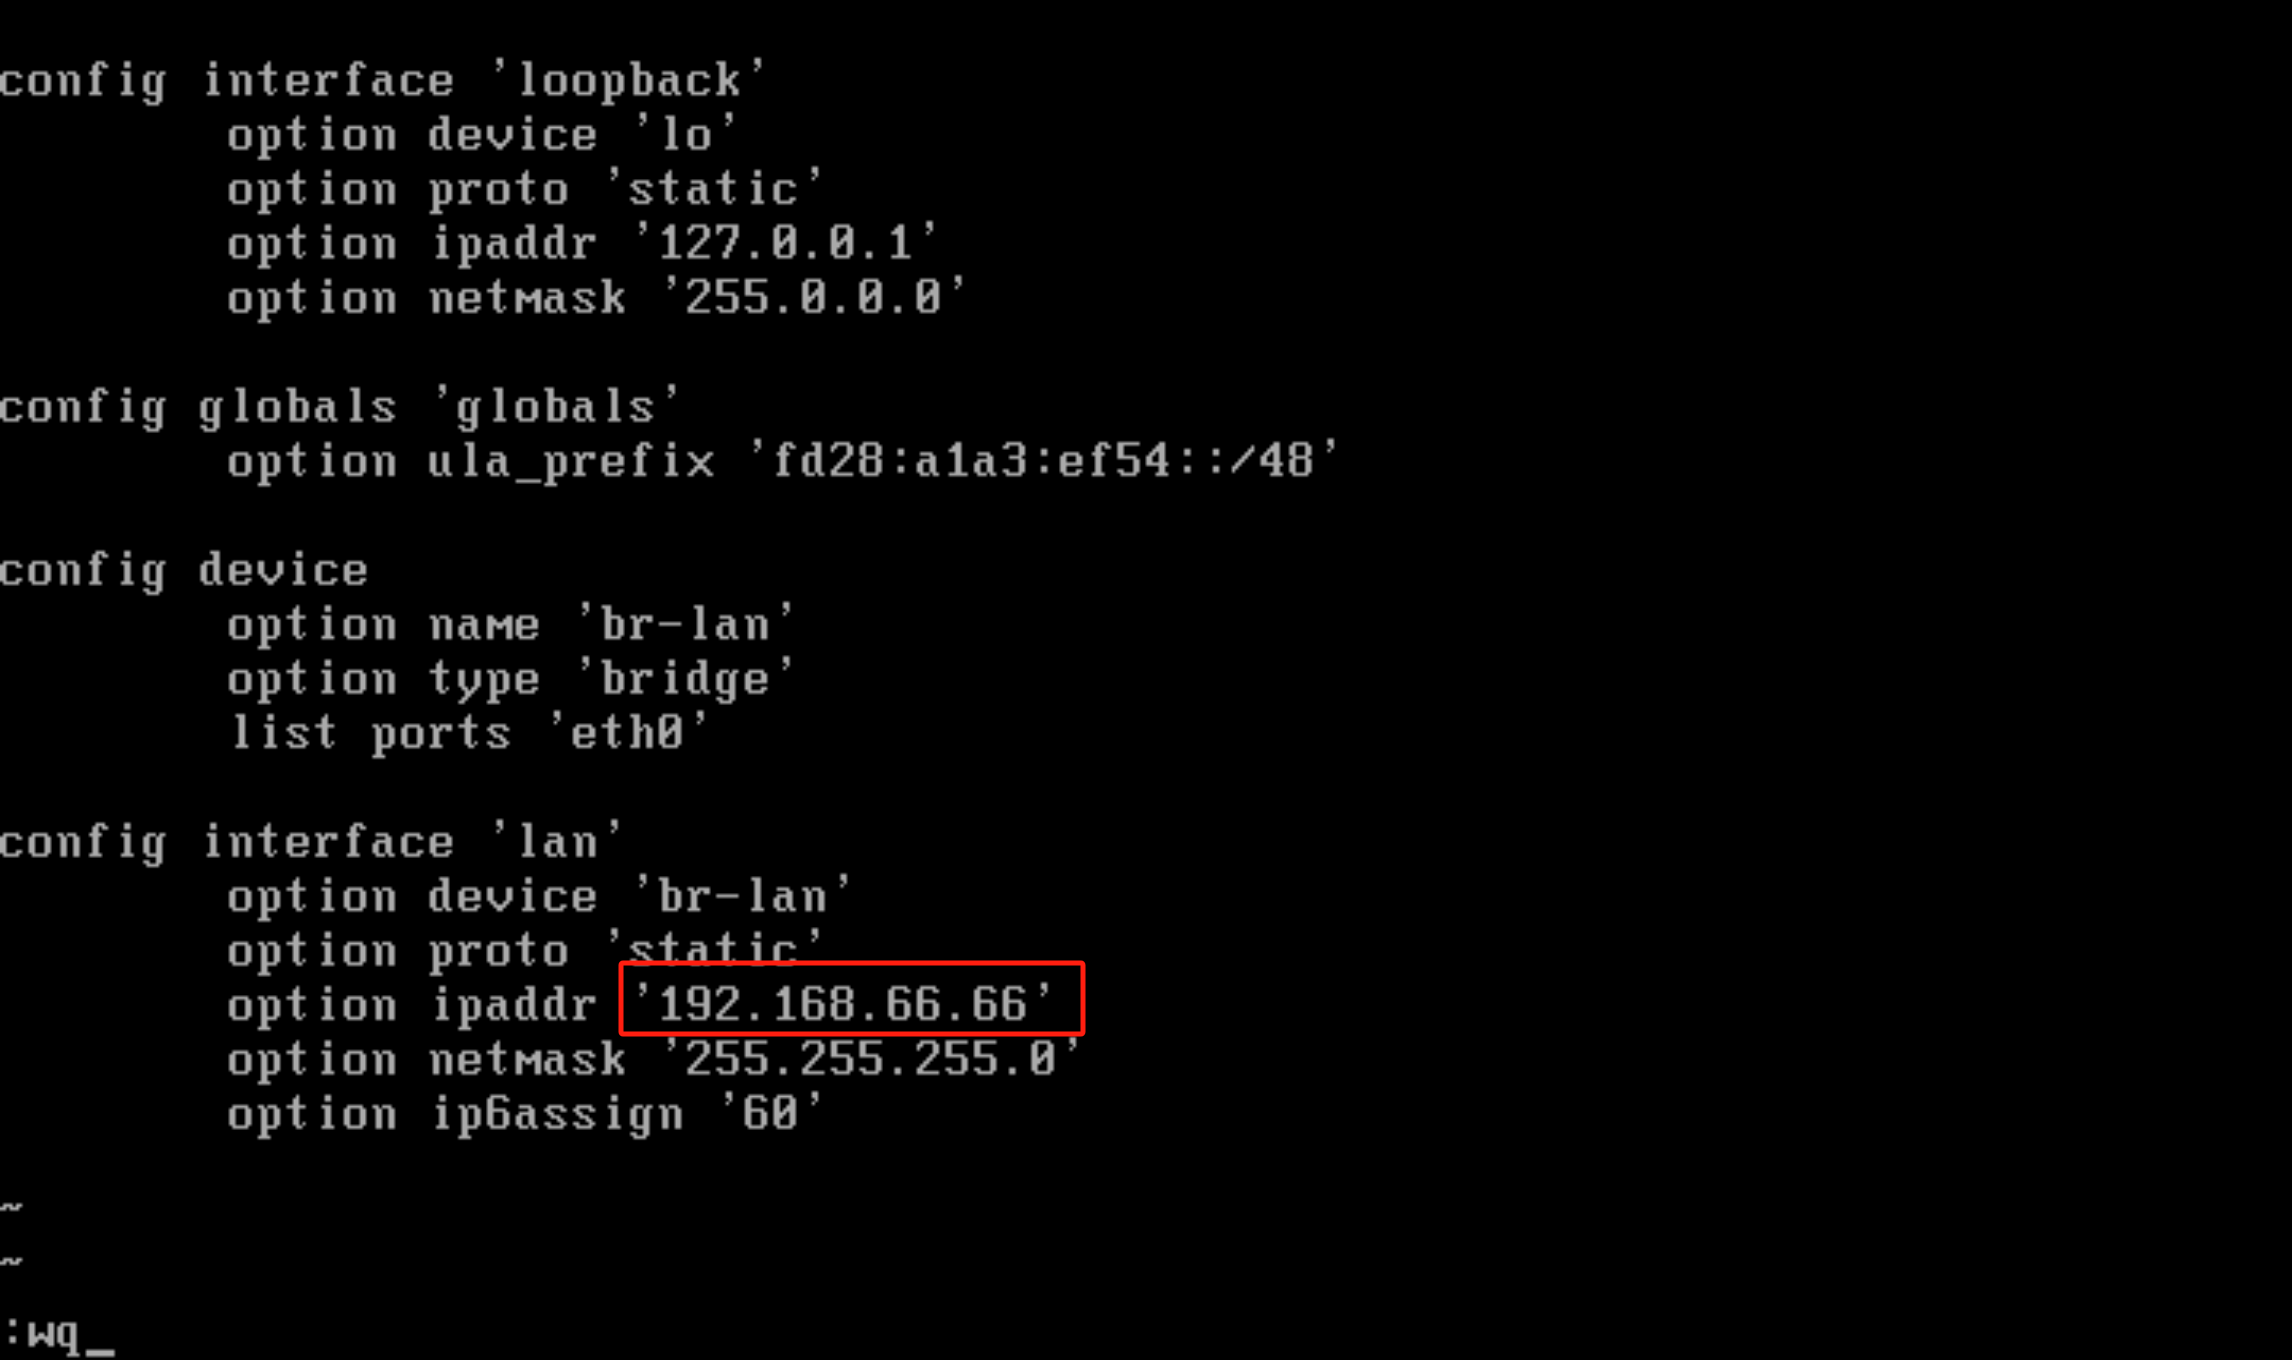
保存成功后,输入下面这个,重启reboot- 1
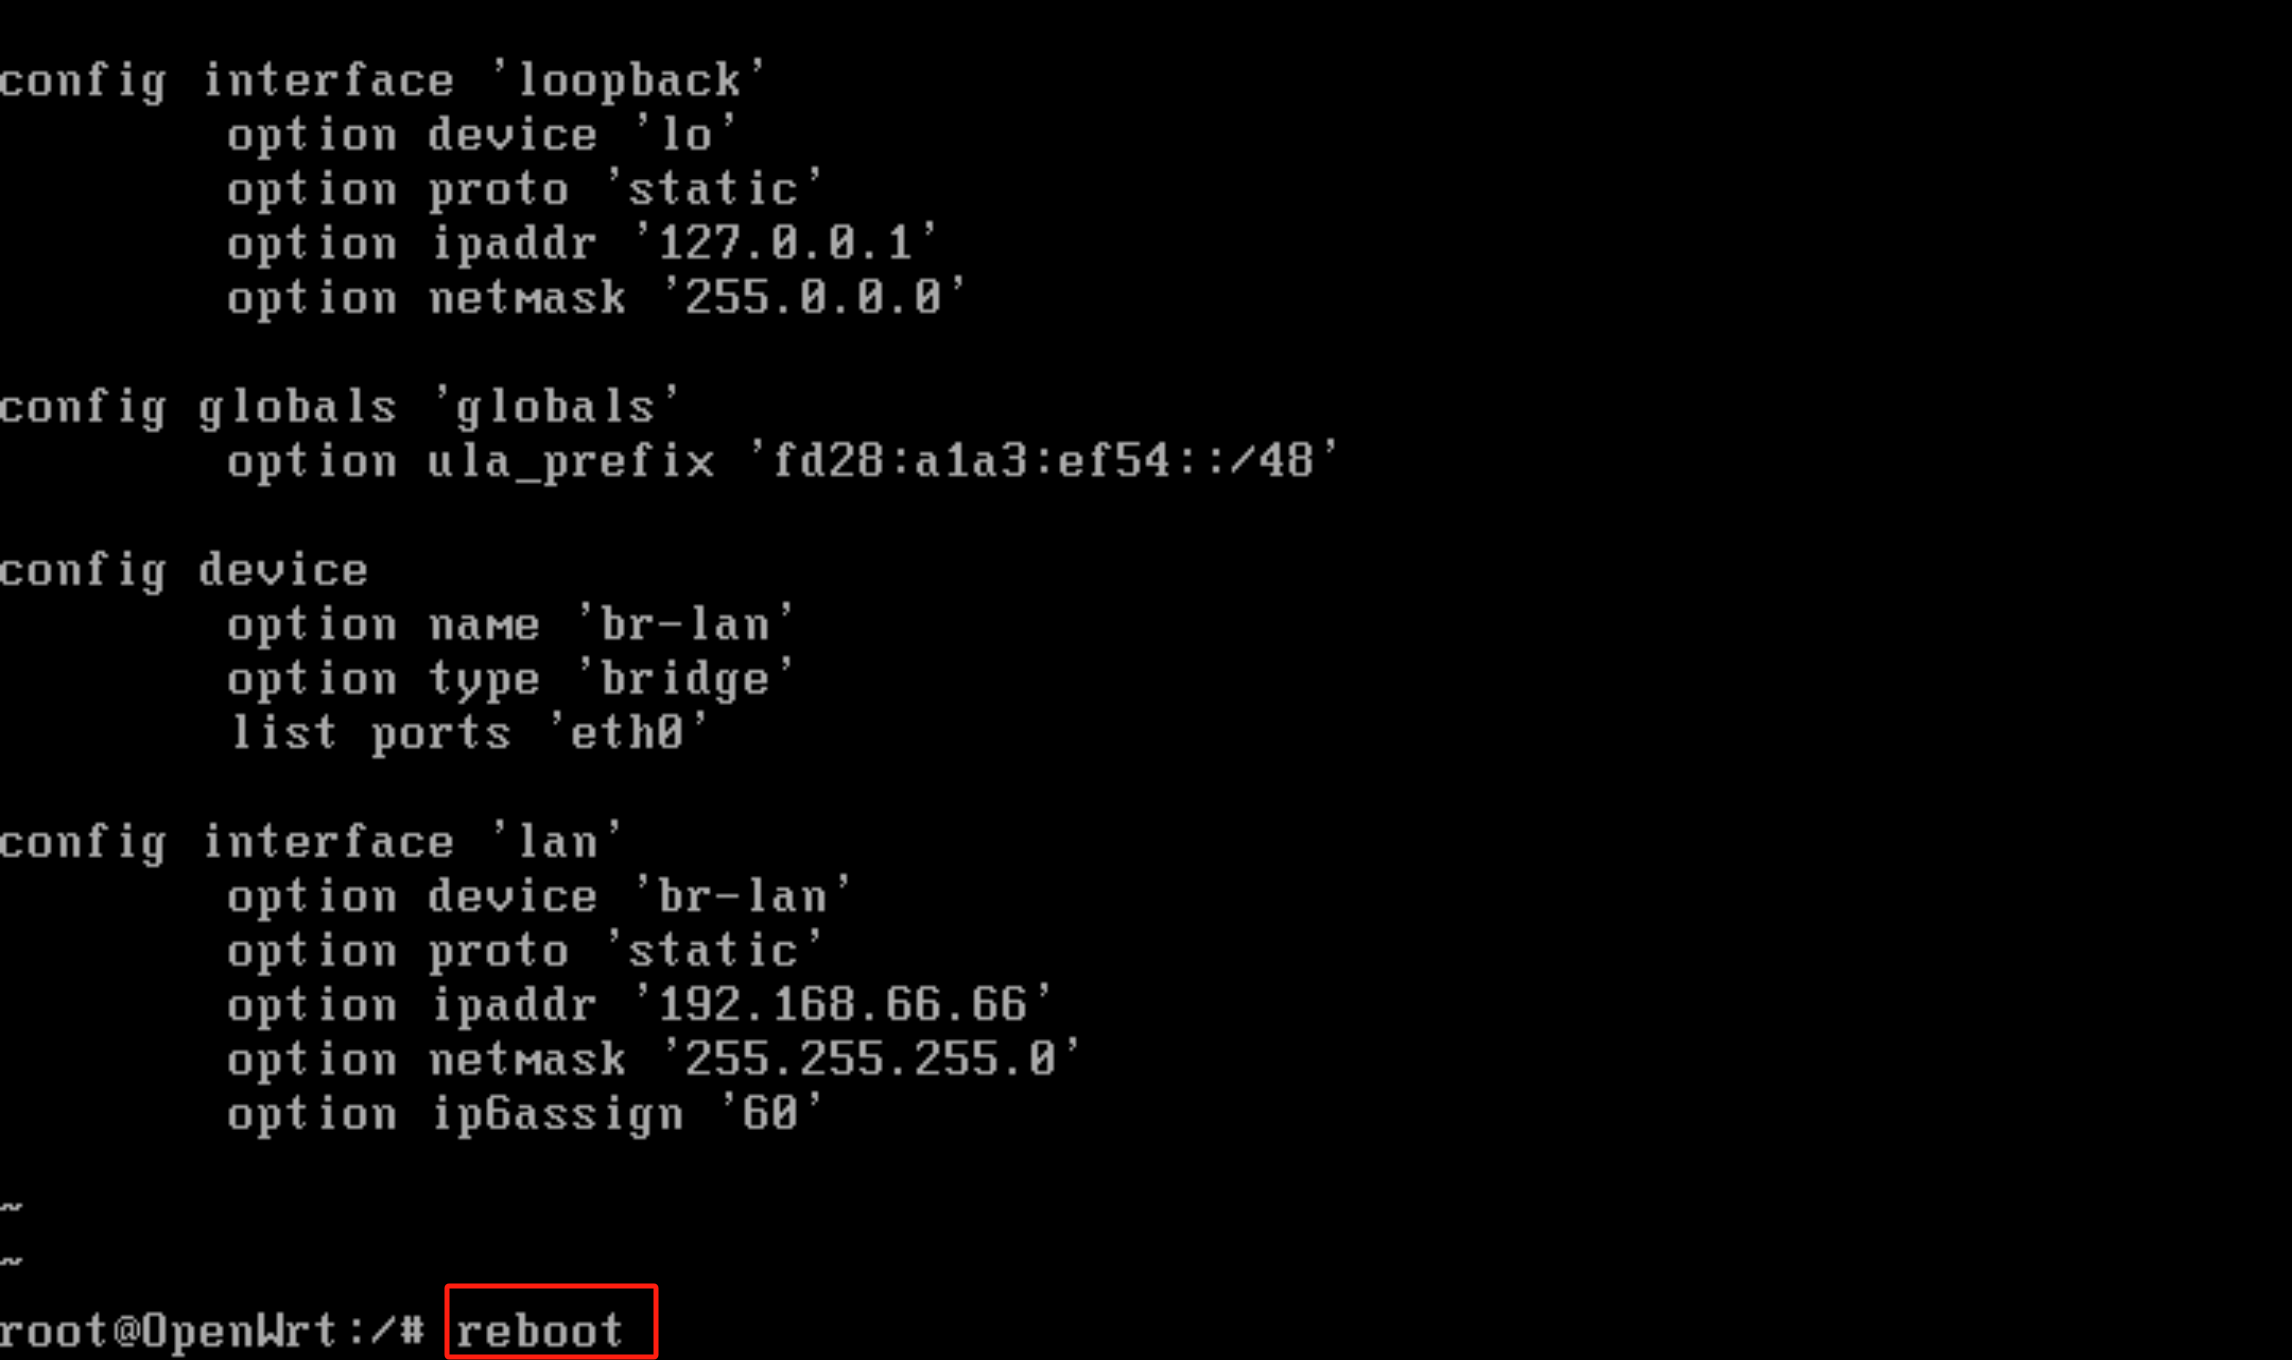
重启成功之后,到你的电脑上的浏览器输入你刚刚配置好的IP地址http://192.168.66.66- 1
下面这个输入密码是需要输入一开始配置好的密码

输入完密码之后就可以进入页面配置dns,如果不配置dns就会没有网络

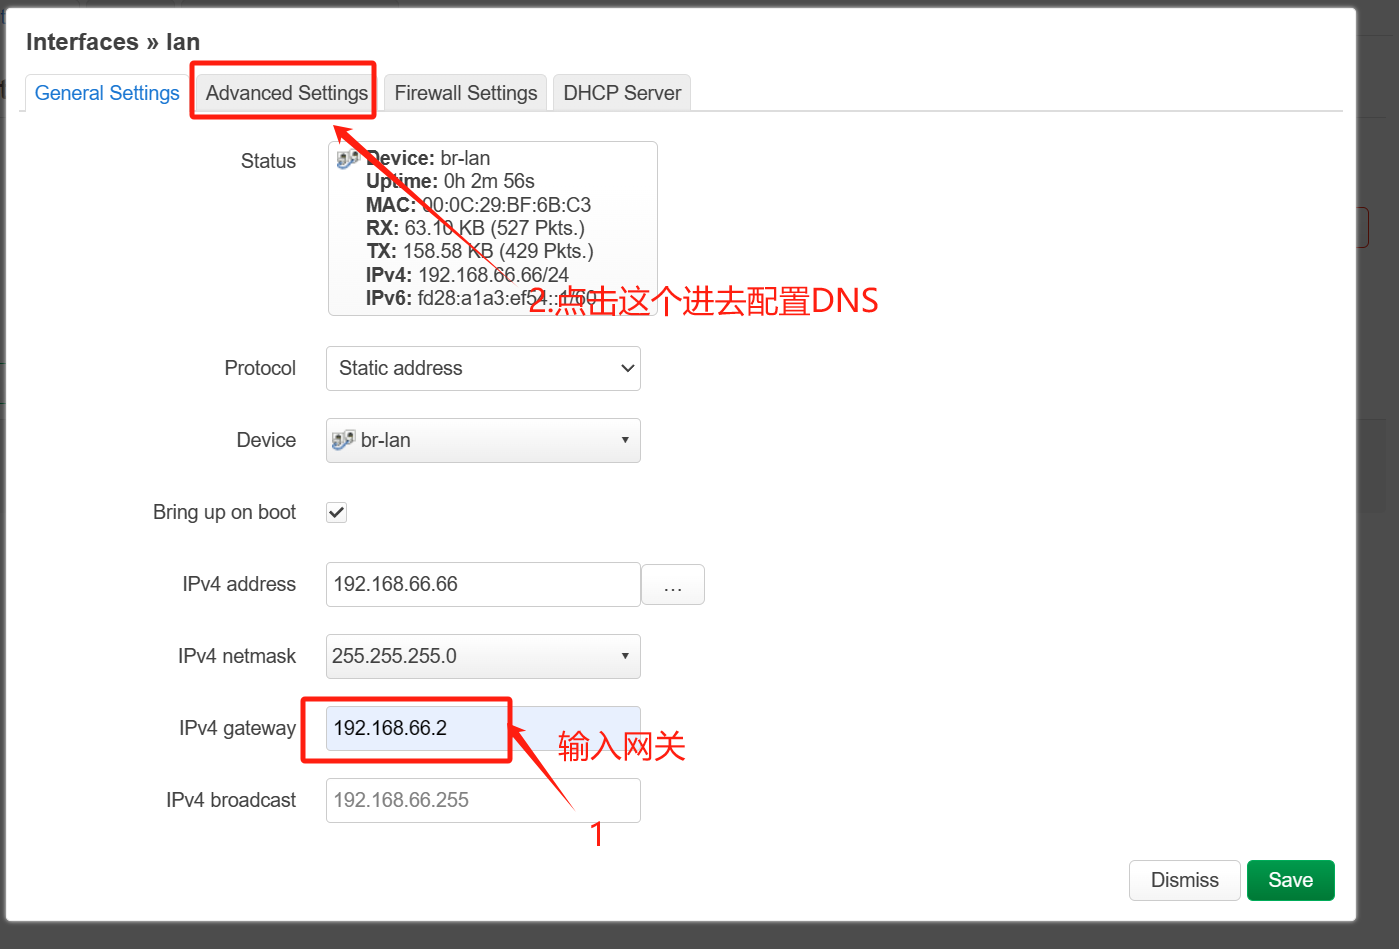


如此就可以联网了,但是联网之前,先ssh连接配置好一些东西,ssh如何连接上网查这里就不过多赘述了这条命令是用来
更换阿里云镜像的,下载软件贼拉快sed -i 's_downloads.openwrt.org_mirrors.aliyun.com/openwrt_' /etc/opkg/distfeeds.conf- 1

更新软件命令:opkg update
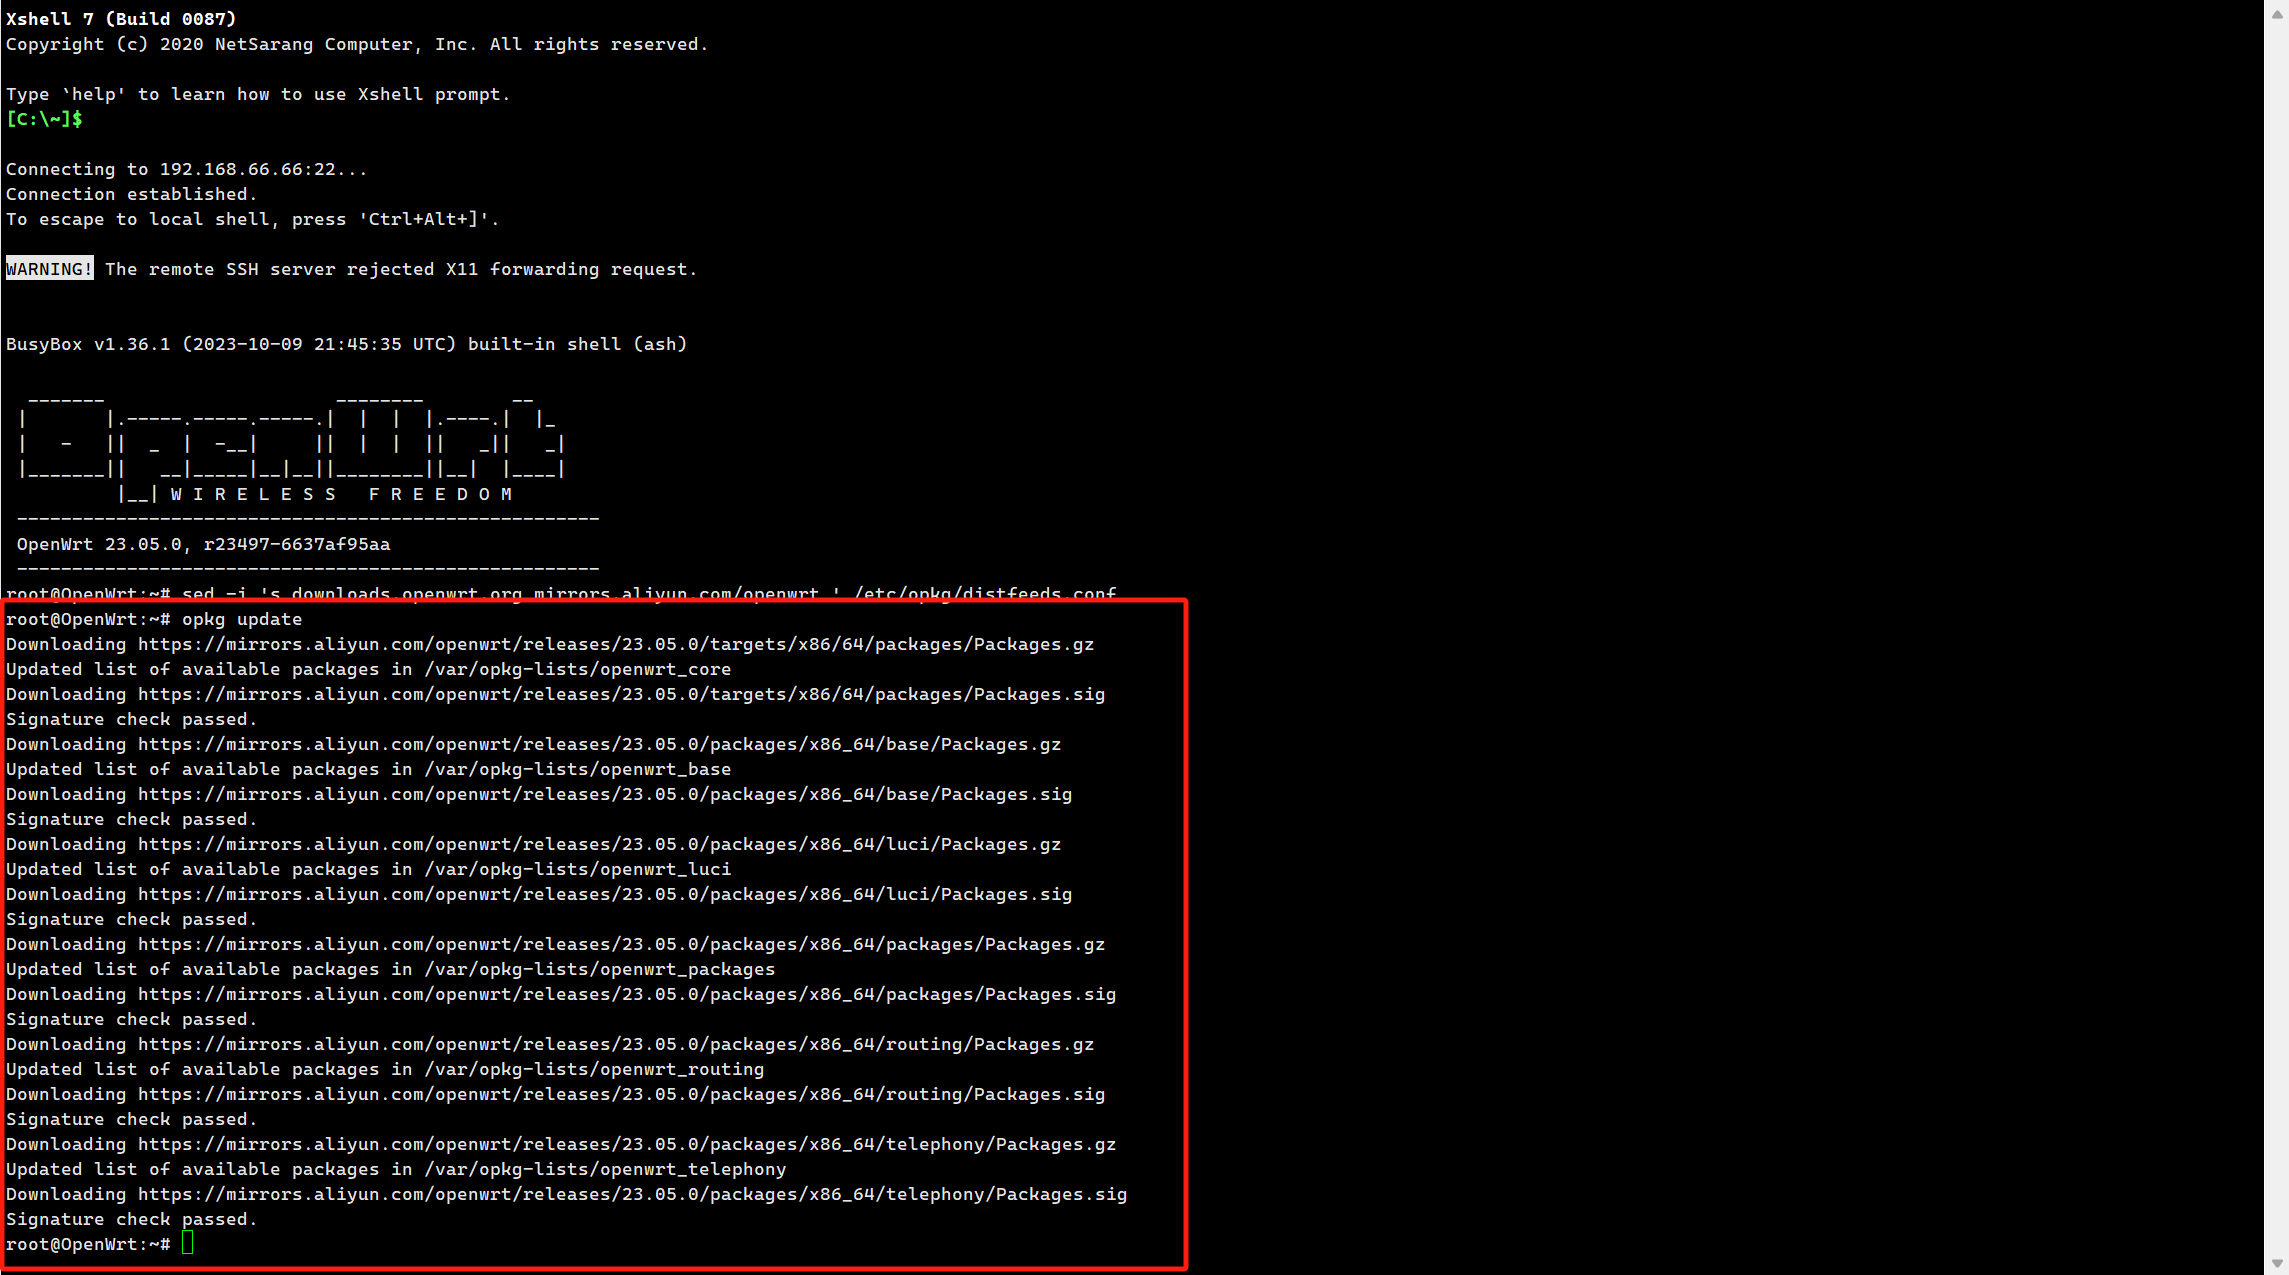
安装中文命令:opkg install luci-i18n-base-zh-cn安装openVPN命令:
opkg install openvpn-openssl luci-app-openvpn openvpn-easy-rsa openvpn-mbedtls luci-i18n-openvpn-zh-cn安装防火墙中文命令:
opkg install luci-i18n-firewall-zh-cn开启xftp命令
opkg install vsftpd openssh-sftp-server /etc/init.d/vsftpd enable /etc/init.d/vsftpd start- 1
- 2
- 3
# Configure firewall uci rename firewall.@zone[0]="lan" uci rename firewall.@zone[1]="wan" uci rename firewall.@forwarding[0]="lan_wan" uci del_list firewall.lan.device="tun0" uci add_list firewall.lan.device="tun0" uci -q delete firewall.vpn uci set firewall.ovpn="rule" uci set firewall.ovpn.name="Allow-OpenVPN" uci set firewall.ovpn.src="wan" uci set firewall.ovpn.dest_port="1194" uci set firewall.ovpn.proto="udp" uci set firewall.ovpn.target="ACCEPT" uci commit firewall /etc/init.d/firewall restart- 1
- 2
- 3
- 4
- 5
- 6
- 7
- 8
- 9
- 10
- 11
- 12
- 13
- 14
- 15
- 生成服务器和客户端证书(
其中如果有冒号是让你输入自定义密钥的密码)
# Configuration parameters export EASYRSA_PKI="/etc/easy-rsa/pki" export EASYRSA_REQ_CN="ovpnca" # Remove and re-initialize the PKI directory easyrsa --batch init-pki # Generate DH parameters # 此步会较久 easyrsa --batch gen-dh # Create a new CA easyrsa --batch build-ca nopass # Generate a keypair and sign locally for a server easyrsa --batch build-server-full server nopass # Generate a keypair and sign locally for a client easyrsa --batch build-client-full client nopass- 1
- 2
- 3
- 4
- 5
- 6
- 7
- 8
- 9
- 10
- 11
- 12
- 13
- 14
- 15
- 16
- 17
- 18
- 19
- 生成服务器配置文件
# Generate TLS PSK OVPN_PKI="/etc/easy-rsa/pki" openvpn --genkey --secret ${OVPN_PKI}/tc.pem # Configuration parameters OVPN_DIR="/etc/openvpn" OVPN_PKI="/etc/easy-rsa/pki" OVPN_DEV="$(uci get firewall.lan.device | sed -e "s/^.*\s//")" OVPN_PORT="$(uci get firewall.ovpn.dest_port)" OVPN_PROTO="$(uci get firewall.ovpn.proto)" OVPN_POOL="192.168.8.0 255.255.255.0" OVPN_DNS="${OVPN_POOL%.* *}.1" OVPN_DOMAIN="$(uci get dhcp.@dnsmasq[0].domain)" OVPN_DH="$(cat ${OVPN_PKI}/dh.pem)" OVPN_TC="$(sed -e "/^#/d;/^\w/N;s/\n//" ${OVPN_PKI}/tc.pem)" OVPN_CA="$(openssl x509 -in ${OVPN_PKI}/ca.crt)" NL=$'\n' # Configure VPN server umask u=rw,g=,o= grep -l -r -e "TLS Web Server Auth" "${OVPN_PKI}/issued" \ | sed -e "s/^.*\///;s/\.\w*$//" \ | while read -r OVPN_ID do OVPN_CERT="$(openssl x509 -in ${OVPN_PKI}/issued/${OVPN_ID}.crt)" OVPN_KEY="$(cat ${OVPN_PKI}/private/${OVPN_ID}.key)" cat << EOF > ${OVPN_DIR}/${OVPN_ID}.conf verb 3 user nobody group nogroup dev ${OVPN_DEV} port ${OVPN_PORT} proto ${OVPN_PROTO} server ${OVPN_POOL} topology subnet client-to-client keepalive 10 120 persist-tun persist-key push "dhcp-option DNS ${OVPN_DNS}" push "dhcp-option DOMAIN ${OVPN_DOMAIN}" push "redirect-gateway def1" push "persist-tun" push "persist-key"${NL}${OVPN_DH}${NL} ${NL}${OVPN_TC}${NL} ${NL}${OVPN_CA}${NL} ${NL}${OVPN_CERT}${NL} ${NL}${OVPN_KEY}${NL} EOF done /etc/init.d/openvpn restart- 1
- 2
- 3
- 4
- 5
- 6
- 7
- 8
- 9
- 10
- 11
- 12
- 13
- 14
- 15
- 16
- 17
- 18
- 19
- 20
- 21
- 22
- 23
- 24
- 25
- 26
- 27
- 28
- 29
- 30
- 31
- 32
- 33
- 34
- 35
- 36
- 37
- 38
- 39
- 40
- 41
- 42
- 43
- 44
- 45
- 46
- 47
- 48
- 49
- 50
- 51
- 52
- 生成客户端ovpn文件
# 先确定使用DDNS还是公网IP作为OpenVPN连接使用,并配置好OVPN_SERV参数,本次以DDNS地址为例子 OVPN_SERV="192.168.66.66" # Configuration parameters OVPN_DIR="/etc/openvpn" OVPN_PKI="/etc/easy-rsa/pki" OVPN_DEV="$(uci get firewall.lan.device | sed -e "s/^.*\s//")" OVPN_PORT="$(uci get firewall.ovpn.dest_port)" OVPN_PROTO="$(uci get firewall.ovpn.proto)" OVPN_TC="$(sed -e "/^#/d;/^\w/N;s/\n//" ${OVPN_PKI}/tc.pem)" OVPN_CA="$(openssl x509 -in ${OVPN_PKI}/ca.crt)" NL=$'\n' # Generate VPN client profiles umask u=rw,g=,o= grep -l -r -e "TLS Web Client Auth" "${OVPN_PKI}/issued" \ | sed -e "s/^.*\///;s/\.\w*$//" \ | while read -r OVPN_ID do OVPN_CERT="$(openssl x509 -in ${OVPN_PKI}/issued/${OVPN_ID}.crt)" OVPN_KEY="$(cat ${OVPN_PKI}/private/${OVPN_ID}.key)" cat << EOF > ${OVPN_DIR}/${OVPN_ID}.ovpn verb 3 dev ${OVPN_DEV%%[0-9]*} nobind client remote ${OVPN_SERV} ${OVPN_PORT} ${OVPN_PROTO} auth-nocache remote-cert-tls server${NL}${OVPN_TC}${NL} ${NL}${OVPN_CA}${NL} ${NL}${OVPN_CERT}${NL} ${NL}${OVPN_KEY}${NL} EOF done ls ${OVPN_DIR}/*.ovpn- 1
- 2
- 3
- 4
- 5
- 6
- 7
- 8
- 9
- 10
- 11
- 12
- 13
- 14
- 15
- 16
- 17
- 18
- 19
- 20
- 21
- 22
- 23
- 24
- 25
- 26
- 27
- 28
- 29
- 30
- 31
- 32
- 33
- 34
- 35
- 36
上面这些配置都运行好了之后就可以进行连接了
后记
看了上面的文档肯定还有些不懂的就是,文件在哪
在
/etc/openvpn下面有.oven文件,到时候直接下载下来就可以用connectVPN来连接了
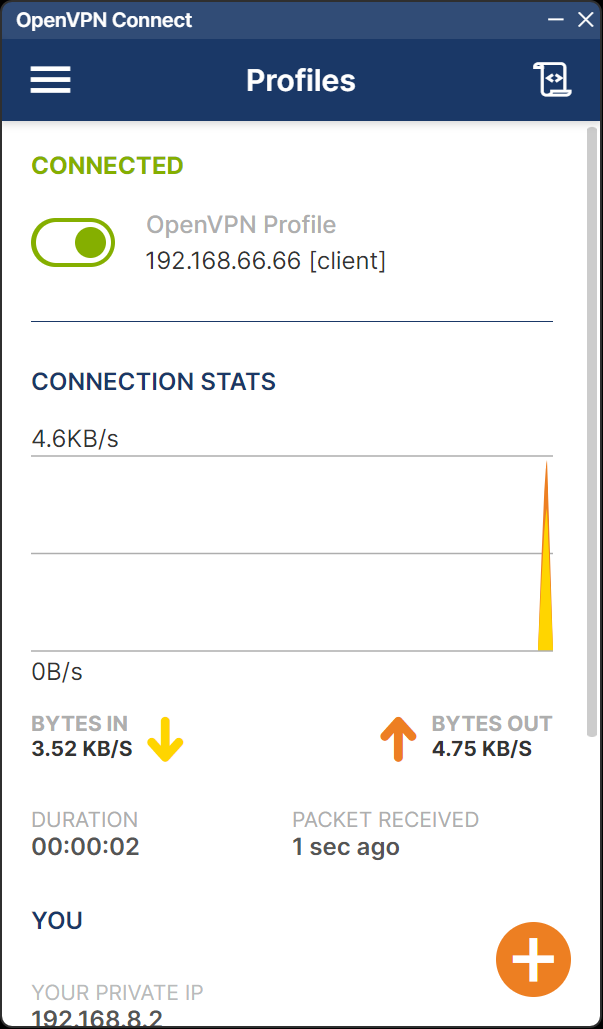
OpenVPN Connect连接工具如何使用这里也不赘述了,可以去openVPN官网,也可以看我上一篇文章叫搭建OpenVPN的文章来看,下载客户端的话,可以去我的公众号幸识SQ去下载如果我的博客帮助到了你,那你可以到我的博客
https://blog.csdn.net/weixin_57228276或者微信公众号搜索幸识SQ,或者是我的个人空间https://xssq.online在那里可以找到我,里面也有更多的优秀文章.也可以到我的抖音:su520520520521查看相关的教程视频 -
相关阅读:
关于第一次接入Kotlin
深度学习入门(第四天)——递归神经网络与词向量原理解读
Python项目开发实战:网络爬虫批量采集股票数据保存到Excel中
翻译助手-免费翻译助手下载
性能测试基础理论
独立成分分析matlab代码
最低成本的foc驱动电路,5v低压开环foc驱动器
4、Buffer
Vue+iview将表格table以excel文件导出的几种方式
CPU保护机制 —— COPP技术 (案列+配置) |||| SDN——转控分离
- 原文地址:https://blog.csdn.net/weixin_57228276/article/details/134495703