-
Azure的AI使用-(语言检测、图像分析、图像文本识别)
1.语言检测
安装包:
- # 语言检测
- %pip install azure-ai-textanalytics==5.2.0
需要用到密钥和资源的终结点,所以去Azure上创建资源,我这个是创建好的了然后点击密钥和终结者去拿到key和终结点

两个密钥选择哪个都行

语言检测代码示例:
- key = ""
- endpoint = ""
- from azure.ai.textanalytics import TextAnalyticsClient
- from azure.core.credentials import AzureKeyCredential
- def authenticate_client():
- ta_credential= AzureKeyCredential(key)
- text_analytics_client=TextAnalyticsClient(
- endpoint=endpoint,
- credential=ta_credential
- )
- return text_analytics_client
- client=authenticate_client();
- # 检测文本是哪种语言
- def language_detection_example():
- try:
- documents = ["Ce document est rédigé en Français."]
- response=client.detect_language(documents=documents,country_hint = 'us')[0]
- print("response",response)
- print("Language: ", response.primary_language.name)
- except Exception as err:
- print("Encountered exception. {}".format(err))
- language_detection_example()
运行结果:
- response {'id': '0', 'primary_language': DetectedLanguage(name=French, iso6391_name=fr, confidence_score=1.0), 'warnings': [], 'statistics': None, 'is_error': False, 'kind': 'LanguageDetection'}
- Language: French
2.提取关键短语
- # 提取关键语言
- def key_phrase_extraction_example(client):
- try:
- documents = ["你好啊,我叫feng,是java程序员,想学习更多的知识"]
- response = client.extract_key_phrases(documents = documents)[0]
- if not response.is_error:
- print("\tKey Phrases:")
- for phrase in response.key_phrases:
- print("\t\t", phrase)
- else:
- print(response.id, response.error)
- except Exception as err:
- print("Encountered exception. {}".format(err))
- key_phrase_extraction_example(client)
返回:感觉对中文的提取一般不是很友好
- Key Phrases:
- feng
- java程
- 你好
- 想学
- 多的知识
换成英文
documents = ["Dr. Smith has a very modern medical office, and she has great staff."]关键字提取好像就会好很多啊!

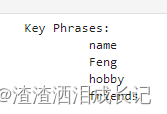
["Hello, my name is Feng. My hobby is singing and traveling, and I hope to make friends with you"]确实英语就好很多。
2.图像分析
安装包:
- # 图像分析
- %pip install --upgrade azure-cognitiveservices-vision-computervision
- # 图像处理库
- %pip install pillow
这是3.2版本的,这个版本可以支持返回分析中国语言
它就是给一个图片,它会分析出图片大概有什么,以及占的比例,就像是百度的识别万物一样,识别出的物品是什么以及占比。
2.1 url图片地址分析-版本3.2
咱们拿这个图片让它帮分析一下

代码示例:
- # 图像分析-url版本
- from azure.cognitiveservices.vision.computervision import ComputerVisionClient
- from azure.cognitiveservices.vision.computervision.models import OperationStatusCodes
- from azure.cognitiveservices.vision.computervision.models import VisualFeatureTypes
- from msrest.authentication import CognitiveServicesCredentials
- import os
- os.environ["VISION_KEY"]=''
- os.environ["VISION_ENDPOINT"]=''
- subscription_key = os.environ["VISION_KEY"]
- endpoint = os.environ["VISION_ENDPOINT"]
- computervision_client = ComputerVisionClient(endpoint, CognitiveServicesCredentials(subscription_key))
- remote_image_url = "https://raw.githubusercontent.com/Azure-Samples/cognitive-services-sample-data-files/master/ComputerVision/Images/landmark.jpg"
- tags_result_remote = computervision_client.tag_image(remote_image_url,language="zh")
- if (len(tags_result_remote.tags) == 0):
- print("No tags detected.")
- else:
- for tag in tags_result_remote.tags:
- print("'{}' with confidence {:.2f}%".format(tag.name, tag.confidence * 100))
- print()
运行结果:

2.2 本地图片分析-版本3.2
- # 图像分析-本地图片
- from azure.cognitiveservices.vision.computervision import ComputerVisionClient
- from azure.cognitiveservices.vision.computervision.models import OperationStatusCodes
- from azure.cognitiveservices.vision.computervision.models import VisualFeatureTypes
- from msrest.authentication import CognitiveServicesCredentials
- import os
- os.environ["VISION_KEY"]=''
- os.environ["VISION_ENDPOINT"]=''
- subscription_key = os.environ["VISION_KEY"]
- endpoint = os.environ["VISION_ENDPOINT"]
- computervision_client = ComputerVisionClient(endpoint, CognitiveServicesCredentials(subscription_key))
- local_image_path = os.path.join("C:\\Users\\Uniigym3\\AppData\\Roaming\\Python\\Python38\\Scripts\\images", "11.png")
- local_image = open(local_image_path, "rb")
- tags_result_local_image = computervision_client.analyze_image_in_stream(local_image,language="zh")
- print(tags_result_local_image)
- if (len(tags_result_local_image.categories) == 0):
- print("No description detected.")
- else:
- for category in tags_result_local_image.categories:
- print("'{}' with confidence {:.2f}%".format(category.name, category.score * 100))
- print()
运行结果:

2.3 url图片地址分析-版本4.0
安装包:
%pip install azure-ai-vision咱们让它分析这个图片

- import os
- import azure.ai.vision as sdk
- service_options = sdk.VisionServiceOptions("",
- "")
- vision_source = sdk.VisionSource(
- url="https://learn.microsoft.com/azure/ai-services/computer-vision/media/quickstarts/presentation.png")
- analysis_options = sdk.ImageAnalysisOptions()
- # 可选的视觉特征
- analysis_options.features = (
- sdk.ImageAnalysisFeature.CAPTION |
- sdk.ImageAnalysisFeature.TEXT
- )
- analysis_options.language = "en"
- # 性别中立的描述文字,默认值为区分性别的描述文字。 例如,在英语中,当你选择性别中立的描述文字时,“女性”或“男性”等术语将替换为“人员”,而“男孩”或“女孩”则将替换为“儿童”。
- analysis_options.gender_neutral_caption = False
- image_analyzer = sdk.ImageAnalyzer(service_options, vision_source, analysis_options)
- result = image_analyzer.analyze()
- # 成功你就按自己选的特征进行
- if result.reason == sdk.ImageAnalysisResultReason.ANALYZED:
- if result.caption is not None:
- print(" Caption:")
- print(" '{}', Confidence {:.4f}".format(result.caption.content, result.caption.confidence))
- if result.text is not None:
- print(" Text:")
- for line in result.text.lines:
- points_string = "{" + ", ".join([str(int(point)) for point in line.bounding_polygon]) + "}"
- print(" Line: '{}', Bounding polygon {}".format(line.content, points_string))
- else:
- error_details = sdk.ImageAnalysisErrorDetails.from_result(result)
- print(" Error reason: {}".format(error_details.reason))
- print(" Error code: {}".format(error_details.error_code))
- print(" Error message: {}".format(error_details.message))
运行结果:除图片的信息展示以外还会反馈出图片的文字
analysis_options.gender_neutral_caption = True ,性别中立的描述文字,默认值为区分性别的描述文字。 例如,在英语中,当你选择性别中立的描述文字时,“女性”或“男性”等术语将替换为“人员”,而“男孩”或“女孩”则将替换为“儿童”。
如果设置False或不加这个设置,刚才的结果就是
Caption:
   'a man pointing at a screen', Confidence 0.7768
2.4 本地图片分析-版本4.0
就只需要把上面的这个url图片的代码改成下面的图片路径代码就可以直接在本地使用了。
vision_source = sdk.VisionSource(url="https://learn.microsoft.com/azure/ai-services/computer-vision/media/quickstarts/presentation.png")vision_source = sdk.VisionSource(filename="C:\\Users\\Uniigym3\\AppData\\Roaming\\Python\\Python38\\Scripts\\images\\test.jpg")我们测试个百变小樱魔术卡

运行结果:

说是有卡通的小女孩,并且标签也识别出日本动漫。
再来测试个图片:好几个国家的语言哈

运行结果:都能轻松的识别出来

图像分析3.2版本git示例:https://github.com/Azure-Samples/cognitive-services-quickstart-code/blob/master/python/ComputerVision/ImageAnalysisQuickstart.py
3.图像OCR文本识别
3.1 url图像地址识别
用这个图片来测试下

- #OCR文本识别
- from azure.cognitiveservices.vision.computervision import ComputerVisionClient
- from azure.cognitiveservices.vision.computervision.models import OperationStatusCodes
- from azure.cognitiveservices.vision.computervision.models import VisualFeatureTypes
- from msrest.authentication import CognitiveServicesCredentials
- import time
- computervision_client = ComputerVisionClient(You endpoint,
- CognitiveServicesCredentials(Your key))
- read_image_url = "https://learn.microsoft.com/azure/ai-services/computer-vision/media/quickstarts/presentation.png"
- read_response = computervision_client.read(read_image_url, raw=True)
- read_operation_location = read_response.headers["Operation-Location"]
- operation_id = read_operation_location.split("/")[-1]
- while True:
- read_result = computervision_client.get_read_result(operation_id)
- if read_result.status not in ['notStarted', 'running']:
- break
- time.sleep(1)
- if read_result.status == OperationStatusCodes.succeeded:
- for text_result in read_result.analyze_result.read_results:
- for line in text_result.lines:
- print(line.text)
- print(line.bounding_box)
- print()
运行结果:可以看到识别到的文本

3.2 本地图像识别
用我自己手写的文字来试下,有标点符号,甚至还特别写了一个看不清的哎呀,让它识别一下

- #OCR文本识别-本地
- from azure.cognitiveservices.vision.computervision import ComputerVisionClient
- from azure.cognitiveservices.vision.computervision.models import OperationStatusCodes
- from azure.cognitiveservices.vision.computervision.models import VisualFeatureTypes
- from msrest.authentication import CognitiveServicesCredentials
- import time
- import os
- computervision_client = ComputerVisionClient(You endpoint,
- CognitiveServicesCredentials( Your key))
- local_image_path = os.path.join("C:\\Users\\Uniigym3\\AppData\\Roaming\\Python\\Python38\\Scripts\\images", "ocrTest2.jpg")
- local_image = open(local_image_path, "rb")
- read_response = computervision_client.read_in_stream(local_image, raw=True)
- read_operation_location = read_response.headers["Operation-Location"]
- operation_id = read_operation_location.split("/")[-1]
- while True:
- read_result = computervision_client.get_read_result(operation_id)
- if read_result.status.lower () not in ['notstarted', 'running']:
- break
- print ('Waiting for result...')
- print(read_result)
- if read_result.status == OperationStatusCodes.succeeded:
- for text_result in read_result.analyze_result.read_results:
- for line in text_result.lines:
- print(line.text)
- print(line.bounding_box)
- print()
运行结果:太感动了哈,它竟然识别出来了,甚至perfect的.都识别出来了 ,很有意思
我尝试把照片倒过来,然后就识别不到那个不清楚的字了。

-
相关阅读:
Qt基础之四:Qt信号与槽机制原理及优缺点
SQLite3 数据库学习(二):SQLite 中的 SQL 语句详解
vscode开发STM32(五)---问题篇
DateUtil时间工具类的基本使用
华为培训笔记
【Attention】Dual Attention(DANet) & Fully Attention(FLA)
5800计算程序
HTTP(Hypertext Transfer Protocol)协议
DevEco Studio鸿蒙虚拟机
Qt 生成应用程序(二)软件多图标与文件操作
- 原文地址:https://blog.csdn.net/dfBeautifulLive/article/details/134328329
