-
Spring笔记(三)(Spring整合web环境)
01、Spring整合web环境
1.1 Javaweb三大组件及环境特点
在Java语言范畴内,web层框架都是基于Javaweb基础组件完成的,所以有必要复习一下Javaweb组件的特点
组件 作用 特点 Servlet 服务端小程序,负责接收客户端请求并作出响应的 单例对象,默认第一次访问创建,可以通过配置指定服务器启动就创建,Servlet创建完毕会执行初始化init方法。每个Servlet有一个service方法,每次访问都会执行service方法,但是缺点是一个业务功能就需要配置一个Servlet Filter 过滤器,负责对客户端请求进行过滤操作的 单例对象,服务器启动时就创建,对象创建完毕执行init方法,对客户端的请求进行过滤,符合要求的放行,不符合要求的直接响应客户端,执行过滤的核心方法doFilter Listener 监听器,负责对域对象的创建和属性变化进行监听的 根据类型和作用不同,又可分为监听域对象创建销毁和域对象属性内容变化的, 根据监听的域不同,又可以分为监听Request域的,监听Session域的,监听ServletContext域的 1.2 Spring整合web环境的思路及实现
在进行Java开发时要遵循三层架构+MVC,Spring操作最核心的就是Spring容器,web层需要注入Service, service层需要注入Dao(Mapper),web层使用Servlet技术充当的话,需要在Servlet中获得Spring容器
具体操作如下:- 在第二节笔记中的转账业务模块,修改pom.xml 文件的打包方式及导包:
<packaging>warpackaging> <dependency> <groupId>javax.servletgroupId> <artifactId>javax.servlet-apiartifactId> <version>4.0.1version> dependency>- 1
- 2
- 3
- 4
- 5
- 6
- 创建web层,servlet
@WebServlet(urlPatterns = "/accountServlet") public class AccountServlet extends HttpServlet { @Override protected void doGet(HttpServletRequest request, HttpServletResponse response) throws ServletException, IOException { // web层调用service层,获得accountService,现在accountService在Spring容器中 ApplicationContext applicationContext = new AnnotationConfigApplicationContext(AccountConfig.class); AccountService accountService = (AccountService) applicationContext.getBean("accountService"); accountService.transferMoney("tom","lucy",500); System.out.println("转账操作成功"); } @Override protected void doPost(HttpServletRequest request, HttpServletResponse response) throws ServletException, IOException { } }- 1
- 2
- 3
- 4
- 5
- 6
- 7
- 8
- 9
- 10
- 11
- 12
- 13
- 14
- 15
- 16
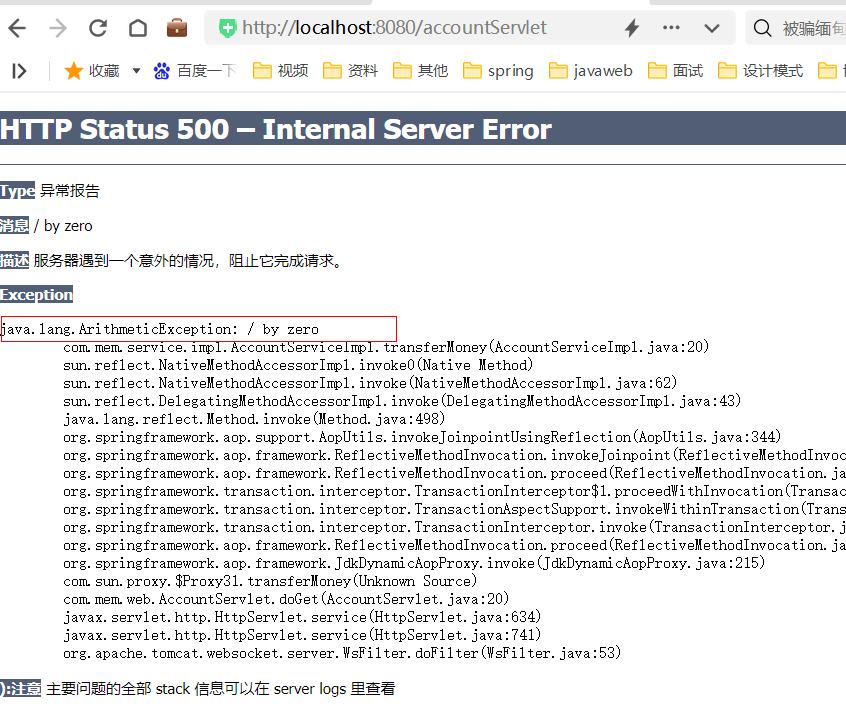
- 配置tomcat,部署项目,访问链接
http://localhost:8080/accountServlet
测试事务
- 模拟有异常
访问前:数据库tom:5000, lucy:5000
访问后:数据库tom:5000, lucy:5000
- 无异常
访问前:数据库tom:5000, lucy:5000
访问后:数据库tom:4500, lucy:5500

上述方案的问题:web层代码如果都去编写创建AnnotationConfigApplicationContext的代码,
那么配置类重复被加载了, Spring容器也重复被创建了,不能每次想从容器中获得一个Bean都得先创建一次容器,这样肯定是不允许。
所以,我们现在的诉求很简单,如下:- ApplicationContext创建一次,配置类加载一次;
- 最好web服务器启动时,就执行第1步操作,后续直接从容器中获取Bean使用即可;
- ApplicationContext的引用需要在web层任何位置都可以获取到。
针对以上诉求我们给出解决思路,如下:
- 在ServletContextListener的contextInitialized方法中执行ApplicationContext的创建。或在Servlet的init 方法中执行ApplicationContext的创建,并给Servlet的load-on-startup属性一个数字值,确保服务器启动Servlet就创建;
- 将创建好的ApplicationContext存储到ServletContext域中,这样整个web层任何位置就都可以获取到了
实现:
- 在main目录下,新增
webapp/WEB-INF/web.xml目录及文件
<web-app xmlns="http://xmlns.jcp.org/xml/ns/javaee" xmlns:xsi="http://www.w3.org/2001/XMLSchema-instance" xsi:schemaLocation="http://xmlns.jcp.org/xml/ns/javaee http://xmlns.jcp.org/xml/ns/javaee/web-app_3_1.xsd" version="3.1"> web-app>- 1
- 2
- 3
- 4
- 5
- 6
- 7
- 新建一个监听器
ContextLoaderListener,用于创建applicationContext,并存入ServletContext域中
public class ContextLoaderListener implements ServletContextListener { @Override // 服务器启动,ServletContext创建,该方法被执行1次 public void contextInitialized(ServletContextEvent sce) { System.out.println("ContextLoaderListener init ...."); // 1. 创建spring容器 ApplicationContext applicationContext = new ClassPathXmlApplicationContext("applicationContext.xml"); // 2. 将容器存储到servletContext域中 sce.getServletContext().setAttribute("applicationContext",applicationContext); } }- 1
- 2
- 3
- 4
- 5
- 6
- 7
- 8
- 9
- 10
- 11
- 修改
AccountServlet类中applicationContext的获取方式,改为从ServletContext域中获取
package com.mem.web; import com.mem.config.AccountConfig; import com.mem.service.AccountService; import org.springframework.context.ApplicationContext; import org.springframework.context.annotation.AnnotationConfigApplicationContext; import javax.servlet.*; import javax.servlet.http.*; import javax.servlet.annotation.*; import java.io.IOException; @WebServlet(urlPatterns = "/accountServlet") public class AccountServlet extends HttpServlet { @Override protected void doGet(HttpServletRequest request, HttpServletResponse response) throws ServletException, IOException { // web层调用service层 // 从ServletContext域中获取applicationContext对象 ApplicationContext applicationContext = (ApplicationContext) request.getServletContext().getAttribute("applicationContext"); AccountService accountService = (AccountService) applicationContext.getBean("accountService"); accountService.transferMoney("tom","lucy",500); System.out.println("转账操作成功####"); } @Override protected void doPost(HttpServletRequest request, HttpServletResponse response) throws ServletException, IOException { } }- 1
- 2
- 3
- 4
- 5
- 6
- 7
- 8
- 9
- 10
- 11
- 12
- 13
- 14
- 15
- 16
- 17
- 18
- 19
- 20
- 21
- 22
- 23
- 24
- 25
- 26
- 27
- 28
- 29
- 30
- 将新建的监听器配置到web.xml中
<listener> <listener-class>com.mem.listener.ContextLoaderListenerlistener-class> listener>- 1
- 2
- 3
- 4
- 测试,结果同上
上述方案问题描述:
在ContextLoaderListener类中,配置文件的名称和容器的名称都写死了,不太友好;
解决方法:
利用常量进行解耦改进:
- 在web.xml文件中,新增全局参数
<context-param> <param-name>contextConfigLocationparam-name> <param-value>classpath:applicationContext.xmlparam-value> context-param>- 1
- 2
- 3
- 4
- 5
- 修改ContextLoaderListener中的代码
public class ContextLoaderListener implements ServletContextListener { private String CONTEXT_CONFIG_LOCATION = "contextConfigLocation"; @Override // 服务器启动,ServletContext创建,该方法被执行1次 public void contextInitialized(ServletContextEvent sce) { System.out.println("ContextLoaderListener init ...."); ServletContext servletContext = sce.getServletContext(); // 0. 获取contextConfigLocation配置文件的名称 String contextConfigLocation = servletContext.getInitParameter(CONTEXT_CONFIG_LOCATION); contextConfigLocation = contextConfigLocation.substring("classpath:".length()); // 1. 创建spring容器 ApplicationContext applicationContext = new ClassPathXmlApplicationContext(contextConfigLocation); // 2. 将容器存储到servletContext域中 servletContext.setAttribute("applicationContext",applicationContext); } }- 1
- 2
- 3
- 4
- 5
- 6
- 7
- 8
- 9
- 10
- 11
- 12
- 13
- 14
- 15
- 16
- 新建一个工具类
WebApplicationContextUtils获取applicationContext对象
public class WebApplicationContextUtils { public static ApplicationContext getWebApplicationContext(ServletContext servletContext){ ApplicationContext applicationContext = (ApplicationContext) servletContext.getAttribute("applicationContext"); return applicationContext; } }- 1
- 2
- 3
- 4
- 5
- 6
- 修改
AccountServlet类中applicationContext的获取方式
@WebServlet(urlPatterns = "/accountServlet") public class AccountServlet extends HttpServlet { @Override protected void doGet(HttpServletRequest request, HttpServletResponse response) throws ServletException, IOException { // web层调用service层,从getWebApplicationContext()方法中获取applicationContext对象 ApplicationContext applicationContext = WebApplicationContextUtils.getWebApplicationContext(request.getServletContext()); AccountService accountService = (AccountService) applicationContext.getBean("accountService"); accountService.transferMoney("tom","lucy",500); System.out.println("转账操作成功####"); } @Override protected void doPost(HttpServletRequest request, HttpServletResponse response) throws ServletException, IOException { } }- 1
- 2
- 3
- 4
- 5
- 6
- 7
- 8
- 9
- 10
- 11
- 12
- 13
- 14
- 15
- 16
1.3 Spring的web开发组件spring-web
到此,就将一开始的诉求都解决了,当然我们能想到的Spring 框架自然也会想到,Spring其实已经为我们定义 好了一个ContextLoaderListener,使用方式跟我们上面自己定义的大体一样,但是功能要比我们强百倍,所以 ,遵循Spring “拿来主义” 的精神,我们直接使用Spring提供的就可以了,开发如下:
- 先导入Spring-web的坐标:
<dependency> <groupId>org.springframeworkgroupId> <artifactId>spring-webartifactId> <version>5.3.9version> dependency>- 1
- 2
- 3
- 4
- 5
- 在web.xml中去配置ContextLoaderListener,并指定配置文件的位置
<listener> <listener-class>org.springframework.web.context.ContextLoaderListenerlistener-class> listener>- 1
- 2
- 3
- 4
- 5
- 6
- 7
- 8
- 在Servlet中直接使用,改成官方的
WebApplicationContextUtils
import org.springframework.web.context.support.WebApplicationContextUtils; @WebServlet(urlPatterns = "/accountServlet") public class AccountServlet extends HttpServlet { @Override protected void doGet(HttpServletRequest request, HttpServletResponse response) throws ServletException, IOException { // web层调用service层 ApplicationContext applicationContext = WebApplicationContextUtils.getWebApplicationContext(request.getServletContext()); AccountService accountService = (AccountService) applicationContext.getBean("accountService"); accountService.transferMoney("tom","lucy",500); System.out.println("转账操作成功####"); } @Override protected void doPost(HttpServletRequest request, HttpServletResponse response) throws ServletException, IOException { } }- 1
- 2
- 3
- 4
- 5
- 6
- 7
- 8
- 9
- 10
- 11
- 12
- 13
- 14
- 15
- 16
- 17
- 18
- 测试,结果同上,容器名:XmlWebApplicationContext
如果核心配置类使用的是注解形式的,那么Spring容器是AnnotationConfigWebApplicationContext,如下配 置方式
<context-param> <param-name>contextClassparam-name> <param-value>com.mem.web.MyAnnotationConfigWebApplicationContextparam-value> context-param>- 1
- 2
- 3
- 4
- 5
- 6
- 7
- 8
- 9
- 10
- 11
两个配置方式都打开,按配置类的方式创建容器,容器名是 MyAnnotationConfigWebApplicationContext
原因:在下面源码分析中,
determineContextClass方法里面,根据是否含有contextClass变量而决定的初始化哪个容器。
String contextClassName = servletContext.getInitParameter(“contextClass”);public class MyAnnotationConfigWebApplicationContext extends AnnotationConfigWebApplicationContext { public MyAnnotationConfigWebApplicationContext(){ super(); // 注册配置类到容器 this.register(AccountConfig.class); } }- 1
- 2
- 3
- 4
- 5
- 6
- 7
测试:结果同上,容器名为:MyAnnotationConfigWebApplicationContext
源码分析:
目的:如何决定是xml配置文件方式还是用配置类方式创建applicationContext
入口:org.springframework.web.context.ContextLoaderListener类的contextInitialized方法public class ContextLoaderListener extends ContextLoader implements ServletContextListener { public ContextLoaderListener() { } public ContextLoaderListener(WebApplicationContext context) { super(context); } public void contextInitialized(ServletContextEvent event) { // 调用父类中的initWebApplicationContext方法,所以查看ContextLoader类 this.initWebApplicationContext(event.getServletContext()); } public void contextDestroyed(ServletContextEvent event) { this.closeWebApplicationContext(event.getServletContext()); ContextCleanupListener.cleanupAttributes(event.getServletContext()); } }- 1
- 2
- 3
- 4
- 5
- 6
- 7
- 8
- 9
- 10
- 11
- 12
- 13
- 14
- 15
- 16
- 17
- 18
public class ContextLoader { public WebApplicationContext initWebApplicationContext(ServletContext servletContext) { // 调用本类的createWebApplicationContext方法 this.context = this.createWebApplicationContext(servletContext); } protected WebApplicationContext createWebApplicationContext(ServletContext sc) { // 调用本类的determineContextClass方法,获取字节码对象, Class<?> contextClass = this.determineContextClass(sc); if (!ConfigurableWebApplicationContext.class.isAssignableFrom(contextClass)) { throw new ApplicationContextException("Custom context class [" + contextClass.getName() + "] is not of type [" + ConfigurableWebApplicationContext.class.getName() + "]"); } else { return (ConfigurableWebApplicationContext)BeanUtils.instantiateClass(contextClass); } } protected Class<?> determineContextClass(ServletContext servletContext) { // 判断 web.xml 文件中有没有contextClass参数, // 如果有,则按配置类的方式(注解) 容器名:AnnotationConfigWebApplicationContext // 如果没有,则按配置文件的方式 容器名:XmlWebApplicationContext String contextClassName = servletContext.getInitParameter("contextClass"); if (contextClassName != null) { return ClassUtils.forName(contextClassName, ClassUtils.getDefaultClassLoader()); } else { contextClassName = defaultStrategies.getProperty(WebApplicationContext.class.getName()); return ClassUtils.forName(contextClassName, ContextLoader.class.getClassLoader()); } } }- 1
- 2
- 3
- 4
- 5
- 6
- 7
- 8
- 9
- 10
- 11
- 12
- 13
- 14
- 15
- 16
- 17
- 18
- 19
- 20
- 21
- 22
- 23
- 24
- 25
- 26
- 27
- 28
查看WebApplicationContext的实现类:

02、web层MVC框架思想与设计思路
Java程序员在开发一般都是MVC+三层架构,MVC是web开发模式,传统的Javaweb技术栈实现的MVC如下

原始Javaweb开发中,Servlet充当Controller的角色,Jsp充当View角色,JavaBean充当模型角色,后期Ajax异 步流行后,在加上现在前后端分离开发模式成熟后,View就被原始Html+Vue替代。原始Javaweb开发中, Service充当Controller有很多弊端,显而易见的有如下几个:

负责共有行为的Servlet称之为前端控制器,负责业务行为的JavaBean称之为控制器Controller

分析前端控制器基本功能如下:- 具备可以映射到业务Bean的能力
- 具备可以解析请求参数、封装实体 等共有功能
- 具备响应视图及响应其他数据的功能
-
相关阅读:
vue3源码学习api-createApp-amount
医工科投稿期刊推荐——9/27
嵌入式软件开发之程序架构设计-任务调度
HTML做一个节日页面【六一儿童节】纯HTML代码
配置iTerm2打开自动执行命令
centos脚本获取昨天日期删除指定文件之外的其他文件
后端Web开发之Maven
重写数组方法 -- js随记
关于渗透实战中分析微信小程序前端代码的诸多问题
Sql中having和where的区别
- 原文地址:https://blog.csdn.net/MeiMing_104/article/details/134299998
