-
python图像处理 ——图像分块
前言
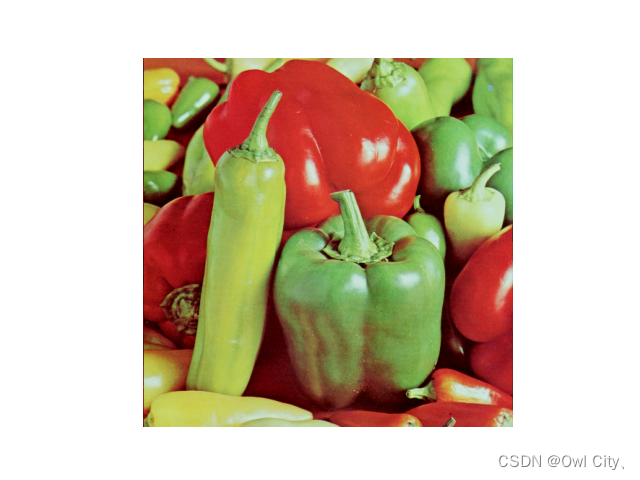
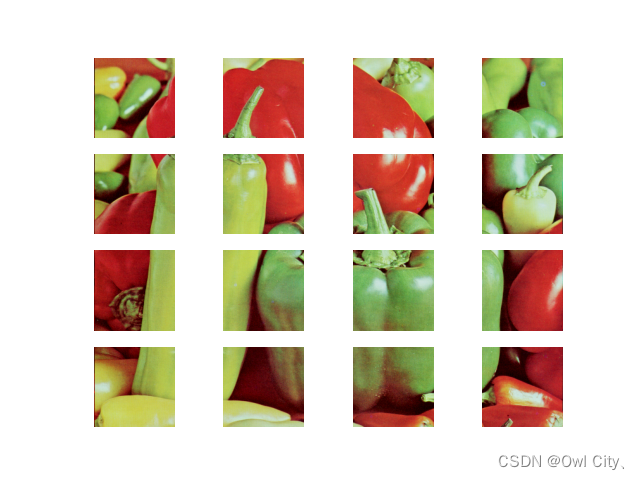
根据图像尺寸创建一个 ( m + 1 ) × ( n + 1 ) 个均匀的网格顶点坐标,对于图像块来说每个图像块的左上角和右下角可以唯一确定一个图像块,这样就可以利用网格顶点坐标对原始图像进行裁剪。
一、分块与合并
1.读取原始图像

2.网格划分,将图像划分为m*n块
def split_image(image, num_blocks): height, width = image.shape[:2] block_size = int(min(height, width) / num_blocks) block_images = [] for i in range(num_blocks): for j in range(num_blocks): x1, y1 = i * block_size, j * block_size x2, y2 = x1 + block_size, y1 + block_size block_image = image[x1:x2, y1:y2] block_images.append((i*num_blocks+j, block_image)) return block_images- 1
- 2
- 3
- 4
- 5
- 6
- 7
- 8
- 9
- 10
- 11
这段代码实现了将一个二维图像切分为多个块的功能。
函数名为 split_image,它有两个参数:image 为需要切分的图片,num_blocks 为需要切分的块数。
(1)通过 shape 属性获取图片的高度 height 和宽度 width。然后通过 min() 函数计算出一个块的大小 block_size,即取高度和宽度中较小值再除以块数。
(2)通过双重循环遍历所有块的位置,每次循环计算块的左上角 (x1, y1) 和右下角 (x2, y2) 的坐标,然后用 NumPy 的切片操作 image[x1:x2, y1:y2] 获取一个块的图像数据,并将其存入 block_images 列表中。
(3)最后返回切分好的块列表 block_images,以及原图片的高度和宽度。3.网格合并
def merge_images(block_images, num_blocks): block_size = block_images[0].shape[0] image_size = block_size * num_blocks merged_image = np.zeros((image_size, image_size, 3), dtype=np.uint8) for i in range(num_blocks): for j in range(num_blocks): x1, y1 = i * block_size, j * block_size x2, y2 = x1 + block_size, y1 + block_size merged_image[x1:x2, y1:y2] = block_images[i * num_blocks + j] return merged_image- 1
- 2
- 3
- 4
- 5
- 6
- 7
- 8
- 9
- 10
这段代码定义了一个名为merge_images的函数,该函数用于将多个图像块合并成一个完整的图像。
函数的参数block_images是一个包含多个图像块的列表,每个图像块都是一个二维数组,表示该块在完整图像中的位置和大小。参数num_blocks表示完整图像被分成多少个块。
(1)函数通过block_images[0].shape[0]获取第一个图像块的高度(或宽度),作为每个块的大小。然后,计算完整图像的大小,即 image_size = block_size * num_blocks。
(2)函数创建一个全黑的数组merged_image,用于存放合并后的完整图像。该数组的大小为(image_size, image_size, 3),其中3表示颜色通道数,dtype=np.uint8表示每个像素点使用8位无符号整数来表示。
(3)函数使用两个嵌套循环遍历所有的图像块,并计算出该块在完整图像中的位置。这里使用了变量i和j来表示当前处理的块的行和列索引,使用变量x1、y1、x2和y2来表示当前块在完整图像中的左上角和右下角位置。
(4)函数将当前块的像素值复制到merged_image数组的相应位置,完成了合并操作。最后返回合并后的完整图像数组。

二、代码
import cv2 import numpy as np from matplotlib import pyplot as plt def split_image(image, num_blocks): height, width = image.shape[:2] block_size = int(min(height, width) / num_blocks) block_images = [] for i in range(num_blocks): for j in range(num_blocks): x1, y1 = i * block_size, j * block_size x2, y2 = x1 + block_size, y1 + block_size block_image = image[x1:x2, y1:y2] block_images.append(block_image) return block_images, height, width def merge_images(block_images, num_blocks): block_size = block_images[0].shape[0] image_size = block_size * num_blocks merged_image = np.zeros((image_size, image_size, 3), dtype=np.uint8) for i in range(num_blocks): for j in range(num_blocks): x1, y1 = i * block_size, j * block_size x2, y2 = x1 + block_size, y1 + block_size merged_image[x1:x2, y1:y2] = block_images[i * num_blocks + j] return merged_image image = cv2.imread("pepper.png") num_blocks = 4 block_images, rows, cols = split_image(image, num_blocks) # 遍历所有分块,将其显示在subplot中 for i in range(len(block_images)): plt.subplot(num_blocks, num_blocks, i+1) plt.imshow(cv2.cvtColor(block_images[i], cv2.COLOR_BGR2RGB)) plt.show() # 合并分块后的图像并显示 merged_image = merge_images(block_images, num_blocks) plt.imshow(cv2.cvtColor(merged_image, cv2.COLOR_BGR2RGB)) plt.show()- 1
- 2
- 3
- 4
- 5
- 6
- 7
- 8
- 9
- 10
- 11
- 12
- 13
- 14
- 15
- 16
- 17
- 18
- 19
- 20
- 21
- 22
- 23
- 24
- 25
- 26
- 27
- 28
- 29
- 30
- 31
- 32
- 33
- 34
- 35
- 36
- 37
- 38
- 39
- 40
-
相关阅读:
字符串的定义和表示
numpy的基础操作
1899. 合并若干三元组以形成目标三元组-c语言-贪心算法+标记数组
MRO工业品采购管理系统:赋能MRO企业采购各节点,构建数字化采购新体系
SpringBoot 条件注解之:自定义条件注解
进程的虚拟地址空间
制作一个简单HTML旅游网站(HTML+CSS+JS)无锡旅游网页设计与实现8个页面
python sqlalchemy(ORM)- 03 更新和查询
jQuery HTML/CSS 参考文档
一起来学Kotlin:概念:8. Kotlin Control Flow: When, For, While, Range 等使用
- 原文地址:https://blog.csdn.net/weixin_42207434/article/details/134234304
