-
C++ Qt 学习(一):Qt 入门
0. 基础知识
0.1 qmake 和 cmake 对比
- qmake:qt 独有的代码构建工具
- cmake:C++ 通用的代码构建工具,绝大部分 C++ 开源项目都使用 cmake 管理代码
- qt 项目,没有特殊要求,使用 qmake 即可
0.2 Qt 3 个窗口类的区别
- QMainWindow
- 包含菜单栏、工具栏、状态栏
- QMainWindow 使用的场景不多
- QWidget
- 一个普通的窗口,不包含菜单栏、状态栏,除了登录界面
- 新建项目时建议使用 Qwidget,因为大部分的窗口可能都要做成无边框窗口,需要自定义标题栏,实现拉伸等
- QDialog
- 对话框,常用来做登录窗口、弹出窗口 (例如设置界面)
1. 图片查看软件

1.1 main.cpp
#include "widget.h" #includeint main(int argc, char *argv[]) { QApplication a(argc, argv); Widget w; w.show(); return a.exec(); } - 1
- 2
- 3
- 4
- 5
- 6
- 7
- 8
- 9
- 10
1.2 widget.h
#ifndef WIDGET_H #define WIDGET_H #includeQT_BEGIN_NAMESPACE namespace Ui { class Widget; } QT_END_NAMESPACE class Widget : public QWidget { Q_OBJECT public: Widget(QWidget *parent = nullptr); ~Widget(); private: void open1(); // 基础版本 void open2(); // 记住上次打开的路径,并指定默认的路径为 文档/图片 void open3(); // 图片自适应显示 private slots: void on_btnOpen_clicked(); private: Ui::Widget *ui; }; #endif // WIDGET_H - 1
- 2
- 3
- 4
- 5
- 6
- 7
- 8
- 9
- 10
- 11
- 12
- 13
- 14
- 15
- 16
- 17
- 18
- 19
- 20
- 21
- 22
- 23
- 24
- 25
- 26
- 27
- 28
1.3 widget.cpp
#include "widget.h" #include "ui_widget.h" #include#include // 用于读取和写入应用程序的设置和配置信息 #include #include #include // 智能指针 Widget::Widget(QWidget *parent) : QWidget(parent), ui(new Ui::Widget) { ui->setupUi(this); ui->label_image->clear(); } Widget::~Widget() { delete ui; } void Widget::open1() { // QFileDialog::getOpenFileName() 用于显示一个打开文件对话框,并返回用户选择的文件路径 // 参数:指向当前窗口的指针 this,打开的窗口标题,默认打开路径,文件类型过滤器 QString filename = QFileDialog::getOpenFileName(this, "请选择图片", "D:/", "图片(*.png *jpg);"); if(filename.isEmpty()) { return; } ui->lineEdit_path->setText(filename); // 显示图片路径 ui->label_image->setPixmap((QPixmap(filename))); // 显示图片 } // 记住上次打开的路径,并指定默认的路径为 文档/图片 void Widget::open2() { // qApp->applicationDirPath() 用于获取当前应用程序所在的目录路径 // "/config/Setting.ini" 是一个固定的字符串表示配置文件的路径 QString config_path = qApp->applicationDirPath() + "/config/Setting.ini"; qDebug() << config_path; // 使用智能指针创建了一个 QSettings 对象,并使用指定的配置文件路径和格式进行初始化 // QSettings::IniFormat 是一个枚举值,用于指定配置文件的格式,此处采用的是 ini 格式的配置文件 // 通过 pIniSet 指针调用 value() 函数来获取指定键的值,并将其转换为 QString 类型 std::unique_ptr<QSettings> pIniSet(new QSettings(config_path, QSettings::IniFormat)); QString lastPath = pIniSet->value("/LastPath/path").toString(); // 设置默认读取路径为 windows 下 图片 目录 if(lastPath.isEmpty()) { lastPath = QStandardPaths::writableLocation(QStandardPaths::PicturesLocation); } QString filename = QFileDialog::getOpenFileName(this, "请选择图片", lastPath, "图片(*.png *jpg);"); if(filename.isEmpty()) { return; } ui->lineEdit_path->setText(filename); ui->label_image->setPixmap((QPixmap(filename))); // 找到给定文件名(filename)中最后一个斜杠"/"的位置 int end = filename.lastIndexOf("/"); // 提取文件名中最后一个斜杠"/"之前的部分,即路径部分 QString _path = filename.left(end); // 将键 "/LastPath/path" 的值设置为 _path pIniSet->setValue("/LastPath/path", _path); qDebug() << _path; } // 图片自适应显示 void Widget::open3() { QString config_path = qApp->applicationDirPath() + "/config/Setting.ini"; qDebug() << config_path; std::unique_ptr<QSettings> pIniSet(new QSettings(config_path, QSettings::IniFormat)); QString lastPath = pIniSet->value("/LastPath/path").toString(); if(lastPath.isEmpty()) { lastPath = QStandardPaths::writableLocation(QStandardPaths::PicturesLocation); } QString filename = QFileDialog::getOpenFileName(this, "请选择图片", lastPath, "图片(*.png *jpg);"); if(filename.isEmpty()) { return; } ui->lineEdit_path->setText(filename); // 图片自适应显示 std::unique_ptr<QPixmap> pix(new QPixmap(filename)); // 通过给定的文件名(filename)加载图像数据 // 将加载的图像按照 ui->label_image 控件的大小进行缩放 // Qt::KeepAspectRatio:保持图像的纵横比例不变 pix->scaled(ui->label_image->size(), Qt::KeepAspectRatio); ui->label_image->setScaledContents(true); // 当图像大于控件大小时,将自动缩放以适应控件的大小 ui->label_image->setPixmap(*pix); // 设置 ui->label_image 控件的图像为加载并缩放后的图像 int end = filename.lastIndexOf("/"); QString _path = filename.left(end); pIniSet->setValue("/LastPath/path", _path); qDebug() << _path; } void Widget::on_btnOpen_clicked() { //open1(); //open2(); open3(); } - 1
- 2
- 3
- 4
- 5
- 6
- 7
- 8
- 9
- 10
- 11
- 12
- 13
- 14
- 15
- 16
- 17
- 18
- 19
- 20
- 21
- 22
- 23
- 24
- 25
- 26
- 27
- 28
- 29
- 30
- 31
- 32
- 33
- 34
- 35
- 36
- 37
- 38
- 39
- 40
- 41
- 42
- 43
- 44
- 45
- 46
- 47
- 48
- 49
- 50
- 51
- 52
- 53
- 54
- 55
- 56
- 57
- 58
- 59
- 60
- 61
- 62
- 63
- 64
- 65
- 66
- 67
- 68
- 69
- 70
- 71
- 72
- 73
- 74
- 75
- 76
- 77
- 78
- 79
- 80
- 81
- 82
- 83
- 84
- 85
- 86
- 87
- 88
- 89
- 90
- 91
- 92
- 93
- 94
- 95
- 96
- 97
- 98
- 99
- 100
- 101
- 102
- 103
- 104
- 105
- 106
- 107
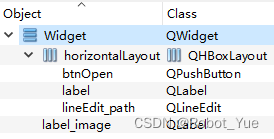
1.4 widget.ui
2. C++ lambda 函数详解
- C++ lambda 表达式的本质就是重载了 operator(),lambda 是一个类,在调用时会进行编译展开,因此 lambda 表达式对象其实就是一个匿名的 functor,所以 lambda 表达式也叫匿名函数对象
- Qt 槽函数可以使用 lambda 函数来写
- C++ 中 lambda 表达式的构成
[捕获列表](形参列表) mutable 异常列表->返回类型 { 函数体 }- 1
- 2
- 3
- 捕获列表:捕获外部变量,捕获的变量可以在函数体中使用,可以省略,即不捕获外部变量
- 形参列表:和普通函数的形参列表一样。可省略,即无参数列表
- mutable:如果有,则表示在函数体中可以修改捕获变量,根据具体需求决定是否需要省略
- 异常列表:noexcept /throw(…),和普通函数的异常列表一样,可省略,即代表可能抛出任何类型的异常
- 返回类型:和函数的返回类型一样。可省略,如省略,编译器将自动推导返回类型
- 函数体:代码实现,可省略,但是没意义
- 捕获方式
- 值捕获:不能在 lambda 表达式中修改捕获变量的值
- 引用捕获:使用引用捕获一个外部变量,需在捕获列表变量前面加上一个引用说明符 &
- 隐式捕获
#includeusing namespace std; int main() { // 1、值捕获 int value = 100; auto f = [value](int a, int b)->int { //value++; // 不能在 lambda 表达式中修改捕获变量的值 return a + b + value; }; cout << f(1, 2) << endl; // 2、引用捕获 auto f2 = [&value](int a, int b)->int { value++; return a + b; }; cout << f2(1, 3) << endl; cout << "value = " << value << endl; // 3、隐式捕获 // = 值捕获 // & 引用捕获 int age = 123; auto f3 = [&](int a, int b)->int { value++; age++; return a + b; }; return 0; } - 1
- 2
- 3
- 4
- 5
- 6
- 7
- 8
- 9
- 10
- 11
- 12
- 13
- 14
- 15
- 16
- 17
- 18
- 19
- 20
- 21
- 22
- 23
- 24
- 25
- 26
- 27
- 28
- 29
- 30
- 31
- 32
- 33
- 34
- 35
- 36
3. 槽函数的常见写法
-
Qt 4 写法
connect(ui->btnOpen, SIGNAL(clicked), this, SLOT(open()));- 1
- 不推荐这种写法,如果 SIGNAL写错了,或者信号名字、槽函数名字写错了编译器检查不出来,导致程序无响应,引起不必要的误解
-
Qt 5 写法
connect(ui.btnOpen, QPushButton::clicked, this, &Widget::open);- 1
- 推荐使用这种写法
-
lambda 函数表达式写法
connect(ui.btnOpen, &QPushButton::clicked, [=](){ // 具体代码实现 });- 1
- 2
- 3
- 适用于 slot 代码比较少的逻辑
-
直接法
void on_控件名_信号名();- 1
- 这种不用 connect,Qt 自动连接
4. 自定义信号及参数注册
4.1 跨 UI 发送自定义信号

-
如何自定义信号
- 使用signals声明
- 返回值是void
- 在需要发送的地方使用下述方法进行发送
- emit 信号名字(参数);
- 在需要链接的地方使用connect进行链
-
widget.h
#ifndef WIDGET_H #define WIDGET_H #includeQT_BEGIN_NAMESPACE namespace Ui { class Widget; } QT_END_NAMESPACE class Widget : public QWidget { Q_OBJECT public: Widget(QWidget *parent = nullptr); ~Widget(); private slots: void on_btnOpen_clicked(); private: Ui::Widget *ui; }; #endif // WIDGET_H - 1
- 2
- 3
- 4
- 5
- 6
- 7
- 8
- 9
- 10
- 11
- 12
- 13
- 14
- 15
- 16
- 17
- 18
- 19
- 20
- 21
- 22
- 23
-
dialog.h
- 跨 UI 发送:New File --> Qt Designer Form Class --> Dialog without Buttons
#ifndef DIALOG_H #define DIALOG_H #includenamespace Ui { class Dialog; } class Dialog : public QDialog { Q_OBJECT public: explicit Dialog(QWidget *parent = nullptr); ~Dialog(); private slots: void on_btnAdd_clicked(); signals: void sig_addOne(int value); private: Ui::Dialog *ui; }; #endif // DIALOG_H - 1
- 2
- 3
- 4
- 5
- 6
- 7
- 8
- 9
- 10
- 11
- 12
- 13
- 14
- 15
- 16
- 17
- 18
- 19
- 20
- 21
- 22
- 23
- 24
- 25
-
widget.cpp
#include "widget.h" #include "ui_widget.h" #include "dialog.h" // 跨 UI 头文件 Widget::Widget(QWidget *parent) : QWidget(parent), ui(new Ui::Widget) { ui->setupUi(this); } Widget::~Widget() { delete ui; } void Widget::on_btnOpen_clicked() { Dialog dlg; // 使用 lambda 函数编写槽函数 connect(&dlg, &Dialog::sig_addOne, [=](int value) { ui->lineEdit->setText(QString::number(value)); }); dlg.exec(); // 需放在 connect 后,因为此行为事件循环会阻塞 UI }- 1
- 2
- 3
- 4
- 5
- 6
- 7
- 8
- 9
- 10
- 11
- 12
- 13
- 14
- 15
- 16
- 17
- 18
- 19
- 20
- 21
- 22
-
dialog.cpp
#include "dialog.h" #include "ui_dialog.h" Dialog::Dialog(QWidget *parent) : QDialog(parent), ui(new Ui::Dialog) { ui->setupUi(this); } Dialog::~Dialog() { delete ui; } void Dialog::on_btnAdd_clicked() { static int value = 100; emit sig_addOne(value++); // 实现跨 UI 自加操作 }- 1
- 2
- 3
- 4
- 5
- 6
- 7
- 8
- 9
- 10
- 11
- 12
- 13
- 14
- 15
4.2 跨线程发送自定义信号
Qt 的子线程无法直接修改 ui,需要发送信号到 ui 线程进行修改
-
widget.h
#ifndef WIDGET_H #define WIDGET_H #include#include "childthread.h" QT_BEGIN_NAMESPACE namespace Ui { class Widget; } QT_END_NAMESPACE class Widget : public QWidget { Q_OBJECT public: Widget(QWidget *parent = nullptr); ~Widget(); private slots: void on_btnUpdate_clicked(); void showInfo(Score s); private: Ui::Widget *ui; }; #endif // WIDGET_H - 1
- 2
- 3
- 4
- 5
- 6
- 7
- 8
- 9
- 10
- 11
- 12
- 13
- 14
- 15
- 16
- 17
- 18
- 19
- 20
- 21
- 22
- 23
- 24
- 25
-
widget.cpp
#include "widget.h" #include "ui_widget.h" #includeWidget::Widget(QWidget *parent) : QWidget(parent), ui(new Ui::Widget) { ui->setupUi(this); qDebug() << "ui thread id = " << QThread::currentThreadId(); } Widget::~Widget() { delete ui; } void Widget::on_btnUpdate_clicked() { ChildThread *ch = new ChildThread(); // 以下实现还是在子线程中(不在 ui 线程中),无法直接修改 ui // connect(ch, &ChildThread::sig_SendToUI, [=](Score s) { // string info = s.name + "id = " + to_string(s.id) + " age = " + to_string(s.age); // ui->lineEdit->setText(QString::fromStdString(info)); // // 用于验证 slot 与 ui 下是否同属一个线程(id) // // 结果表明此处的 slot 与子线程的 run() 同属一个线程(id) // qDebug() << "slot thread id = " << QThread::currentThreadId(); // }); // 以下实现在 ui 线程 (主线程) 中,可以直接修改 ui connect(ch, &ChildThread::sig_SendToUI, this, &Widget::showInfo); ch->start(); } void Widget::showInfo(Score s) { qDebug() << "ui thread id2 = " << QThread::currentThreadId(); string info = s.name + "id = " + to_string(s.id) + " age = " + to_string(s.age); ui->lineEdit->setText(QString::fromStdString(info)); } - 1
- 2
- 3
- 4
- 5
- 6
- 7
- 8
- 9
- 10
- 11
- 12
- 13
- 14
- 15
- 16
- 17
- 18
- 19
- 20
- 21
- 22
- 23
- 24
- 25
- 26
- 27
- 28
- 29
- 30
- 31
- 32
- 33
- 34
- 35
- 36
- 37
- 38
-
childthread.h
#ifndef CHILDTHREAD_H #define CHILDTHREAD_H #include#include using namespace std; struct Score { string name; int id; int age; }; class ChildThread : public QThread { Q_OBJECT public: ChildThread(); protected: void run() override; signals: void sig_SendToUI(Score score); }; #endif // CHILDTHREAD_H - 1
- 2
- 3
- 4
- 5
- 6
- 7
- 8
- 9
- 10
- 11
- 12
- 13
- 14
- 15
- 16
- 17
- 18
- 19
- 20
- 21
- 22
- 23
- 24
- 25
- 26
- 27
- 28
-
childthread.cpp
#include "childthread.h" #includeChildThread::ChildThread() { // 非基础类型参数需要注册 qRegisterMetaType<Score>("Score"); qRegisterMetaType<string>("string"); } void ChildThread::run() { qDebug() << "run thread id = " << QThread::currentThreadId(); Score s; s.name = "jack"; s.id = 1001; s.age = 26; emit sig_SendToUI(s); // 发送信号 } - 1
- 2
- 3
- 4
- 5
- 6
- 7
- 8
- 9
- 10
- 11
- 12
- 13
- 14
- 15
- 16
- 17
- 18
- 19
4.3 处理信号重名问题
-
例如 QComboBox 的信号
Q_SIGNALS: void currentIndexChanged(int index); void currentIndexChanged(const QString &);- 1
- 2
- 3
-
解决方案
// 错误写法 connect(ui->comboBox, &QComboBox::currentIndexChanged, this, &Widget::onIndex); // 解决方案一 connect(ui->comboBox, SIGNAL(currentIndexChanged(int)), this, SLOT(onIndex(int))); // 解决方案二 connect(ui->comboBox, QOverload<int>::of(&QComboBox::currentIndexChanged), this, &Widget::onIndex);- 1
- 2
- 3
- 4
- 5
- 6
- 7
- 8
5. connect 函数详解
template <typename Func1, typename Func2> static inline QMetaObject::Connection connect(const typename QtPrivate::FunctionPointer<Func1>::Object *sender, Func1 signal, const typename QtPrivate::FunctionPointer<Func2>::Object *receiver, Func2 slot, Qt::ConnectionType type = Qt::AutoConnection)- 1
- 2
- 3
- 4
- 5
- 6
enum ConnectionType { AutoConnection, DirectConnection, QueuedConnection, BlockingQueuedConnection, UniqueConnection = 0x80, SingleShotConnection = 0x100, };- 1
- 2
- 3
- 4
- 5
- 6
- 7
- 8
-
AutoConnection
- 默认连接方式,如果接收方在发出信号的线程中,使用 Qt::DirectConnection
- 否则使用 Qt::QueuedConnection,在发出信号时确定连接类型
- Qt 中默认使用 AutoConnection,所以平时写信号槽时都是 4 个参数
-
DirectConnection
- 当发出信号时,插槽立即被调用,槽在发送信号的线程中执行
-
QueuedConnection
- 当控制返回到接收方线程的事件循环时调用槽,槽在接收方的线程中执行
-
BlockingQueuedConnection
- 与 Qt::QueuedConnection 相同,只是发送信号的线程会阻塞,直到槽返回
- 如果接收方存在于发送信号的线程中,则不能使用此连接,否则应用程序将产生死锁
-
UniqueConnection
- 这是一个可以使用按位 OR 与上述任何一种连接类型组合的标志,当 Qt::UniqueConnection 被设置时,如果连接已经存在,QObject::connect() 将失败 (例如,如果相同的信号已经连接到相同的对象对的插槽)
6. Qt 信号槽与 MOC
- moc 全称是 Meta-Object Compiler,也就是 “元对象编译器”
- Qt 程序在交由标准编译器编译之前,先要使用 moc 分析 C++ 源文件
- 如果发现在一个头文件中包含了宏 Q_OBJECT,则会生成另外一个 C++ 源文件,这个源文件中包含了 Q_OBJECT 宏的实现代码,这个新的文件名是原文件名前面加上 moc_ 构成,这个新的文件同样将进入编译系统,最终被链接到二进制代码中去。因此,这个新的文件不是 “替换” 掉旧的文件,而是与原文件一起参与编译
- 另外,还可看出:moc 的执行是在预处理器之前,因为预处理器执行之后,Q_OBJECT 宏就不存在了
可以这么理解,moc 把 Qt 中一些不是 C++ 的关键字做了解析,让 C++ 编译器认识,例如:slots, signals,emit 等,moc 会把这些重新编译解析
7. Qt 内存管理机制
-
C++ 派生类
- 构造顺序:先执行基类的构造函数,再执行派生类的构造函数
- 析构顺序:先执行派生类的析构函数,再执行基类的析构函数
-
Qt 半内存管理机制
- QObject 及其派生类的对象,如果其 parent 非 0,那么其 parent 析构时会析构该对象
- QWidget 及其派生类的对象,可以设置 Qt::WA_DeleteOnClose 标志位,当 close 时会调用 QWidgetPrivate::close_helper,进而调用 deleteLater 析构该对象
8. 解决 Qt 中文乱码问题
-
粘贴别人的代码时,首先在记事本里复制一遍,再粘贴到 QtCreator
-
使用 u8
- ui.pushButton->setText (u8"你好")
-
不使用 QtCreator开发,直接使用 vs2019
-
其他设置
- QtCreator — 选项 — 文本编辑器 — UTF8 BOM 总是删除
- #pragma execution_character_set(“utf-8”)
-
相关阅读:
GoLand设置GOROOT报错The selected directory is not a valid home for Go SDK
python进阶(26)collections标准库
猿创征文|信息抽取(2)——pytorch实现Bert-BiLSTM-CRF、Bert-CRF模型进行实体抽取
如何在PDF上编辑文字?这三个方法让你轻松实现
Web渗透_ACUNETIX WEB VULNERABILITY SCANNER介绍
【strapi系列】strapi在登录时调用api/auth/local获取token接口一直报401、403、400错误的问题解决
【QT深入理解】QT中的几种常用的排序函数
Vue动态缓存KeepAlive
基于STM32设计的物流追踪系统(GPS+BC20+华为云IOT)
Unity ProBuilder(自己创建斜面、拐角)
- 原文地址:https://blog.csdn.net/qq_42994487/article/details/134165511
