-
Vue 商场首页头部布局

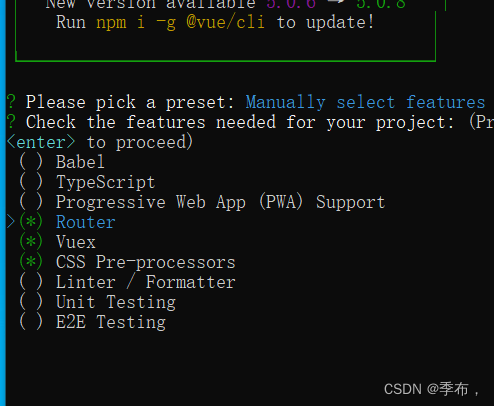

封装基础网络请求,前后端联调请求后端接口
npm install axios -S- 1
src/network/requestConfig.js
import axios from 'axios'; import store from "@/store"; export function request(config){ const instance = axios.create({ baseURL:"http://127.0.0.1:8000/", // baseURL:process.env.VUE_APP_BASE_URL, timeout:5000, }) // 请求拦截 instance.interceptors.request.use(config=>{ // 一般来说我们会在这里边给一些实例加上token const token = window.localStorage.getItem("token"); if(token){ // config.headers.Authorization="token"; config.headers.Authorization=token; } // 直接放行 return config; },err=>{ // 这里写一些错误的代码在这里 }) // 响应拦截 instance.interceptors.response.use(res=>{ if(res.data.status==false){ window.localStorage.setItem("token",""); store.commit("setIsLogin",false); } return res.data?res.data:res; },err=>{ // 响应错误的在这里处理,比如404 500这些特殊的状态码 // 咱们跳转一个特定的处理页面 }) return instance(config); }- 1
- 2
- 3
- 4
- 5
- 6
- 7
- 8
- 9
- 10
- 11
- 12
- 13
- 14
- 15
- 16
- 17
- 18
- 19
- 20
- 21
- 22
- 23
- 24
- 25
- 26
- 27
- 28
- 29
- 30
- 31
- 32
- 33
- 34
- 35
- 36
- 37
- 38
- 39
src/network/home.js
import {request} from "./requestConfig.js" export function getMainMenu(){ return request({ url:"/main_menu", }) }- 1
- 2
- 3
- 4
- 5
- 6
- 7
- 8
- 9
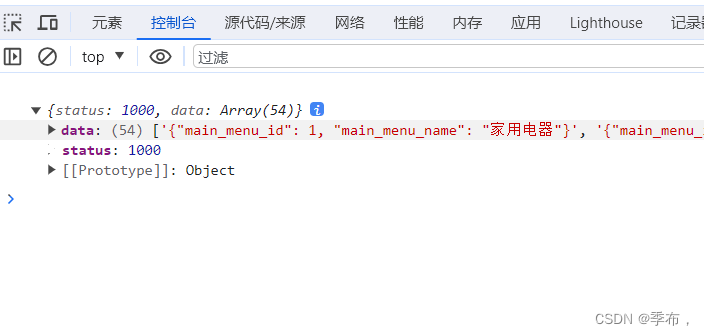
测试
<script setup> import {getMainMenu} from "@/network/home" getMainMenu().then(res=>{ console.log(res) }) </script>- 1
- 2
- 3
- 4
- 5
- 6
- 7
配置基础 router 信息
src/router/index.js
import { createRouter, createWebHistory } from 'vue-router' import HomeView from '../views/HomeView.vue' const routes = [ { path: '/', name: 'home', component: HomeView, meta:{ title:"慕西商城首页" } }, ] const router = createRouter({ history: createWebHistory(process.env.BASE_URL), routes }) router.beforeEach((to,from)=>{ document.title = to.meta.title; }) export default router- 1
- 2
- 3
- 4
- 5
- 6
- 7
- 8
- 9
- 10
- 11
- 12
- 13
- 14
- 15
- 16
- 17
- 18
- 19
- 20
- 21
- 22
- 23
- 24
- 25
- 26
src/views/HomeView.vue
<template> <p>首页</p> </template>- 1
- 2
- 3
- 4

慕西商城首页顶层标题栏开发

src/assets/css/config.css
全局配置@import './base.css'; /*定义全局变量*/ :root { --font-red: #f10215; --font-gray: #999; --content-width:1200px; --el-color-danger:#e2231a !important; }- 1
- 2
- 3
- 4
- 5
- 6
- 7
- 8
- 9
main.js
全局引入import "@/assets/css/config.css"- 1
这个宽度是1200 引用在src/assets/css/config.css全局中设置–content-width

<template> <div class="wrapper"> <div class="header"> <a href="#">你好,请登录</a> <a href="#">免费注册</a> | <a href="#">我的订单</a> </div> </div> </template> <style lang="less" scoped> //最外层 .wrapper{ background-color: #e3e4e5; height: 30px; .header{ //引用全局变量中的宽度变量 width: var(--content-width); margin: 0 auto; //居中 text-align: right; //右对齐 line-height: 30px; //上下对齐 a{ color: var(--font-gray); // 鼠标滑过的效果 &:hover{ color: var(--font-red); } margin-left: 10px; } } } </style>- 1
- 2
- 3
- 4
- 5
- 6
- 7
- 8
- 9
- 10
- 11
- 12
- 13
- 14
- 15
- 16
- 17
- 18
- 19
- 20
- 21
- 22
- 23
- 24
- 25
- 26
- 27
- 28
- 29
- 30
- 31
- 32
- 33

取地址符空格增加免费注册和右边分割线的距离
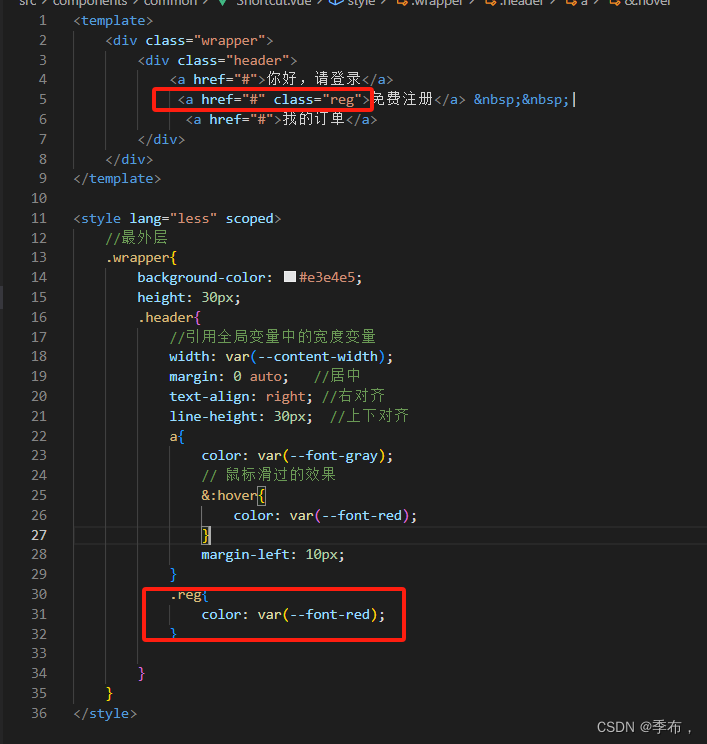
<a href="#">免费注册</a> |- 1

也可以把免费注册设置为一直是红色的
慕西商城首页头部结构开发

components/home/Header.vue
<template> <div class="main"> <div class="content"> <div class="logo"> 我是logo </div> <div class="search-box"> 我是搜索框 </div> <div class="right"> 我是右侧的图片 </div> </div> </div> </template> <script> </script> <style lang="less" scoped> .main{ .content{ width: var(--content-width); margin: 0 auto; //居中对其 height: 140px; } } </style>- 1
- 2
- 3
- 4
- 5
- 6
- 7
- 8
- 9
- 10
- 11
- 12
- 13
- 14
- 15
- 16
- 17
- 18
- 19
- 20
- 21
- 22
- 23
- 24
- 25
- 26
- 27
- 28
- 29
- 30
- 31
- 32
views/HomeView.vue 中引入
<template> <div> <Shortcut></Shortcut> <Header></Header> <div> 我是主页 </div> </div> </template> <script setup> import Shortcut from "@/components/common/Shortcut.vue" import Header from "@/components/home/Header" </script>- 1
- 2
- 3
- 4
- 5
- 6
- 7
- 8
- 9
- 10
- 11
- 12
- 13
- 14
- 15

让标签浮动,在一行显示
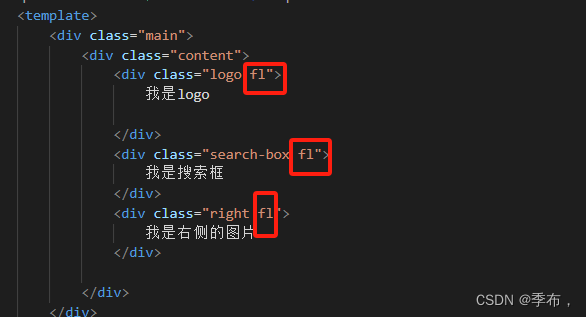

<template> <div class="main"> <div class="content"> <div class="logo fl"> <Logo></Logo> </div> <div class="search-box fl"> 我是搜索框 </div> <div class="right fl"> <img src="@/assets/images/header-right.png"> </div> </div> </div> </template> <script setup> import Logo from "@/components/common/Logo.vue" </script> <style lang="less" scoped> .main{ .content{ width: var(--content-width); margin: 0 auto; //居中对其 height: 140px; border: 1px solid red; } .search-box{ width: 800px; } .right{ img{ width:200px; } line-height: 140px; } } </style>- 1
- 2
- 3
- 4
- 5
- 6
- 7
- 8
- 9
- 10
- 11
- 12
- 13
- 14
- 15
- 16
- 17
- 18
- 19
- 20
- 21
- 22
- 23
- 24
- 25
- 26
- 27
- 28
- 29
- 30
- 31
- 32
- 33
- 34
- 35
- 36
- 37
- 38
- 39
- 40
- 41
- 42
- 43
common/Logo.vue
<template> <div> <img class="logo" src="@/assets/images/logo/logo-big.png" alt=""> </div> </template> <style scoped lang="less"> div{ .logo{ width: 100px; height: 100px; } line-height: 140px; } </style>- 1
- 2
- 3
- 4
- 5
- 6
- 7
- 8
- 9
- 10
- 11
- 12
- 13
- 14
- 15
- 16
- 17
- 18

可以让右边的图片再往右靠边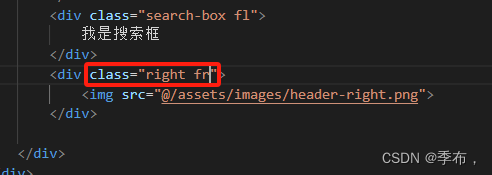

慕西商城首页头部搜索框开发
src/components/home/Header.vue
<template> <div class="main"> <div class="content"> <div class="logo fl"> <Logo></Logo> </div> <div class="search-box fl"> <div class="input-search fl"> <SearchBox></SearchBox> </div> </div> <div class="right fr"> <img src="@/assets/images/header-right.png" /> </div> </div> </div> </template> <script setup> import Logo from "@/components/common/Logo.vue"; import SearchBox from "@/components/home/SearchBox.vue"; </script> <style lang="less" scoped> .main { .content { width: var(--content-width); margin: 0 auto; //居中对其 height: 140px; // border: 1px solid red; } .search-box { width: 800px; height: 70px; } .right { img { width: 200px; } line-height: 140px; } } </style>- 1
- 2
- 3
- 4
- 5
- 6
- 7
- 8
- 9
- 10
- 11
- 12
- 13
- 14
- 15
- 16
- 17
- 18
- 19
- 20
- 21
- 22
- 23
- 24
- 25
- 26
- 27
- 28
- 29
- 30
- 31
- 32
- 33
- 34
- 35
- 36
- 37
- 38
- 39
- 40
- 41
- 42
- 43
- 44
home/SearchBox.vue
<template> <div class="main"> <div class="content"> <input type="text" placeholder="请输入搜索条件" /> <span class="iconfont icon-fangdajing"></span> </div> <div class="hotword"> <a v-for="(item, key) in hotWords" :key="key" :class="item.active === true ? 'active' : ''" href="#" >{{ item.word }}</a > </div> </div> </template> <script setup> import { ref } from "vue"; const hotWords = ref([ { word: "电脑", active: true }, { word: "手记", active: false }, { word: "裙子", active: false }, { word: "空调", active: false }, { word: "裤子", active: false }, ]); </script> <style scoped lang="less"> @red: #e2231a; .main { height: 140px; margin-top: 45px; .content { width: 550px; height: 35px; border: 2px solid @red; margin-left: 80px; //距左边logo距离 input { width: 485px; line-height: 35px; height: 35px; padding-left: 15px; } span { display: inline-block; background-color: @red; width: 50px; height: 35px; line-height: 35px; text-align: center; color: white; font-weight: 700; &:hover { cursor: pointer; background-color: #c81623; } //搜索按钮有颜色渐变的效果 } .hotword { margin-right: 300px; margin-top: 10px; a { color: #999; margin-right: 10px; &:hover { color: @red; } } .active { color: @red; } } } } </style>- 1
- 2
- 3
- 4
- 5
- 6
- 7
- 8
- 9
- 10
- 11
- 12
- 13
- 14
- 15
- 16
- 17
- 18
- 19
- 20
- 21
- 22
- 23
- 24
- 25
- 26
- 27
- 28
- 29
- 30
- 31
- 32
- 33
- 34
- 35
- 36
- 37
- 38
- 39
- 40
- 41
- 42
- 43
- 44
- 45
- 46
- 47
- 48
- 49
- 50
- 51
- 52
- 53
- 54
- 55
- 56
- 57
- 58
- 59
- 60
- 61
- 62
- 63
- 64
- 65
- 66
- 67
- 68
- 69
- 70
- 71
- 72
- 73
- 74
- 75
- 76
- 77
- 78
- 79

Element-Plus 简介与安装
npm install element-plus --save- 1
main.js
// 引入element-plus import ElementPlus from 'element-plus' import 'element-plus/dist/index.css'- 1
- 2
- 3
- 4
慕西商城首页头部我的购物车开发

home/ShopCart.vue
<template> <div class="main"> <div class="shopcart"> <el-badge :value="12" class="item"> <span class="iconfont icon-gouwuche"></span> </el-badge> <span>我的购物车</span> </div> </div> </template> <style scoped lang="less"> @red: #e2231a; .main { height: 140px; margin-top: 45px; margin-left: 20px; .shopcart{ border: 1px solid #e3e4e5; width: 130px; height: 35px; line-height: 35px; text-align: center; padding-top: 4px; .item{ height: 25px; line-height: 25px; >span{ color: @red; font-weight: 700; } } &:hover{ cursor: pointer; border: 1px solid @red; } >span{ margin-left: 20px; color: @red; } } } </style>- 1
- 2
- 3
- 4
- 5
- 6
- 7
- 8
- 9
- 10
- 11
- 12
- 13
- 14
- 15
- 16
- 17
- 18
- 19
- 20
- 21
- 22
- 23
- 24
- 25
- 26
- 27
- 28
- 29
- 30
- 31
- 32
- 33
- 34
- 35
- 36
- 37
- 38
- 39
- 40
- 41
- 42
- 43
- 44
- 45
- 46
- 47
home/header.vue
<template> <div class="main"> <div class="content"> <div class="logo fl"> <Logo></Logo> </div> <div class="search-box fl"> <div class="input-search fl"> <SearchBox></SearchBox> </div> <div class="shopcart fl"> <ShopCart></ShopCart> </div> </div> <div class="right fr"> <img src="@/assets/images/header-right.png" /> </div> </div> </div> </template>- 1
- 2
- 3
- 4
- 5
- 6
- 7
- 8
- 9
- 10
- 11
- 12
- 13
- 14
- 15
- 16
- 17
- 18
- 19
- 20

-
相关阅读:
2579. 统计染色格子数(javascript)
看我为了水作业速通C++!
msvc编译器编码错误解决方案
玉米社:SEM竞价推广投放之提升转化操作办法
【Node.JS 】http的概念及作用
lxml&&BeautifulSoup
javascript:如何循环遍历内部具有多个数组的两个对象以获得我想要的值?
centos7安装php
vscode ssh 免密连接
Nuxt 菜鸟入门学习笔记五:CSS 样式
- 原文地址:https://blog.csdn.net/weixin_47906106/article/details/134028762
