-
selenium安装和python中基本使用
selenium安装和python中基本使用
背景
selenium出现的初衷就是一个自动化测试工具,她可以打开浏览器,然后像用户一样去操作浏览器(比如点击按钮,搜索内容等)。在使用 python 爬取网络数据时,经常会看到接口返回一些加密数据,当我们爬取对应接口数据后,往往需要想办法对其结果进行解密才能拿到最终想要的数据内容。
例如下面艺恩电影票房展现的数据,当选择年度时候调用的接口返回的数据是一串加密数据,无法从中一眼看出有效数据,但是页面中却显示了最终的数据:
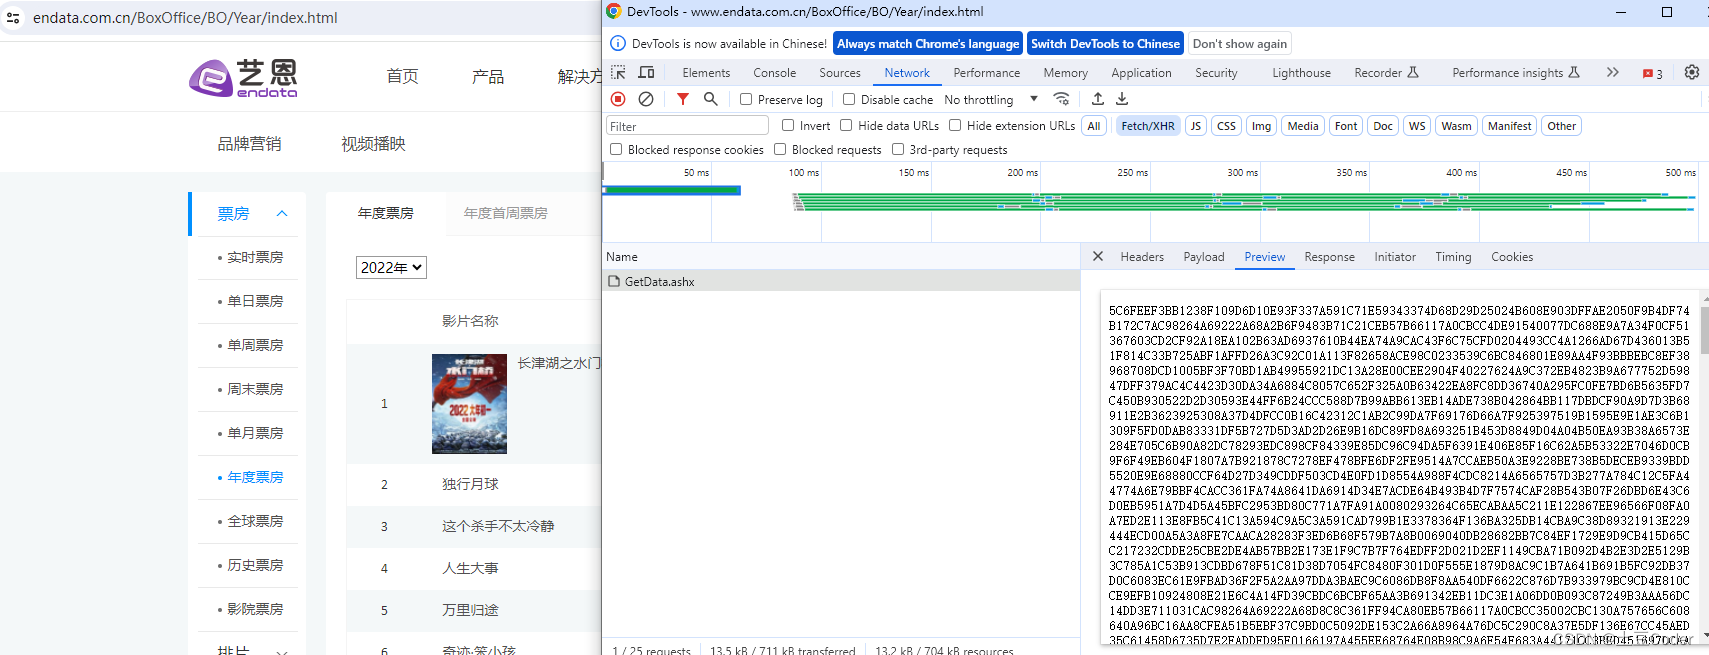
当程序员使用selenium打开一个浏览器窗口时,程序员可以使用代码的形式去获取这个浏览器中看到的内容来直接提取网页中的各种信息,因为此时不管程序中对接口返回的数据如何加密,最终显示在浏览器中的数据都是用户能看得懂的解密后的内容,程序员想要爬取有效信息直接爬取这些内容即可。
下载和安装浏览器驱动
这里我们选择的是 Chrome 浏览器,首先查看你本地浏览器的版本
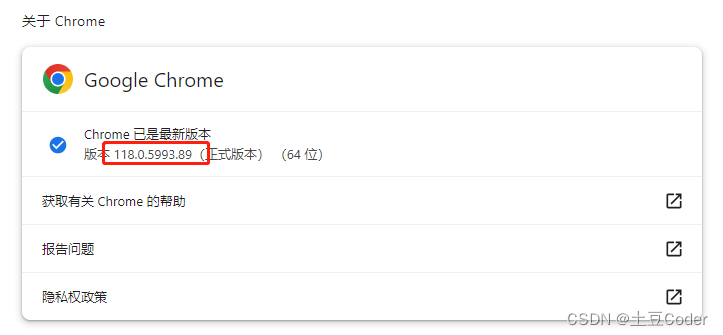
115.xx版本之前驱动下载
115版本之前的 Chromedriver 通过 Chromedriver 淘宝镜像来找到对应版本的对应操作系统的压缩包来下载
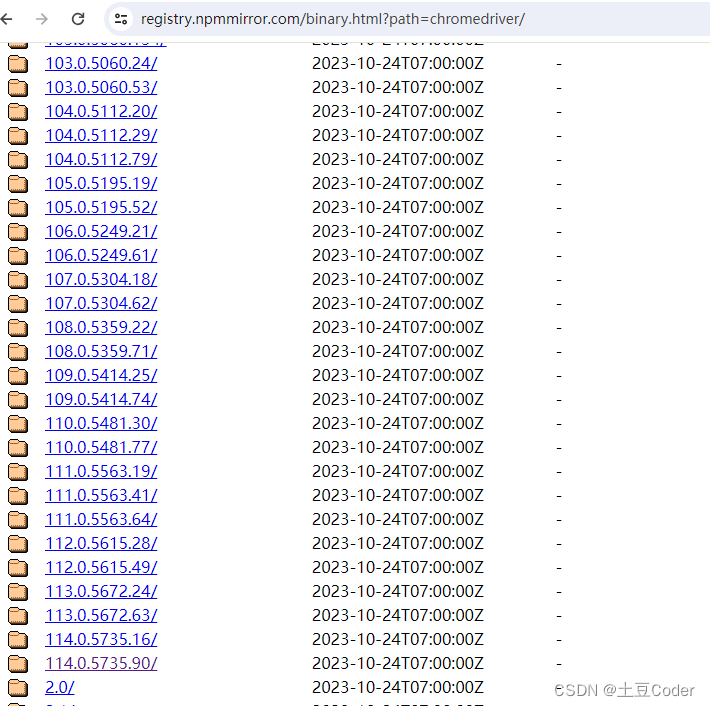
例如这里选择的版本是
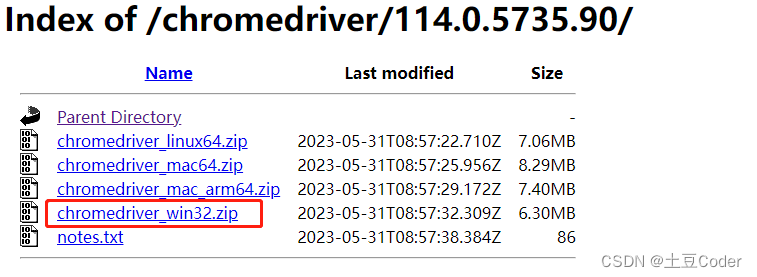
114.0.5753.90注意:Windows不管是32位还是64位都是这个 chromedriver_win32.zip 这个包
115.xx及之后的高版本驱动
115.xx及之后版本的Chromedriver版本及对应操作系统下载地址如下:
版本号 驱动地址 115.0.5790.170 linux64 mac-arm64 mac-x64 win32 win64 116.0.5845.96 linux64 mac-arm64 mac-x64 win32 win64 117.0.5938.92 linux64 mac-arm64 mac-x64 win32 win64 118.0.5993.18 linux64 mac-arm64 mac-x64 win32 win64 119.0.6026.0 linux64 mac-arm64 mac-x64 win32 win64 注意:因为这里没有我需要的
118.0.5993.89版本,所以就选择一个最相近的版本118.0.5993.18配置浏览器驱动
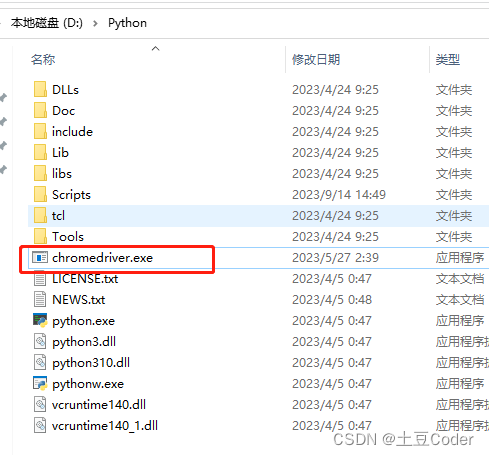
配置过程很简单,只需要将驱动器下载后的内容解压,将其中的
chromedriver.exe文件放在 python 解析器所在的文件夹中即可。如何查看你的python解析器的位置呢?使用vscode执行一个.py文件:
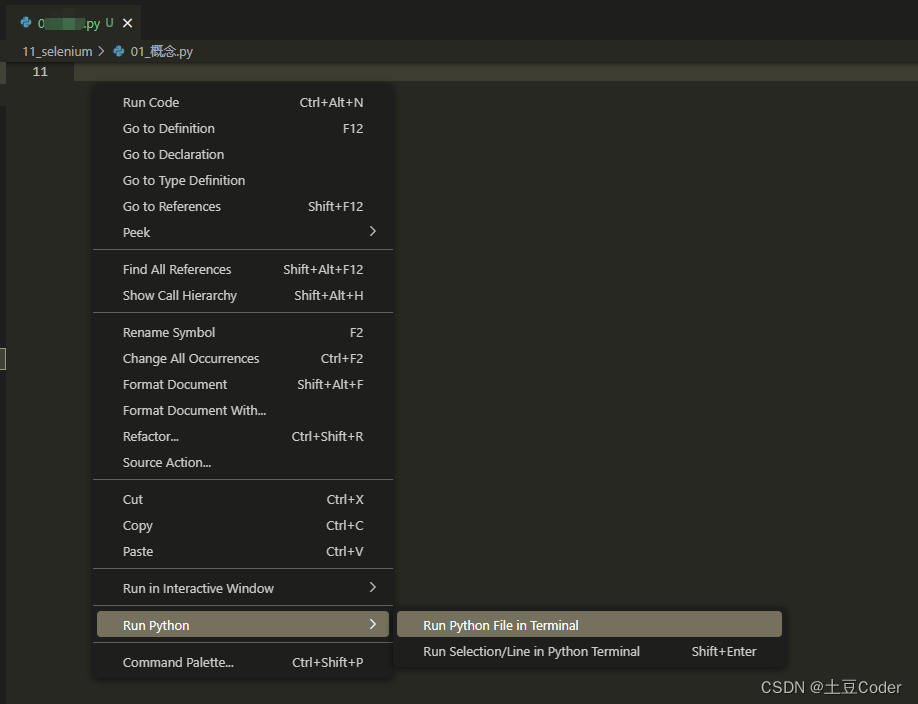
执行时编辑器就会提示你,解析你的
.py文件的 python 解析器的位置所在
安装selenium
在 vscode 中打开一个终端直接输入命令
pip install selenium- 1
使用selenium
创建一个
.py文件from selenium.webdriver import Chrome web = Chrome() web.get('http://www.baidu.com') input() # 防止页面自动关闭- 1
- 2
- 3
- 4
- 5
注意:我本地浏览器版本是
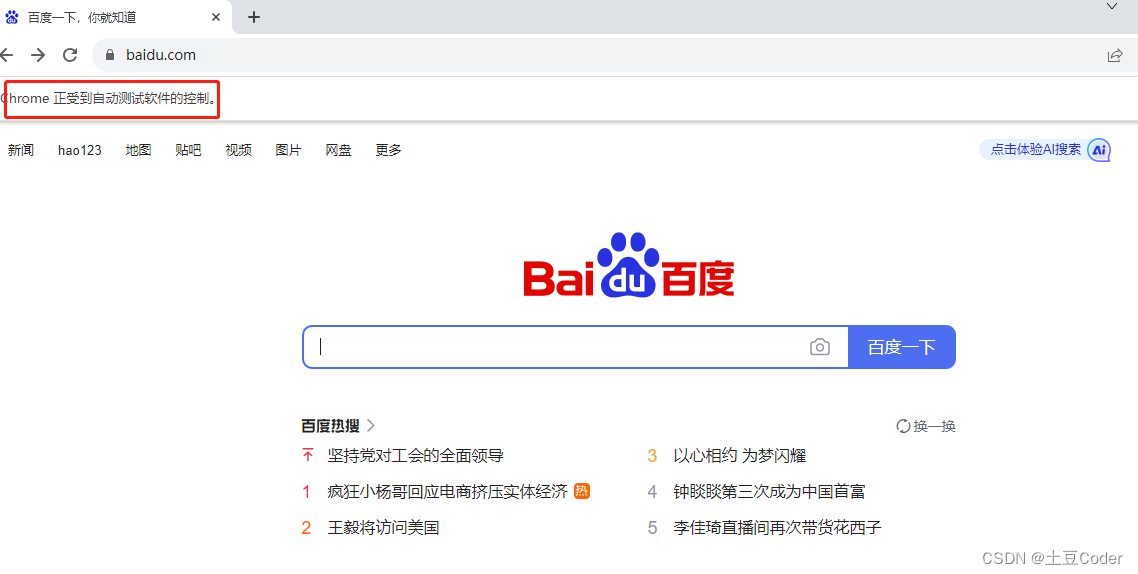
118.0.5993.89,驱动版本是118.0.5993.18,版本没有完全对应,可能会导致打开的页面出现闪退,所以在程序里加上一个input()防止闪退(盲猜是这个原因,如果你有更好的解决方式,欢迎留言 Thanks♪(・ω・)ノ)。web = Chrome()创建浏览器对象web.get(url)打开 url 网址
执行效果:
点击按钮
点击
www.baidu.com首页中的 “换一换” 按钮from selenium.webdriver import Chrome web = Chrome() web.get('http://www.baidu.com') el = web.find_element('class name', 'hot-refresh-text') el.click() input()- 1
- 2
- 3
- 4
- 5
- 6
- 7
- 8
搜索内容
搜索“周杰伦”获取搜索结果
from selenium.webdriver import Chrome from selenium.webdriver.common.keys import Keys web = Chrome() web.get('http://www.baidu.com') el = web.find_element('id', 'kw').send_keys('周杰伦', Keys.ENTER)- 1
- 2
- 3
- 4
- 5
- 6
执行效果:

打开和关闭子窗口
打开子窗口
点击某个链接会跳转到新窗口
from selenium.webdriver import Chrome from selenium.webdriver.common.keys import Keys import time web = Chrome() web.get('http://lagou.com') # 定位到全国 web.find_element('xpath', '//*[@id="changeCityBox"]/p[1]/a').click() time.sleep(1) # 查找前端工作 web.find_element('xpath', '//*[@id="search_input"]').send_keys('前端开发', Keys.ENTER) time.sleep(1) # 点击第一条结果,会产生一个新窗口 web.find_element('xpath', '//*[@id="openWinPostion"]').click() # selenium视角进入新窗口(当前窗口的最后一个窗口, 其中web.window_handles就是当前浏览器的tabs选项卡) web.switch_to.window(web.window_handles[-1]) # 获取职位描述 job_details = web.find_element('xpath', '//*[@id="job_detail"]/dd[2]/div').text print(job_details) input()- 1
- 2
- 3
- 4
- 5
- 6
- 7
- 8
- 9
- 10
- 11
- 12
- 13
- 14
- 15
- 16
- 17
- 18
- 19
- 20
- 21
- 22
- 23
- 24
- 25
- 26
web.switch_to.window切换视角到指定选项卡web.window_handles当前浏览器所有选项卡
执行效果:

关闭子窗口
web.close() web.switch_to.window(web.window_handles[0])- 1
- 2
关掉子窗口后,此时的窗口视角还是这个子窗口,所以关闭这个子窗口后需要将视角重新指向想要指定的窗口。
进入和退出iframe
获取iframe内容
from selenium.webdriver import Chrome from selenium.webdriver.common.keys import Keys web = Chrome() web.get('https://www.fhmeiju.cc/vodplay/yueyudiyiji-8-1/') iframe = web.find_element('xpath', '//*[@id="buffer"]') web.switch_to.frame(iframe) tx = web.find_element('xpath', '/html/body/table/tbody/tr/td/font/strong').text print(tx) input()- 1
- 2
- 3
- 4
- 5
- 6
- 7
- 8
- 9
- 10
- 11
处理页面中嵌入的
iframe需要先拿到iframe, 然后切换视角到这个iframe,然后再通过这个视角取iframe里的内容web.switch_to.frame(xxx)切换视角到xxxiframe
离开iframe
web.switch_to.default_content()- 1
web.switch_to.default_content()切换视角回嵌入iframe的主页面
切换下拉选择器选项
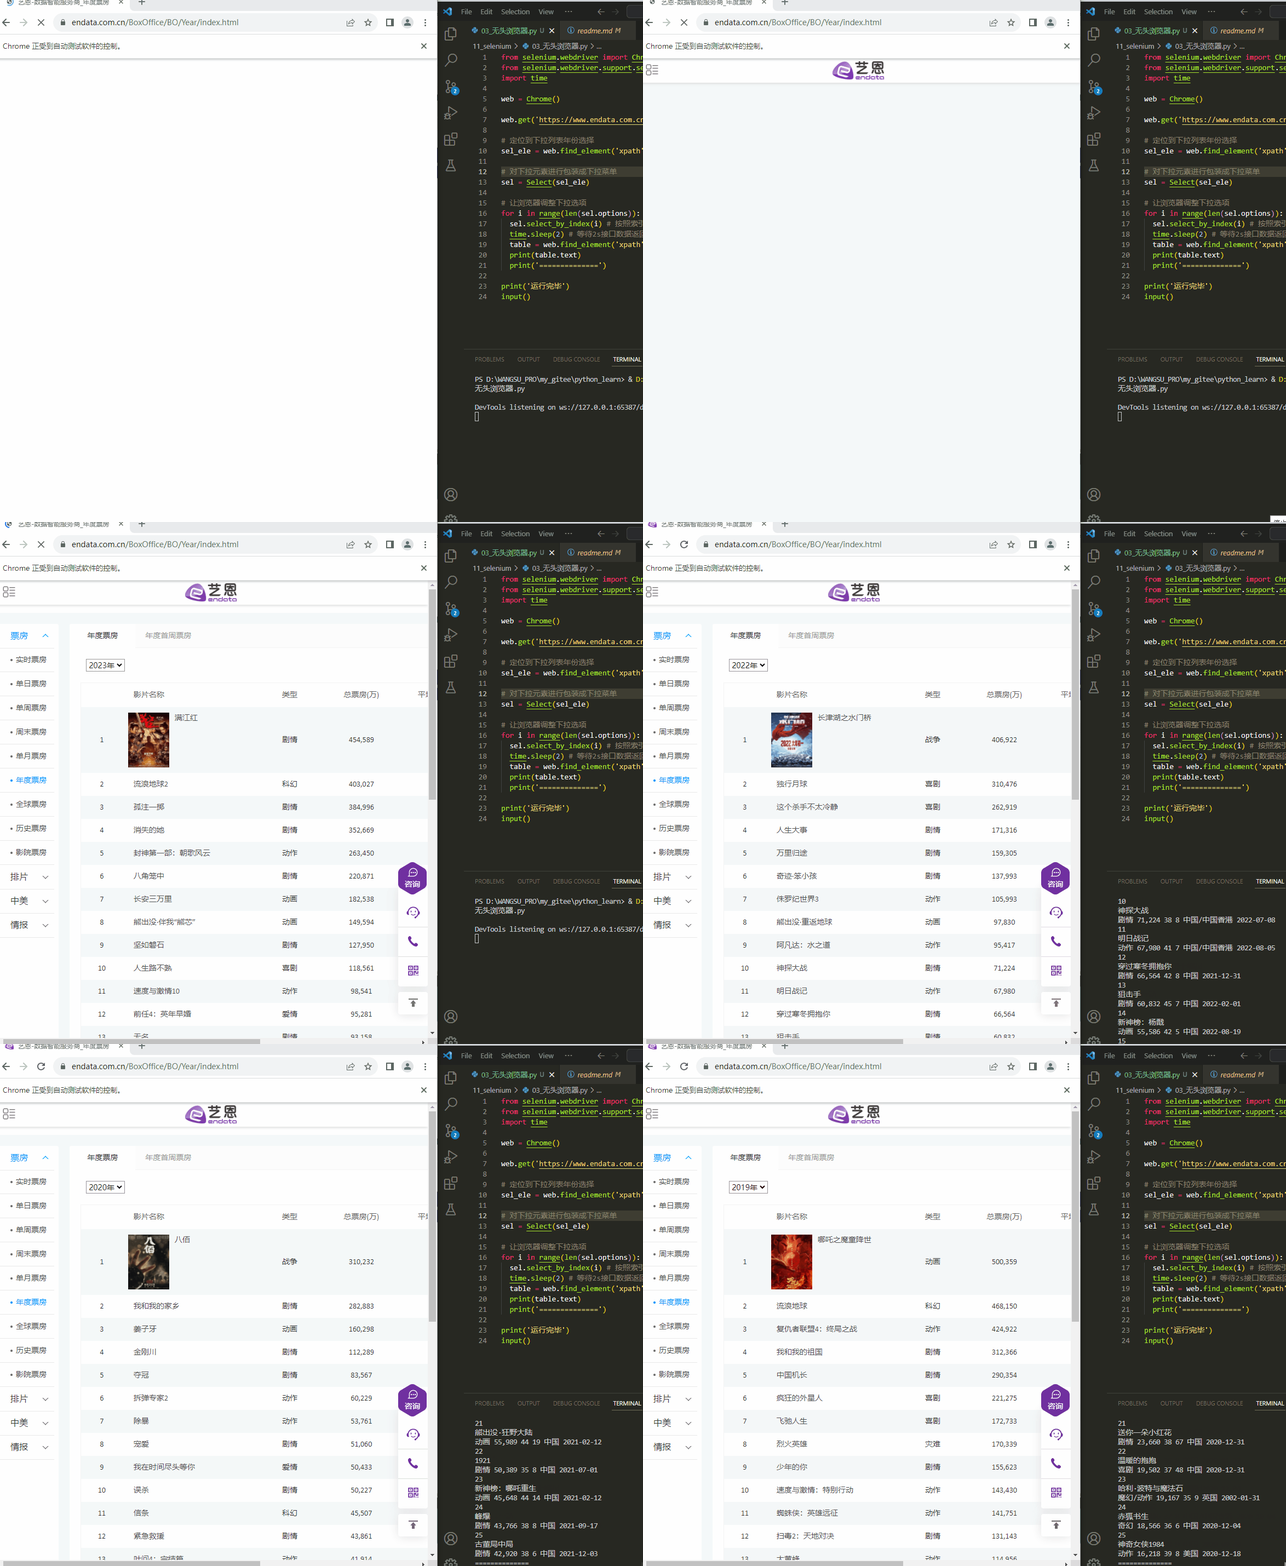
from selenium.webdriver import Chrome from selenium.webdriver.support.select import Select import time web = Chrome() web.get('https://www.endata.com.cn/BoxOffice/BO/Year/index.html') # 定位到下拉列表年份选择 sel_ele = web.find_element('xpath', '//*[@id="OptionDate"]') # 对下拉元素进行包装成下拉菜单 sel = Select(sel_ele) # 让浏览器调整下拉选项 for i in range(len(sel.options)): sel.select_by_index(i) # 按照索引切换 time.sleep(2) # 等待2s接口数据返回 table = web.find_element('xpath', '//*[@id="TableList"]/table/tbody') print(table.text) print('==============') print('运行完毕') input()- 1
- 2
- 3
- 4
- 5
- 6
- 7
- 8
- 9
- 10
- 11
- 12
- 13
- 14
- 15
- 16
- 17
- 18
- 19
- 20
- 21
- 22
- 23
- 24
Select(xxx)包装浏览器中的下拉选择器sel.select_by_index(xxx)按照下拉选择器索引切换sel.select_by_value(xxx)按照下拉选择器值切换sel.select_by_visible_text(xxx)按照下拉选择器显示值切换
执行结果:
设置无头浏览器
如果只想要获取浏览器页面数据,但是并不希望真正的去自动打开运行浏览器,可以对创建的浏览器对象进行配置:
from selenium.webdriver import Chrome from selenium.webdriver.chrome.options import Options opt = Options() opt.add_argument('--headless') opt.add_argument('--disable-gpu') web = Chrome(options=opt)- 1
- 2
- 3
- 4
- 5
- 6
- 7
- 8
更多
-
web.page_source获取 Element 源代码内容浏览器显示内容如果是从后端渲染返回的可能网页源代码和 Element 源代码是一样的,但是如果数据是通过 Ajax 获取后再经过 js 进行处理再展示的,源代码中就找不到这些返回的数据,但是 Element 中是可以显示找到的,如果我们直接对 Element 源代码进行数据爬虫,是不是就会更方便
-
el.screenshot_as_png将页面中 el 元素所在的位置截屏保存为.png图片字节内容 -
ActionChains(web).move_to_element_with_offset(ele, x, y).click().perform移动鼠标到 ele 位置并且偏移量分别为 x 和 y,然后点击该点前面是定义这个动作链,直到
perform()才开始执行这个动作链 -
options = Options() options.add_argument('--disable-blink-features=AutomationControlled') web = Chrome(options=options)- 1
- 2
- 3
设置 selenium 创建出来的浏览器中
window.navigator.webdriver的值为false来躲过一些网站对驱动的监测 -
ActionChains(web).drag_and_drop_by_offset(ele, x, y).perform()拖住 element 元素拽动距离为:横向x,纵向y
find_element
传参 查找内容 find_element('class name', 'kw')查找选择器类名为 kw的元素find_element('id', 'kw')查找id名为 kw的元素find_element('xpath', 'xxx')通过 xpath 方式查找 -
相关阅读:
TreeMap和HashMap的区别
STM32个人笔记-嵌入式C语言优化
Qt之自定义插件(单控件,Qt设计师中使用)
二、JavaScript基本语法:var、let、const、数据类型、运算符、类型转换
整人代码-C++
Tax4Fun软件安装包
Matlab之显示绘制曲线轨迹命令drawnow
HTML旅游景点网页作业制作——旅游中国11个页面(HTML+CSS+JavaScript)
JavaWeb【Tomcat】
第一章 - 第11节- 因特网概述 - 课件
- 原文地址:https://blog.csdn.net/weixin_43443341/article/details/134014343
