-
SpringCloud-Nacos
一、介绍
(1)作为服务注册中心和配置中心
(2)等价于:Eureka+Config+Bus
(3)nacos集成了ribbon,支持负载均衡二、安装
(1)官网
(2)
(3)如果是单节点部署,修改startup.cmd后启动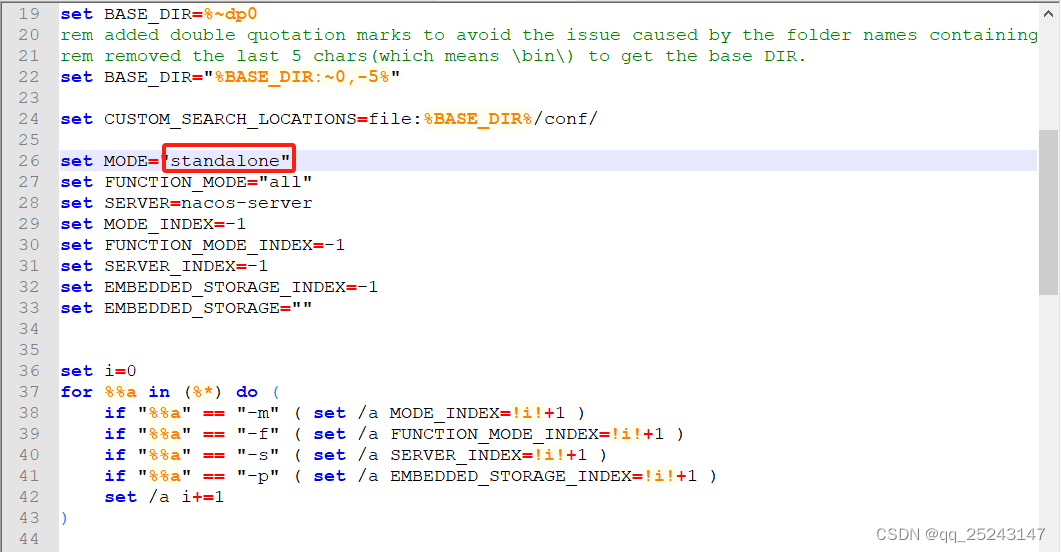
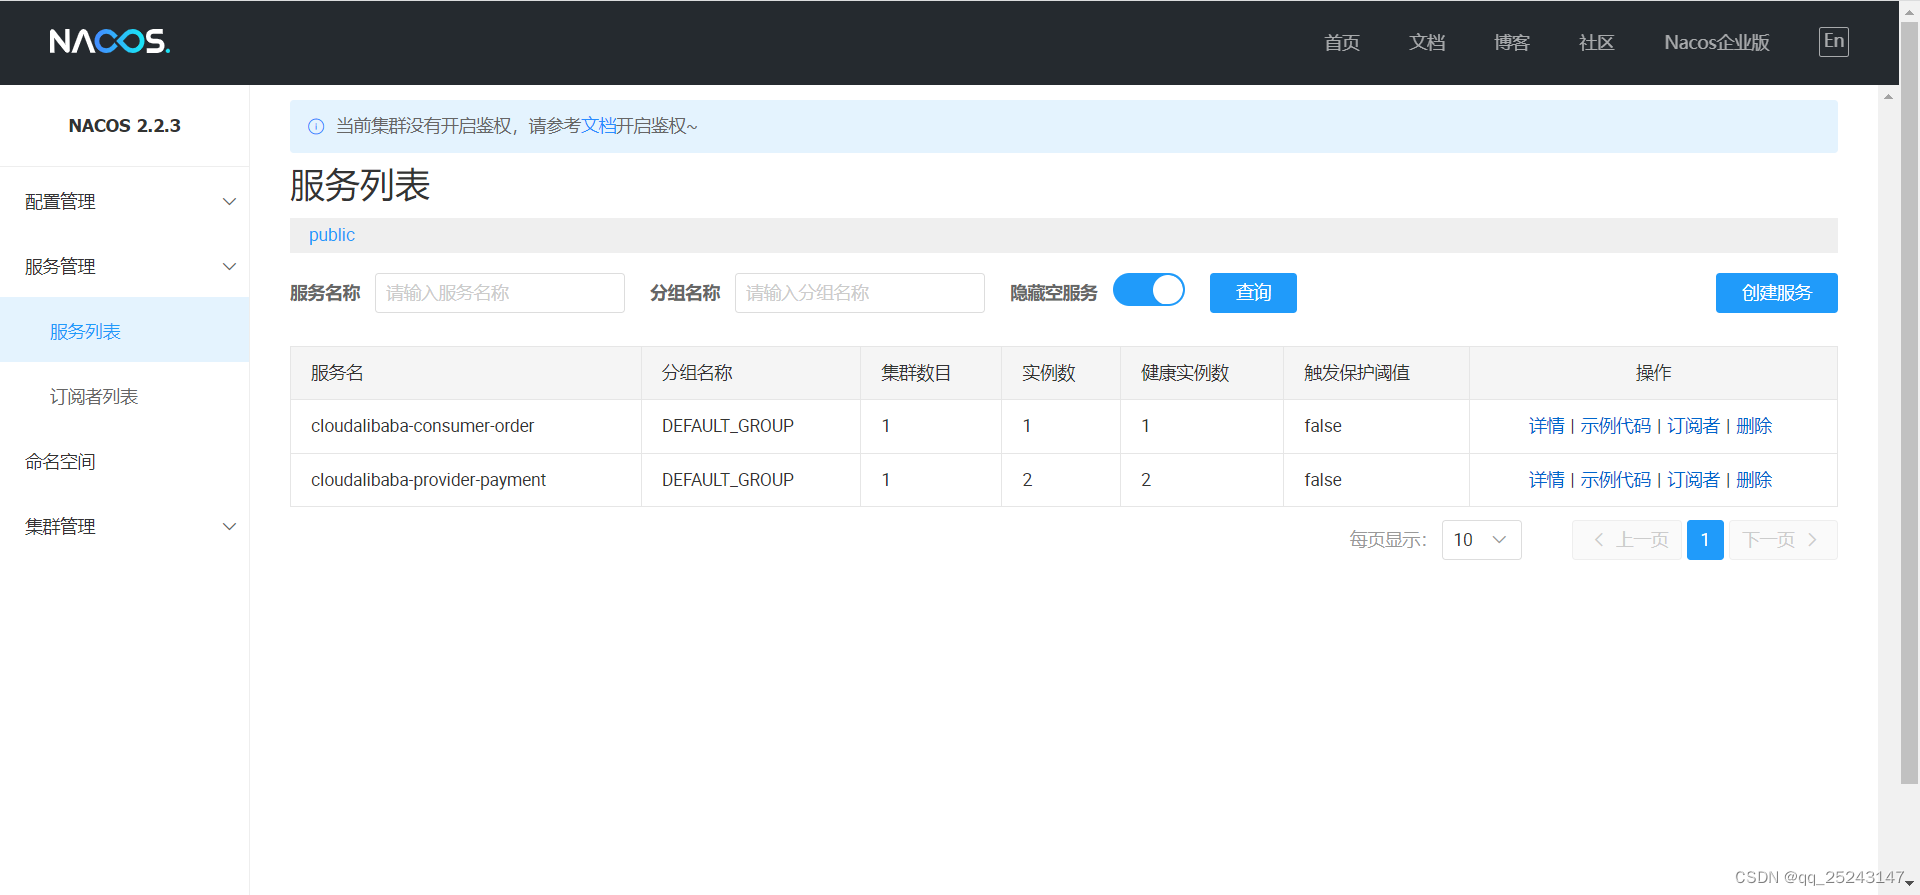
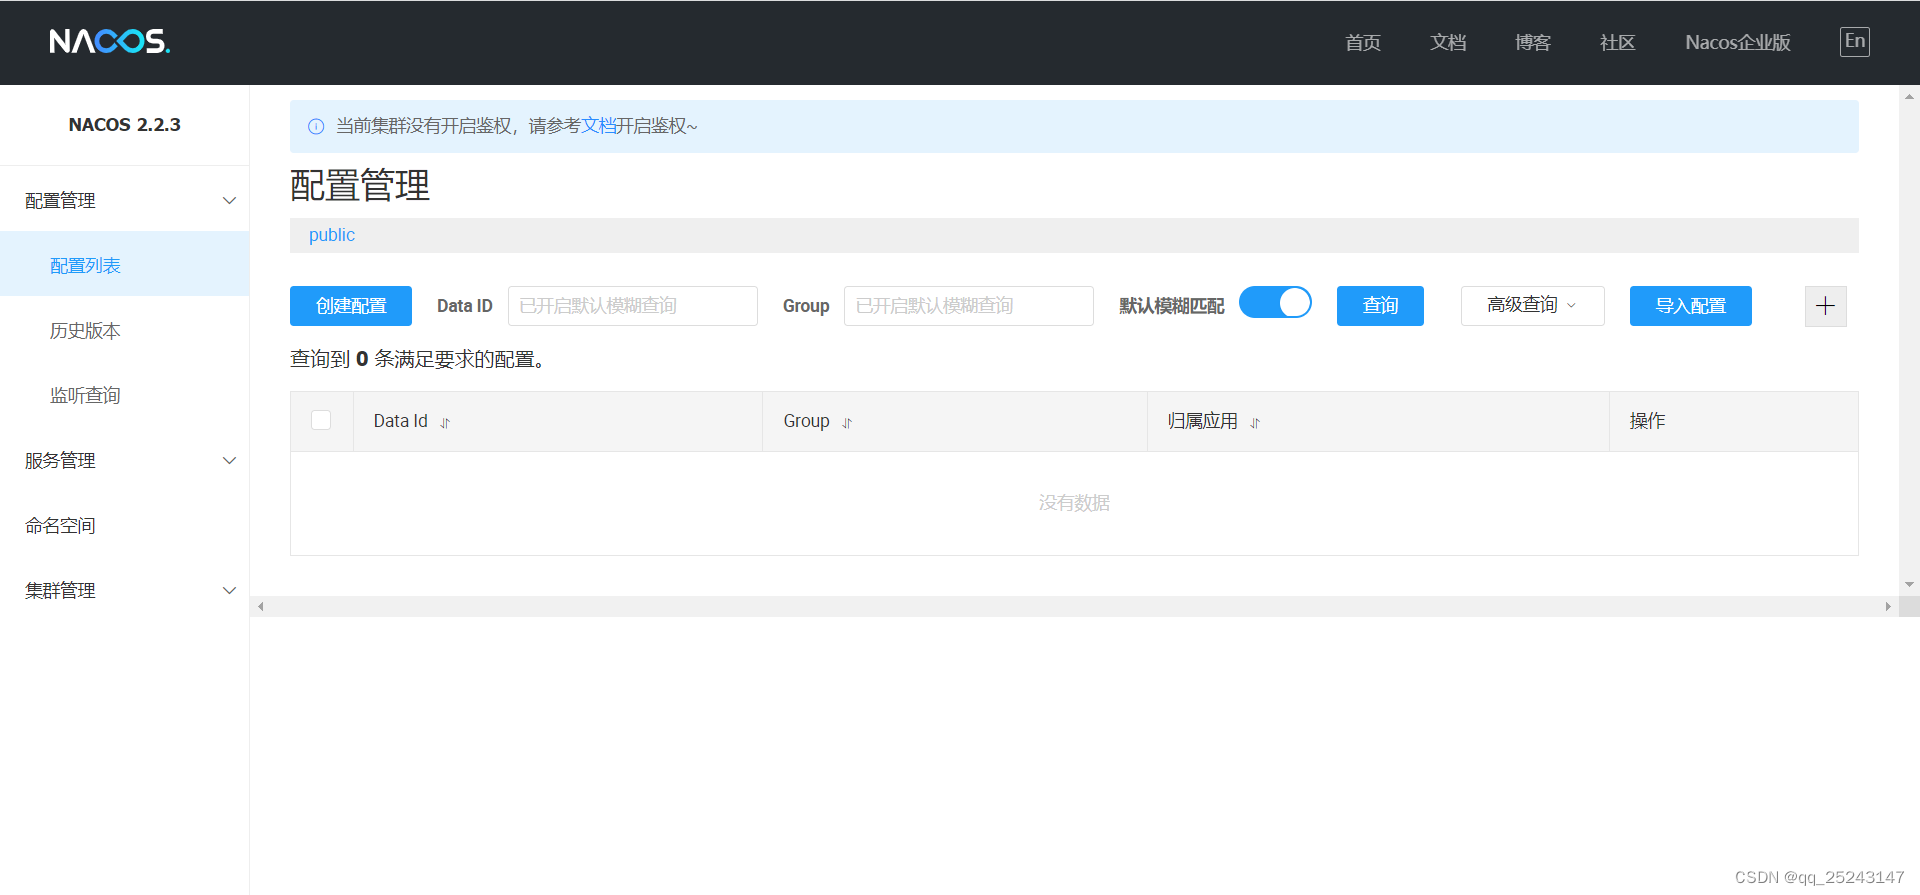
(4)运行http://localhost:8848/nacos/
(5)
三、编写服务提供者
(1)编写pom.xml
<?xml version="1.0" encoding="UTF-8"?> <project xmlns="http://maven.apache.org/POM/4.0.0" xmlns:xsi="http://www.w3.org/2001/XMLSchema-instance" xsi:schemaLocation="http://maven.apache.org/POM/4.0.0 http://maven.apache.org/xsd/maven-4.0.0.xsd"> <parent> <artifactId>demo20220821</artifactId> <groupId>com.wsh.springcloud</groupId> <version>1.0-SNAPSHOT</version> </parent> <modelVersion>4.0.0</modelVersion> <artifactId>cloudalibaba-provider-payment9001</artifactId> <dependencies> <dependency> <groupId>com.alibaba.cloud</groupId> <artifactId>spring-cloud-alibaba-nacos-discovery</artifactId> </dependency> <dependency> <groupId>com.wsh.springcloud</groupId> <artifactId>cloud-api-common</artifactId> <version>1.0-SNAPSHOT</version> </dependency> <dependency> <groupId>org.springframework.boot</groupId> <artifactId>spring-boot-starter-web</artifactId> </dependency> <dependency> <groupId>org.springframework.boot</groupId> <artifactId>spring-boot-starter-actuator</artifactId> </dependency> <dependency> <groupId>org.projectlombok</groupId> <artifactId>lombok</artifactId> </dependency> <dependency> <groupId>org.springframework.boot</groupId> <artifactId>spring-boot-starter-test</artifactId> <scope>test</scope> </dependency> </dependencies> </project>- 1
- 2
- 3
- 4
- 5
- 6
- 7
- 8
- 9
- 10
- 11
- 12
- 13
- 14
- 15
- 16
- 17
- 18
- 19
- 20
- 21
- 22
- 23
- 24
- 25
- 26
- 27
- 28
- 29
- 30
- 31
- 32
- 33
- 34
- 35
- 36
- 37
- 38
- 39
- 40
- 41
- 42
(2)编写application.yml
server: port: 9001 spring: application: name: cloudalibaba-provider-payment cloud: nacos: discovery: server-addr: localhost:8848 management: endpoints: web: exposure: include: "*"- 1
- 2
- 3
- 4
- 5
- 6
- 7
- 8
- 9
- 10
- 11
- 12
- 13
- 14
- 15
- 16
(3)编写启动类
package com.wsh.springcloud; import org.springframework.boot.SpringApplication; import org.springframework.boot.autoconfigure.SpringBootApplication; import org.springframework.cloud.client.discovery.EnableDiscoveryClient; /** * @ClassName ConfigMain3344 * @Description: TODO * @Author wshaha * @Date 2023/10/15 * @Version V1.0 **/ @SpringBootApplication @EnableDiscoveryClient public class ProviderPayment9001 { public static void main(String[] args) { SpringApplication.run(ProviderPayment9001.class, args); } }- 1
- 2
- 3
- 4
- 5
- 6
- 7
- 8
- 9
- 10
- 11
- 12
- 13
- 14
- 15
- 16
- 17
- 18
- 19
- 20
- 21
(4)编写Controller
package com.wsh.springcloud.controller; import org.springframework.beans.factory.annotation.Value; import org.springframework.web.bind.annotation.GetMapping; import org.springframework.web.bind.annotation.RestController; /** * @ClassName TestController * @Description: TODO * @Author wshaha * @Date 2023/10/18 * @Version V1.0 **/ @RestController public class TestController { @Value("${server.port}") private String port; @GetMapping("/payment/test") public String test(){ return "test: " + port; } }- 1
- 2
- 3
- 4
- 5
- 6
- 7
- 8
- 9
- 10
- 11
- 12
- 13
- 14
- 15
- 16
- 17
- 18
- 19
- 20
- 21
- 22
- 23
- 24
- 25
(5)启动
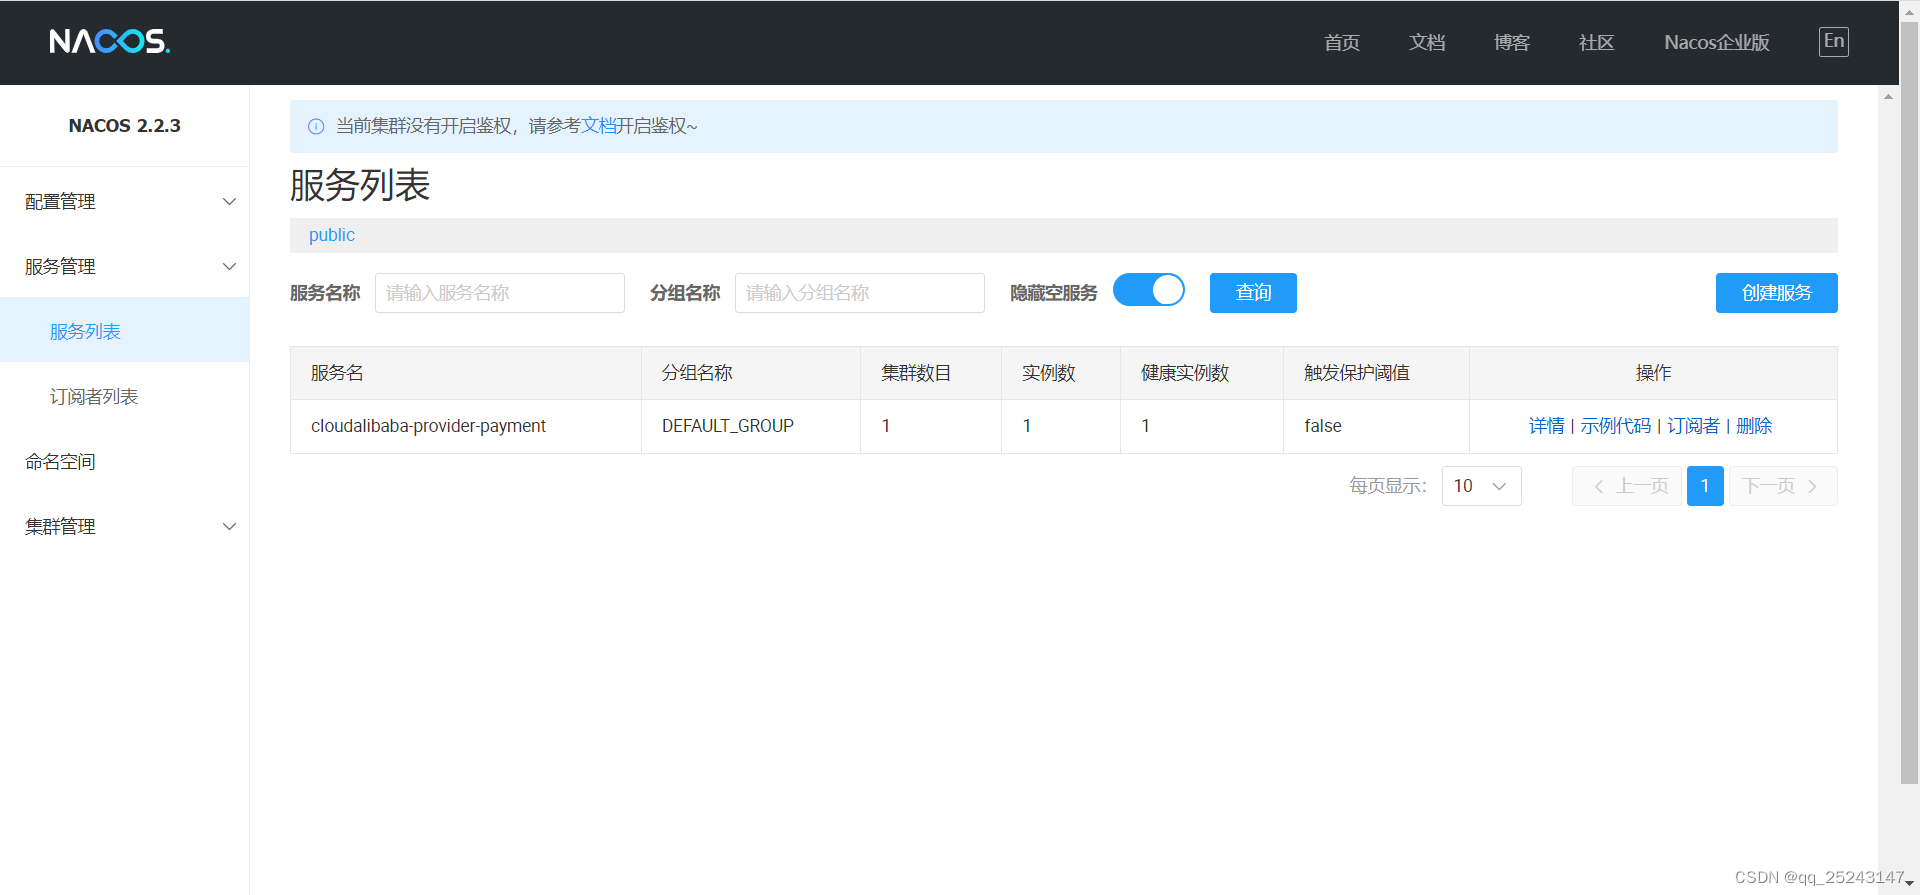
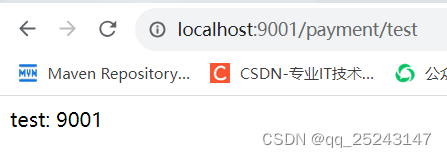
(6)按照此配置创建9002,运行
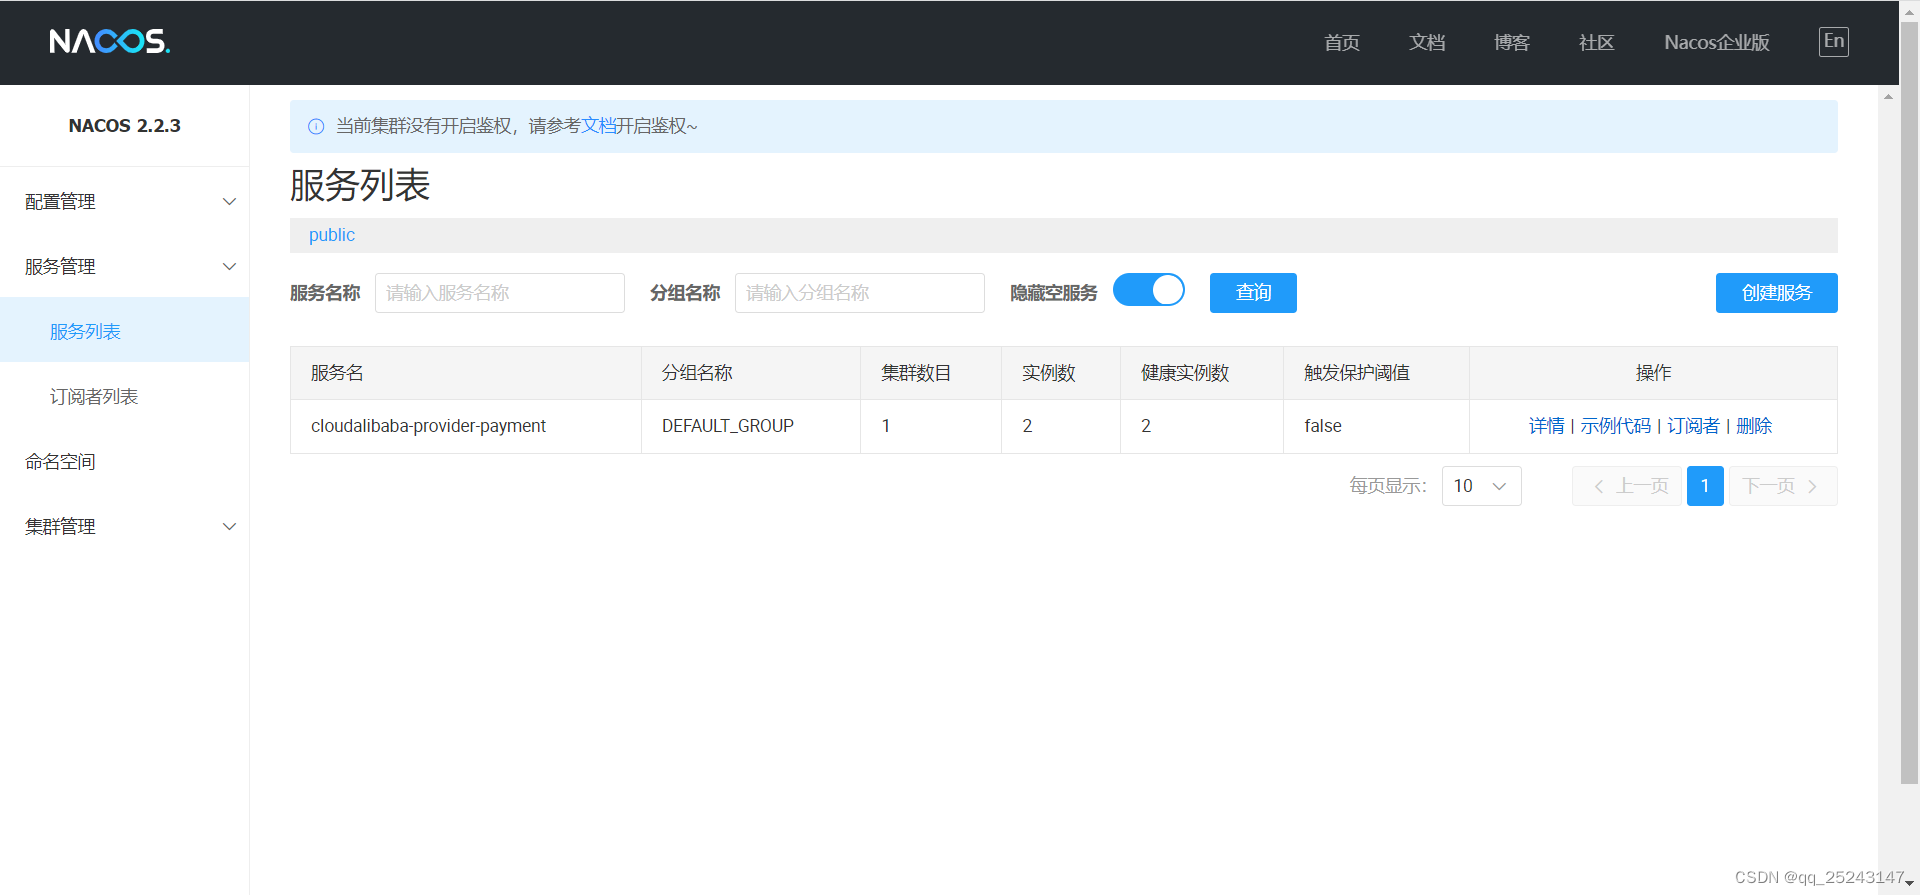

四、编写服务提供者
(1)编写pom.xml
<?xml version="1.0" encoding="UTF-8"?> <project xmlns="http://maven.apache.org/POM/4.0.0" xmlns:xsi="http://www.w3.org/2001/XMLSchema-instance" xsi:schemaLocation="http://maven.apache.org/POM/4.0.0 http://maven.apache.org/xsd/maven-4.0.0.xsd"> <parent> <artifactId>demo20220821</artifactId> <groupId>com.wsh.springcloud</groupId> <version>1.0-SNAPSHOT</version> </parent> <modelVersion>4.0.0</modelVersion> <artifactId>cloudalibaba-consumer-order83</artifactId> <dependencies> <dependency> <groupId>com.alibaba.cloud</groupId> <artifactId>spring-cloud-alibaba-nacos-discovery</artifactId> </dependency> <dependency> <groupId>com.wsh.springcloud</groupId> <artifactId>cloud-api-common</artifactId> <version>1.0-SNAPSHOT</version> </dependency> <dependency> <groupId>org.springframework.boot</groupId> <artifactId>spring-boot-starter-web</artifactId> </dependency> <dependency> <groupId>org.springframework.boot</groupId> <artifactId>spring-boot-starter-actuator</artifactId> </dependency> <dependency> <groupId>org.projectlombok</groupId> <artifactId>lombok</artifactId> </dependency> <dependency> <groupId>org.springframework.boot</groupId> <artifactId>spring-boot-starter-test</artifactId> <scope>test</scope> </dependency> </dependencies> </project>- 1
- 2
- 3
- 4
- 5
- 6
- 7
- 8
- 9
- 10
- 11
- 12
- 13
- 14
- 15
- 16
- 17
- 18
- 19
- 20
- 21
- 22
- 23
- 24
- 25
- 26
- 27
- 28
- 29
- 30
- 31
- 32
- 33
- 34
- 35
- 36
- 37
- 38
- 39
- 40
- 41
- 42
(2)编写application.yml
server: port: 83 spring: application: name: cloudalibaba-consumer-order cloud: nacos: discovery: server-addr: localhost:8848 management: endpoints: web: exposure: include: "*" server-url: http://cloudalibaba-provider-payment- 1
- 2
- 3
- 4
- 5
- 6
- 7
- 8
- 9
- 10
- 11
- 12
- 13
- 14
- 15
- 16
- 17
- 18
(3)编写启动类
package com.wsh.springCloud; import org.springframework.boot.SpringApplication; import org.springframework.boot.autoconfigure.SpringBootApplication; import org.springframework.cloud.client.discovery.EnableDiscoveryClient; /** * @ClassName ConsumerOrder83 * @Description: TODO * @Author wshaha * @Date 2023/10/18 * @Version V1.0 **/ @EnableDiscoveryClient @SpringBootApplication public class ConsumerOrder83 { public static void main(String[] args) { SpringApplication.run(ConsumerOrder83.class, args); } }- 1
- 2
- 3
- 4
- 5
- 6
- 7
- 8
- 9
- 10
- 11
- 12
- 13
- 14
- 15
- 16
- 17
- 18
- 19
- 20
- 21
- 22
(4)编写配置类
package com.wsh.springCloud.config; import org.springframework.cloud.client.loadbalancer.LoadBalanced; import org.springframework.context.annotation.Bean; import org.springframework.context.annotation.Configuration; import org.springframework.web.client.RestTemplate; /** * @ClassName MyConfig * @Description: TODO * @Author wshaha * @Date 2023/10/18 * @Version V1.0 **/ @Configuration public class MyConfig { @Bean @LoadBalanced public RestTemplate restTemplate(){ return new RestTemplate(); } }- 1
- 2
- 3
- 4
- 5
- 6
- 7
- 8
- 9
- 10
- 11
- 12
- 13
- 14
- 15
- 16
- 17
- 18
- 19
- 20
- 21
- 22
- 23
- 24
(5)编写Controller
package com.wsh.springCloud.controller; import org.springframework.beans.factory.annotation.Autowired; import org.springframework.beans.factory.annotation.Value; import org.springframework.web.bind.annotation.GetMapping; import org.springframework.web.bind.annotation.RestController; import org.springframework.web.client.RestTemplate; /** * @ClassName TestController * @Description: TODO * @Author wshaha * @Date 2023/10/18 * @Version V1.0 **/ @RestController public class TestController { @Value("${server-url}") private String url; @Autowired private RestTemplate restTemplate; @GetMapping("/consumer/test") public String test(){ String rtn = restTemplate.getForObject(url + "/payment/test", String.class); return rtn; } }- 1
- 2
- 3
- 4
- 5
- 6
- 7
- 8
- 9
- 10
- 11
- 12
- 13
- 14
- 15
- 16
- 17
- 18
- 19
- 20
- 21
- 22
- 23
- 24
- 25
- 26
- 27
- 28
- 29
- 30
- 31
(6)运行

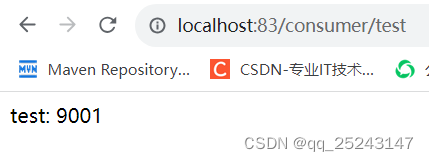
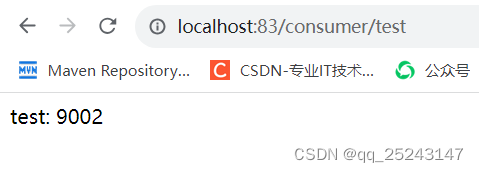
五、编写服务配置中心客户端
(1)编写pom.xml
<?xml version="1.0" encoding="UTF-8"?> <project xmlns="http://maven.apache.org/POM/4.0.0" xmlns:xsi="http://www.w3.org/2001/XMLSchema-instance" xsi:schemaLocation="http://maven.apache.org/POM/4.0.0 http://maven.apache.org/xsd/maven-4.0.0.xsd"> <parent> <artifactId>demo20220821</artifactId> <groupId>com.wsh.springcloud</groupId> <version>1.0-SNAPSHOT</version> </parent> <modelVersion>4.0.0</modelVersion> <artifactId>cloudalibaba-config-client3377</artifactId> <dependencies> <dependency> <groupId>com.alibaba.cloud</groupId> <artifactId>spring-cloud-alibaba-nacos-config</artifactId> </dependency> <dependency> <groupId>com.alibaba.cloud</groupId> <artifactId>spring-cloud-alibaba-nacos-discovery</artifactId> </dependency> <dependency> <groupId>com.wsh.springcloud</groupId> <artifactId>cloud-api-common</artifactId> <version>1.0-SNAPSHOT</version> </dependency> <dependency> <groupId>org.springframework.boot</groupId> <artifactId>spring-boot-starter-web</artifactId> </dependency> <dependency> <groupId>org.springframework.boot</groupId> <artifactId>spring-boot-starter-actuator</artifactId> </dependency> <dependency> <groupId>org.projectlombok</groupId> <artifactId>lombok</artifactId> </dependency> <dependency> <groupId>org.springframework.boot</groupId> <artifactId>spring-boot-starter-test</artifactId> <scope>test</scope> </dependency> </dependencies> </project>- 1
- 2
- 3
- 4
- 5
- 6
- 7
- 8
- 9
- 10
- 11
- 12
- 13
- 14
- 15
- 16
- 17
- 18
- 19
- 20
- 21
- 22
- 23
- 24
- 25
- 26
- 27
- 28
- 29
- 30
- 31
- 32
- 33
- 34
- 35
- 36
- 37
- 38
- 39
- 40
- 41
- 42
- 43
- 44
- 45
- 46
(2)编写bootstrap.yaml
server: port: 3377 spring: application: name: cloudalibaba-config-client cloud: nacos: discovery: server-addr: localhost:8848 config: server-addr: localhost:8848 file-extension: yaml management: endpoints: web: exposure: include: "*"- 1
- 2
- 3
- 4
- 5
- 6
- 7
- 8
- 9
- 10
- 11
- 12
- 13
- 14
- 15
- 16
- 17
- 18
- 19
(3)编写application.yaml
spring: profiles: active: dev- 1
- 2
- 3
(4)编写启动类
package com.wsh.springcloud; import org.springframework.boot.SpringApplication; import org.springframework.boot.autoconfigure.SpringBootApplication; import org.springframework.cloud.client.discovery.EnableDiscoveryClient; /** * @ClassName ConfigMain3344 * @Description: TODO * @Author wshaha * @Date 2023/10/15 * @Version V1.0 **/ @SpringBootApplication @EnableDiscoveryClient public class ConfigClient3377 { public static void main(String[] args) { SpringApplication.run(ConfigClient3377.class, args); } }- 1
- 2
- 3
- 4
- 5
- 6
- 7
- 8
- 9
- 10
- 11
- 12
- 13
- 14
- 15
- 16
- 17
- 18
- 19
- 20
- 21
(5)编写Controller
package com.wsh.springcloud.controller; import org.springframework.beans.factory.annotation.Value; import org.springframework.cloud.context.config.annotation.RefreshScope; import org.springframework.web.bind.annotation.GetMapping; import org.springframework.web.bind.annotation.RestController; /** * @ClassName TestController * @Description: TODO * @Author wshaha * @Date 2023/10/18 * @Version V1.0 **/ @RestController @RefreshScope public class TestController { @Value("${myInfo}") private String myInfo; @GetMapping("/configClient/myInfo") public String test(){ return "myInfo: " + myInfo; } }- 1
- 2
- 3
- 4
- 5
- 6
- 7
- 8
- 9
- 10
- 11
- 12
- 13
- 14
- 15
- 16
- 17
- 18
- 19
- 20
- 21
- 22
- 23
- 24
- 25
- 26
- 27
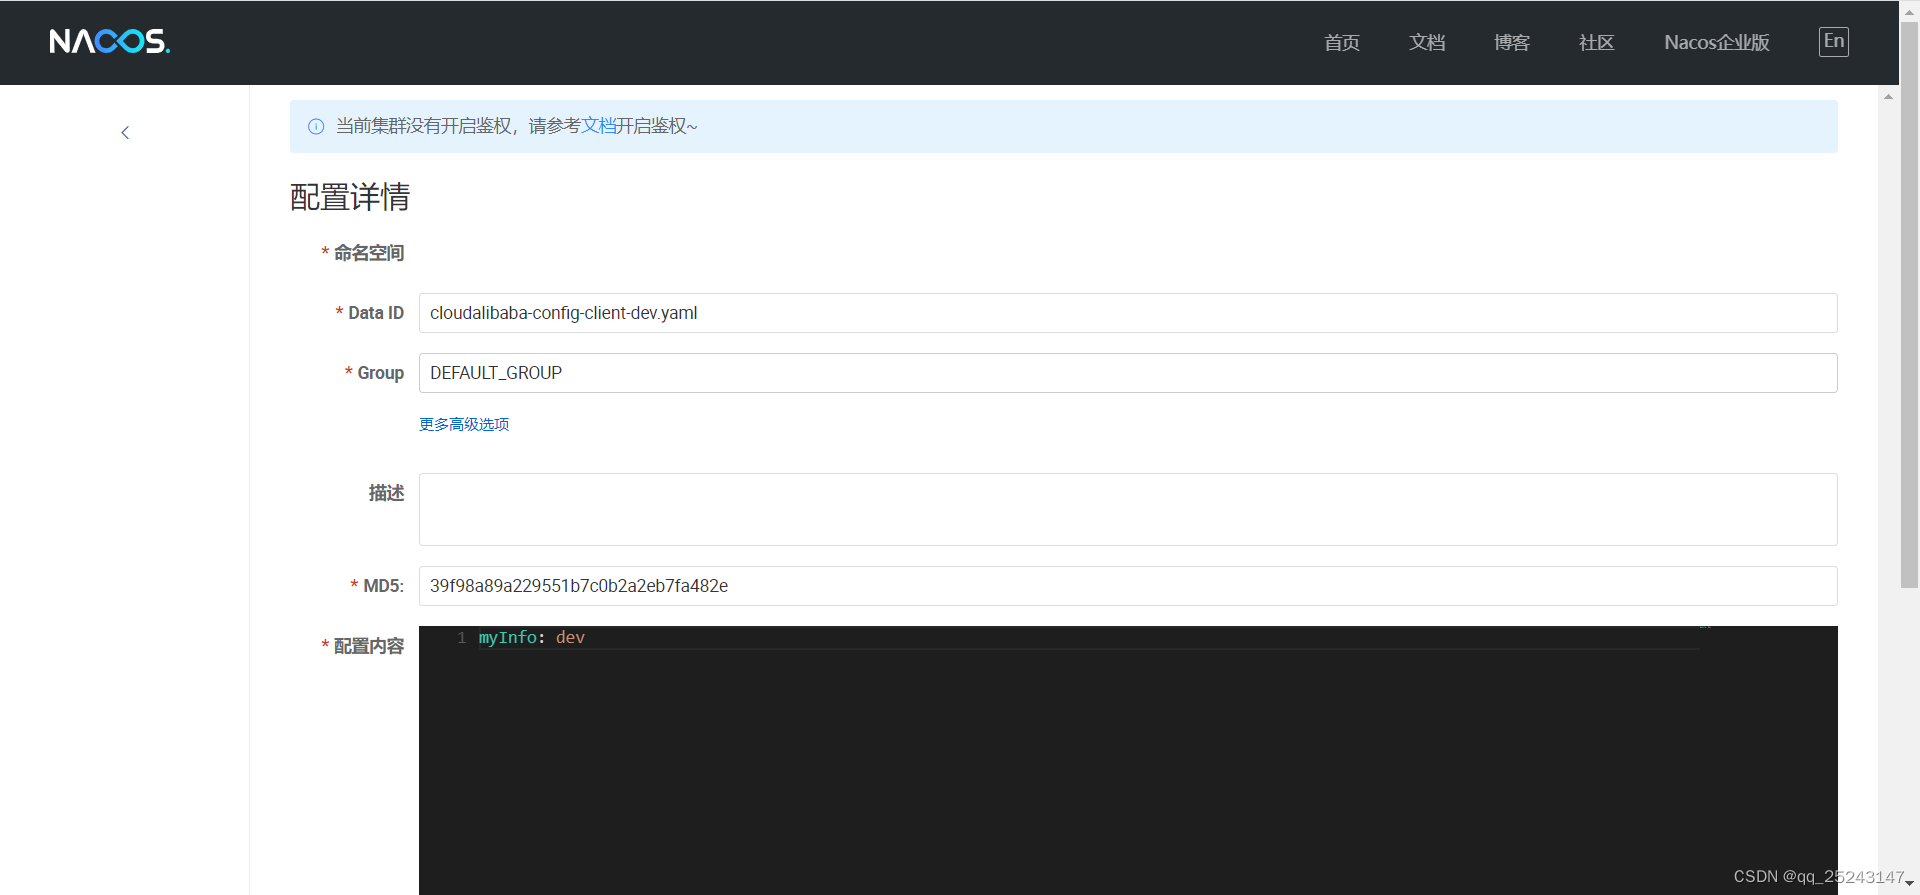
(6)nacos添加配置(DataID = spring.application.name + spring.profiles.active + spring.cloud.nacos.config.file-extension)
(7)运行

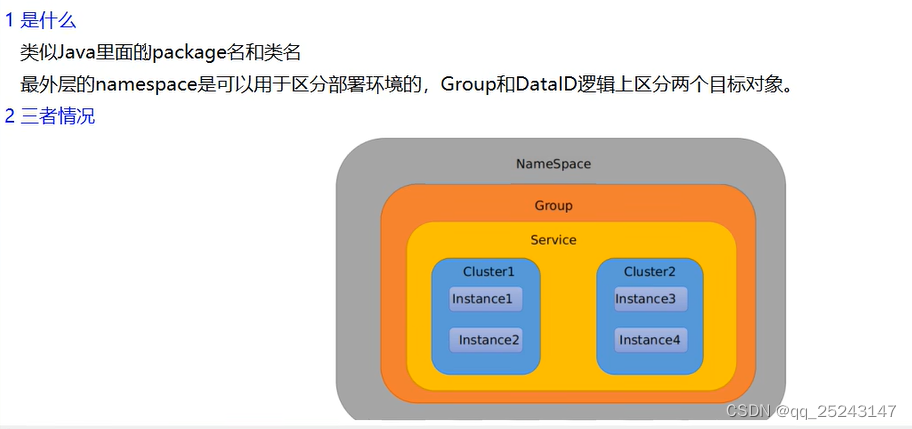
六、命名空间、组名、DataId
(1)
(2)

(3)同时测试命名空间、组名、DataId
a、修改bootstrap.yamlserver: port: 3377 spring: application: name: cloudalibaba-config-client cloud: nacos: discovery: server-addr: localhost:8848 config: server-addr: localhost:8848 file-extension: yaml namespace: e9b0b33c-533d-4c8d-9e77-6a91e9dd2f5f group: TEST management: endpoints: web: exposure: include: "*"- 1
- 2
- 3
- 4
- 5
- 6
- 7
- 8
- 9
- 10
- 11
- 12
- 13
- 14
- 15
- 16
- 17
- 18
- 19
- 20
- 21
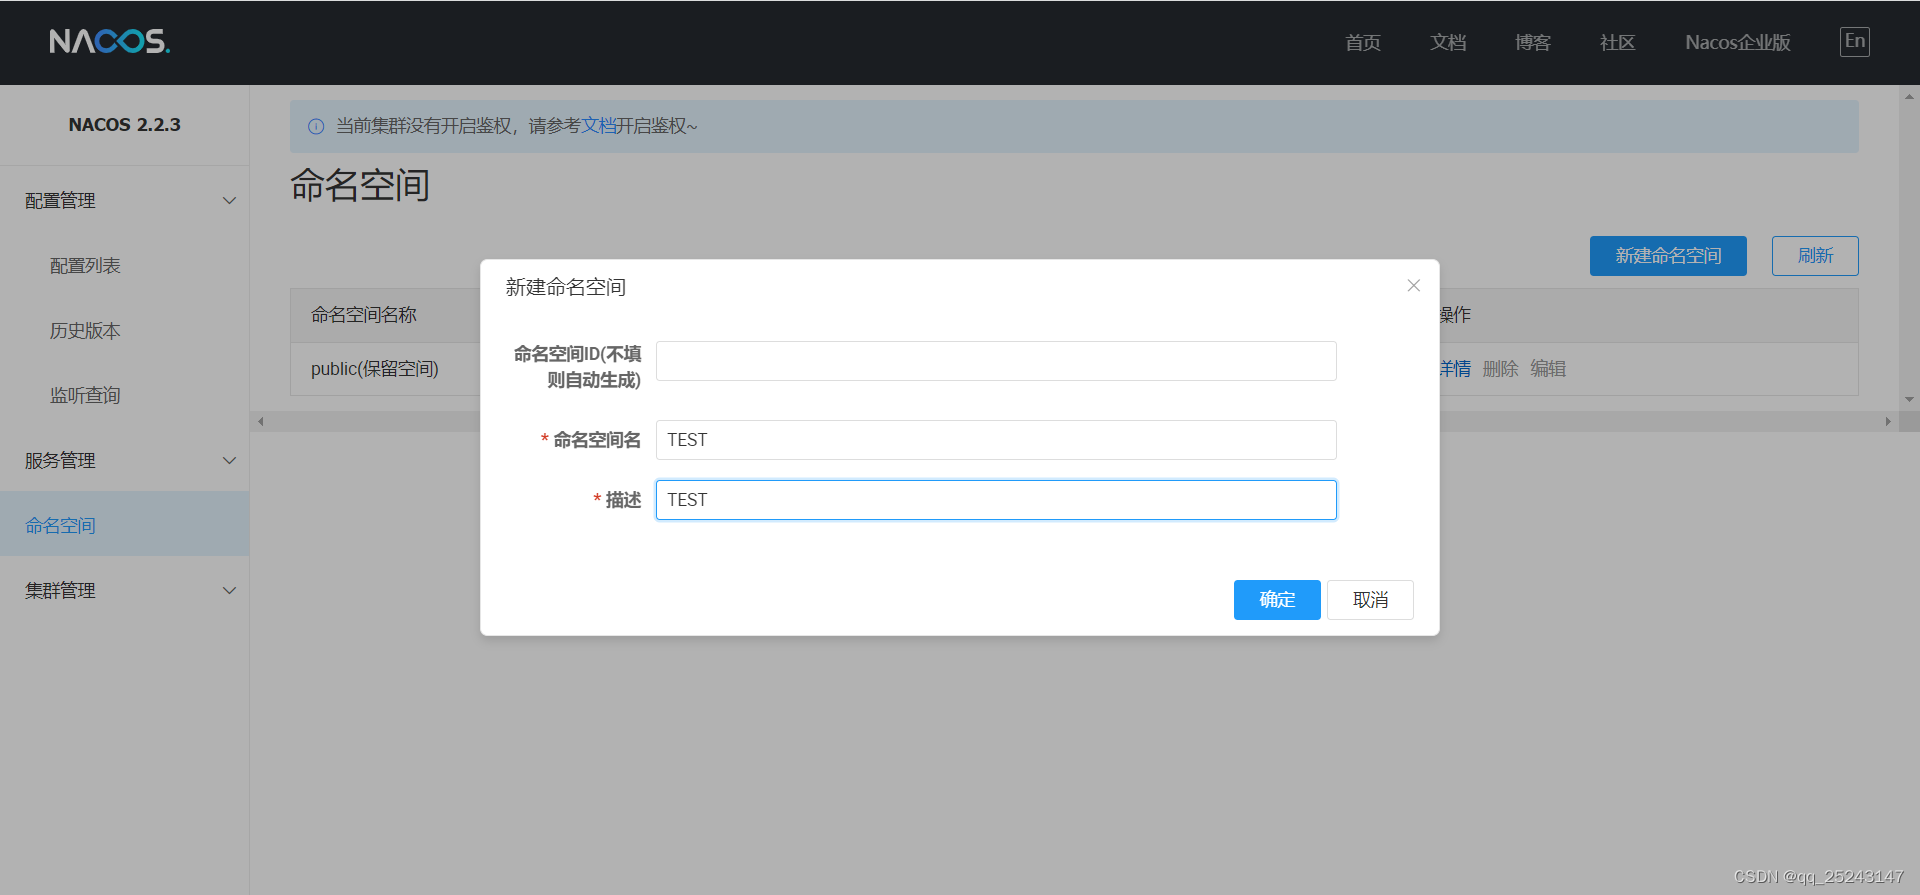
b、新建命名空间TEST
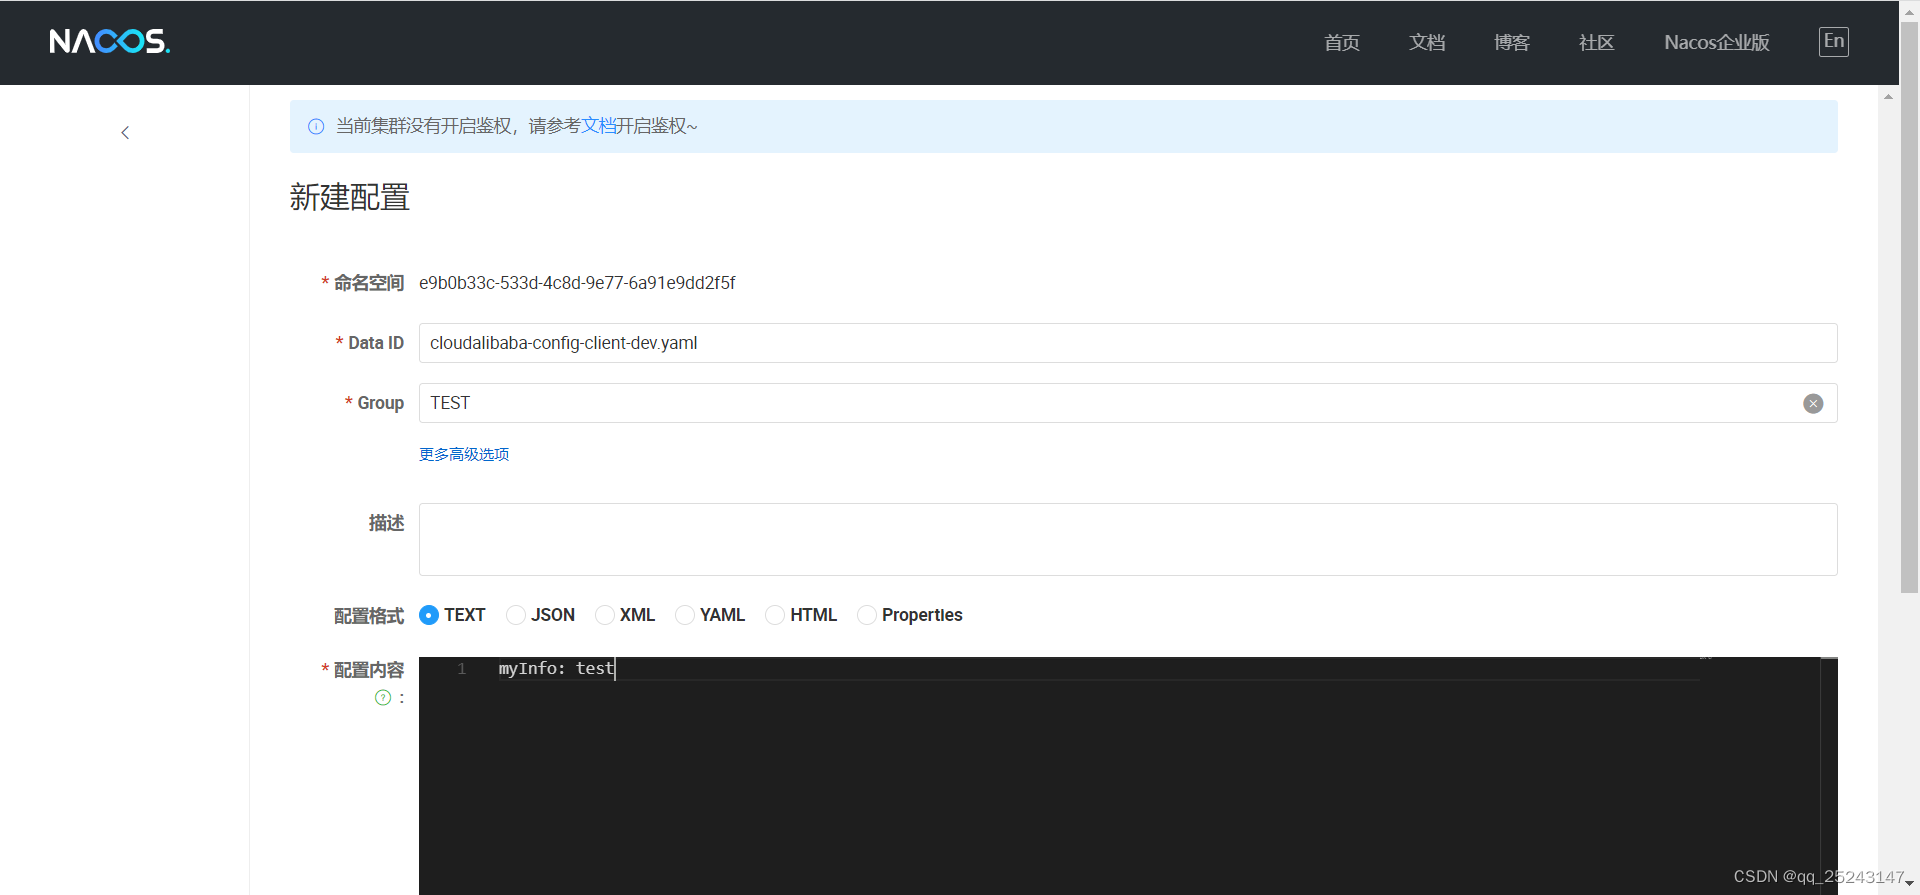
c、创建配置
d、运行

七、配置持久化
(1)运行\nacos\conf下的mysql-schema.sql
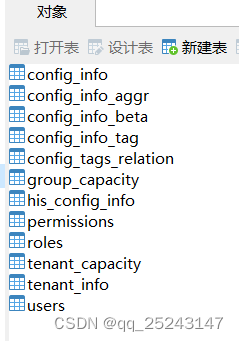
(2)编写\nacos\conf下的application.properties
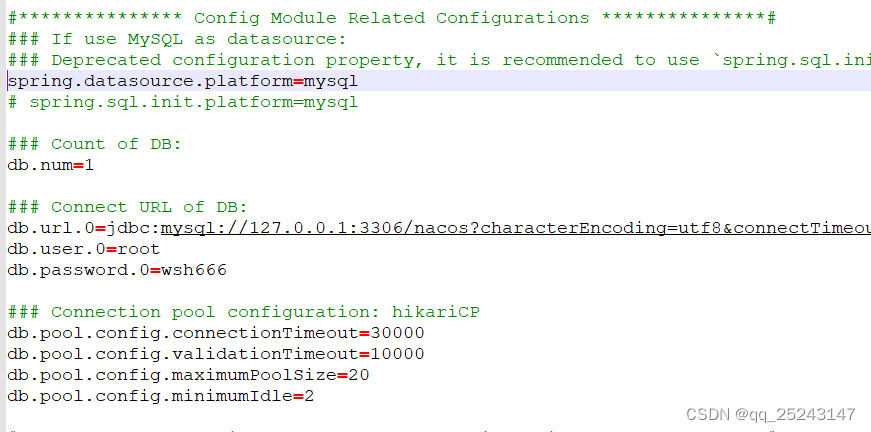
(3)运行
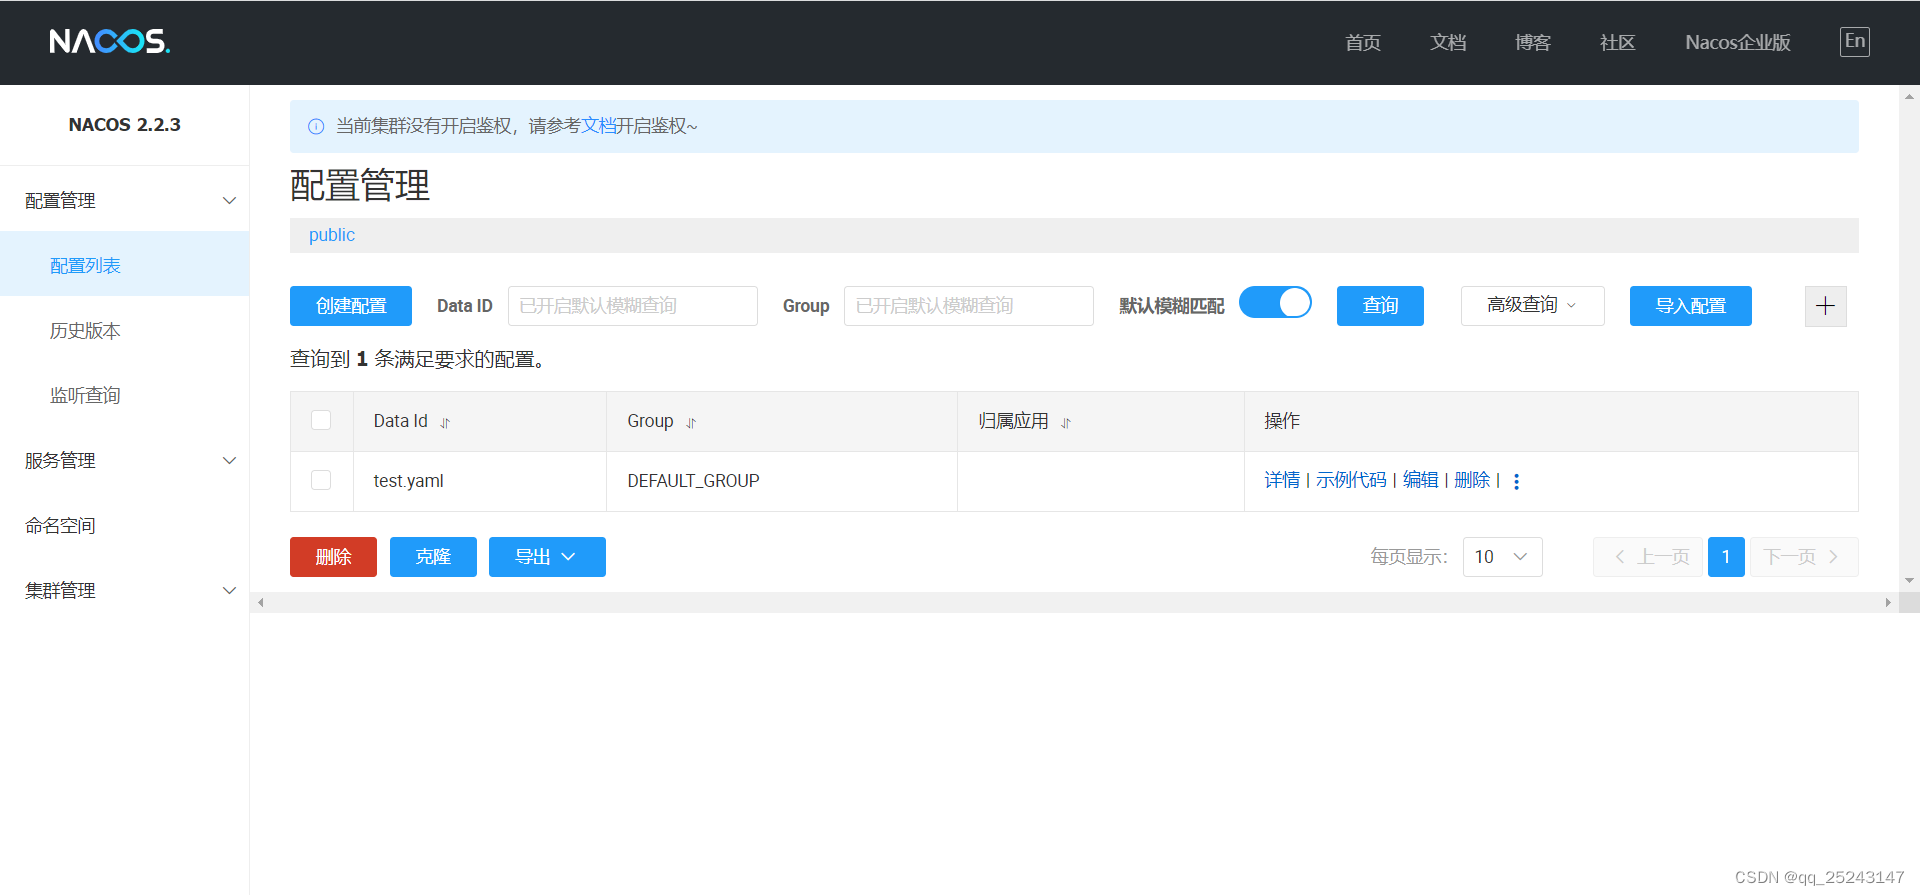
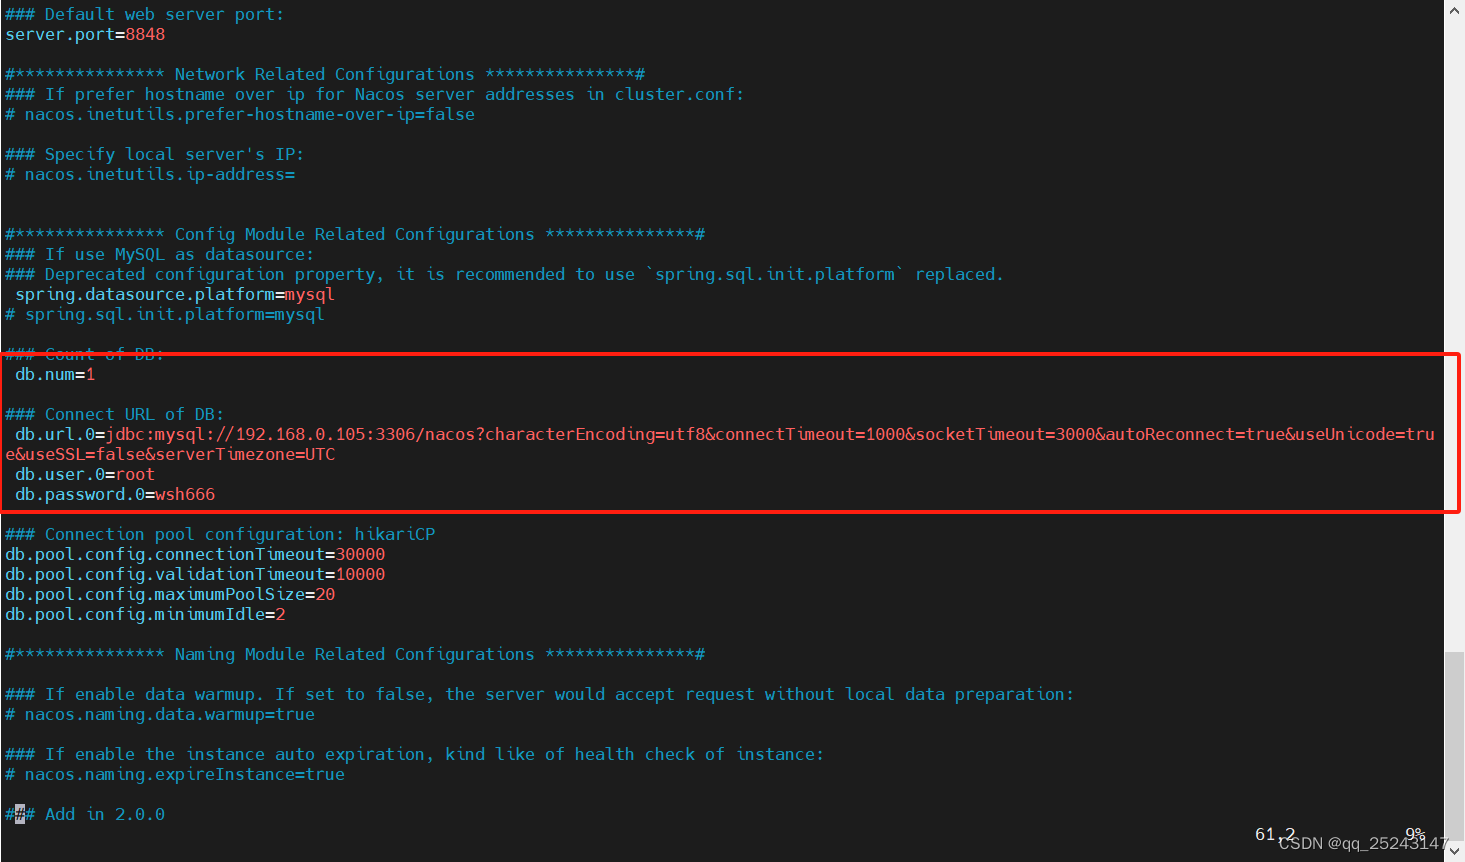
八、linux安装
(1)修改conf下的application.properties
(2)开放端口8848iptables -I IN_public_allow -s 0.0.0.0/0 -p tcp --dport 8848 -j ACCEPT
(3)执行./startup.sh

-
相关阅读:
Unity的IUnityLinkerProcessor:深入解析与实用案例
Autodesk_Revit2022安装图文教程_Revit2022建筑信息模型BIM软件图文教程
AudioOptions
实时数仓:咸鱼的实时数仓经验分享
时代变了,199 美元的 iPhone 都可以想了?
基于 Spring Boot 博客系统开发(四)
学计算机必参加的含金量赛事!
C++ 类和对象 (上)
软考_系统设计架构师--备考重点建议与心得
独立咖啡店如何有效经营?看懂十三个生存逻辑就成功了
- 原文地址:https://blog.csdn.net/qq_25243147/article/details/133914785
