-
【GO 编程语言】面向对象
指针与结构体

一、OOP 思想
Go语言不是面向对象的语言,这里只是通过一些方法来模拟面向对象,从而更好的来理解面向对象思想- 面向过程的思维模式
- 1.面向过程的思维模式是
简单的线性思维,思考问题首先陷入第一步做什么、第二步做什么的细节中,这种思维模式适合处埋简单的事情。 - 2.面向对象的思维模式说白了就是
分类思维模式。首先思考解决问题,需要哪些分类,然后对这些分类进行单独思考。最后,才对某个分类下的细节进行面向过程的思索。
- 1.面向过程的思维模式是
- 面向对象的三大特点:封装、继承、多态
二、继承
继承就是子类继承父类的特征和行为,使得子类具有父类的属性和方法,使得子类具有父类相同的行为。子类会具有父类的一般特性也会具有自身的特性。Go 使用结构体嵌套实现继承
package main import "fmt" // 1、定义一个父“类”结构体 type Person struct { name string age int } // 2、定义一个子“类”结构体 type Student struct { Person // 匿名变量、继承 school string // 子类自己的属性字段 } func main() { g1 := Person{name: "guan", age: 18} fmt.Println(g1.name) g2 := Student{Person{name: "guan0001", age: 22}, school: "NNU"} fmt.Println(g2.Person.name) fmt.Println(g2.name) // 提升字段 // 对于Student来说,Person是匿名字段,Person中的属性 name、age就叫做提升字段 // 提升字段可以通过名字直接访问不需要通过结构体名Person var g3 Student g3.name = "guan003" g3.school = "NNU" fmt.Println(g3) }- 1
- 2
- 3
- 4
- 5
- 6
- 7
- 8
- 9
- 10
- 11
- 12
- 13
- 14
- 15
- 16
- 17
- 18
- 19
- 20
- 21
- 22
- 23
- 24
- 25
- 26
- 27
- 28
- 29
- 30
- 31
- 32
三、方法
什么事方法
Go 语言中同时拥有函数和方法。
-
方法:
- 某个类别的行为功能,需要制定的接受者调用
- 一段独立的功能代码,可以直接调用
-
函数
- 一段独立功能的代码,可以直接调用
- 命名不能冲突
package main import "fmt" type Dog struct { name string age int } type Cat struct { name string age int } // 方法定义 func (dog Dog) eat() { fmt.Println("Dog,eating") } func (dog Dog) sleep() { fmt.Println("Dog,sleeping") } func (cat Cat) eat() { fmt.Println("Cat,eating") } func main() { dog := Dog{name: "wangwangDog", age: 1} dog.eat() dog.sleep() cat := Cat{name: "miaomiaoCat", age: 2} cat.eat() }- 1
- 2
- 3
- 4
- 5
- 6
- 7
- 8
- 9
- 10
- 11
- 12
- 13
- 14
- 15
- 16
- 17
- 18
- 19
- 20
- 21
- 22
- 23
- 24
- 25
- 26
- 27
- 28
- 29
- 30
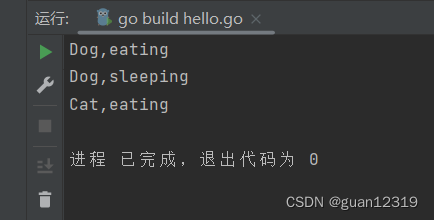 # 方法重写
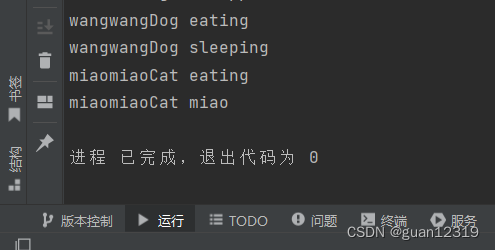
- 子类可以重写父类的方法 override
- 子类可以新增自己的属性和方法
- 子类可以直接访问父类的属性和方法
package main import ( "fmt" ) type Animal struct { name string age int } type Dog struct { Animal } type Cat struct { Animal color string } // 方法定义 func (animal Animal) eat() { fmt.Println(animal.name, "eating") } func (animal Animal) sleep() { fmt.Println(animal.name, "sleeping") } // 子类重写父类的方法 func (cat Cat) eat() { fmt.Println(cat.name, "eating") } // 子类拓展自己的方法 func (cat Cat) miao() { fmt.Println(cat.name, "miao") } func main() { dog := Dog{Animal{name: "wangwangDog", age: 1}} dog.eat() dog.sleep() cat := Cat{Animal{name: "miaomiaoCat", age: 2}, "red"} cat.eat() cat.miao() }- 1
- 2
- 3
- 4
- 5
- 6
- 7
- 8
- 9
- 10
- 11
- 12
- 13
- 14
- 15
- 16
- 17
- 18
- 19
- 20
- 21
- 22
- 23
- 24
- 25
- 26
- 27
- 28
- 29
- 30
- 31
- 32
- 33
- 34
- 35
- 36
- 37
- 38
- 39
- 40
- 41
- 42
- 43
四、接口实现
Go语言提供了另外一种数据类型即接口,它把所有的具有共性的方法定义在一起,任何其他类型只要
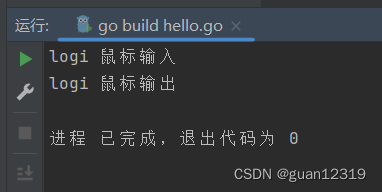
实现接口定义的全部方法就是实现了这个接口。package main import "fmt" // USB 通过 interface 来声明定义一个接口 type USB interface { Input() Output() } type Mouse struct { name string } // go 语言不需要像java通过implement显示的实现接口 // 实现接口中的方法,就算实现了接口 // go语言中,接口和实现类的关系,是非侵入式的 func (mouse Mouse) Input() { fmt.Println(mouse.name, "鼠标输入") } func (mouse Mouse) Output() { fmt.Println(mouse.name, "鼠标输出") } func test(u USB) { u.Input() u.Output() } func main() { // 通过传入接口实现类来进行具体方法的调用 m := Mouse{name: "logi"} test(m) }- 1
- 2
- 3
- 4
- 5
- 6
- 7
- 8
- 9
- 10
- 11
- 12
- 13
- 14
- 15
- 16
- 17
- 18
- 19
- 20
- 21
- 22
- 23
- 24
- 25
- 26
- 27
- 28
- 29
- 30
- 31
- 32
- 33
- 34
五、多态
多态:一个事务拥有多种形态。是面向对象中很重要的一个特点。
Go 语言通过接口来模拟多态package main import ( "fmt" ) type Animal interface { eat() sleep() } type Dog struct { name string } type Cat struct { name string } func (cat Cat) sleep() { //TODO implement me fmt.Println(cat.name, "sleeping") } // 方法定义 func (dog Dog) eat() { fmt.Println(dog.name, "eating") } func (dog Dog) sleep() { fmt.Println(dog.name, "sleeping") } func (cat Cat) eat() { fmt.Println(cat.name, "eating") } func (cat Cat) miao() { fmt.Println(cat.name, "miao") } func animalTest(a Animal) { fmt.Println("animalTest") a.eat() a.sleep() } func main() { dog := Dog{name: "旺财"} dog.eat() dog.sleep() cat := Cat{name: "喵喵"} cat.eat() cat.sleep() cat.miao() // animal animalTest(dog) animalTest(cat) // 定义一个类型为接口类型的变量 // 实际上可以赋值为任意实现类的对象 var animal Animal animal = dog fmt.Println(animal) animal = cat fmt.Println(cat) }- 1
- 2
- 3
- 4
- 5
- 6
- 7
- 8
- 9
- 10
- 11
- 12
- 13
- 14
- 15
- 16
- 17
- 18
- 19
- 20
- 21
- 22
- 23
- 24
- 25
- 26
- 27
- 28
- 29
- 30
- 31
- 32
- 33
- 34
- 35
- 36
- 37
- 38
- 39
- 40
- 41
- 42
- 43
- 44
- 45
- 46
- 47
- 48
- 49
- 50
- 51
- 52
- 53
- 54
- 55
- 56
- 57
- 58
- 59
- 60
- 61
- 62
- 63
- 64
六、空接口
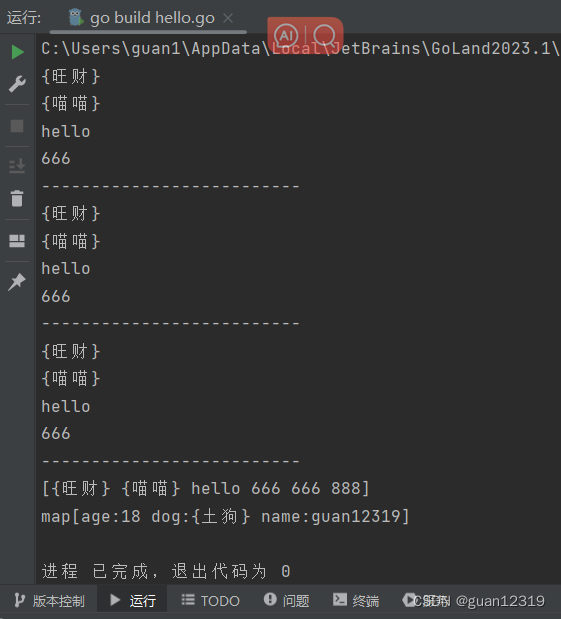
package main import ( "fmt" ) // 空接口 type Animal interface { } type Dog struct { name string } type Cat struct { name string } func (cat Cat) sleep() { //TODO implement me fmt.Println(cat.name, "sleeping") } // 方法定义 func (dog Dog) eat() { fmt.Println(dog.name, "eating") } func (dog Dog) sleep() { fmt.Println(dog.name, "sleeping") } func (cat Cat) eat() { fmt.Println(cat.name, "eating") } func (cat Cat) miao() { fmt.Println(cat.name, "miao") } func test(a Animal) { fmt.Println(a) } // fmt 下的输出接受的参数都是这样的 func test1(a Animal) { fmt.Println(a) } func main() { var animal1 Animal = Dog{name: "旺财"} fmt.Println(animal1) var animal2 Animal = Cat{name: "喵喵"} fmt.Println(animal2) var animal3 Animal = "hello" fmt.Println(animal3) var animal4 Animal = 666 fmt.Println(animal4) fmt.Println("--------------------------") test(animal1) test(animal2) test(animal3) test(animal4) fmt.Println("--------------------------") test1(animal1) test1(animal2) test1(animal3) test1(animal4) // map key string value obj map1 := make(map[string]interface{}) map1["name"] = "guan12319" map1["age"] = 18 map1["dog"] = Dog{name: "土狗"} fmt.Println("--------------------------") // 切片 s1 := make([]interface{}, 0, 10) s1 = append(s1, animal1, animal2, animal3, animal4, 666, 888) fmt.Println(s1) fmt.Println(map1) }- 1
- 2
- 3
- 4
- 5
- 6
- 7
- 8
- 9
- 10
- 11
- 12
- 13
- 14
- 15
- 16
- 17
- 18
- 19
- 20
- 21
- 22
- 23
- 24
- 25
- 26
- 27
- 28
- 29
- 30
- 31
- 32
- 33
- 34
- 35
- 36
- 37
- 38
- 39
- 40
- 41
- 42
- 43
- 44
- 45
- 46
- 47
- 48
- 49
- 50
- 51
- 52
- 53
- 54
- 55
- 56
- 57
- 58
- 59
- 60
- 61
- 62
- 63
- 64
- 65
- 66
- 67
- 68
- 69
- 70
- 71
- 72
- 73
- 74
- 75
- 76
- 77
- 78
- 79
- 80
- 81
- 82
- 83
- 84
- 85
七、接口继承
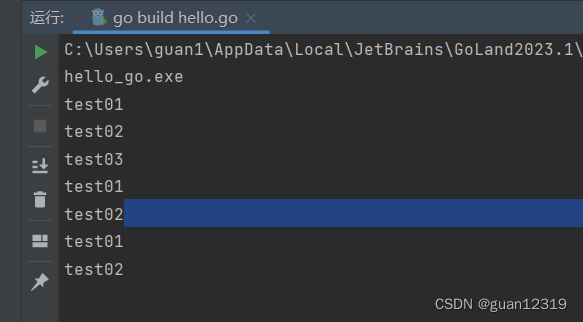
package main import "fmt" // 接口继承 type A interface { test01() } type B interface { test02() } type C interface { A B test03() } type Dog struct { } func (dog Dog) test01() { fmt.Println("test01") } func (dog Dog) test02() { fmt.Println("test02") } func (dog Dog) test03() { fmt.Println("test03") } func main() { var dog Dog = Dog{} dog.test01() dog.test02() dog.test03() // 在接口嵌套中,嵌套的接口默认继承了被嵌套接口的所有方法 var testA A = dog testA.test01() var testB B = dog testB.test02() var testC C = dog testC.test01() testC.test02() testC.test03() }- 1
- 2
- 3
- 4
- 5
- 6
- 7
- 8
- 9
- 10
- 11
- 12
- 13
- 14
- 15
- 16
- 17
- 18
- 19
- 20
- 21
- 22
- 23
- 24
- 25
- 26
- 27
- 28
- 29
- 30
- 31
- 32
- 33
- 34
- 35
- 36
- 37
- 38
- 39
- 40
- 41
- 42
- 43
- 44
- 45
- 46
- 47
- 48
- 49
八、接口断言
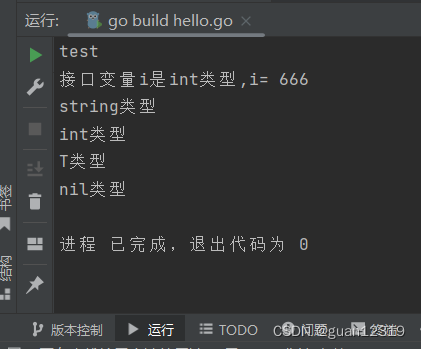
package main import "fmt" // 接口断言 func assertString(i interface{}) { s := i.(string) fmt.Println(s) } func assertInt(i interface{}) { s, ok := i.(int) if ok { fmt.Println("接口变量i是int类型,i=", s) } else { fmt.Println("接口变量i不是int类型") } } type T interface { } func test(i interface{}) { switch i.(type) { // 如果断言的类型,同时实现了Switch断言的多个case,取第一个case case string: fmt.Println("string类型") case int: fmt.Println("int类型") case T: fmt.Println("T类型") case nil: fmt.Println("nil类型") default: fmt.Println("未知类型") } } func main() { assertString("test") assertInt(666) a := "hello" b := 888 c := true var i T test(a) test(b) test(c) test(i) }- 1
- 2
- 3
- 4
- 5
- 6
- 7
- 8
- 9
- 10
- 11
- 12
- 13
- 14
- 15
- 16
- 17
- 18
- 19
- 20
- 21
- 22
- 23
- 24
- 25
- 26
- 27
- 28
- 29
- 30
- 31
- 32
- 33
- 34
- 35
- 36
- 37
- 38
- 39
- 40
- 41
- 42
- 43
- 44
- 45
- 46
- 47
- 48
- 49
- 50
- 51
- 52
九、Type别名
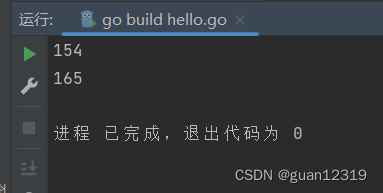
package main import "fmt" // 通过type 关键字的定义,DiyInt就是一种新的类型,它具有int的特性 type Diyint int func main() { var a Diyint = 88 var b int = 66 c := int(a) + b fmt.Println(c) // myint类型只会在代码中存在,编译完成时并不会有myint类型 type myint = int var d myint = 66 var e int = 99 f := d + e fmt.Println(f) }- 1
- 2
- 3
- 4
- 5
- 6
- 7
- 8
- 9
- 10
- 11
- 12
- 13
- 14
- 15
- 16
- 17
- 18
- 19
- 20
- 面向过程的思维模式
-
相关阅读:
2 Java NIO--Buffer使用说明
一篇文章带你搞懂MybatisPlus
同创永益CNBR平台——云原生时代下的系统稳定器
4.go语言复合类型简述
洛谷月赛 P5588 小猪佩奇爬树
Knife4j 基础(OpenAPI3+SpringBoot2.7)
12、Java——对象和类案例代码详解
vue3引入全局js
Linux脚本练习之script075-域名进行计数排序处理
2023年最新Python大数据之Python基础【七】管理系统
- 原文地址:https://blog.csdn.net/guanguan12319/article/details/131886901

- 最新文章
-
【FHE】我们如何实现同态加密推理(八):SiLU 的密文化——两条路径,和一个 8 字节的开关
SQLcl 中 c/old/new 替换变量为何失效?先定位再替换
不让模型写作文,直接从它脑子里读答案:Jev 决策在 .NET 的两条路线
Halo插件:支持GitHub的图床附件策略
电视投屏界的“一股清流”!SimpleTVCast 6.0.0-beta 抢先体验:无需TV端App,界面大换血!✨
华三VXLAN集中式网关实战指南:Spine多活网关 + 双活接入(M-LAG)
软件更好写之后口碑会更重要
大 O、大 Omega、大 Theta 的区别,O(n) 复杂度是什么意思
Java标签跳转:一个鲜为人知但却很实用的小技巧
多智能体系统论文速读