-
Spring(JavaEE进阶系列1)
目录
3.4.1使用ApplicationContext获取上下文
3.4.3ApplicationContext与BeanFactory的区别
3.6.8.4@Autowired VS @Resource区别
前言:
这节中小编主要是介绍一下有关于Spring框架,以及框架的具体搭建。那么我们为什么要学习框架呢?我们学习框架相当于从“小作坊”到“工厂”的升级,小作坊就是需要我们自己来做,从最底层做起,工厂就是组件式装配,特点就是便捷更加易用、简单高效。
1.Servlet与Spring对比
在我们之前使用了Servlet来实现了博客系统,在之前的学习中我们也深刻的体会到了使用Servlet的时候带来的一些痛点,如下所示:
- 添加外部jar包不方便,容易出错,比如添加了一个不匹配的外部jar版本。
- 运行和调试的时候需要配置Tomcat不方便。
- 发布不方便,Servlet项目必须依靠外置的Tomcat(外置的web容器)运行。
- 路由配置不方便,一个访问地址对应一个Servlet类。
那么如果我们使用的是Spring框架相比于Servlet就会有以下的好处:
- 无需配置Tomcat,点击“运行”按钮就可以运行项目,Spring Boot内置了Web容器(可直接运行)。
- 快速添加外部jar包。
- 快速发布项目(使用java-jar方式就可以发布)。
- 对象会自动装配。
2.什么是Spring
我们通常说的Spring指的是Spring Framework(Spring 框架),它是一个开源的框架,它支持广泛的应用场景,可以让Java企业级的应用程序开发起来更加的简单。总的来说Spring是包含了众多工具方法IoC容器。
2.1什么是容器
那么在上述的Spring概念的介绍中我们提及到了容器的概念,那么什么是容器呢?
容器就是用来容纳某种物品的装置。在我们之前的学习中我也接触到了一些容器,比如List和Map数据存储容器,以及我们上次学习的Tomcat是Web容器。
2.2什么是IoC
Spring也是一个容器,那么Spring是什么容器呢?在上述中我们从Spring的概念中得知它是一个IoC容器。
那么究竟什么是IoC容器呢?
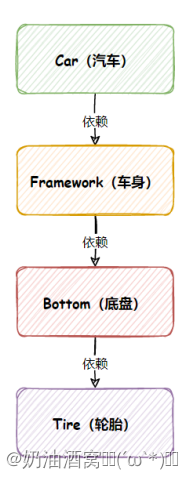
IoC = Inversion of Control 翻译过来就是“控制返转”的意思。也就是说Spring是一个“控制返转”的容器,怎么理解这句话呢?准确来说应该是一个“控制(权)返转”的一个容器,针对这个权,在我之前的学习中我创建一个对象都是通过new来创建出来的,它的生命周期是由当前代码(程序猿)控制的。但是这里我们学习的对象的生命周期不是由程序猿来控制了而是由当前代码片段来控制,即是由Spring(Spring容器/IoC容器)来进行控制,即我们这里说的控制权反转,就是对象创建的生命周期进行了反转。下面我们就来举一个具体点的例子说明。
代码展示:
1.Car代码展示
- package old;
- /**
- * 传统开发
- * 汽车
- */
- public class Car {
- private Framework framework;
- public Car() {
- this.framework = new Framework();
- }
- public void init() {
- //需要依赖车身
- System.out.println("执行了 Car的init 方法");
- framework.init();
- }
- }
2.Framework代码展示
- package old;
- /**
- * 传统开发
- * 车身
- */
- public class Framework {
- private Bottom bottom;
- public Framework() {
- this.bottom = new Bottom();
- }
- public void init() {
- System.out.println("执行了 Framework的init 方法");
- bottom.init();
- }
- }
3.Bottom代码展示
- package old;
- /**
- * 传统开发
- * 底盘
- */
- public class Bottom {
- private Tire tire;
- public Bottom() {
- this.tire = new Tire();
- }
- public void init() {
- System.out.println("执行了 Bottom的init 方法");
- tire.init();
- }
- }
4.Tire代码展示
- package old;
- /**
- * 传统开发
- * 轮胎
- */
- public class Tire {
- private int size = 20;
- public void init() {
- System.out.println("执行了 Tire的inti 方法" + "轮胎的大小是:" + size);
- }
- }
5.主函数展示
- package old;
- /**
- * 传统开发
- */
- public class Test {
- public static void main(String[] args) {
- Car car = new Car();
- car.init();
- }
- }
结果展示:
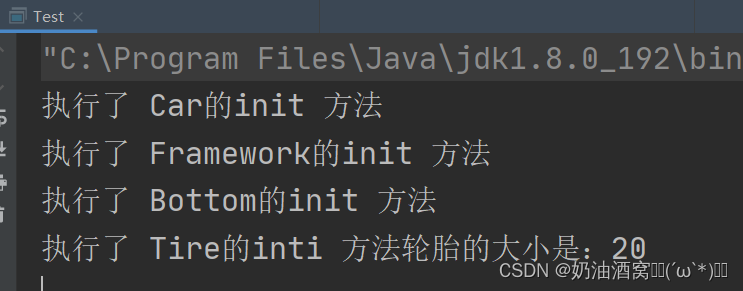
经过上述代码的编写大家会发现每一层都需要依赖上一层才可以,这样就会高度耦合,那么接下来我们这里来使用Spring来进行一个编写。那么经过解耦合的一个过程就达到了以下的效果。

代码展示:
1.Car代码展示
- package IoC;
- public class Car {
- private Framework framework;
- public Car(Framework framework){
- this.framework = framework;
- }
- public void init() {
- System.out.println("Car init");
- framework.init();
- }
- }
2.Framework代码展示
- package IoC;
- public class Framework {
- private Bottom bottom;
- public Framework(Bottom bottom) {
- this.bottom = bottom;
- }
- public void init() {
- System.out.println("Bottom init");
- bottom.init();
- }
- }
3.Bottom代码展示
- package IoC;
- public class Bottom {
- private Tire tire;
- public Bottom(Tire tire) {
- this.tire = tire;
- }
- public void init() {
- System.out.println("Bottom init");
- tire.init();
- }
- }
4.Tire代码展示
- package IoC;
- public class Tire {
- private int size = 15;
- public Tire(int size) {
- this.size = size;
- }
- public void init() {
- System.out.println("Tire init, size:" + size);
- }
- }
5.Test代码展示
- package IoC;
- /**
- * 模拟IoC容器
- */
- public class Test {
- private Tire tire;
- private Bottom bottom;
- private Framework framework;
- private Car car;
- public Test() {
- this.tire = new Tire(15);
- this.bottom = new Bottom(this.tire);
- this.framework = new Framework(this.bottom);
- this.car = new Car(this.framework);
- }
- public static void main(String[] args) {
- Test test = new Test();
- test.car.init();
- }
- }
结果展示:

注意:这里我们是模拟一个IoC容器,所以在IoC容器中会存在new对象的操作,我们关注的只是除了IOC容器以外的代码。
故通过上述的代码案例当我你在修改案例需求的时候就不会牵一发而动全身了,所以IoC容器就达到了一个很好的一个解耦合的效果。
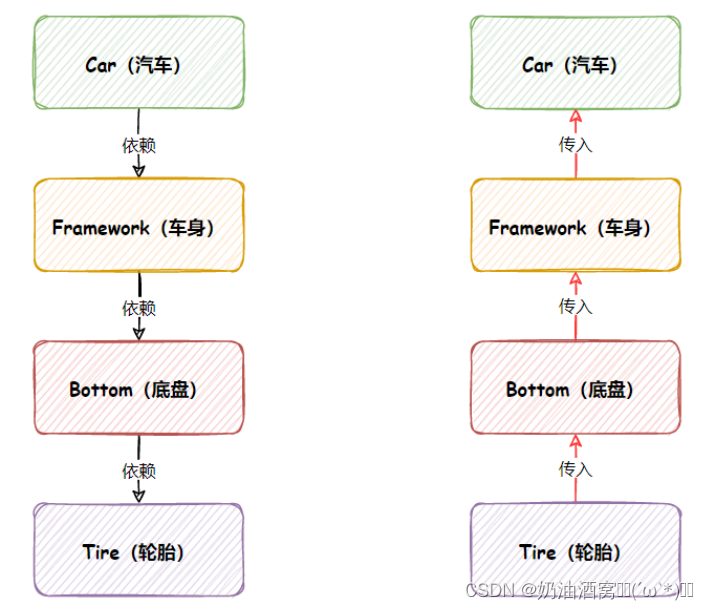
在传统的代码开发中对象创建顺序是:Car -> Framework ->Bottom ->Tire
改进之后解耦合的代码的对象的创建对象顺序是:Tire -> Bottom -> Framework -> Car
2.3SpringIoC容器的理解
Spring(IoC)容器管理的资源,管理的就是对象,这里的对象就是Bean。
既然Spring是一个IoC容器,重点还在于容器二字上,那么它就具备两个最基本的功能:
- 将对象存入到容器。
- 从容器中取出对象。
也就是说学Spring最核心的就是学会如何将对象存储到Spring中,再从Spring中获取对象的过程。
那么将对象存储到容器中的好处就是将对象存储在IoC容器中相当于将以后可能用到的所有工具制作好都放到仓库中,需要的时候就直接取就好了,用完之后在把它放回到仓库中,而new对象的方式相当于,每次需要工具的时候才会去做,用完之后就直接扔掉了也不会保存,下次再次使用的时候还得重新再做,这就是IoC容器和普通程序开发的区别。
2.4DI依赖注入
DI依赖注入:指的是在运行期间,动态的将依赖对象获取到的过程就叫依赖注入。也就是如果在启动A类的时候需要将B类动态的获取到的一个过程。
2.5IoC与DI的区别
IoC和DI都是Spring框架中的核心概念,他们的区别在于:
IoC(Inverse of Control,控制返转):他是一种思想,主要解决程序设计中的对象依赖关系管理问题。在IoC思想中,对象的创建权反转给第三方容器,由容器进行对象的创建及依赖关系的管理。
DI(Dependency Injection,依赖注入):它是IoC思想的具体实现方式之一,用于实现IoC。在Spring中,依赖注入时指在对象创建时,由容器自动将依赖对象注入到需要依赖的对象中。
简单来说,他们的关系是:
- IoC是一种思想、理念、定义了对象创建和依赖关系处理的方式。
- DI是IoC思想的具体实现方式之一,实际提供对象依赖关系的注入功能。
3.Spring项目的创建和使用
3.1正确配置Maven国内源
为什么我们需要先来配置国内源呢?如果不配就会导致创建Spring/Spring Boot失败,或者是在maven项目中引入jar失败。致使项目运行不了。
所以我们需要进行以下配置:

如果没有settings.xml文件的可以在小编的Gitee中直接下载获取☞https://gitee.com/YAUGAOLELE/configuration-filehttps://gitee.com/YAUGAOLELE/configuration-file/blob/master/settings.xmlhttps://gitee.com/YAUGAOLELE/configuration-file

如果有settings.xml文件的请打开该文件,找到下面对应的位置将下面的代码复制进去。
alimaven aliyun maven http://maven.aliyun.com/nexus/content/groups/public/ central 对应的位置如下所示:
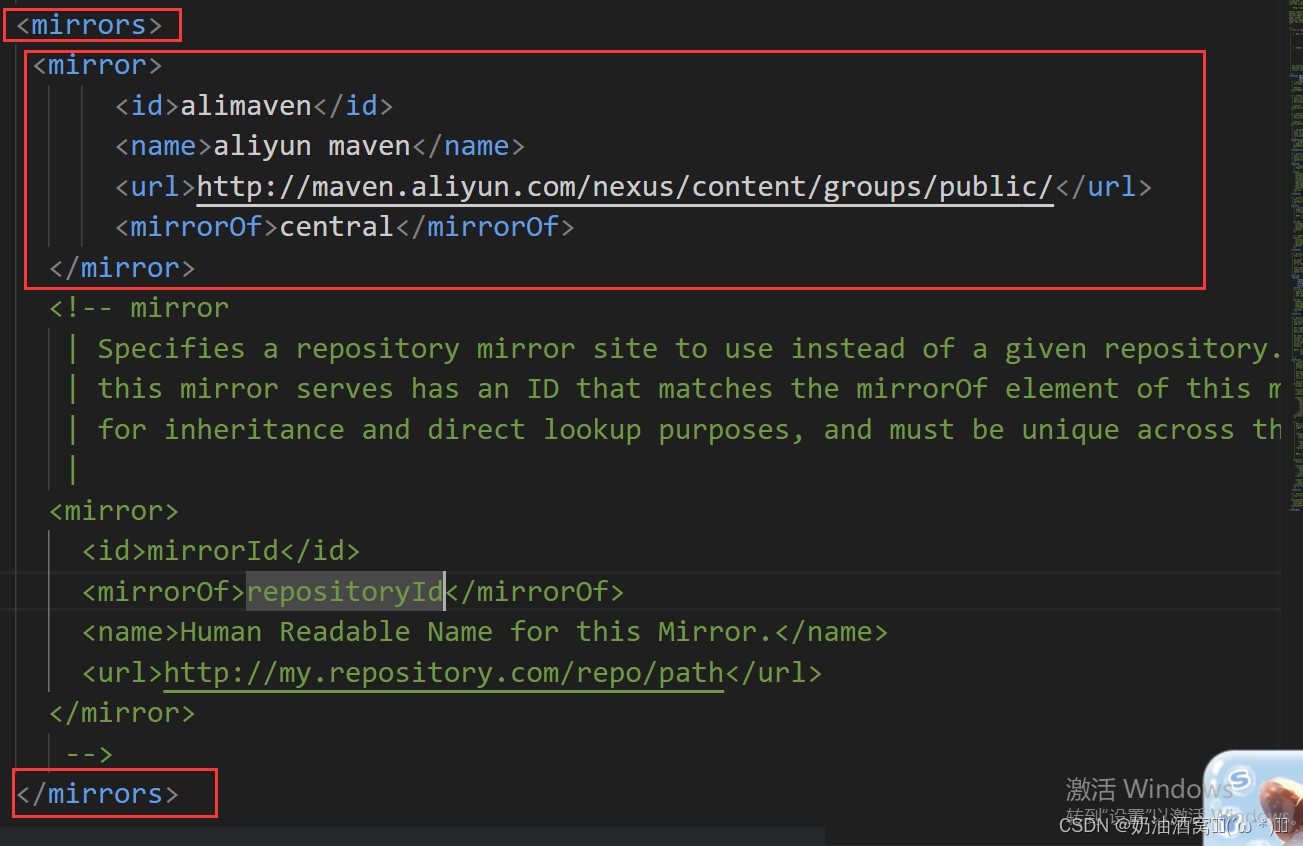
注意这里需要进行两步配置,步骤和上述一样。
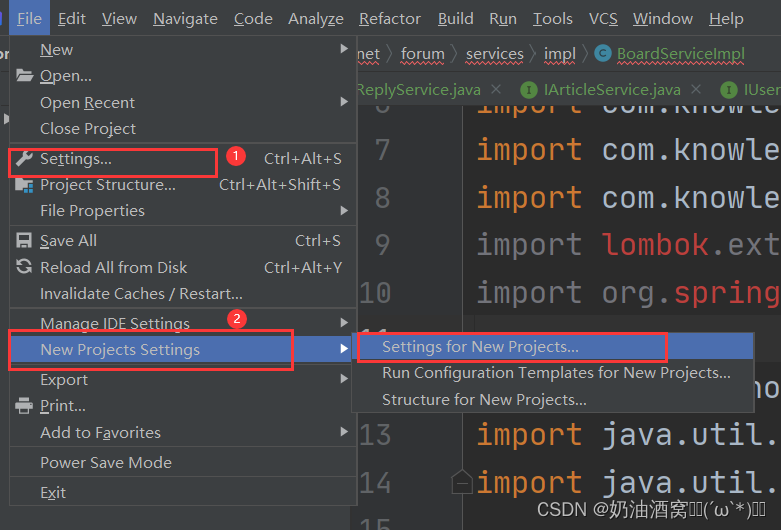 配置好之后就可以对jar包进行重新下载了。
3.2Spring的项目创建
①创建一个maven项目。

②创建文件的名字,然后选择路径。
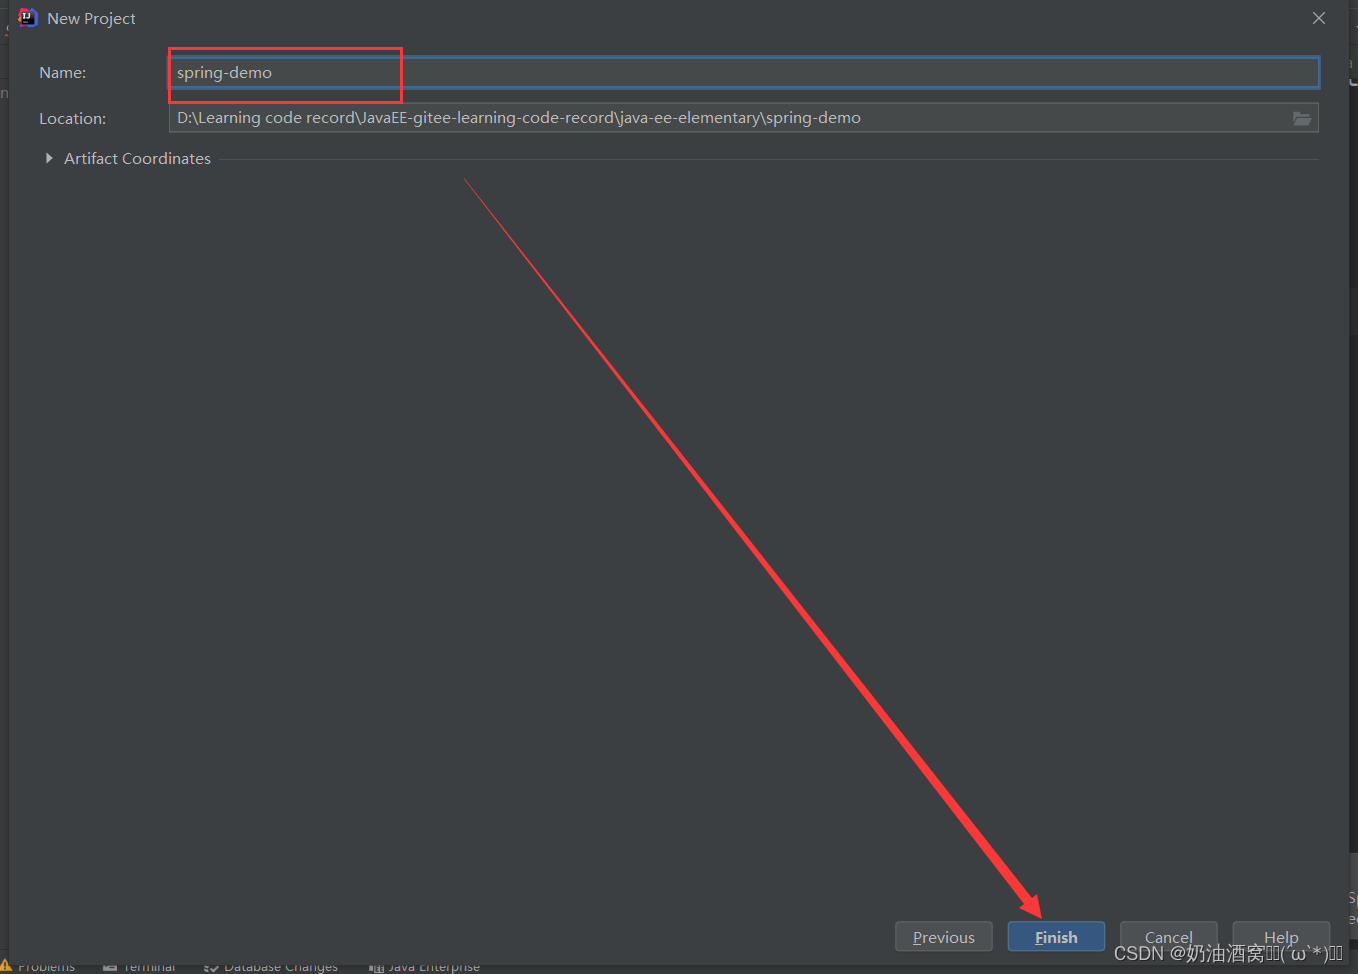
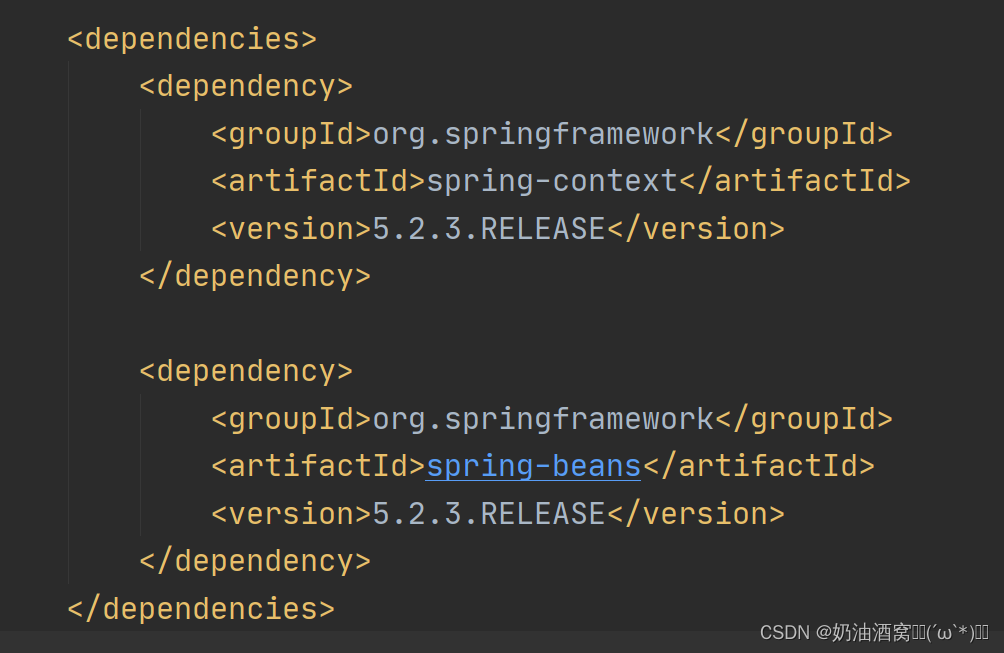
③pom.xml中添加依赖。
配置Gitee地址:https://gitee.com/YAUGAOLELE/configuration-file/blob/master/pom.xml
④创建一个启动测试类

3.3将Bean对象存储到Spring(IoC容器)
①创建一个Bean对象
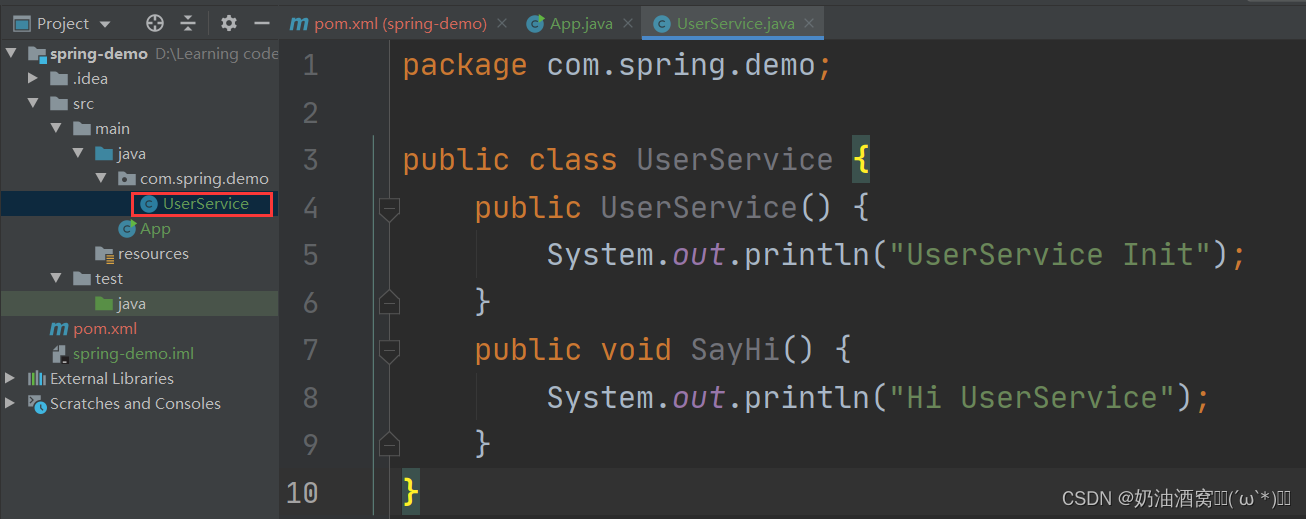
②将Bean存储到Spring中
我们需要先来在resource里面创建一个spring-config.xml文件,然后将下面的这段放置在里面。
或者可以直接从小编的Gitee中获取配置:https://gitee.com/YAUGAOLELE/configuration-file/blob/master/spring-config.xml
接下来就可以直接存储bean对象了。如下所示:

3.4获取并使用Bean
3.4.1使用ApplicationContext获取上下文
①得到Spring上下文对象,获取Bean对象。

②代码展示:
- import com.spring.demo.UserService;
- import org.springframework.context.ApplicationContext;
- import org.springframework.context.support.ClassPathXmlApplicationContext;
- public class App {
- public static void main(String[] args) {
- //1.先得到spring上下文对象
- ApplicationContext context =
- new ClassPathXmlApplicationContext("spring-config.xml");
- //2.得到Bean【依赖查找 -> IoC的一种实现】
- UserService userService = (UserService) context.getBean("user");
- //3.使用Bean对象
- userService.SayHi();
- }
- }
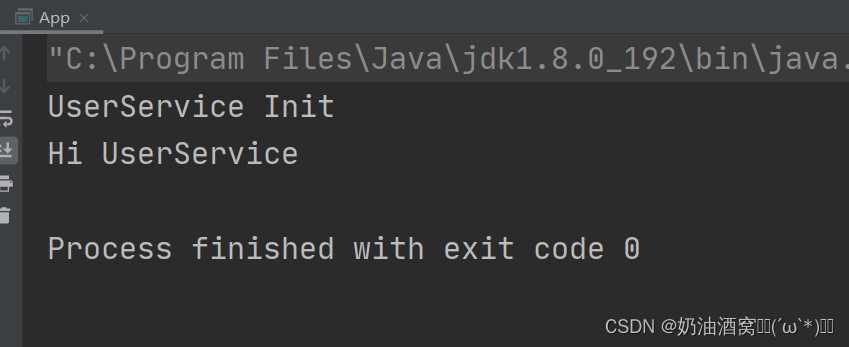
③运行结果展示:
3.4.2使用BeanFactory获取上下文
代码展示:
- import com.spring.demo.UserService;
- import org.springframework.beans.factory.BeanFactory;
- import org.springframework.beans.factory.xml.XmlBeanFactory;
- import org.springframework.core.io.ClassPathResource;
- public class BeanFactory {
- //1.获取spring上下文对象
- BeanFactory context = new BeanFactory(new ClassPathResource("spring-config.xml"));
- //2.获取Bean
- UserService userService = (UserService)context.getBean("user");
- //3.使用Bean
- userService.SayHi();
- }
结果展示:

3.4.3ApplicationContext与BeanFactory的区别
我们可以看到使用两者都可以获取到Bean对象,但是它两有什么区别呢?
相同点:
都是容器管理对象,都可以获取Bean对象。
区别:
- ApplicationContext属于BeanFactory的子类,ApplicationContext拥有更多的功能(国际化支持、资源访问支持、以及事件传播等方面的支持)。
- 加载Bean机制不同:BeanFactory懒加载,按需加载(使用一个Bean加载一个Bean),ApplicationContext一次性加载所有Bean对象。所以ApplicationContext启动的时候非常慢,但是在启动之后在获取对象的时候就会非常快,而BeanFactory在启动的时候就会非常快,但是在获取对象的时候机会非常慢。
3.5getBean方法的使用
3.5.1根据名称获取Bean对象
需要进行强制转换。

代码展示:
- import com.spring.demo.UserService;
- import org.springframework.context.ApplicationContext;
- import org.springframework.context.support.ClassPathXmlApplicationContext;
- public class App {
- public static void main(String[] args) {
- //1.先得到spring上下文对象
- ApplicationContext context =
- new ClassPathXmlApplicationContext("spring-config.xml");
- //2.得到Bean【依赖查找 -> IoC的一种实现】
- UserService userService = (UserService) context.getBean("user");
- //3.使用Bean对象
- userService.SayHi();
- }
- }
结果展示:

注意:上述的这种方法虽然可以不用进行强制类型转换,但是如果存储多个的话可以就会出现错误,会导致分不清到底是谁。
如下所示:
如下存储了多个user,此时就会出现问题。


3.5.2根据类型获取Bean对象
不需要进行强制类型转换。

代码展示:
- package com.spring.demo;
- import org.springframework.context.ApplicationContext;
- import org.springframework.context.support.ClassPathXmlApplicationContext;
- public class App2 {
- public static void main(String[] args) {
- //1.先得到spring上下文对象
- ApplicationContext context =
- new ClassPathXmlApplicationContext("spring-config.xml");
- //2.得到Bean【依赖查找 -> IoC的一种实现】
- UserService userService = context.getBean(UserService.class);
- //3.使用Bean对象
- userService.SayHi();
- }
- }
结果展示: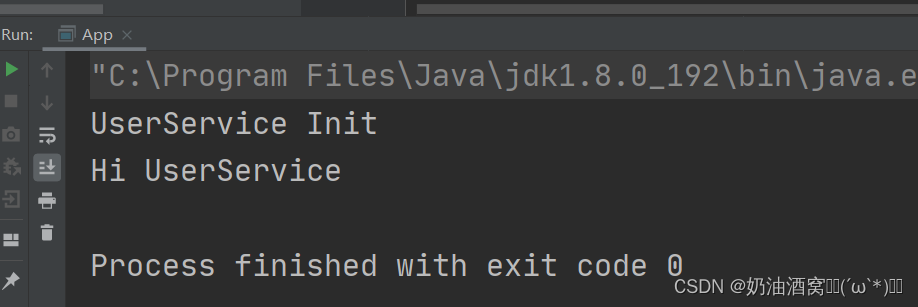
3.5.3根据名称 + 类型来获取
不需要进行强制类型转换,也不会出现上述两个对象的分不清楚的问题。

代码展示:
- package com.spring.demo;
- import org.springframework.context.ApplicationContext;
- import org.springframework.context.support.ClassPathXmlApplicationContext;
- public class App3 {
- public static void main(String[] args) {
- //1.先得到spring上下文对象
- ApplicationContext context =
- new ClassPathXmlApplicationContext("spring-config.xml");
- //2.得到Bean【依赖查找 -> IoC的一种实现】
- UserService userService = context.getBean("user",UserService.class);
- //3.使用Bean对象
- userService.SayHi();
- }
- }
结果展示:
3.6更加简单的存储Bean对象
3.6.1配置

3.6.2注解
更加简单的添加存储Bean对象有以下两种实现方式。
①通过类注解来实现Bean对象的存储。(@Controller、@Service、@Repository、@Component、@Configuration)
②通过方法注解实现Bean对象的存储。(@Bean)
我们常见的五大类注解有以下几个:
- @Controller【控制器】校验参数的合法性(相当于是安检系统)。
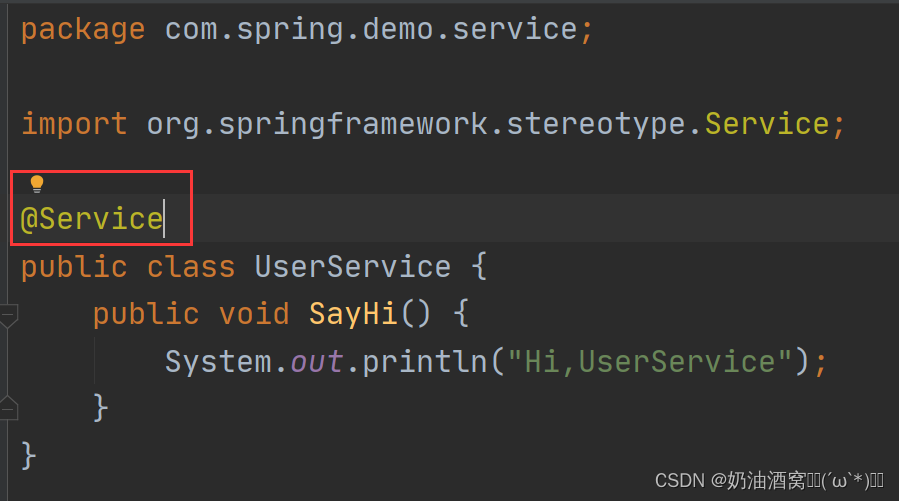
- @Service【服务】业务组装(相当于是客服中心)。
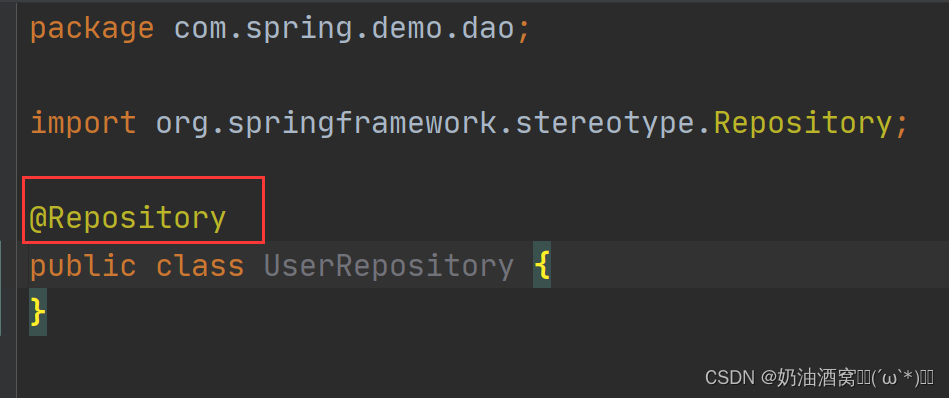
- @Repository【数据持久层】实际业务处理(相当于是实际办理的业务)。
- @Component【组件】工具类实现(相当于是基础的工具)。
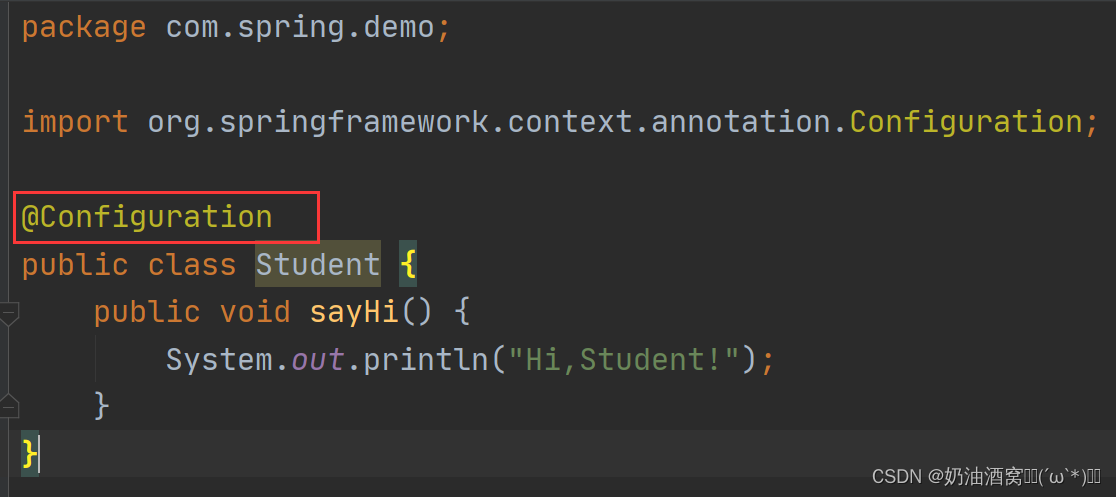
- @Configuration【配置层】配置。
注意:当我们使用注解存储Bean和使用xml存储Bean是可以混合使用的。
3.6.2.1@Controller注解

3.6.2.2@Service注解
3.6.2.3@Repository注解
3.6.2.4@Component注解

3.6.2.5@Configuration注解
3.6.3类注解存储Bean命名问题(默认命名规则)
①默认类名首字母小写就可以获取到Bean对象。

代码展示:
Teacher代码展示:
- package com.spring.demo;
- import org.springframework.context.annotation.Configuration;
- @Configuration
- public class Teacher {
- public void SayHi() {
- System.out.println("Hi Teacher");
- }
- }
App_Teacher代码展示:
- package com.spring.demo;
- import org.springframework.context.ApplicationContext;
- import org.springframework.context.support.ClassPathXmlApplicationContext;
- public class App_Teacher {
- public static void main(String[] args) {
- ApplicationContext context = new ClassPathXmlApplicationContext("spring-config.xml");
- Teacher teacher = context.getBean("teacher", Teacher.class);
- teacher.SayHi();
- }
- }
结果展示:
②使用原类名可以获取到对象。

代码展示:
UConfig代码展示:
- package com.spring.demo;
- import org.springframework.stereotype.Repository;
- @Repository
- public class UConfig {
- public void sayHi() {
- System.out.println("Hi,UConfig");
- }
- }
App_UConfig代码展示- package com.spring.demo;
- import org.springframework.context.ApplicationContext;
- import org.springframework.context.support.ClassPathXmlApplicationContext;
- public class App_UConfig {
- public static void main(String[] args) {
- ApplicationContext context = new ClassPathXmlApplicationContext("spring-config.xml");
- UConfig uConfig = context.getBean("UConfig",UConfig.class);
- uConfig.sayHi();
- }
- }
结果展示:
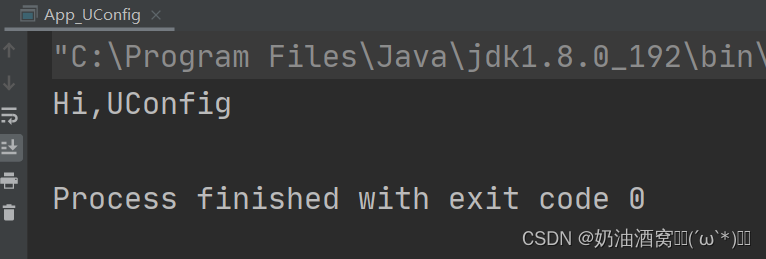
注意:如果我们这里也使用的是首字母小写的话就会获取不到对象了,如下所示:


总结:
如果首字母是大写,第二个字母时小写,那么Bean的名称就是列名小写,如果不满足首字母大写和第二个字母小写,那么Bean的名称就为原类名。
3.6.4为什么要这么多注解
既然功能都是一样的 ,为什么需要这么多注解呢?
这和为什么每个省份都有自己的车牌号一样,比如陕西的是陕XXX,北京的是京XXX一样,这样就可以更加直观的标识出一辆车的归属地。那么这里的注解也是一样的道理,就是让程序员看到的时候就能直接了解当前类的用途,比如@Controller是业务逻辑层的,@Service是服务层的,@Repository是持久层的,@Configuration是配置层的。他们的程序的工程分层,调用流程如下所示:

3.6.5五大类注解之间的关系
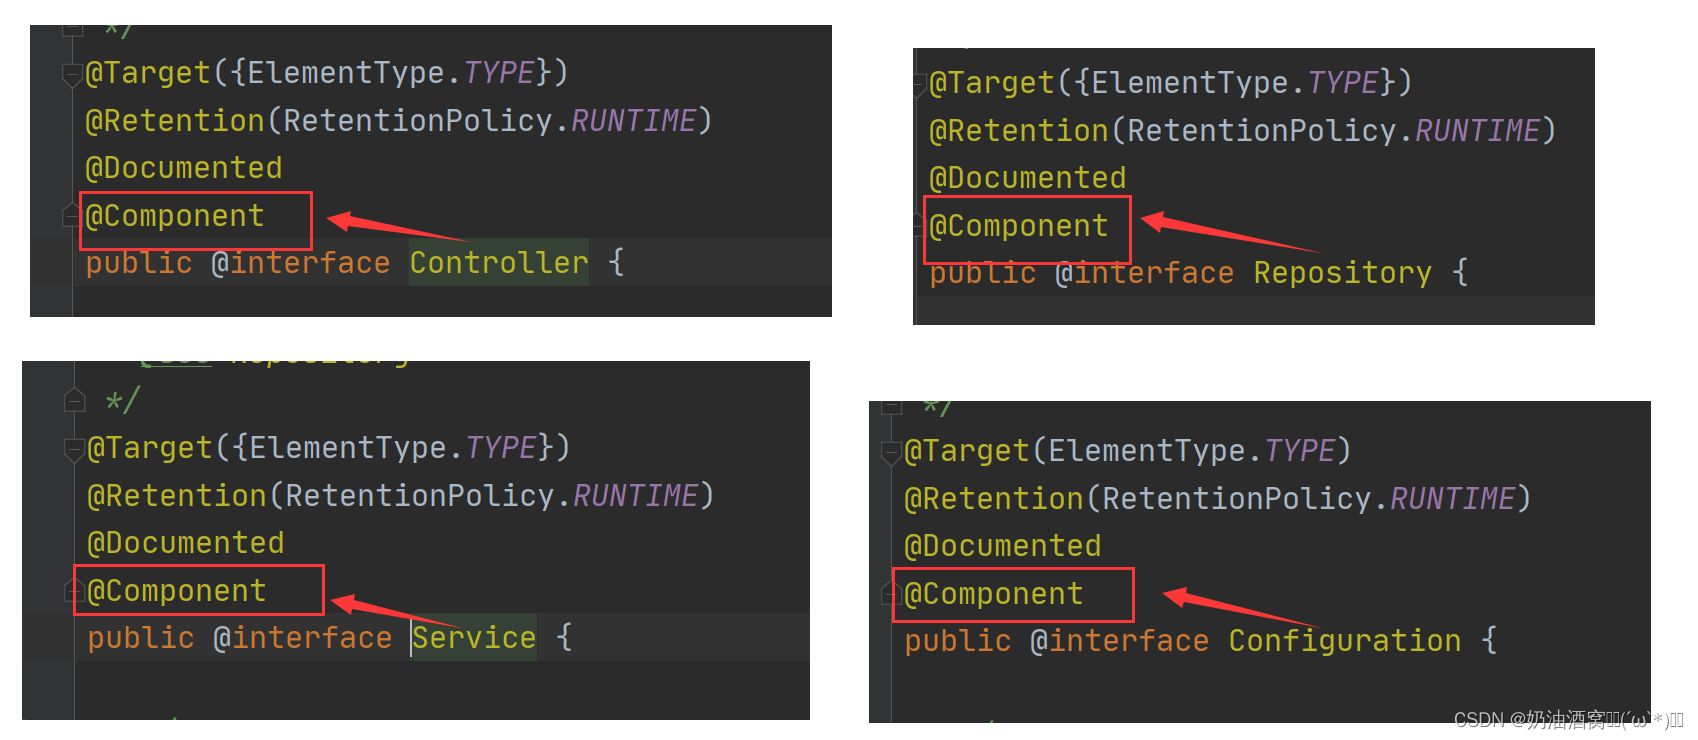
当我们查看@Controller、@Service、@Repository、@Configuration的原码时就会发现这些注解里面都有一个注解是@Component,说明他本身就是属于@Component的“子类”。
3.6.6方法注解@Bean
@Bean注解必须配合五大类注解一起使用。
文章实体类代码:
- package com.spring.demo.model;
- import java.time.LocalDateTime;
- /**
- * 普通文章实体类
- */
- public class ArticleInfo {
- private int aid;
- private String title;
- private String content;
- private LocalDateTime createtime;
- @Override
- public String toString() {
- return "ArticleInfo{" +
- "aid=" + aid +
- ", title='" + title + '\'' +
- ", content='" + content + '\'' +
- ", createtime=" + createtime +
- '}';
- }
- public int getAid() {
- return aid;
- }
- public void setAid(int aid) {
- this.aid = aid;
- }
- public String getTitle() {
- return title;
- }
- public void setTitle(String title) {
- this.title = title;
- }
- public String getContent() {
- return content;
- }
- public void setContent(String content) {
- this.content = content;
- }
- public LocalDateTime getCreatetime() {
- return createtime;
- }
- public void setCreatetime(LocalDateTime createtime) {
- this.createtime = createtime;
- }
- }
注解代码展示:
- package com.spring.demo.Controller;
- import com.spring.demo.model.ArticleInfo;
- import org.springframework.context.annotation.Bean;
- import org.springframework.stereotype.Controller;
- import java.time.LocalDateTime;
- @Controller
- public class Articles {
- @Bean //将当前方法返回的对象存储到IoC容器中
- public ArticleInfo articleInfo() {
- //伪代码
- ArticleInfo articleInfo = new ArticleInfo();
- articleInfo.setAid(1);
- articleInfo.setTitle("文章标题");
- articleInfo.setContent("文章正文");
- articleInfo.setCreatetime(LocalDateTime.now());
- return articleInfo;
- }
- }
测试代码展示:
- package com.spring.demo.Controller;
- import com.spring.demo.model.ArticleInfo;
- import org.junit.jupiter.api.Test;
- import org.springframework.context.ApplicationContext;
- import org.springframework.context.support.ClassPathXmlApplicationContext;
- class ArticlesTest {
- @Test
- void articleInfo() {
- ApplicationContext context = new ClassPathXmlApplicationContext("spring-config.xml");
- ArticleInfo articleInfo = context.getBean("articleInfo", ArticleInfo.class);
- System.out.println(articleInfo.toString());
- }
- }
结果展示:

注意:@Bean获取时默认命名是方法名。
3.6.7@Bean的几种重命名方式
在上面的时候我们是直接通过方法名来获取的,那么我们还可通过给Bean进行重命名的方式来进行获取。
①可以通过设置 name 属性给 Bean 对象进⾏重命名操作但是不写name关键字,如下代码所示:

②可以通过设置 name 属性给 Bean 对象进⾏重命名操作,如下代码所示:

③可以通过设置 value 属性给 Bean 对象进⾏重命名操作,如下代码所示:

④重命名扩展:@Bean支持指定多个名称,如下代码所示:

默认命名注意事项:当@Bean重命名之后,那么默认的使用方法命名获取Bean对象的方式就不能使用了。
3.6.8获取Bean对象(对象装配)
在上述过程中我们学会了如何通过五大类注解以及方法注解的方式将对象存储到IoC容器中,接下来我们就来学习一下如何将Bean对象取出来。
获取Bean对象也叫做对象装配,是把对象取出来放到某个类中,有时候也叫对象注入。
对象装配(对象注入)的实现方法有以下三种:
- 属性注入。
- Setter注入。
- 构造方法注入。
接下来我们就来分别看一下吧。
3.6.8.1属性注入
属性注入时使用@Autowired实现的,将Service类注入到Controller类中。
使用代码:
以前获取对象的写法:
- package com.spring.demo.service;
- import com.spring.demo.dao.UserRepository;
- import org.springframework.context.ApplicationContext;
- import org.springframework.context.support.ClassPathXmlApplicationContext;
- import org.springframework.stereotype.Service;
- @Service
- public class UserService1 {
- public int add() {
- System.out.println("Do UserService1 add method");
- //传统获取的写法
- // UserRepository userRepository = new UserRepository();
- // return userRepository.add();
- //Spring v1.0版本的写法
- ApplicationContext context = new ClassPathXmlApplicationContext("spring-config.xml");
- UserRepository userRepository = context.getBean("userRepository", UserRepository.class);
- return userRepository.add();
- }
- }
现在使用属性注入之后代码的写法:
- package com.spring.demo.service;
- import com.spring.demo.dao.UserRepository;
- import org.springframework.beans.factory.annotation.Autowired;
- import org.springframework.stereotype.Service;
- @Service
- public class UserService1 {
- @Autowired
- private UserRepository userRepository;
- public int add() {
- System.out.println("Do UserService1 add method");
- //Spring v2.0版本的写法
- return userRepository.add();
- }
- }
要想对其进行重命名可以使用@Qualifier来进行重命名。

同样也可以将@Autowired注解换成@Resource注解。

测试代码展示:
- package com.spring.demo.service;
- import org.junit.jupiter.api.Test;
- import org.springframework.context.ApplicationContext;
- import org.springframework.context.support.ClassPathXmlApplicationContext;
- import static org.junit.jupiter.api.Assertions.*;
- class UserService1Test {
- @Test
- void add() {
- ApplicationContext context = new ClassPathXmlApplicationContext("spring-config.xml");
- UserService1 userService1 = context.getBean("userService1",UserService1.class);
- userService1.add();
- }
- }
结果展示:

优点:
- 使用简单。
缺点:
- 无法注入final修饰的变量。

- 通用性问题:只适用于IoC容器。
- 更容易违背单一设计原则,因为使用起来比较简单。
3.6.8.2Setter注入
Setter注入黑盒属性的Setter方法实现类似,只不过在设置set方法的时候需要加上@Autowired注解。
使用代码:
- package com.spring.demo.service;
- import com.spring.demo.dao.UserRepository;
- import org.springframework.beans.factory.annotation.Autowired;
- import org.springframework.stereotype.Service;
- @Service
- public class UserService2 {
- private UserRepository userRepository;
- @Autowired
- public UserService2(UserRepository userRepository) {
- this.userRepository = userRepository;
- }
- public void sayHi() {
- System.out.println("Do UserService2 sayHi");
- userRepository.add();
- }
- }
测试代码展示:
- package com.spring.demo.service;
- import org.junit.jupiter.api.Test;
- import org.springframework.context.ApplicationContext;
- import org.springframework.context.support.ClassPathXmlApplicationContext;
- class UserService2Test {
- @Test
- void sayHi() {
- ApplicationContext context = new ClassPathXmlApplicationContext("spring-config.xml");
- UserService2 userService2 = context.getBean("userService2",UserService2.class);
- userService2.sayHi();
- }
- }
结果展示: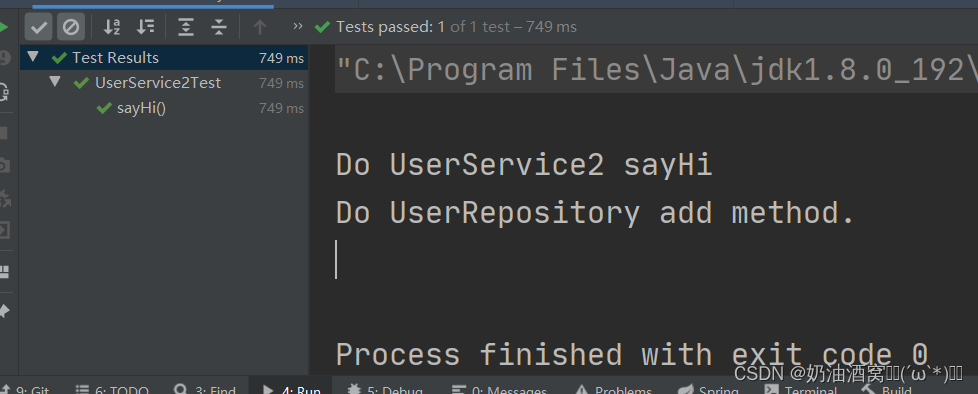
优点:
- 通常Setter只Set一个属性,所以Setter注入更加符合单一设计原则。
缺点:
- 无法注入一个final修饰的变量。
- setter注入对象的时候可以被修改,setter本来就是一个方法,既然是一个方法就有可能被多次调用和修改。
3.6.8.3构造方法注入
构造方法注入就是在类的构造方法中实现注入。
使用代码:
- package com.spring.demo.service;
- import com.spring.demo.dao.UserRepository;
- import org.springframework.beans.factory.annotation.Autowired;
- import org.springframework.stereotype.Service;
- @Service
- public class UserService3 {
- private final UserRepository userRepository;
- @Autowired
- public UserService3(UserRepository userRepository) {
- this.userRepository = userRepository;
- }
- public void sayHi() {
- System.out.println("Do UserService1 add method");
- }
- }
测试代码展示:
- package com.spring.demo.service;
- import org.junit.jupiter.api.Test;
- import org.springframework.context.ApplicationContext;
- import org.springframework.context.support.ClassPathXmlApplicationContext;
- import static org.junit.jupiter.api.Assertions.*;
- class UserService3Test {
- @Test
- void sayHi() {
- ApplicationContext context = new ClassPathXmlApplicationContext("spring-config.xml");
- UserService3 userService3 = context.getBean("userService3",UserService3.class);
- userService3.sayHi();
- }
- }
结果展示: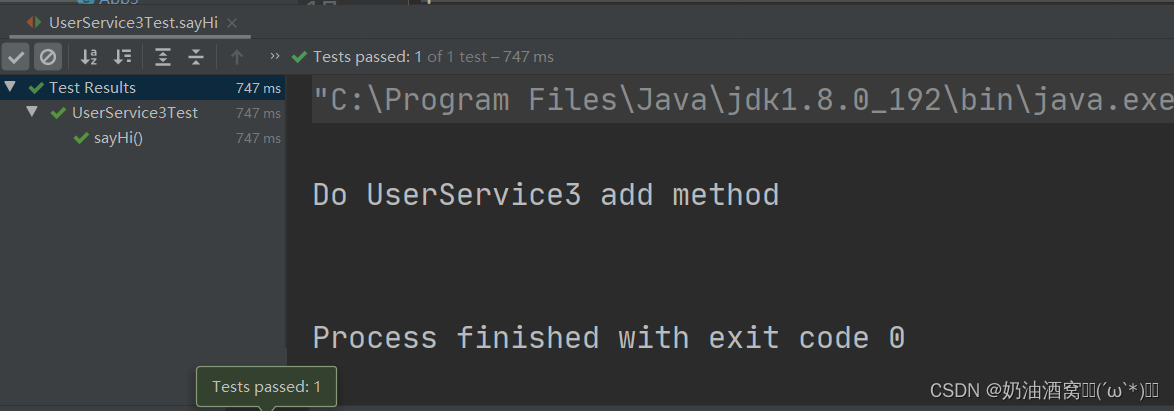
优点:
- 可以注入一个final修改的变量。
- 注入的时候对象不会被修改,因为构造方法只会加载一次。
- 构造方法注入可以保证注入对象完全初始化。
- 构造方法注通用性更好。
缺点:
- 写法比属性注入更加复杂。
- 使用构造注入,无法解决循环依赖的问题。
3.6.8.4@Autowired VS @Resource区别
- 出身不同:@Resource来自于JDK;@Autowired来自于Spring框架。
- 支持参数不同:@Resource支持很多参数设置,@Autowired只支持一个参数设置。
- 使用上的区别:@Resource不支持构造方法注入,而@Autowired支持构造方法注入。
- idea兼容性支持不同:使用@Autowired在idea专业版下可能会误报;@Resource不存在误报的问题。
3.6.9同一类型多个Bean报错
当出现以下多个Bean,返回同一个对象类型时程序会报错,如下所示:
代码展示:
- package com.spring.demo.model;
- import org.springframework.context.annotation.Bean;
- import org.springframework.stereotype.Component;
- @Component
- public class Users {
- @Bean
- public User user1() {
- User user = new User();
- user.setId(1);
- user.setName("Java");
- return user;
- }
- @Bean
- public User user2() {
- User user = new User();
- user.setId(2);
- user.setName("MySQL");
- return user;
- }
- }
在另一个类中获取User对象,如下所示:
代码展示:
- package com.spring.demo.Controller;
- import com.spring.demo.model.User;
- import org.springframework.stereotype.Controller;
- import javax.annotation.Resource;
- @Controller //将对象存储到Spring中
- public class UserController {
- //注入
- @Resource
- private User user;
- public User getUser() {
- return user;
- }
- }
结果展示:

解决方案:
- 将属性的名字和Bean的名字对应上。
- @Autowired配合@Qualifier一起使用。
3.6.10Bean的作用域
定义:限定程序中变量的可用范围叫做作用域,或者说在源代码中定义变量的某个区域就叫做作用域。而Bean作用域指的是Bean在Spring容器中的某种行为(单例、原型...),比如singleton单例作用域,就表示Bean在整个Sprig中只有一份,它是全局共享的,那么当其他人修改了这个值之后,那么另一个人读到的就是被修改的值。
Bean作用域类型:
- singleton:单例模式(默认的作用域)。
- prototype:原型模式。
- request:请求作用域。只适用于Spring MVC项目(Spring Web)。
- session:会话作用域。一个Http会话共享一个Bean。只适用于Spring MVC项目(Spring Web)。
- application:应用作用域。表示的是一个Context容器共享一个作用域。只适用于Spring MVC项目(Spring Web)。
- websocket:websocket作用域。只适用于websocket作用域。
单例作用域(singleton)VS全局作用域(application)
- singleton是Spring Core的作用域;application是Spring Web中的作用域。
- singleton作用于IoC容器,而application作用于Servlet容器。
3.6.11设置Bean的作用域
- @Scope("prototype")
- @Scope(ConfigurableBeanFactory.SCOPE_PROTOTYPE)
3.6.12Spring的生命周期
- 启动容器。
- 读取配置进行Bean实例化。
- 将Bean加入到容器中。
- 装配Bean属性(给当前类的属性DI,进行赋值)。
3.6.13Bean的生命周期
1.实例化(内存空间的分配)。
2.设置Bean属性(进行依赖注入,将依赖的Bean赋值到当前类的属性上)。
3.Bean的初始化。
3.1执行各种通知。
3.2初识化的前置方法。
3.3初始化方法。
3.4初始化的后置方法。
4.使用Bean
5.销毁Bean。
结束语:
好了这节小编就给大分享到这里啦,希望这节对大家有关于Spring的基础知识的了解有一定帮助,想要学习的同学记得关注小编和小编一起学习吧!如果文章中有任何错误也欢迎各位大佬及时为小编指点迷津(在此小编先谢过各位大佬啦!)

-
相关阅读:
C++——隐式类型转换
document.getElementById()报错处理
第五章:Java中的方法和方法重载
【基础篇】五、基于SpringBoot来整合SSM的案例(上)
haproxyhttp和https同源代理配置步骤
London Dock丨伦敦一区的房产明星,拥揽泰晤士河美景,尽享都市奢华生活
rgb转hsl,红绿蓝转色调饱和度亮度(颜色转换,c#)
808. 分汤 : 挺有意思的 DP 题
测试/开发程序员的“我“要跳槽,利与弊共存......
php一句话木马免杀
- 原文地址:https://blog.csdn.net/weixin_61599986/article/details/132823908
