-
spring boot整合常用redis客户端(Jedis、Lettuce、RedisTemplate、Redisson)常见场景解决方案
Java操作redis有三种客户端供选择:Jedis、Lettuce、Redisson。
在实际项目中运用最多的客户端还是Redisson、RedisTemplate;其中RedisTemplate并非是一个新的redis客户端实现,RedisTemplate是Spring Data Redis中提供的封装好的redis操作模板,Spring Data Redis则是Spring Data下的一个子模块(Spring Data还包括jdbc、jpa、elasticsearch、redis等等数据库访问实现),RedisTemplate是对Jedis和Lettuce的进一步封装,简化Jedis和Lettuce对redis的操作,在spring boot2.x之后的版本使用RedisTemplate时默认采用Lettuce实现,spring boot1.x的版本默认是采用Jedis实现。redis客户端中命令行获取value时出现中文乱码,可用以下命令(在redis客户端外面执行该命令):
redis-cli --raw get redisTemplate redis-cli:redis客户端可执行文件 redisTemplate:获取value的key- 1
- 2
- 3
一、Jedis
Jedis 是一款老牌 Redis 的 Java 客户端。
优点:
1、Jedis 的 API 提供了比较全面的 Redis 命令的支持
2、Jedis 中的 Java 方法基本和 Redis 的 API 保持着一致,也就是说了解 Redis 的API,可以熟练的使用 Jedis
3、支持 pipelining、事务、LUA Scripting、Redis Sentinel、Redis Cluster等等 redis 提供的高级特性
4、客户端轻量,简洁,便于集成和改造
5、使用广泛,开发人员易上手
缺点:
1、使用阻塞的 I/O 操作,且其方法调用都是同步的,程序流需要等到 sockets 处理完 I/O 才能执行,不支持异步
2、Jedis 在实现上是直接连接的 redis server,如果在多线程环境下是非线程安全的,这个时候可以使用连接池来管理 Jedis,解决 Jedis 客户端实例存在非线程安全的问题(也就是可以通过配置JedisPool来实现基于Jedis的连接池)
3、不支持读写分离,需要自己实现
4、技术文档差,可以说几乎没有
通过配置 JedisPool 设置连接池并将JedisPool对象注入到spring容器内,使用时通过 @Autowired 方式注入JedisPool 使用。
jar包:<dependency> <groupId>redis.clientsgroupId> <artifactId>jedisartifactId> <version>3.3.0version> dependency>- 1
- 2
- 3
- 4
- 5
配置信息:
spring: redis: host: 127.0.0.1 #redis服务端主机ip port: 6379 #redis端口号 #password: 123456 #redis密码 database: 0 #使用redis的哪个库,redis有16个库,默认是0即第一个库 client-name: ceshi #生成的客户端实例名称(jedis连接的名称) connection-timeout: 3000 #连接redis超时时间 so-timeout: 2000 #socket超时时间 max-total: 16 #连接池最大连接数 max-idle: 8 #连接池最大空闲连接数 min-idle: 4 #连接池最小空闲连接数 max-wait-millis: 1000 #从连接池获取连接最长等待时间 test-on-borrow: true #在连接池分配Jedis实例时,是否测试连接可用性- 1
- 2
- 3
- 4
- 5
- 6
- 7
- 8
- 9
- 10
- 11
- 12
- 13
- 14
JedisPool配置类:
package com.database.pool.testpool.config; import lombok.Data; import org.apache.commons.pool2.impl.GenericObjectPoolConfig; import org.springframework.boot.context.properties.ConfigurationProperties; import org.springframework.context.annotation.Bean; import org.springframework.context.annotation.Configuration; import redis.clients.jedis.JedisPool; /** * JedisPool连接池在创建时不会建立连接,只有客户端使用JedisPool获取连接时才会检查是否有空闲的连接,如果没有则创建连接给客户端,如果有则直接分配空闲连接给客户端 */ @Data @Configuration @ConfigurationProperties("spring.redis")//获取spring.redis开头的配置赋值给对应字段 public class JedisPoolConfig { /** 以下参数是针对创建redis连接的设置 **/ /** * redis服务端IP */ private String host; /** * redis端口 */ private Integer port; /** * 连接超时时间 */ private Integer connectionTimeout; /** * socket超时时间 */ private Integer soTimeout; /** * redis密码 */ private String password; /** * 使用哪个数据库 */ private Integer database; /** * 生成的客户端实例名称 */ private String clientName; /** 以下参数是针对连接池jedisPool的设置 **/ /** * 连接池最大连接数 */ private Integer maxTotal; /** * 连接池最大空闲连接数 */ private Integer maxIdle; /** * 连接池最小空闲连接数 */ private Integer minIdle; /** * 当连接池中的jedis 实例都被分配完时,是否要进行阻塞 */ private boolean blockWhenExhausted; /** * 从连接池获取连接最长等待时间,当blockWhenExhausted为true时,最大的阻塞时长 */ private Integer maxWaitMillis; /** * 创建Jedis实例时,是否进行连接可用性测试,默认关闭,如果打开,则保证创建的都是连接可用的Jedis实例 */ private boolean testOnCreate; /** * 在连接池分配Jedis实例时,是否测试连接可用性,默认关闭,如果打开,则保证分配出去的连接都是可用的 */ private boolean testOnBorrow; /** * 归还Jedis实例到连接池时,是否测试连接可用性,默认关闭 */ private boolean testOnReturn; /** * 是否开启一个idle object evitor线程对空闲的Jedis实例进行扫描,如果验证失败,此Jedis实例会被从资源池中删除掉,只有在timeBetweenEvictionRunsMillis大于0时才生效 */ private boolean testWhileIdle; /** * idle object evitor线程两次扫描之间要sleep的毫秒数即扫描空闲连接是否可用的时间间隔 */ private Integer timeBetweenEvictionRunsMillis; /** * idle object evitor线程每次扫描的最多的对象数 */ private Integer numTestsPerEvictionRun; /** * 空闲驱逐时间,一个对象至少停留在idle状态的最短时间,然后才能被idle object evitor扫描并驱逐;这一项只有在timeBetweenEvictionRunsMillis大于0时才生效 */ private Integer minEvictableIdleTimeMillis; /** * 软空闲驱逐时间,在minEvictableIdleTimeMillis基础上,还需要检测至少softMinEvictableIdleTimeMillis长时间,才会进行驱逐 */ private Integer softMinEvictableIdleTimeMillis; /** * 分配连接资源时,是否使用LIFO(last in first out)策略,即分配最新使用的连接;还是使用FIFO策略,分配最久没有使用的连接;默认为true,即LIFO */ private boolean lifo; /** * 驱逐连接池中连接的策略,默认实现逻辑:资源的空闲毫秒数,如果大于空闲驱逐时间minEvictableIdleTimeMillis,或大于softMinEvictableIdleTimeMillis且当前的空闲资源数量大于配置的最小空闲资源数量,则进行驱逐,可重写该接口自定义驱逐策略 */ //private EvictionPolicy evictionPolicy; /** * JedisPool针对单节点的redis服务使用jedis连接池时做配置 * JedisPool和JedisSentinelPool使用完jedis连接后都需要调用close方法而JedisCluster使用完jedis连接后不需要调用close方法(内部机制会自动进行连接状态转换) * @return */ @Bean public JedisPool generateJedisPoolFactory() { //JedisSentinelPool Sentinel模式的redis服务需要配置JedisSentinelPool而非JedisPool //JedisCluster 集群模式的redis服务需要配置JedisCluster而非JedisPool GenericObjectPoolConfig poolConfig = new GenericObjectPoolConfig(); poolConfig.setMaxTotal(maxTotal); poolConfig.setMaxIdle(maxIdle); poolConfig.setMinIdle(minIdle); poolConfig.setMaxWaitMillis(maxWaitMillis); poolConfig.setTestOnBorrow(testOnBorrow); JedisPool jedisPool = new JedisPool(poolConfig, host, port,connectionTimeout,soTimeout,password,database,clientName); return jedisPool; } }- 1
- 2
- 3
- 4
- 5
- 6
- 7
- 8
- 9
- 10
- 11
- 12
- 13
- 14
- 15
- 16
- 17
- 18
- 19
- 20
- 21
- 22
- 23
- 24
- 25
- 26
- 27
- 28
- 29
- 30
- 31
- 32
- 33
- 34
- 35
- 36
- 37
- 38
- 39
- 40
- 41
- 42
- 43
- 44
- 45
- 46
- 47
- 48
- 49
- 50
- 51
- 52
- 53
- 54
- 55
- 56
- 57
- 58
- 59
- 60
- 61
- 62
- 63
- 64
- 65
- 66
- 67
- 68
- 69
- 70
- 71
- 72
- 73
- 74
- 75
- 76
- 77
- 78
- 79
- 80
- 81
- 82
- 83
- 84
- 85
- 86
- 87
- 88
- 89
- 90
- 91
- 92
- 93
- 94
- 95
- 96
- 97
- 98
- 99
- 100
- 101
- 102
- 103
- 104
- 105
- 106
- 107
- 108
- 109
- 110
- 111
- 112
- 113
- 114
- 115
- 116
- 117
- 118
- 119
- 120
- 121
- 122
- 123
- 124
- 125
- 126
- 127
- 128
- 129
- 130
- 131
- 132
- 133
- 134
- 135
- 136
- 137
- 138
- 139
- 140
- 141
- 142
- 143
- 144
- 145
- 146
- 147
- 148
- 149
- 150
- 151
- 152
- 153
使用JedisPool类:
package com.database.pool.testpool.controller; import org.springframework.beans.factory.annotation.Autowired; import org.springframework.web.bind.annotation.GetMapping; import org.springframework.web.bind.annotation.PathVariable; import org.springframework.web.bind.annotation.RequestMapping; import org.springframework.web.bind.annotation.RestController; import redis.clients.jedis.Jedis; import redis.clients.jedis.JedisPool; @RequestMapping("/test") @RestController public class TestController { @Autowired private JedisPool jedisPool; /** * jedis 测试 * @param value * @return */ @GetMapping("/info/{value}") public String info(@PathVariable("value") String value){ Jedis resource = null; String jedis = null; try { //jedisPool.getNumActive() 活跃连接数(被客户端使用的连接数) //jedisPool.getNumIdle() 空闲连接数(未被客户端使用可用于分配给客户端使用的连接数) System.out.println("jedisPool信息:"+ jedisPool.getNumActive()+" "+jedisPool.getNumWaiters()+" "+jedisPool.getNumIdle()); resource = jedisPool.getResource();//获取连接 System.out.println("jedisPool信息:"+ jedisPool.getNumActive()+" "+jedisPool.getNumWaiters()+" "+jedisPool.getNumIdle()+" "+resource.clientGetname()); resource.set("jedis",value);//使用连接 jedis = resource.get("jedis"); Jedis resource1 = jedisPool.getResource(); System.out.println("jedisPool信息:"+ jedisPool.getNumActive()+" "+jedisPool.getNumWaiters()+" "+jedisPool.getNumIdle()); resource1.close(); System.out.println("jedisPool信息:"+ jedisPool.getNumActive()+" "+jedisPool.getNumWaiters()+" "+jedisPool.getNumIdle()); }finally { //使用完jedis之后需要close,这个close的作用不是把jedis连接关闭,而是将这个jedis连接从活跃状态(被客户端使用的状态)设置为空闲状态,方便下次通过getResource //获取该连接给其他客户端使用,否则下次getResource时由于没有空闲连接会再次创建一个jedis连接,不能达到复用连接的目的 if (resource != null)resource.close();//关闭连接(将连接设置为空闲状态) System.out.println("jedisPool信息:"+ jedisPool.getNumActive()+" "+jedisPool.getNumWaiters()+" "+jedisPool.getNumIdle()); Jedis resource2 = jedisPool.getResource(); System.out.println("jedisPool信息:"+ jedisPool.getNumActive()+" "+jedisPool.getNumWaiters()+" "+jedisPool.getNumIdle()); resource2.close(); System.out.println("jedisPool信息:"+ jedisPool.getNumActive()+" "+jedisPool.getNumWaiters()+" "+jedisPool.getNumIdle()); } return jedis; } }- 1
- 2
- 3
- 4
- 5
- 6
- 7
- 8
- 9
- 10
- 11
- 12
- 13
- 14
- 15
- 16
- 17
- 18
- 19
- 20
- 21
- 22
- 23
- 24
- 25
- 26
- 27
- 28
- 29
- 30
- 31
- 32
- 33
- 34
- 35
- 36
- 37
- 38
- 39
- 40
- 41
- 42
- 43
- 44
- 45
- 46
- 47
- 48
- 49
- 50
- 51
- 52
- 53
- 54
测试:


哨兵模式配置:

集群模式配置:

二、Lettuce
Lettuce 是一种可扩展的、线程安全的 Redis 高级客户端,从 Spring Boot 2.x 开始, Lettuce 已取代 Jedis 成为SpringBoot 默认的 Redis 客户端
优点:
1、相比于 Jedis,Lettuce 属于后起之秀,对 Redis 支持更加全面,并且解决了 Jedis 客户端实例存在非线程安全的问题
2、支持同步编程,异步编程,响应式编程,自动重新连接,主从模式,集群模块,哨兵模式,管道和编码器等等高级的 Redis 特性
3、Lettuce 底层基于 Netty 框架的事件驱动与 redis 通信,采用了非阻塞的 I/O 操作,可异步调用,相比 Jedis,性能高
4、Lettuce 的 API 是线程安全的,如果不是执行阻塞和事务操作,如 BLPOP 和MULTI/EXEC 等命令,多个线程就可以共享一个连接,性能方面差异很小
缺点:
1、API 更加抽象,学习使用成本高
jar包:<dependency> <groupId>io.lettucegroupId> <artifactId>lettuce-coreartifactId> <version>6.1.8.RELEASEversion> dependency>- 1
- 2
- 3
- 4
- 5
配置信息:
spring: redis: host: 127.0.0.1 #redis服务端主机ip port: 6379 #redis端口号 #password: 123456 #redis密码 database: 0 #使用redis的哪个库,redis有16个库,默认是0即第一个库 client-name: ceshi #生成的客户端实例名称(lettuce连接的名称) connection-timeout: 3000 #连接redis超时时间- 1
- 2
- 3
- 4
- 5
- 6
- 7
- 8
配置类:
package com.database.pool.testpool.config; import io.lettuce.core.RedisClient; import io.lettuce.core.RedisURI; import io.lettuce.core.api.StatefulRedisConnection; import org.springframework.beans.factory.annotation.Value; import org.springframework.context.annotation.Bean; import org.springframework.context.annotation.Configuration; import java.time.Duration; /** * lettuce连接redis配置类 * Lettuce 的 API 是线程安全的,所以不需要像Jedis那样采用JedisPool解决线程安全问题,执行的命令不是阻塞式命令性能差异小 * 如果没有性能问题则不需要配置Lettuce连接池 */ @Configuration public class LettuceConfig { /** * 读取spring.redis.host配置的值设置为host字段的值,如果没有该配置则使用默认值 127.0.0.1 (@Value注解默认值时字符串不需要加引号) */ @Value("${spring.redis.host:127.0.0.1}") private String host; @Value("${spring.redis.port:6379}") private Integer port; @Value("${spring.redis.host:lettuce1}") private String clientName; @Value("${spring.redis.database:0}") private Integer database; @Value("${spring.redis.connection-timeout:3000}") private Integer connectionTimeout; /** * 构建StatefulRedisConnection对象到spring容器中,对象名字为 simpleConnection * @return */ @Bean("simpleConnection") public StatefulRedisConnection<String,String> simpleConnection(){ RedisURI redisURI = new RedisURI(); redisURI.setClientName(clientName); redisURI.setHost(host); redisURI.setPort(port); redisURI.setDatabase(database); redisURI.setTimeout(Duration.ofMillis(connectionTimeout)); RedisClient redisClient = RedisClient.create(redisURI); return redisClient.connect(); } }- 1
- 2
- 3
- 4
- 5
- 6
- 7
- 8
- 9
- 10
- 11
- 12
- 13
- 14
- 15
- 16
- 17
- 18
- 19
- 20
- 21
- 22
- 23
- 24
- 25
- 26
- 27
- 28
- 29
- 30
- 31
- 32
- 33
- 34
- 35
- 36
- 37
- 38
- 39
- 40
- 41
- 42
- 43
- 44
- 45
- 46
- 47
- 48
- 49
- 50
- 51
- 52
- 53
- 54
- 55
- 56
- 57
使用类:
package com.database.pool.testpool.controller; import io.lettuce.core.api.StatefulRedisConnection; import org.springframework.web.bind.annotation.GetMapping; import org.springframework.web.bind.annotation.PathVariable; import org.springframework.web.bind.annotation.RequestMapping; import org.springframework.web.bind.annotation.RestController; import javax.annotation.Resource; @RequestMapping("/test") @RestController public class TestController { /** * 注入名字为simpleConnection的StatefulRedisConnection对象 */ @Resource(name = "simpleConnection") private StatefulRedisConnection statefulRedisConnection; /** * lettuce 测试 * @param value * @return */ @GetMapping("/info/{value}") public String info(@PathVariable("value") String value){ statefulRedisConnection.sync().set("lettuce",value); return statefulRedisConnection.sync().get("lettuce").toString(); } }- 1
- 2
- 3
- 4
- 5
- 6
- 7
- 8
- 9
- 10
- 11
- 12
- 13
- 14
- 15
- 16
- 17
- 18
- 19
- 20
- 21
- 22
- 23
- 24
- 25
- 26
- 27
- 28
- 29
- 30
- 31
- 32
- 33
- 34
- 35
- 36
测试:

主从模式配置:

哨兵模式配置:

Cluster模式配置:

连接池配置:
导入包:<dependency> <groupId>org.apache.commonsgroupId> <artifactId>commons-pool2artifactId> <version>2.11.1version> dependency>- 1
- 2
- 3
- 4
- 5
github示例:

三、Redisson
Redisson 是一个在 Redis 的功能基础上实现的 Java 驻内存数据网格客户端。实现了分布式和可扩展的 Java 数据结构,提供很多分布式相关操作服务,如分布式锁,分布式集合,可通过 Redis 支持延迟队列。
优点:
1、实现了分布式特性和可扩展的 Java 数据结构,例如分布式锁,分布式集合,分布式对象,分布式远程调度等等高级功能,适合分布式开发
2、与 Lettuce 一样,基于 Netty 框架的事件驱动与 redis 通信,支持异步调用,性能高
3、Redisson 的 API 是线程安全的,所以可以使用单个 Redisson 连接来完成各种操作
4、支持读写分离,支持读负载均衡,在主从复制和 Redis Cluster 架构下都可以使用
5、内建 Tomcat Session Manager,为 Tomcat 6/7/8 提供了会话共享功能,可以与 Spring Session 集成,实现基于 Redis 的会话共享
6、相比于 Jedis、Lettuce 等基于 redis 命令封装的客户端,Redisson 提供的功能更加高端和抽象,Redisson 可以类比 Spring 框架,这些框架搭建了应用程序的基础框架和功能,可以显著提升开发效率,让开发者有更多的时间来关注业务逻辑
7、文档较丰富,有中文文档
缺点:
1、和 Jedis、Lettuce 客户端相比,基础功能较为简单,对字符串的支持比较差,不支持排序、事务、管道、分区等 Redis 特性
2、API 更加抽象,学习使用成本高jar包:
<dependency> <groupId>org.redissongroupId> <artifactId>redissonartifactId> <version>3.12.4version> dependency>- 1
- 2
- 3
- 4
- 5
配置信息:
spring: redis: host: 127.0.0.1 #redis服务端主机ip port: 6379 #redis端口号 #password: 123456 #redis密码 database: 0 #使用redis的哪个库,redis有16个库,默认是0即第一个库 connection-timeout: 3000 #建立连接超时时间,毫秒 timeout: 3000 #命令等待超时时间,毫秒 client-name: redissonPool #客户端名称 retry-attempts: 3 #命令失败重试次数,如果尝试达到 retry-attempts 仍然不能将命令发送至某个指定的节点时,将抛出错误 retry-interval: 2000 #命令重试发送时间间隔,毫秒 connection-pool-size: 20 #连接池连接数量 idle-connection-timeout: 1800000 #空闲连接超时时间,毫秒 connection-minimum-idle-size: 10 #最小空闲连接数量- 1
- 2
- 3
- 4
- 5
- 6
- 7
- 8
- 9
- 10
- 11
- 12
- 13
- 14
配置类:
package com.database.pool.testpool.config; import org.redisson.Redisson; import org.redisson.api.RedissonClient; import org.redisson.codec.JsonJacksonCodec; import org.redisson.config.Config; import org.springframework.beans.factory.annotation.Value; import org.springframework.context.annotation.Bean; import org.springframework.context.annotation.Configuration; @Configuration public class RedissonConfig { @Value("${spring.redis.host}") private String host; @Value("${spring.redis.port}") private String port; @Value("${spring.redis.database}") private Integer database; @Value("${spring.redis.connection-timeout}") private Integer connectionTimeout; @Value("${spring.redis.timeout}") private Integer timeout; @Value("${spring.redis.client-name}") private String clientName; @Value("${spring.redis.retry-attempts:3}") private Integer retryAttempts; @Value("${spring.redis.retry-interval:2000}") private Integer retryInterval; @Value("${spring.redis.connection-pool-size}") private Integer connectionPoolSize; @Value("${spring.redis.idle-connection-timeout}") private Integer idleConnectionTimeout; @Value("${spring.redis.connection-minimum-idle-size}") private Integer connectionMinimumIdleSize; @Bean public RedissonClient initRedissonClient(){ Config config = new Config(); //单节点配置 config.useSingleServer().setAddress("redis://" + host + ":" + port).setDatabase(database).setConnectTimeout(connectionTimeout).setTimeout(timeout).setClientName(clientName) .setRetryAttempts(retryAttempts).setRetryInterval(retryInterval).setConnectionPoolSize(connectionPoolSize).setIdleConnectionTimeout(idleConnectionTimeout).setConnectionMinimumIdleSize(connectionMinimumIdleSize); //设置序列化 config.setCodec(JsonJacksonCodec.INSTANCE); //主从配置 //config.useMasterSlaveServers().setMasterAddress("").setPassword("").addSlaveAddress(new String[]{"",""}); //哨兵配置 //config.useSentinelServers(); //集群配置 //config.useClusterServers().addNodeAddress(); return Redisson.create(config); } }- 1
- 2
- 3
- 4
- 5
- 6
- 7
- 8
- 9
- 10
- 11
- 12
- 13
- 14
- 15
- 16
- 17
- 18
- 19
- 20
- 21
- 22
- 23
- 24
- 25
- 26
- 27
- 28
- 29
- 30
- 31
- 32
- 33
- 34
- 35
- 36
- 37
- 38
- 39
- 40
- 41
- 42
- 43
- 44
- 45
- 46
- 47
- 48
- 49
- 50
- 51
- 52
- 53
- 54
- 55
- 56
- 57
- 58
- 59
- 60
- 61
- 62
- 63
- 64
- 65
- 66
使用类:
package com.database.pool.testpool.controller; import org.redisson.api.RedissonClient; import org.springframework.beans.factory.annotation.Autowired; import org.springframework.web.bind.annotation.GetMapping; import org.springframework.web.bind.annotation.PathVariable; import org.springframework.web.bind.annotation.RequestMapping; import org.springframework.web.bind.annotation.RestController; @RequestMapping("/test") @RestController public class TestController { @Autowired private RedissonClient redissonClient; /** * redisson 测试 * @param value * @return */ @GetMapping("/info/{value}") public String info(@PathVariable("value") String value){ redissonClient.getBucket("redisson").set(value); Object redisson = redissonClient.getBucket("redisson").get(); return redisson.toString(); } }- 1
- 2
- 3
- 4
- 5
- 6
- 7
- 8
- 9
- 10
- 11
- 12
- 13
- 14
- 15
- 16
- 17
- 18
- 19
- 20
- 21
- 22
- 23
- 24
- 25
- 26
- 27
- 28
- 29
- 30
- 31
- 32
- 33
测试:

如果启动时出现这个错误:

是由于 redisson 版本导致的,刚开始是 3.2.0 版本会有以上报错,后面更换为 3.12.4 版本就可以正常启动。也可以使用 redisson-spring-boot-starter 的自动装配+配置实现集成。
三者对比:
1、Jedis 和 Lettuce 是比较纯粹的 Redis 命令客户端,几乎没提供什么分布式操作服务。
2、Jedis 和 Lettuce 两者相比,Jedis 需要JedisPool来解决线程安全问题,其他方面并没有太明显的区别,如果不需要使用 Redis 的高级功能,优先推荐使用 Lettuce。
3、相比于 Jedis、Lettuce 而言,Redisson 提供的功能更加高端和抽象,特别是分布式功能的支持提供了很多开箱即用的 Redis 高级功能,如果应用中需要使用到 Redis 的高级功能,比如分布式锁,分布式对象,分布式会话共享等等,建议使用 Redisson。
总结:
如果项目中对分布式功能的需求场景不多,推荐使用 Lettuce或Jedis。
如果项目中除了对基本的数据缓存操作需求以外,还需要用到分布式锁等功能,推荐采用Lettuce + Redisson组合方式使用(使用Lettuce弥补Redisson对于基础功能支持的不足,为了方便切换Jedis和Lettuce可以通过RedisTemplate来使用Jedis或Lettuce)。四、RedisTemplate
RedisTemplate是Spring Data Redis框架提供的对Jedis和Lettuce的封装客户端,本质上还是使用Jedis或Lettuce,spring boot1.x的版本默认采用Jedis实现,spring boot2.x的版本默认采用Lettuce实现;可以方便的在Jedis和Lettuce之间切换具体的客户端实现;和日志门面与日志实现框架的关系一样,日志门面统一了操作日志的api,而具体日志的记录交给日志实现框去做,这样在切换日志实现时不用修改日志相关代码;RedisTemplate性能上不及Jedis,使用RedisTemplate时项目中至少需要有Jedis或Lettuce客户端之一的依赖包,否则会报错,RedisTemplate会自动根据项目中依赖的客户端选择底层使用Jedis还是Lettuce。
jar包:<dependency> <groupId>org.springframework.bootgroupId> <artifactId>spring-boot-starter-data-redisartifactId> <version>2.3.5.RELEASEversion> dependency> <dependency> <groupId>org.apache.commonsgroupId> <artifactId>commons-pool2artifactId> <version>2.11.1version> dependency>- 1
- 2
- 3
- 4
- 5
- 6
- 7
- 8
- 9
- 10
- 11
- 12
- 13
- 14
- 15
配置信息:
spring: redis: host: 127.0.0.1 #redis服务端主机ip port: 6379 #redis端口号 #password: 123456 #redis密码 database: 0 #使用redis的哪个库,redis有16个库,默认是0即第一个库 client-name: ceshi #生成的客户端实例名称(jedis连接的名称) timeout: 3000 #连接redis超时时间 lettuce: #lettuce连接池配置,lettuce连接池的配置需要 commons-pool2 包的支持,如果不使用lettuce连接池不需要导入该包 pool: min-idle: 4 #最小空闲连接数 max-idle: 8 #最大空闲连接数 max-active: 8 #最大连接活跃数 max-wait: 3000 #最长等待连接池分配连接时间- 1
- 2
- 3
- 4
- 5
- 6
- 7
- 8
- 9
- 10
- 11
- 12
- 13
- 14
序列化配置:
package com.database.pool.testpool.config; import org.springframework.beans.factory.annotation.Autowired; import org.springframework.context.annotation.Bean; import org.springframework.context.annotation.Configuration; import org.springframework.data.redis.core.RedisTemplate; import org.springframework.data.redis.serializer.GenericJackson2JsonRedisSerializer; import org.springframework.data.redis.serializer.StringRedisSerializer; /** * redisTemplate序列化配置 * 不配置序列化会导致redisTemplate设置的key和value有十六进制编码信息 */ @Configuration public class RedisTemplateSerializeConfig { @Autowired private RedisTemplate redisTemplate; @Bean public RedisTemplate redisTemplateSerialize(){ //指定redisTemplate的key和value的序列化实例对象,由于hash类型的有key,value由filed和value组成,因此可以针对hash类型的key和value单独设置序列化 StringRedisSerializer stringRedisSerializer = new StringRedisSerializer(); GenericJackson2JsonRedisSerializer genericJackson2JsonRedisSerializer = new GenericJackson2JsonRedisSerializer(); redisTemplate.setKeySerializer(stringRedisSerializer); redisTemplate.setValueSerializer(genericJackson2JsonRedisSerializer); redisTemplate.setHashKeySerializer(stringRedisSerializer); redisTemplate.setHashValueSerializer(genericJackson2JsonRedisSerializer); return redisTemplate; } }- 1
- 2
- 3
- 4
- 5
- 6
- 7
- 8
- 9
- 10
- 11
- 12
- 13
- 14
- 15
- 16
- 17
- 18
- 19
- 20
- 21
- 22
- 23
- 24
- 25
- 26
- 27
- 28
- 29
- 30
- 31
- 32
- 33
使用类:
package com.database.pool.testpool.controller; import org.springframework.beans.factory.annotation.Autowired; import org.springframework.data.redis.core.RedisTemplate; import org.springframework.web.bind.annotation.GetMapping; import org.springframework.web.bind.annotation.PathVariable; import org.springframework.web.bind.annotation.RequestMapping; import org.springframework.web.bind.annotation.RestController; @RequestMapping("/test") @RestController public class TestController { @Autowired private RedisTemplate redisTemplate; /** * redisTemplate 测试 * @param value * @return */ @GetMapping("/info/{value}") public String info(@PathVariable("value") String value){ redisTemplate.opsForValue().set("redisTemplate",value); return redisTemplate.opsForValue().get("redisTemplate").toString(); } }- 1
- 2
- 3
- 4
- 5
- 6
- 7
- 8
- 9
- 10
- 11
- 12
- 13
- 14
- 15
- 16
- 17
- 18
- 19
- 20
- 21
- 22
- 23
- 24
- 25
- 26
- 27
- 28
- 29
- 30
- 31
- 32
- 33
测试:

如果不配置redisTemplate序列化会有问题(虽然通过redisTemplate api还是可以正常操作):

设置序列化之后,key前面的16进制编码不会自动添加上:

redisTemplate底层使用lettuce客户端时,如果配置了lettuce连接池,没有导入 commons-pool2 包时报错如下:

以上是针对使用redisTemplate时底层使用lettuce客户端时的配置,如果使用redisTemplate底层使用Jedis客户端则做如下配置:
jar包(同样需要spring-boot-starter-data-redis包,但需要排除这个包里面依赖的lettuce的包并且导入Jedis的包):<dependency> <groupId>org.springframework.bootgroupId> <artifactId>spring-boot-starter-data-redisartifactId> <version>2.3.5.RELEASEversion> <exclusions> <exclusion> <groupId>io.lettucegroupId> <artifactId>lettuce-coreartifactId> exclusion> exclusions> dependency> <dependency> <groupId>redis.clientsgroupId> <artifactId>jedisartifactId> <version>3.3.0version> dependency>- 1
- 2
- 3
- 4
- 5
- 6
- 7
- 8
- 9
- 10
- 11
- 12
- 13
- 14
- 15
- 16
- 17
- 18
- 19
配置信息:
spring: redis: host: 127.0.0.1 #redis服务端主机ip port: 6379 #redis端口号 #password: 123456 #redis密码 database: 0 #使用redis的哪个库,redis有16个库,默认是0即第一个库 client-name: ceshi #生成的客户端实例名称(jedis连接的名称) timeout: 3000 #连接redis超时时间 jedis: #jedis连接池配置 pool: min-idle: 4 #最小空闲连接数 max-idle: 8 #最大空闲连接数 max-active: 8 #最大连接活跃数 max-wait: 3000 #最长等待连接池分配连接时间- 1
- 2
- 3
- 4
- 5
- 6
- 7
- 8
- 9
- 10
- 11
- 12
- 13
- 14
序列化及使用的代码和redisTemplate使用lettuce客户端一致。
测试:

将spring-boot-starter-data-redis包中依赖的Lettuce包排出后,如果不导入Jedis或Lettuce的依赖,项目启动报错如下:

哨兵模式配置:

集群模式配置:
为了减少操作redis的代码可以使用SpringCache功能自动化将数据缓存在redis中,并优先读取redis缓存;但这种功能有局限性,方法加上注解后会自动根据key缓存查询到的数据,并从缓存中读取这个key的值;只能适用于简单场景,如果对于key的一些特殊场景的操作则还是需要单独写代码处理。redis的一些建议:


缓存穿透解决方案(缓存中没有数据,查询数据库但数据是不存在的导致数据库也查询不到数据,就不能将数据缓存在redis中,这样每次查询这样的数据都会查询redis和数据库,导致缓存失效;重点是查询的数据是本来就不存在的):

缓存击穿解决方案(某个热点的key缓存失效后(比如缓存时间到了或数据做了修改删除了缓存中的数据)这样一瞬间查询这个key的请求会全部打到数据库上,就叫做缓存击穿;重点是查询的数据是存在的,只是缓存失效了):
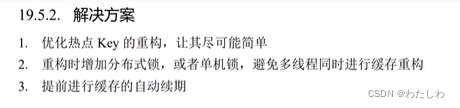
核心是延迟缓存过期或缓存失效后通过加锁让一个线程查询数据库并重构热点key的缓存,其他线程则读取重构后的缓存(加锁时通过双重检查的模式让后续的线程从缓存中读取数据)。缓存雪崩解决方案(缓存击穿的升级版,多个热点key同时失效,导致多个热点key的请求全部请求数据库;所以缓存击穿的解决方案在缓存雪崩中针对单个key的处理方式也适用):


注意:redis客户端模式主要作用是更新redis缓存后,redis会自动通知本地缓存更新;这个功能在redis6.x版本支持。

-
相关阅读:
devServer.proxy 实现分环境部署???
SqlBoy:分组问题
javascript 变量原理
c#枚举使用
rust学习Cell、RefCell、OnceCell
第二十章 构建和配置 Nginx (UNIX® Linux macOS)
2022年全球市场聚碳酸酯天窗玻璃总体规模、主要生产商、主要地区、产品和应用细分研究报告
机器学习笔记--改进KNN算法实现人脸识别
数据结构学习笔记(一)——基本概念
【Python学习笔记】Optuna + Transformer B站视频实践
- 原文地址:https://blog.csdn.net/doubiy/article/details/132389354

