-
在vue使用wangEditor(简单使用)
wangEditor不同的版本使用方法都不一样,这里以目前最新的参考官网方法使用2023-09-28
首先安装,参考官网,注意editor跟editor-for-vue两个都要装
- yarn add @wangeditor/editor
- # 或者 npm install @wangeditor/editor --save
- yarn add @wangeditor/editor-for-vue
- # 或者 npm install @wangeditor/editor-for-vue --save
然后就是参考官网示例操作就好了,官网有现成的代码示例,这里再加点注意事项注释
全部代码:
- <div>
- <div style="border: 1px solid #ccc">
- <Toolbar
- style="border-bottom: 1px solid #ccc"
- :editor="editor"
- :defaultConfig="toolbarConfig"
- :mode="mode"
- />
- <Editor
- style="height: 500px; overflow-y: hidden"
- v-model="html"
- :defaultConfig="editorConfig"
- :mode="mode"
- @onCreated="onCreated"
- />
- div>
- div>
- <script>
- import { Editor, Toolbar } from "@wangeditor/editor-for-vue";
- import { DomEditor } from "@wangeditor/editor";
- import "@wangeditor/editor/dist/css/style.css"//
- export default {
- components: { Editor, Toolbar },
- data() {
- return {
- editor: null,
- toolbar: null,
- html: "",
- toolbarConfig: {},
- editorConfig: { placeholder: "请输入内容..." },
- mode: "simple", // default or 'simple'两种模式
- };
- },
- methods: {
- // editor创建时的钩子
- onCreated(editor) {
- this.editor = Object.seal(editor); // 一定要用 Object.seal() ,否则会报错
- this.$nextTick(() => {
- //一定要用 this.$nextTick包裹起来,等editor实例创建好之后才能获取到toolbar实例
- this.toolbar = DomEditor.getToolbar(this.editor);
- this.toolbar.getConfig().toolbarKeys //可以查看当前的默认配置
- this.editor.getAllMenuKeys()//查询编辑器注册的所有菜单 key
- this.toolbar.config.insertKeys = {
- index: 4, // 插入的位置,基于当前的 toolbarKeys
- keys: ['emotion'],
- };
- });
- this.toolbarConfig.toolbarKeys = [
- // 菜单 key或者组的key
- 'headerSelect',
- // 注意分割线也算一个菜单
- '|',
- // 菜单 key
- 'bold',
- 'italic',
- 'color',
- 'justifyLeft',
- 'justifyRight',
- 'justifyCenter'
- // 继续配置其他菜单...
- ]
- },
- },
- mounted() {
- // 模拟 ajax 请求,异步渲染编辑器
- },
- beforeDestroy() {
- const editor = this.editor;
- if (editor == null) return;
- editor.destroy(); // 组件销毁时,及时销毁编辑器
- },
- };
- script>
最终效果:
简易模式
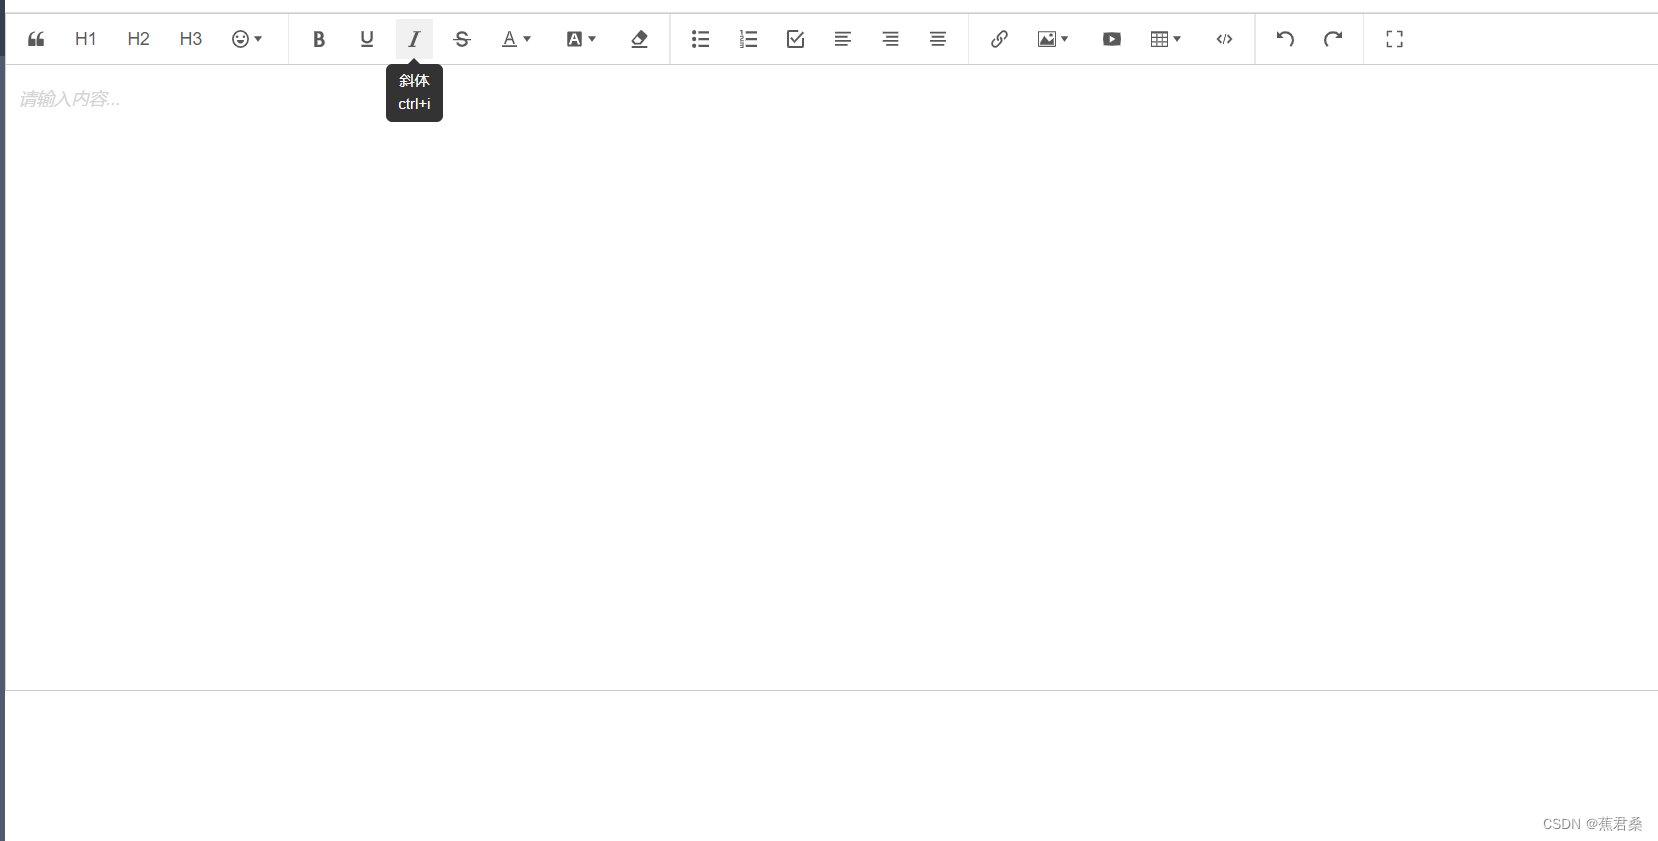
由于我自定义了Toolbar的菜单配置所以覆盖了原本的默认菜单,如果不自定义将使用默认的菜单配置
自定义菜单:

-
相关阅读:
webhook--详解(gitee 推送)
解决过的Java相关问题
Unity架构之场景重新加载
北京映急物流有限公司 面试.net软件工程师岗位
常用半导体器件
前端和后端分别做什么?
python中的命名空间和变量作用域介绍
C# 同步 异步 回调 状态机 async await Demo
Rust3 Using Structs to Structure Related Data & Enums and Pattern Matching
什么叫做云计算?
- 原文地址:https://blog.csdn.net/weixin_52941842/article/details/133395686
