-
【云原生】DevOps 环境搭建
本文使用 Gitlab,Jenkins,Docker,K8s,Harbor 实现CICD环境搭建
一、Gitlab环境部署
说明:内存尽量给多点(2G以上),后面会安装一些软件,会占用内存
1.1、安装依赖软件yum install curl openssh-server postfix- 1
1.2、下载gitlab包并安装
1.2.1、安装方法1:curl -s https://packages.gitlab.com/install/repositories/gitlab/gitlab-ce/script.rpm.sh | sudo bash yum install gitlab-ce- 1
- 2
1.2.2、安装方法2:
下载地址:https://packages.gitlab.com/gitlab/gitlab-ce?filter=rpms&page=34 下载gitlab-ce-8.9.6-ce.0.el7.x86_64.rpm安装包到本地 上传gitlab-ce-8.9.6-ce.0.el7.x86_64.rpm软件包的到服务器,然后执行以下操作 安装软件包 [root@CentOS7 ~]# yum localinstall gitlab-ce-8.9.6-ce.0.el7.x86_64.rpm- 1
- 2
- 3
- 4
- 5
1.3、配置并启动
gitlab-ctl reconfigure #初始化 gitlab-ctl status #查看状态 gitlab-ctl stop #停止gitlab gitlab-ctl start #启动gitlab- 1
- 2
- 3
- 4
- 5
- 6
- 7
1.4、初始化后检查
[root@CentOS7 ~]# gitlab-ctl status #出现以下信息说明正确 run: gitlab-workhorse: (pid 2213) 68s; run: log: (pid 2058) 110s run: logrotate: (pid 2077) 102s; run: log: (pid 2076) 102s run: nginx: (pid 2064) 108s; run: log: (pid 2063) 108s run: postgresql: (pid 1933) 130s; run: log: (pid 1932) 130s run: redis: (pid 1850) 136s; run: log: (pid 1849) 136s run: sidekiq: (pid 2048) 112s; run: log: (pid 2047) 112s run: unicorn: (pid 2239) 55s; run: log: (pid 2015) 114s- 1
- 2
- 3
- 4
- 5
- 6
- 7
- 8
1.5、网页登陆配置gitlab
在浏览器输入当前服务器的ip地址即可打开网页
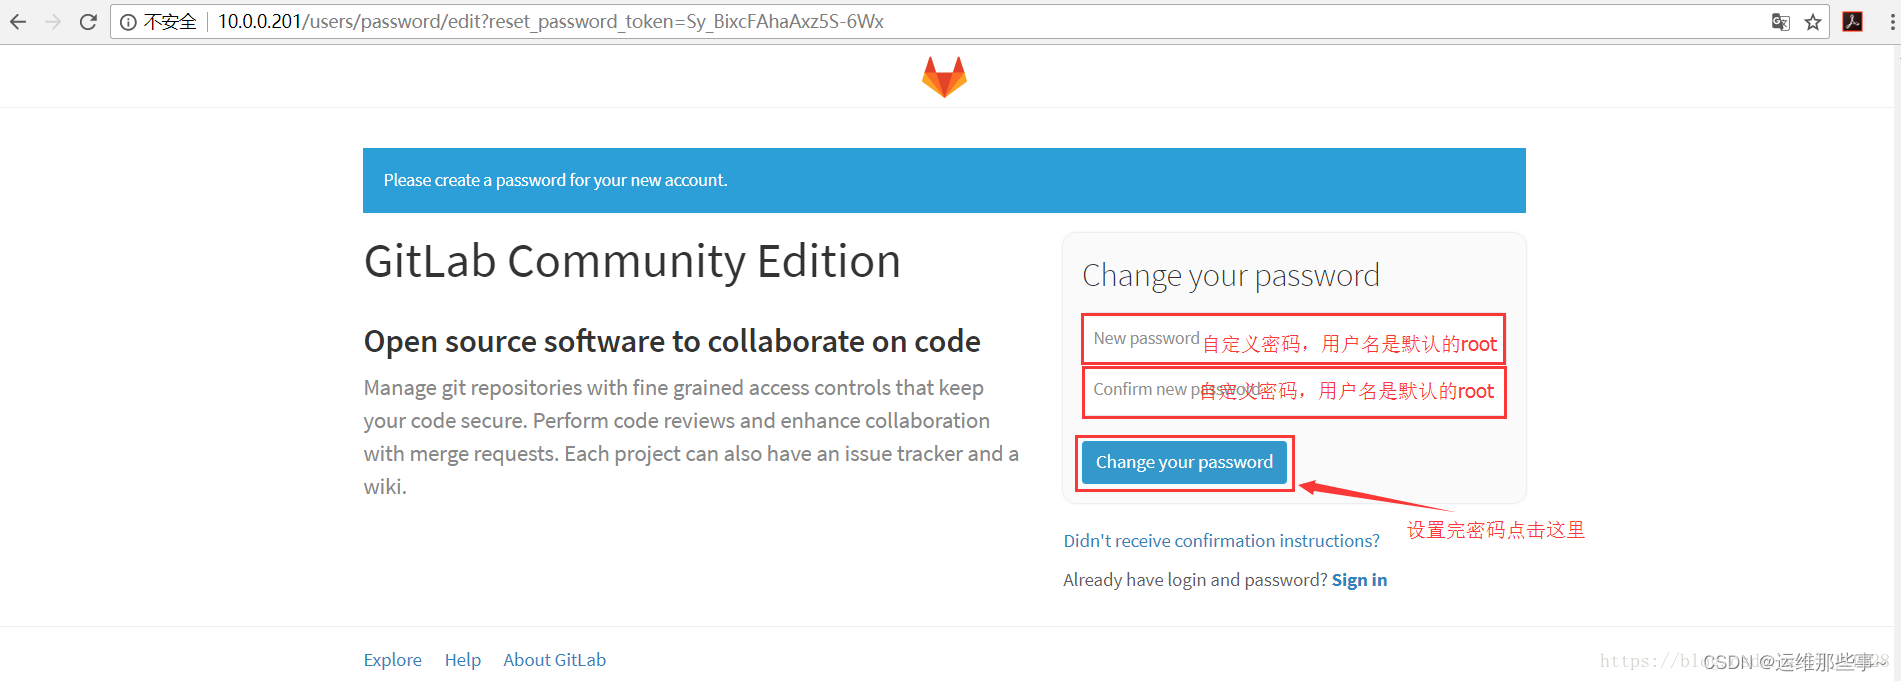
1.5.1、设置初始登陆的密码:

1.5.2、登陆gitlab(默认用户:root 密码:自定义)

1.5.3、登陆后的界面如下:

二、Jenkins环境部署
2.1、下载存储库sudo wget -O /etc/yum.repos.d/jenkins.repo https://pkg.jenkins.io/redhat/jenkins.repo sudo rpm --import https://pkg.jenkins.io/redhat/jenkins.io-2023.key- 1
- 2
2.2、安装jdk及jenkins
yum install fontconfig tzdata-java java-17-openjdk yum install jenkins- 1
- 2
2.3、启动jenkins
systemctl status jenkins- 1
2.4、启动完成后安装必要插件
Git、Git Parameter、GitLab、Localization Support、Localization: Chinese (Simplified)、Pipeline、Publish Over SSH、SonarQube Scanner、- 1
3、安装Docker
[root@localhost ~]# cat install-docker.sh #! /bin/bash yum install -y yum-utils device-mapper-persistent-data lvm2 yum-config-manager --add-repo https://download.docker.com/linux/centos/docker-ce.repo yum install -y docker-ce-18.06.2.ce-3.el7 设置docker的加速镜像 curl -sSL https://get.daocloud.io/daotools/set_mirror.sh | sh -s http://f1361db2.m.daocloud.io- 1
- 2
- 3
- 4
- 5
- 6
- 7
3.1、检查是否安装成功
[root@gitlab-jenkins ~]# docker info Containers: 4 Running: 0 Paused: 0 Stopped: 4 Images: 253 Server Version: 18.06.2-ce Storage Driver: overlay2 Backing Filesystem: xfs Supports d_type: true Native Overlay Diff: true Logging Driver: json-file Cgroup Driver: cgroupfs Plugins: Volume: local Network: bridge host macvlan null overlay Log: awslogs fluentd gcplogs gelf journald json-file logentries splunk syslog Swarm: inactive Runtimes: runc Default Runtime: runc Init Binary: docker-init containerd version: 468a545b9edcd5932818eb9de8e72413e616e86e runc version: 69663f0bd4b60df09991c08812a60108003fa340 init version: fec3683 Security Options: seccomp Profile: default Kernel Version: 3.10.0-957.el7.x86_64 Operating System: CentOS Linux 7 (Core) OSType: linux Architecture: x86_64 CPUs: 1 Total Memory: 8.623GiB Name: gitlab-jenkins ID: JHXP:OQFK:7F7P:LJMR:M723:PUIO:ZGDA:7MEK:L7RS:6SLT:USI6:IUSV Docker Root Dir: /var/lib/docker Debug Mode (client): false Debug Mode (server): false Registry: https://index.docker.io/v1/ Labels: Experimental: false Insecure Registries: harbor.hcloud.com:81 192.168.122.150 8.219.115.180 127.0.0.0/8 Registry Mirrors: https://kgdsiwq8.mirror.aliyuncs.com/ Live Restore Enabled: false- 1
- 2
- 3
- 4
- 5
- 6
- 7
- 8
- 9
- 10
- 11
- 12
- 13
- 14
- 15
- 16
- 17
- 18
- 19
- 20
- 21
- 22
- 23
- 24
- 25
- 26
- 27
- 28
- 29
- 30
- 31
- 32
- 33
- 34
- 35
- 36
- 37
- 38
- 39
- 40
- 41
- 42
- 43
- 44
- 45
- 46
- 47
- 48
- 49
4、安装k8s集群见如下文档
k8s安装文档
5、安装Harnor仓库见如下文档
Harbor仓库安装
6、配置Jenkins Pipelinepipeline { agent any environment { image_name = "192.168.122.150/per-test/auth-service:${date}" server_name = "per-auth-service" namespace = "per" } stages { stage('pull code') { steps { checkout([$class: 'GitSCM', branches: [[name: "${params.TAG}"]], extensions: [], userRemoteConfigs: [[credentialsId: 'test', url: 'https://codeup.aliyun.com/63ee8eeba823fsf32dffwe/user-auth.git']]]) updateGitlabCommitStatus(name: env.STAGE_NAME, state: 'success') script{ env.BUILD_TASKS = env.STAGE_NAME + "√..." + env.TAB_STR } } } stage('Code Build'){ steps { retry(2) { sh "/opt/maven/bin/mvn clean package -U -Dmaven.test.skip=true" } updateGitlabCommitStatus(name: env.STAGE_NAME, state: 'success') script{ env.BUILD_TASKS += env.STAGE_NAME + "√..." + env.TAB_STR } } } stage('Docker Build'){ steps { retry(2) { sh ''' # 以下参数根据实际情况修改即可 HOSTS_LIST="" APOLLO_APP_ID="per-auth-service" APOLLO_KEY="" APOLLO_META="http://192.168.122.229:8080" APOLLO_CLUSTER="test" SPRING_PROFILES="test_docker" LINUX_TIME_ZONE="America/Lima" JVM_TIME_ZONE="GMT-5" JAR_FILE="auth-service-1.0.0-SNAPSHOT.jar" cd ./auth-service docker build --build-arg APOLLO_APP_ID="${APOLLO_APP_ID}" --build-arg APOLLO_KEY="${APOLLO_KEY}" --build-arg APOLLO_META="${APOLLO_META}" --build-arg APOLLO_CLUSTER="${APOLLO_CLUSTER}" --build-arg SPRING_PROFILES="${SPRING_PROFILES}" --build-arg LINUX_TIME_ZONE="${LINUX_TIME_ZONE}" --build-arg JAR_FILE="${JAR_FILE}" --build-arg JVM_TIME_ZONE="${JVM_TIME_ZONE}" -t "${image_name}" . docker login -uadmin -pHarbor12345 192.168.122.150 docker push ${image_name} && docker rmi ${image_name} ''' } updateGitlabCommitStatus(name: env.STAGE_NAME, state: 'success') script{ env.BUILD_TASKS += env.STAGE_NAME + "√..." + env.TAB_STR } } } stage('Application Deploy'){ steps { retry(2) { sh 'kubectl --kubeconfig /opt/kubernetes/config set image -n ${namespace} deploy/${server_name} ${server_name}=${image_name}' } //retry(2) { echo 'test' } updateGitlabCommitStatus(name: env.STAGE_NAME, state: 'success') script{ env.BUILD_TASKS += env.STAGE_NAME + "√..." + env.TAB_STR } } } } }- 1
- 2
- 3
- 4
- 5
- 6
- 7
- 8
- 9
- 10
- 11
- 12
- 13
- 14
- 15
- 16
- 17
- 18
- 19
- 20
- 21
- 22
- 23
- 24
- 25
- 26
- 27
- 28
- 29
- 30
- 31
- 32
- 33
- 34
- 35
- 36
- 37
- 38
- 39
- 40
- 41
- 42
- 43
- 44
- 45
- 46
- 47
- 48
- 49
- 50
- 51
- 52
- 53
- 54
- 55
- 56
- 57
- 58
- 59
- 60
- 61
- 62
- 63
- 64
- 65
- 66
- 67
- 68
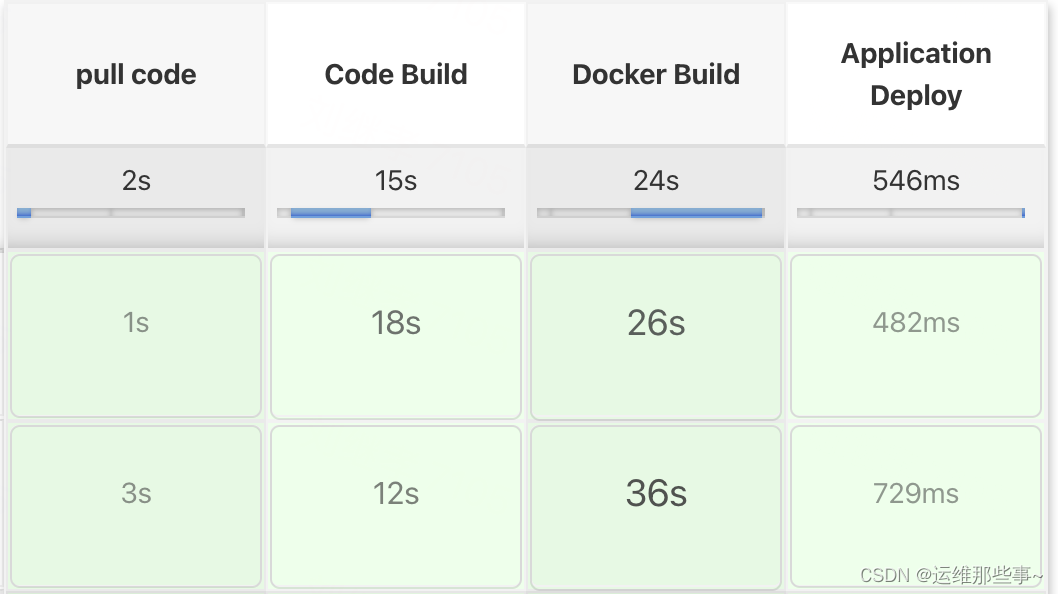
6.1、验证是否可以执行成功

6.2、k8s查看pod是否正常[root@kubernetes-master ~]# kubectl get pod -n hc-per NAME READY STATUS RESTARTS AGE per-app-service-689756cb69-lcx9x 1/1 Running 0 10m- 1
- 2
- 3
-
相关阅读:
【左程云算法全讲】认识复杂度、对数器、二分法与异或运算
MySQL 索引(一)
MIPS五种寻址方式
单调栈的相关应用
Kubernetes部署Prometheus
微信小程序-云数据库开发
设计模式之桥接模式(六)
1、Spring简介
MATLAB|不给糖果就捣蛋
自动控制原理7.7---离散系统的数字校正
- 原文地址:https://blog.csdn.net/ljx1528/article/details/133177525