-
MySQL学习笔记2
MySQL glibc版本安装:
下载相应的安装包。
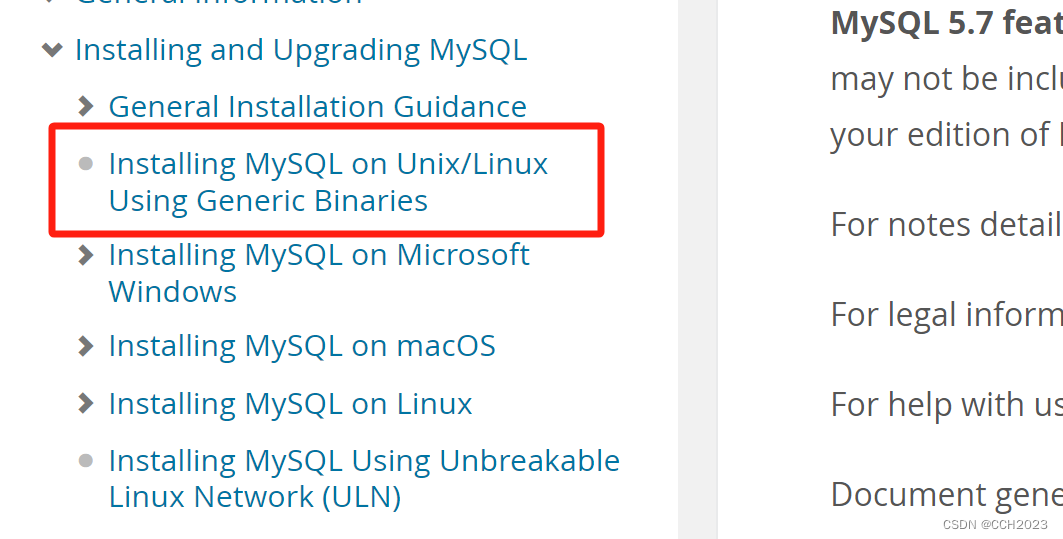
学会查看mysql的官方文档:
1)

2)点击“Reference Manual”按钮:

3)选择5.7版本:

4)点击Installing MySQL on Unix/Linux Using Generic Binaries,安装通用二进制版本,链接:
安装步骤:
1)克隆模板机,生成MySQL模板;
2)启动系统;
3)更改主机名mysql-server.lnmp.com, 然后重启网络;
4)拍摄快照,这个在目前这个阶段还是操作得比较少的,现在操作下:
5)需要安装一个依赖库:

如果不安装的话,数据目录初始化和sbusequent随后的服务器启动将会失败。

6)上传软件包解压,了解目录结构:

再理解下,这是一个绿色软件,只要将它解压到某个位置,不需要编译。

解压文件后,查看这个目录里面都有什么文件:

看官方文档的解释:

这个叫MySQL Installation Layout。其实就是目录布局。
Miscellaneous support files:杂项支持文件。
bin:使用程序都在bin目录下面。
include:包含头文件,一般C语言或者c++语言编的程序。
lib:lib库,这个软件依赖哪些库。
support-files:数据库启动脚本文件,就放在support-files中。

7)安装需求:
选项 值(自定义也可以采用默认形式) 安装路径 /mysql_3306 数据路径 /mysql_3306/data 端口号 3306 8)在官方文档中,已经说明MySQL的安装方法,我们就参考这个执行,但是我们的需求要求安装目录,这个要注意下:
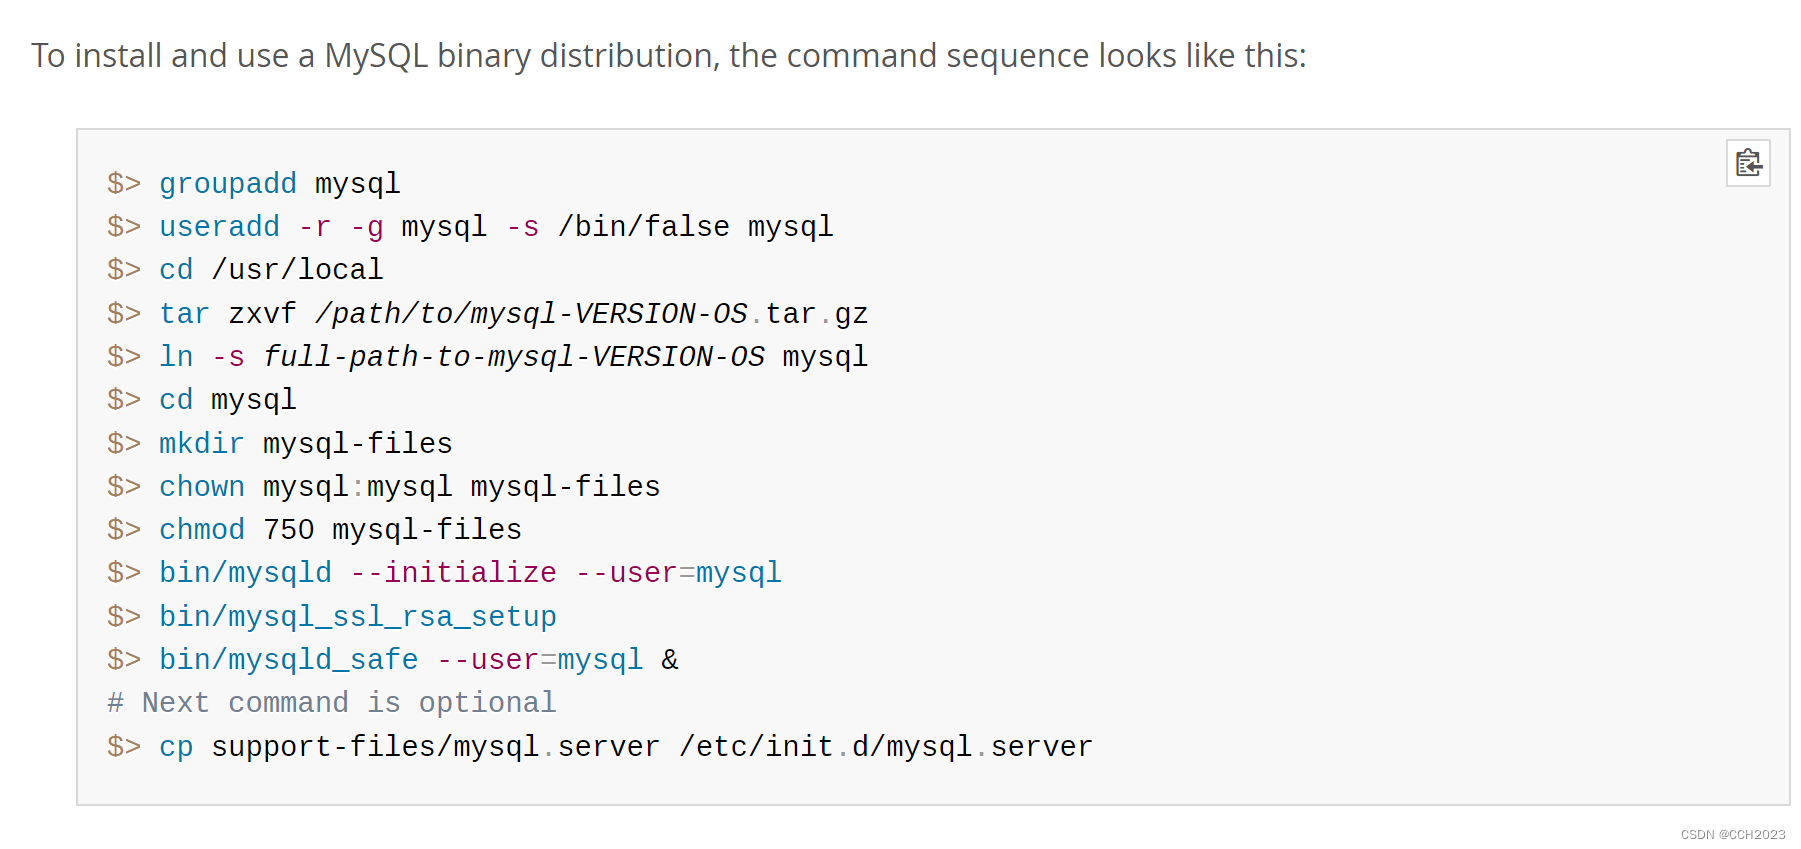
其中: bin/mysql_ssl_rsa_setup 这个是ssl加密传输用的,为了安全对性能有所损耗。
9)安装过程:
第一步:创建mysql用户:
- [root@mysql-server ~]# useradd -rs /sbin/nologin mysql
- [root@mysql-server ~]# id mysql
- uid=998(mysql) gid=996(mysql) groups=996(mysql)
mysql启动运行过程中,需要一个特定的用户。
第二步:清空系统中原有的mairadb的配置文件(/etc/my.cnf):
[root@mysql-server ~]# rm -f /etc/my.cnf第三步:创建安装目录:
[root@mysql-server ~]# mkdir /mysql_3306第四步:将解压文件拷贝到安装位置/mysql_3306:
- [root@mysql-server ~]# cp -r mysql-5.7.43-linux-glibc2.12-x86_64/* /mysql_3306
- [root@mysql-server ~]# cd /mysql_3306/
- [root@mysql-server mysql_3306]# ll
- total 272
- drwxr-xr-x 2 root root 4096 Sep 22 21:36 bin
- drwxr-xr-x 2 root root 73 Sep 22 21:36 docs
- drwxr-xr-x 3 root root 4096 Sep 22 21:36 include
- drwxr-xr-x 5 root root 230 Sep 22 21:36 lib
- -rw-r--r-- 1 root root 260986 Sep 22 21:36 LICENSE
- drwxr-xr-x 4 root root 30 Sep 22 21:36 man
- -rw-r--r-- 1 root root 566 Sep 22 21:36 README
- drwxr-xr-x 28 root root 4096 Sep 22 21:36 share
- drwxr-xr-x 2 root root 90 Sep 22 21:36 support-files
说明:将数据文件移动或拷贝到mysql的安装路径后,说明mysql数据库已经安装完成。
这个就是绿色软件。
第五步:在安装目录/mysql_3306, 创建一个mysql-files目录:
- [root@mysql-server mysql_3306]# mkdir mysql-files
- [root@mysql-server mysql_3306]# chown mysql:mysql mysql-files/
- [root@mysql-server mysql_3306]# chmod 750 mysql-files/

说明:
mysql-files目录为secure_file_priv系统变量提供一个位置 ,该位置将导入和导出操作限制到特定目录。数据库导入导出存放的路径。
第六步:初始化数据库:可以实现数据库初始化,这个步骤会产生一个随机密码:
- [root@mysql-server mysql_3306]# bin/mysqld --initialize --user=mysql --basedir=/mysql_3306
- [root@mysql-server mysql_3306]# bin/mysqld --initialize --user=mysql --basedir=/mysql_3306
- 2023-09-22T13:52:40.729232Z 0 [Warning] TIMESTAMP with implicit DEFAULT value is deprecated. Please use --explicit_defaults_for_timestamp server option (see documentation for more details).
- 2023-09-22T13:52:40.921792Z 0 [Warning] InnoDB: New log files created, LSN=45790
- 2023-09-22T13:52:40.954854Z 0 [Warning] InnoDB: Creating foreign key constraint system tables.
- 2023-09-22T13:52:41.011011Z 0 [Warning] No existing UUID has been found, so we assume that this is the first time that this server has been started. Generating a new UUID: 4c2907eb-594f-11ee-95c9-000c295cf01e.
- 2023-09-22T13:52:41.012304Z 0 [Warning] Gtid table is not ready to be used. Table 'mysql.gtid_executed' cannot be opened.
- 2023-09-22T13:52:41.496484Z 0 [Warning] A deprecated TLS version TLSv1 is enabled. Please use TLSv1.2 or higher.
- 2023-09-22T13:52:41.496503Z 0 [Warning] A deprecated TLS version TLSv1.1 is enabled. Please use TLSv1.2 or higher.
- 2023-09-22T13:52:41.498326Z 0 [Warning] CA certificate ca.pem is self signed.
- 2023-09-22T13:52:41.819447Z 1 [Note] A temporary password is generated for root@localhost: i7d+i7iooeeT
选项说明:
--initialize: 初始化过程。
--user=mysql: 以mysql用户的身份初始化数据库,产生的文件都是mysql作为拥有者。
--basedir=/mysql_3306 更改mysql的默认安装路径到实际的工作目录。
2023-09-22T13:52:41.819447Z 1 [Note] A temporary password is generated for root@localhost: i7d+i7iooeeT
root@localhost:数据库的本机的root账号。
需要将这个临时密码进行保存,后面要进行使用。
经验之谈: 想查看mysql软件有没有初始化成功,主要是看mysql目录中有没有产生data文件夹,且文件夹中至少要有一个mysql文件夹。


第七步:设置安全加密连接:
[root@mysql-server mysql_3306]# bin/mysql_ssl_rsa_setup --datadir=/mysql_3306/data特别注意:
由于更改了mysql的默认安装路径,则需要加--datadir=mysql数据路径来指定。第八步:启动数据库:
拷贝启动脚本文件到指定目录,并修改脚本文件中的mysql的安装目录和数据目录:
cp support-files/mysql.server /etc/init.d/mysql_3306使用 vim /etc/init.d/mysql_3306来修改安装目录和数据目录:

说明:glibc版本的数据库要求安装到/usr/local/mysql目录,其mysql.server启动脚本对应的目录也是/usr/local/mysql,这会导致mysql无法启动。所以需要更改其basedir和datadir。

查看这个脚本的权限,具有执行权限。
第九步:启动数据库服务:
- [root@mysql-server ~]# service mysql_3306 start
- Starting MySQL.Logging to '/mysql_3306/data/mysql-server.lnmp.com.err'.
- SUCCESS!
- [root@mysql-server ~]#
说明:
当mysql启动成功后,其日志会自动写入到data数据目录中主机名.err文件中,这个文件要多看,涉及到mysql无法启动、启动报错,其详细的原因99%可以在err文件中找到。

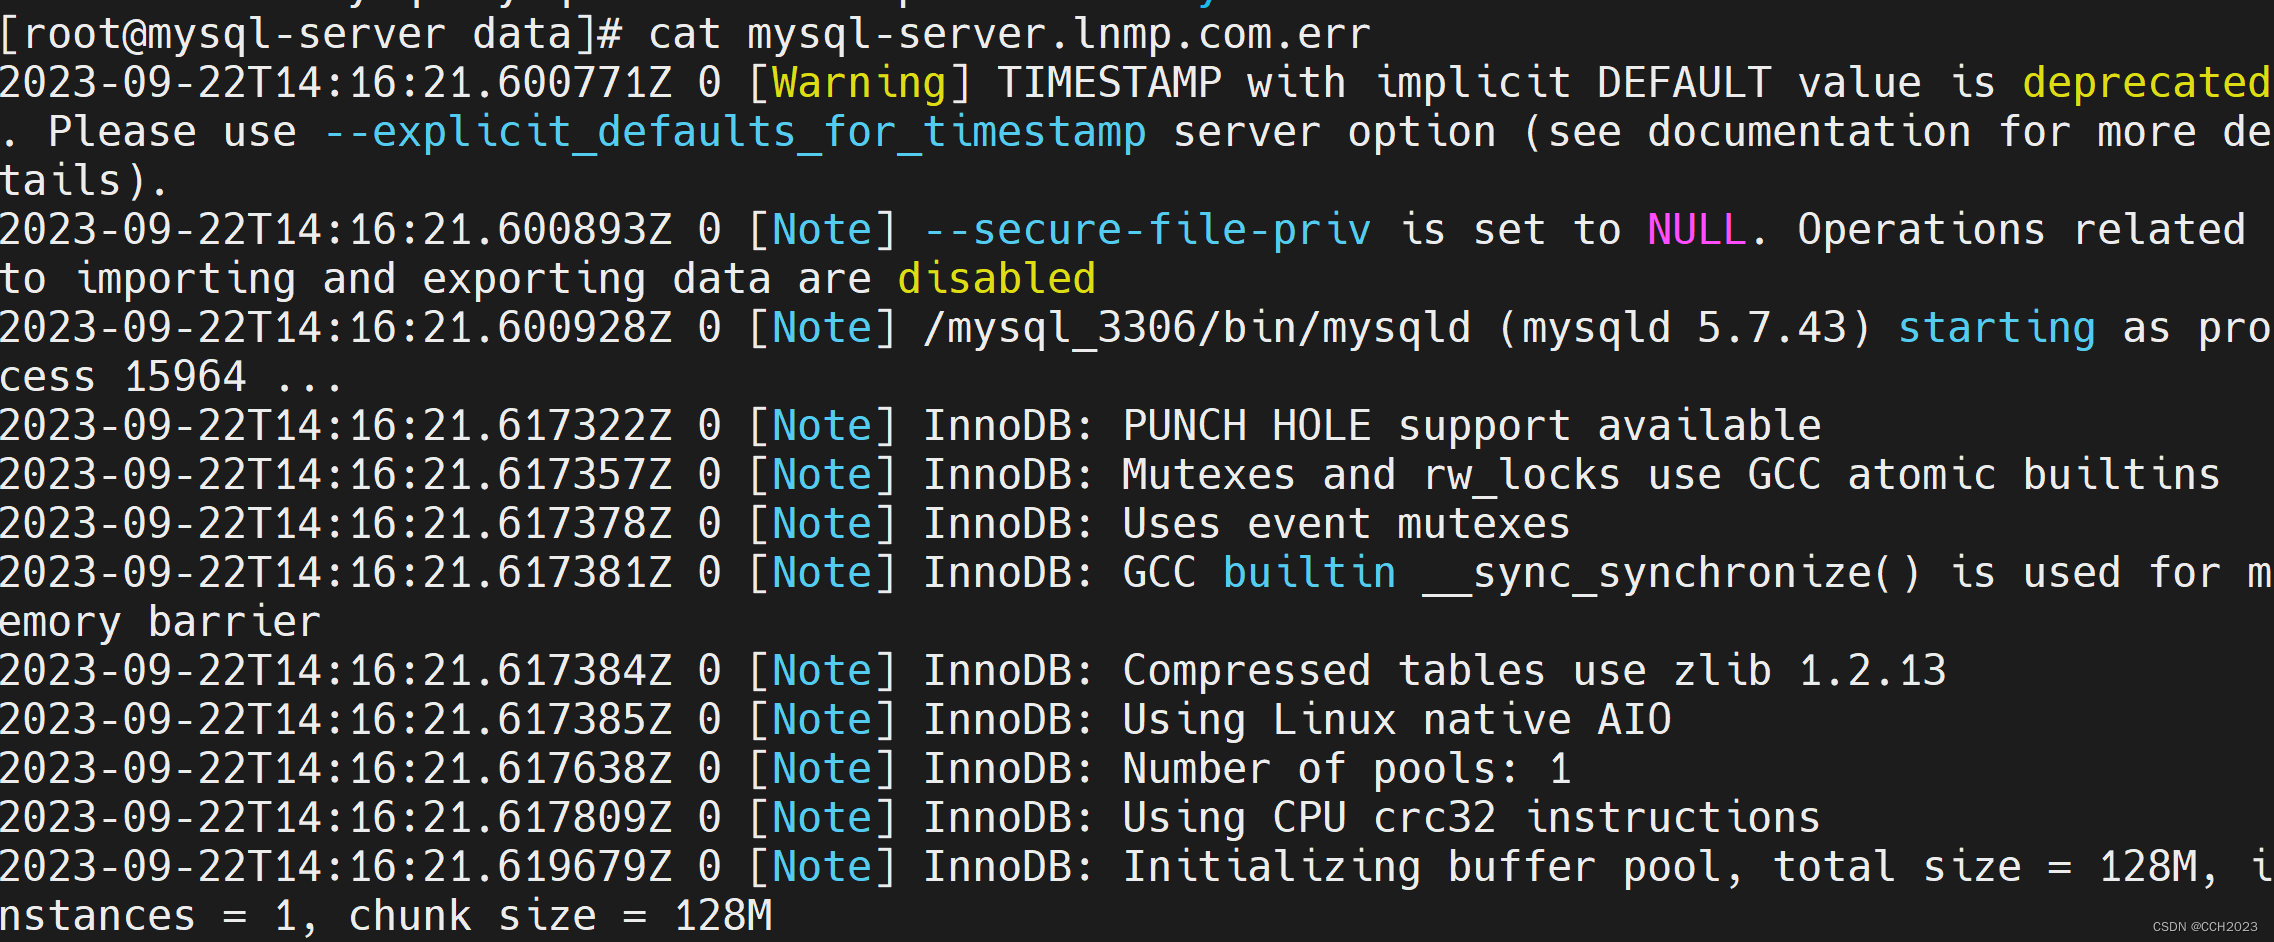
学会分析err日志文件。
第十步:查看端口是否监听:
- [root@mysql-server ~]# netstat -ntlp |grep 3306
- tcp6 0 0 :::3306 :::* LISTEN 15964/mysqld
第十一步:让mysql自动启动:
- [root@mysql-server ~]# chkconfig --list
- Note: This output shows SysV services only and does not include native
- systemd services. SysV configuration data might be overridden by native
- systemd configuration.
- If you want to list systemd services use 'systemctl list-unit-files'.
- To see services enabled on particular target use
- 'systemctl list-dependencies [target]'.
- netconsole 0:off 1:off 2:off 3:off 4:off 5:off 6:off
- network 0:off 1:off 2:on 3:on 4:on 5:on 6:off
- [root@mysql-server ~]# chkconfig --add mysql_3306
- [root@mysql-server ~]#
- [root@mysql-server ~]# chkconfig mysql_3306 on

安装完后续配置:
1)更改数据库管理员root账号密码:
- [root@mysql-server mysql_3306]# bin/mysqladmin -uroot password '1q2w3e4r' -p
- Enter password:
- mysqladmin: [Warning] Using a password on the command line interface can be insecure.
- Warning: Since password will be sent to server in plain text, use ssl connection to ensure password safety.

在数据库中更改密码的方法:
- mysql> set password=password('1q2w3e4r');
- Query OK, 0 rows affected, 1 warning (0.00 sec)
- mysql>
- mysql> flush privileges;
- Query OK, 0 rows affected (0.00 sec)
- mysql> set password='1q2w3e4r';
- Query OK, 0 rows affected (0.00 sec)
- mysql>
- mysql> flush privileges;
- Query OK, 0 rows affected (0.00 sec)
配置环境变量:
- [root@mysql-server mysql_3306]# echo "export PATH=$PATH:/mysql_3306/bin" >> /etc/profile
- [root@mysql-server mysql_3306]# source /etc/profile
添加mysql命令到环境变量中,找到则直接使用,否则报错。
- [root@mysql-server ~]# mysql -uroot -p
- Enter password:
- Welcome to the MySQL monitor. Commands end with ; or \g.
- Your MySQL connection id is 9
- Server version: 5.7.43 MySQL Community Server (GPL)
- Copyright (c) 2000, 2023, Oracle and/or its affiliates.
- Oracle is a registered trademark of Oracle Corporation and/or its
- affiliates. Other names may be trademarks of their respective
- owners.
- Type 'help;' or '\h' for help. Type '\c' to clear the current input statement.
- mysql>
设置完成后,在任何位置调用mysql客户端命令。
手工定义mysql的配置文件(非常重要):
- [root@mysql-server mysql_3306]# cat my.cnf
- [mysqld]
- basedir=/mysql_3306
- datadir=/mysql_3306/data
- socket=/tmp/mysql.sock
参数说明:
[mysqld] 代表对服务器端进行配置
basedir: 代表数据库的安装目录
datadir: 代表数据目录,以后专门用于存放数据文件的,是核心目录
socket:套接字文件。专门为客户端与服务端连接提供一个桥梁。
- [root@mysql-server ~]# service mysql_3306 restart
- Shutting down MySQL.. SUCCESS!
- Starting MySQL. SUCCESS!

启动成功后,会在/tmp目录中,有一个mysql.sock文件。运行时存在这个mysql.sock文件。套接字文件。
数据库安全配置:
- [root@mysql-server ~]# mysql_secure_installation
- Securing the MySQL server deployment.
- Enter password for user root:
- VALIDATE PASSWORD PLUGIN can be used to test passwords
- and improve security. It checks the strength of password
- and allows the users to set only those passwords which are
- secure enough. Would you like to setup VALIDATE PASSWORD plugin?
- Press y|Y for Yes, any other key for No: n
- Using existing password for root.
- Change the password for root ? ((Press y|Y for Yes, any other key for No) : n
- ... skipping.
- By default, a MySQL installation has an anonymous user,
- allowing anyone to log into MySQL without having to have
- a user account created for them. This is intended only for
- testing, and to make the installation go a bit smoother.
- You should remove them before moving into a production
- environment.
- Remove anonymous users? (Press y|Y for Yes, any other key for No) : y
- Success.
- Normally, root should only be allowed to connect from
- 'localhost'. This ensures that someone cannot guess at
- the root password from the network.
- Disallow root login remotely? (Press y|Y for Yes, any other key for No) : y
- Success.
- By default, MySQL comes with a database named 'test' that
- anyone can access. This is also intended only for testing,
- and should be removed before moving into a production
- environment.
- Remove test database and access to it? (Press y|Y for Yes, any other key for No) : y
- - Dropping test database...
- Success.
- - Removing privileges on test database...
- Success.
- Reloading the privilege tables will ensure that all changes
- made so far will take effect immediately.
- Reload privilege tables now? (Press y|Y for Yes, any other key for No) : y
- Success.
- All done!
其主要是是否启动密码校验器、是否设置root密码、是否允许root远程连接、是否移除测试数据库等等一系列的功能。
-
相关阅读:
libmodbus开发库介绍
thymeleaf的日常使用
javaweb JSP JAVA 电影院在线订票系统(电影购票系统 电影售票 电影票预订系统)(支持在线选座)
GIT error: Committing is not possible because you have unmerged files.
交换机与路由技术-27-OSPF路由重分发
C#学习记录——线程的简介及基本操作
【跟着大佬学JavaScript】之数组去重(结果对比)
【Github开源项目体验】- ZFile 基于 Java 的在线网盘
JAVA:实现Matrix Graphs矩阵图算法(附完整源码)
leetcode_23合并K个升序链表
- 原文地址:https://blog.csdn.net/chang_chunhua/article/details/133149334
