-
CentOS 7 安装Libevent
CentOS 7 安装Libevent
1.下载安装包
新版本是libevent-2.1.12-stable.tar.gz。(如果你的系统已经安装了libevent,可以不用安装)
官网:http://www.monkey.org/~provos/libevent/2.创建目录
# mkdir libevent-stable
3.解压
# tar zxvf libevent-2.1.12-stable.tar.gz4.进入目录
# cd libevent-2.1.12-stable5.设置安装路径
# ./configure –prefix=/usr/local/libevent- [root@localhost libevent-2.1.12-stable]# ./configure -prefix=/usr/local/libevent
- checking for a BSD-compatible install... /usr/bin/install -c
- checking whether build environment is sane... yes
- checking for a thread-safe mkdir -p... /usr/bin/mkdir -p
- checking for gawk... gawk
- checking whether make sets $(MAKE)... yes
- checking whether make supports nested variables... yes
- checking whether make supports nested variables... (cached) yes
- checking whether make supports the include directive... yes (GNU style)
- checking for gcc... gcc
- checking whether the C compiler works... yes
- checking for C compiler default output file name... a.out
- checking for suffix of executables...
- checking whether we are cross compiling... no
- checking for suffix of object files... o
- checking whether we are using the GNU C compiler... yes
- 提示报错:
- configure: error: openssl is a must but can not be found. You should add the directory containing ‘openssl.pc’ to the ‘PKG_CONFIG_PATH’ environment variable, or set ‘CFLAGS’ and ‘LDFLAGS’ directly for openssl, or use `–disable-openssl’ to disable support for openssl encryption
大致报错信息:编译libevent源码,openssl 依赖包在CentOS系统中没有发现openssl, 系统全局变量中缺少PKG_CONFIG_PATH 变量定义,注意PKG_CONFIG_PATH变量必须包含openssl.pc 连接文件。
解决办法:重新安装OpenSSL 替换CentOS 7 默认自带的OpenSSL。
一、查看主机openssl版本信息
1、查看路径
# which openssl
复制
2、查看版本
# openssl version
复制
3、查看CentOS版本
# cat /etc/redhat-release
温馨提示:CentOS 7.6 默认版本:openssl-1.0.2k
二、安装Openssl
方法一、下载源码编译安装
访问OpenSSL官网资源,查看是否有最新的版本发布。官网资源地址:https://www.openssl.org/source
1、解压并切换目录
tar -zxvf openssl-1.0.2j.tar.gz
cd openssl-1.0.2j
复制
2、设定Openssl 安装,( –prefix )参数为欲安装之目录,也就是安装后的档案会出现在该目录下
./config --prefix=/usr/local/openssl
复制
3、执行命令
./config -t
复制
4、执行make、make install,编译Openssl
make & make install建议再安装一次,使用shared 生成动态连接库。否则无法找到库文件
./config shared --prefix=/usr/local/opensslmake clean
make&& make install
5、centos 切换openssl版本
mv /usr/bin/openssl /usr/bin/openssl.bak
mv /usr/include/openssl /usr/include/openssl.bakln -s /usr/local/openssl/bin/openssl /usr/bin/openssl
ln -s /usr/local/openssl/include/openssl /usr/include/opensslecho "/usr/local/openssl/lib" >> /etc/ld.so.conf
ldconfig -v
ln -s /usr/local/openssl/lib/libssl.so.1.0.0 /usr/lib64/libssl.so.1.0.0
ln -s /usr/local/openssl/lib/libcrypto.so.1.0.0 /usr/lib64/libcrypto.so.1.0.0
- 注意:不能直接删除软链接
- CentOS 7 OpenSSL 默认libssl.so.* 和libcrypto.so.* 软连接。
- [root@localhost lib]# find / -name libssl.so.1.0.2k
- /var/lib/docker/overlay2/30e17a77fc02fa56f32ede3a9d504681b9035fecbd69d5b283d9d2d635bd8b55/diff/usr/lib64/libssl.so.1.0.2k
- /var/lib/docker/overlay2/99f62cd325cf4c1fd668b98f95919648b19b0638ff2626250be1c14908f91ee9/diff/usr/lib64/libssl.so.1.0.2k
- /usr/lib64/libssl.so.1.0.2k
- [root@localhost lib]# find / -name libcrypto.so.1.0.2k
- /var/lib/docker/overlay2/30e17a77fc02fa56f32ede3a9d504681b9035fecbd69d5b283d9d2d635bd8b55/diff/usr/lib64/libcrypto.so.1.0.2k
- /var/lib/docker/overlay2/99f62cd325cf4c1fd668b98f95919648b19b0638ff2626250be1c14908f91ee9/diff/usr/lib64/libcrypto.so.1.0.2k
- /usr/lib64/libcrypto.so.1.0.2k
- 如需使用新版本开发,则需替换原来的软链接指向,即替换原动态库,进行版本升级。
- 替换/lib(lib64)和/usr/lib(lib64)和/usr/local/lib(lib64)存在的相应动态库:
- [root@localhost lib]# ln -s /usr/local/openssl/lib/libssl.so.1.0.0 /usr/lib64/libssl.so.1.0.0
- [root@localhost lib]# ln -s /usr/local/openssl/lib/libcrypto.so.1.0.0 /usr/lib64/libcrypto.so.1.0.0
设置PKG_CONFIG_PATH 全局环境变量
- vi /etc/procfile
- -- 最后一行添加如下指令:
- export PKG_CONFIG_PATH=/usr/local/openssl/lib/pkgconfig
- -- 修改后的配置文件生效
- source /etc/profilee
再次编译Libevent 源码
5.设置安装路径
# ./configure –prefix=/usr/local/libevent- [root@localhost libevent-2.1.12-stable]# ./configure -prefix=/usr/local/libevent
- checking for a BSD-compatible install... /usr/bin/install -c
- checking whether build environment is sane... yes
- checking for a thread-safe mkdir -p... /usr/bin/mkdir -p
- checking for gawk... gawk
- checking whether make sets $(MAKE)... yes
- checking whether make supports nested variables... yes
- checking whether make supports nested variables... (cached) yes
- checking whether make supports the include directive... yes (GNU style)
- checking for gcc... gcc
- checking whether the C compiler works... yes
- checking for C compiler default output file name... a.out
- checking for suffix of executables...
- *****
6. 编译并且安装至指定路径地址(/usr/local/libevent)
# make & make install
- root@localhost libevent-2.1.12-stable]# make & make install
- [1] 8554
- make install-am
- make all-am
- make[1]: 进入目录“/usr/local/libevent-stable/libevent-2.1.12-stable”
- make[1]: 进入目录“/usr/local/libevent-stable/libevent-2.1.12-stable”
- CC sample/le_proxy-le-proxy.o
- CC sample/le_proxy-le-proxy.o
- CC libevent_openssl_la-bufferevent_openssl.lo
- mv: 无法获取"sample/.deps/le_proxy-le-proxy.Tpo" 的文件状态(stat): 没有那个文件或目录
- make[1]: *** [sample/le_proxy-le-proxy.o] 错误 1
- make[1]: 离开目录“/usr/local/libevent-stable/libevent-2.1.12-stable”
- make: *** [all] 错误 2
- In file included from /usr/local/openssl/include/openssl/ssl.h:152:0,
- from bufferevent_openssl.c:66:
- bufferevent_openssl.c: 在函数‘bufferevent_openssl_socket_new’中:
- /usr/local/openssl/include/openssl/bio.h:589:34: 警告:计算出的值未被使用 [-Wunused-value]
- # define BIO_set_close(b,c) (int)BIO_ctrl(b,BIO_CTRL_SET_CLOSE,(c),NULL)
- ^
- bufferevent_openssl.c:1466:3: 附注:in expansion of macro ‘BIO_set_close’
- BIO_set_close(bio, 0);
- ^
- CCLD libevent_openssl.la
- CCLD sample/le-proxy
- CC sample/https_client-https-client.o
- CC sample/https_client-hostcheck.o
- ******
至此CentOS 7 安装Libevent 网络库结束。
CentOS 7 验证Libevent 框架
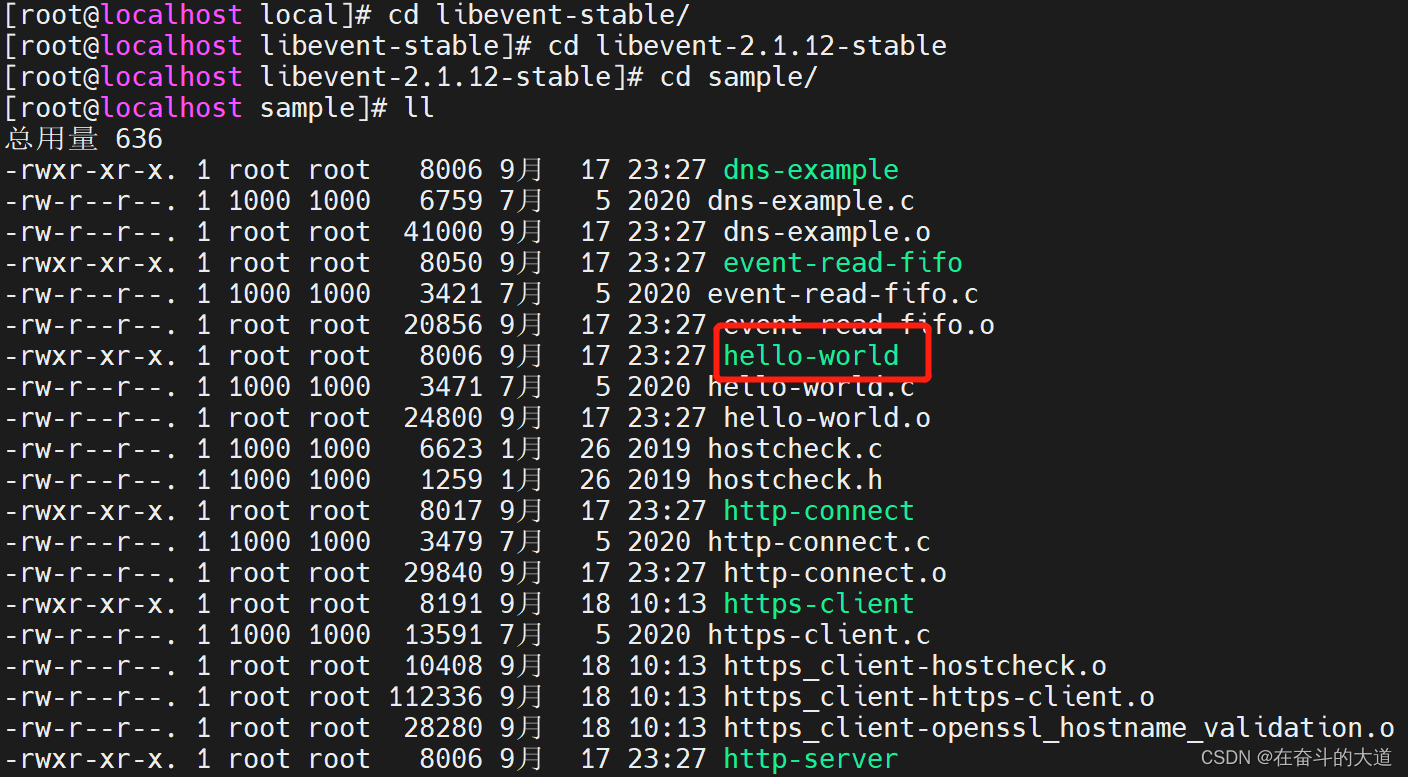
前提:使用libevent 源码中的sample 文件夹中的hello-word
NetCat 工具:各种TCP和UDP监听和连接测试用途。
判断CentOS 7 中是否安装netcat/nc, 执行如下指令:
# nc --help
如果没有netcat 版本信息输出和使用手册输出,你则需要安装netcat/nc 工具,请执行如下指令:# yum install -y nc
- [root@localhost ~]# yum install -y nc
- 已加载插件:fastestmirror
- Determining fastest mirrors
- * base: mirrors.bupt.edu.cn
- * extras: mirrors.ustc.edu.cn
- * updates: mirrors.bupt.edu.cn
- base | 3.6 kB 00:00:00
- docker-ce-stable | 3.5 kB 00:00:00
- extras | 2.9 kB 00:00:00
- updates | 2.9 kB 00:00:00
- docker-ce-stable/7/x86_64/primary_db | 117 kB 00:00:26
- 正在解决依赖关系
- --> 正在检查事务
- ---> 软件包 nmap-ncat.x86_64.2.6.40-19.el7 将被 安装
- *****
启动Libevent服务端
- [root@localhost sample]# ./hello-world
- *** 等待客户端连接 ***
使用NetCat/NC 模拟TCP请求
- [root@localhost ~]# nc 192.168.43.10 9995
- Hello, World!
LibEvent 服务端输出
- [root@localhost sample]# ./hello-world
- *** 等待客户端连接 ***
- flushed answer
-
相关阅读:
源码编译CEF(branch=6045)+mp4+mp3笔记
有一个项目管理软件,名字叫8Manage PM!
Layer2之争:短期看Optimism 长期看zkSync?
【jmeter】接口测试流程
golang匿名函数 加油
华为杯数学建模比赛经验分享
极客DIY开源方案分享——数字幅频均衡功率放大器设计(实用的嵌入式电子设计作品软硬件综合实践)
Linux chmod命令使用介绍
【PyTorch深度学习项目实战100例】—— 基于Conv3D实现三维立体MNIST数据集分类 | 第54例
我是如何入门网络安全?有什么自学心得?
- 原文地址:https://blog.csdn.net/zhouzhiwengang/article/details/132975701
