-
【JavaEE】多线程案例-定时器

1. 前言
在生活中,我们肯定遇到过访问某个网站的时候或者加载视频的时候,出现请求超时的现象吧,如果客户端向服务器发送请求,但是没有得到响应该怎么办呢?难道要让我们死等吗?这肯定是不现实的,那么这时候就需要用到我们的定时器。客户端向服务器发送请求,如果超过一段时间没有得到响应,那么定时器就会决定是重新发送请求还是停止请求。在多线程案例中,定时器是一个比较复杂的案例,同时也是比较重要的一个多线程案例。今天我将为大家分享关于定时器知识的分享。

2. 如何使用Java标准库提供的定时器
在 Java 的 util 包下提供了定时器的实现,我们可以直接使用 Java 标准库提供的定时器。
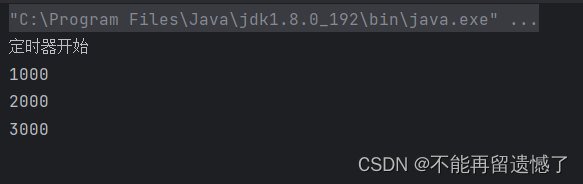
import java.util.Timer; import java.util.TimerTask; public class Demo1 { public static void main(String[] args) { Timer timer = new Timer(); timer.schedule(new TimerTask() { @Override public void run() { System.out.println(3000); } },3000); timer.schedule(new TimerTask() { @Override public void run() { System.out.println(2000); } },2000); timer.schedule(new TimerTask() { @Override public void run() { System.out.println(1000); } },1000); System.out.println("定时器开始"); } }- 1
- 2
- 3
- 4
- 5
- 6
- 7
- 8
- 9
- 10
- 11
- 12
- 13
- 14
- 15
- 16
- 17
- 18
- 19
- 20
- 21
- 22
- 23
- 24
- 25
- 26
- 27
- 28
- 29
- 30
- Timer 类表示定时器类
- 调用 Timer 类的 schedule 方法,将 TimerTask 类添加到定时器内
- TimerTask 类包括了该任务的具体实现内容,以及执行这个任务的时间

delay 表示从调用 schedule 方法开始的多长时间执行这个任务。不管哪个任务先添加的,总是按照时间的从小到大顺序执行。并且仔细观察我们可以发现,当执行完定时器当中的内容的时候,整个线程并没有结束,这是因为 Timer 内部的线程阻止了线程的结束。3. 如何自己实现一个定时器
3.1 构建 MyTimerTask 任务类
虽然 Java 标准库为我们提供了定时器,但是我们作为初学者,还是需要知道他究竟是如何实现的,我们能自己实现一个计时器对理解定时器作用是非常大的。
class Mytimer { private long time; private Runnable runnable; public Mytimer(Runnable runnable, long delay) { this.runnable = runnable; this.time = System.currentTimeMillis() + delay; } public long getTime() { return this.time; } public Runnable getRunnable() { return this.runnable; } }- 1
- 2
- 3
- 4
- 5
- 6
- 7
- 8
- 9
- 10
- 11
- 12
- 13
- 14
- 15
- 16
先创建一个 MyTimerTask 类用来描述任务的具体内容,包括执行的操作和执行的时间。
3.2 使用优先级队列来存储多个任务
当创建一个 MyTimerTask 类用来描述具体的内容之后,又该用什么来存储这多个 MyTimerTask 任务呢?因为它是按照时间的先后顺序执行的,时间近的任务优先级高,那么这样的话,我们就可以使用优先级队列这个数据结构来存储 MyTimerTask 类,并且创建的小根堆,时间最接近的放在堆顶。
PriorityQueue<MyTimerTask> queue = new PriorityQueue<>();- 1
3.3 实现 schedule 方法来添加任务
当调用 schedule 方法的时候,就调用 PriorityQueue 的 offer 方法将任务添加到优先级队列中。
public void schedule(MyTimerTask myTimerTask) { queue.offer(myTimerTask); }- 1
- 2
- 3
3.4 实现 Timer 类当中的扫描线程和具体细节
Timer 线程中需要一个扫描线程来看堆顶任务是否该执行了。当优先级队列为空的时候,需要该线程进入等待状态,直到调用 schedule 方法向队列中添加任务的时候才唤醒该线程。所以我们前面的 schedule 方法就需要稍作调整。
private static Object locker = new Object(); public void schedule(MyTimerTask myTimerTask) { synchronized (locker) { queue.offer(myTimerTask); locker.notify(); } } public MyTimer() { Thread t = new Thread(() -> { while (true) { try { synchronized (locker) { //通常线程被唤醒之后的判断不使用if, //而是使用while循环,因为唤醒线程的方法不止有notify //interrupt方法也可以唤醒处于等待状态的线程 //当处于等待状态的线程是因为interrupt方法唤醒的时候 //就说明没有执行schedule方法,此时queue中还是为空的 while (queue.isEmpty()) { locker.wait(); } } } catch (Exception e) { e.printStackTrace(); } } }); }- 1
- 2
- 3
- 4
- 5
- 6
- 7
- 8
- 9
- 10
- 11
- 12
- 13
- 14
- 15
- 16
- 17
- 18
- 19
- 20
- 21
- 22
- 23
- 24
- 25
- 26
- 27
- 28
- 29
这里在调用 schedule 方法的好处不止有唤醒当堆为空时的等待状态,还有一些好处,我们在后面遇到的时候为大家讲解。
当堆不为空的时候,就要判断堆顶的任务是否到了需要执行的时间,如果到了需要执行的时间,就执行,没到则不需要做。
public MyTimer() { Thread t = new Thread(() -> { while (true) { try { synchronized (locker) { while (queue.isEmpty()) { locker.wait(); } MyTimerTask task = queue.peek(); if (curTime >= task.getTime()) { task.getRunnable().run(); queue.poll(); }else { ; } } } catch (Exception e) { e.printStackTrace(); } } }); t.start(); }- 1
- 2
- 3
- 4
- 5
- 6
- 7
- 8
- 9
- 10
- 11
- 12
- 13
- 14
- 15
- 16
- 17
- 18
- 19
- 20
- 21
- 22
- 23
- 24
当我们运行这个计时器的时候,看看结果如何
import java.util.PriorityQueue; class MyTimerTask { private long time; private Runnable runnable; public MyTimerTask(Runnable runnable, long delay) { this.runnable = runnable; this.time = System.currentTimeMillis() + delay; } public long getTime() { return this.time; } public Runnable getRunnable() { return this.runnable; } } class MyTimer { PriorityQueue<MyTimerTask> queue = new PriorityQueue<>(); private static Object locker = new Object(); public void schedule(Runnable runnable, long delay) { synchronized (locker) { queue.offer(new MyTimerTask(runnable,delay)); locker.notify(); } } public MyTimer() { Thread t = new Thread(() -> { while (true) { try { synchronized (locker) { while (queue.isEmpty()) { locker.wait(); } MyTimerTask task = queue.peek(); long curTime = System.currentTimeMillis(); if (curTime >= task.getTime()) { task.getRunnable().run(); queue.poll(); }else { ; } } } catch (Exception e) { e.printStackTrace(); } } }); t.start(); } } public class Demo3 { public static void main(String[] args) { MyTimer myTimer = new MyTimer(); myTimer.schedule(new Runnable() { @Override public void run() { System.out.println(3000); } },3000); myTimer.schedule(new Runnable() { @Override public void run() { System.out.println(2000); } },2000); myTimer.schedule(new Runnable() { @Override public void run() { System.out.println(1000); } },1000); System.out.println("计时器开始"); } }- 1
- 2
- 3
- 4
- 5
- 6
- 7
- 8
- 9
- 10
- 11
- 12
- 13
- 14
- 15
- 16
- 17
- 18
- 19
- 20
- 21
- 22
- 23
- 24
- 25
- 26
- 27
- 28
- 29
- 30
- 31
- 32
- 33
- 34
- 35
- 36
- 37
- 38
- 39
- 40
- 41
- 42
- 43
- 44
- 45
- 46
- 47
- 48
- 49
- 50
- 51
- 52
- 53
- 54
- 55
- 56
- 57
- 58
- 59
- 60
- 61
- 62
- 63
- 64
- 65
- 66
- 67
- 68
- 69
- 70
- 71
- 72
- 73
- 74
- 75
- 76
- 77
- 78
- 79
- 80
- 81
- 82
- 83
- 84

这里为什么会报错呢?
3.5 定时器的修改及优化
这里我们遗漏了一个细节,前面学习优先级队列的时候,我们知道优先级队列当中的元素必须是可比较的元素,跟 TreeMap 和 TreeSet 是一样的,但是 MyTimerTask 是一个类,类与类之间是不能够进行大小的比较的,所以我们需要重写 MyTimerTask 中的 compareTo 方法来指明比较方式。
class MyTimerTask implements Comparable<MyTimerTask>{ private long time; private Runnable runnable; public MyTimerTask(Runnable runnable, long delay) { this.runnable = runnable; this.time = System.currentTimeMillis() + delay; } public long getTime() { return this.time; } public Runnable getRunnable() { return this.runnable; } @Override public int compareTo(MyTimerTask o) { return (int) (this.time - o.time); } }- 1
- 2
- 3
- 4
- 5
- 6
- 7
- 8
- 9
- 10
- 11
- 12
- 13
- 14
- 15
- 16
- 17
- 18
- 19
- 20
- 21
当进行这样的修改之后,堆中的元素就是可比较的了。写到这里其实功能就已经实现了,但是呢?还需要做出优化:当堆顶元素未到达执行时间的时候,难道真的什么都不用做吗?如果什么都不做的话,那么代码就会回到上面的while循环部分,继续判断堆顶元素是否到达了执行时间,因为计算机的执行速度很快,那么在这个到达执行堆顶元素任务的时间之内又进行了上万次判断,那么这种情况就叫做忙等。要想解决这个忙等问题,当判断未到达堆顶元素的执行时间的时候,我们让该线程等待一定的时间,不让这个线程继续循环判断。
public MyTimer() { Thread t = new Thread(() -> { while (true) { try { synchronized (locker) { while (queue.isEmpty()) { locker.wait(); } MyTimerTask task = queue.peek(); long curTime = System.currentTimeMillis(); if (curTime >= task.getTime()) { task.getRunnable().run(); queue.poll(); }else { locker.wait(task.getTime() - curTime); } } } catch (Exception e) { e.printStackTrace(); } } }); t.start(); }- 1
- 2
- 3
- 4
- 5
- 6
- 7
- 8
- 9
- 10
- 11
- 12
- 13
- 14
- 15
- 16
- 17
- 18
- 19
- 20
- 21
- 22
- 23
- 24
- 25
到这里就可以说说前面 schedule 方法的 notify 方法的又一个好处:如果在 Timer 计时器在等待执行堆顶元素的过程中,又加入了一个任务,并且这个任务的执行时间先于之前堆顶元素任务的执行时间,那么当添加完成之后就会唤醒 Timer 计时器的等待状态,然后将这个刚加入的任务放入堆顶,并且下一个执行该任务。
4. 计时器完整代码
import java.util.PriorityQueue; class MyTimerTask implements Comparable<MyTimerTask>{ private long time; private Runnable runnable; public MyTimerTask(Runnable runnable, long delay) { this.runnable = runnable; this.time = System.currentTimeMillis() + delay; } public long getTime() { return this.time; } public Runnable getRunnable() { return this.runnable; } @Override public int compareTo(MyTimerTask o) { return (int) (this.time - o.time); } } class MyTimer { PriorityQueue<MyTimerTask> queue = new PriorityQueue<>(); private static Object locker = new Object(); public void schedule(Runnable runnable, long delay) { synchronized (locker) { queue.offer(new MyTimerTask(runnable,delay)); locker.notify(); } } public MyTimer() { Thread t = new Thread(() -> { while (true) { try { synchronized (locker) { while (queue.isEmpty()) { locker.wait(); } MyTimerTask task = queue.peek(); long curTime = System.currentTimeMillis(); if (curTime >= task.getTime()) { task.getRunnable().run(); queue.poll(); }else { locker.wait(task.getTime() - curTime); } } } catch (Exception e) { e.printStackTrace(); } } }); t.start(); } } public class Demo3 { public static void main(String[] args) { MyTimer myTimer = new MyTimer(); myTimer.schedule(new Runnable() { @Override public void run() { System.out.println(3000); } },3000); myTimer.schedule(new Runnable() { @Override public void run() { System.out.println(2000); } },2000); myTimer.schedule(new Runnable() { @Override public void run() { System.out.println(1000); } },1000); System.out.println("计时器开始"); } }- 1
- 2
- 3
- 4
- 5
- 6
- 7
- 8
- 9
- 10
- 11
- 12
- 13
- 14
- 15
- 16
- 17
- 18
- 19
- 20
- 21
- 22
- 23
- 24
- 25
- 26
- 27
- 28
- 29
- 30
- 31
- 32
- 33
- 34
- 35
- 36
- 37
- 38
- 39
- 40
- 41
- 42
- 43
- 44
- 45
- 46
- 47
- 48
- 49
- 50
- 51
- 52
- 53
- 54
- 55
- 56
- 57
- 58
- 59
- 60
- 61
- 62
- 63
- 64
- 65
- 66
- 67
- 68
- 69
- 70
- 71
- 72
- 73
- 74
- 75
- 76
- 77
- 78
- 79
- 80
- 81
- 82
- 83
- 84
- 85
- 86
- 87
- 88
- 89
- 90

-
相关阅读:
Python | Leetcode Python题解之第42题接雨水
相关性 与 独立性
电子管是什么?
关系型数据库语言基础整理
[附源码]SSM计算机毕业设计汽车租赁管理系统-JAVA
【HCIP】RSTP
ISO20000信息技术服务管理体系认证条件
mac 安装 selenium + chrome driver
Clion常用插件
现在性价比高的运动耳机有哪些、性价比最高的蓝牙耳机排行榜
- 原文地址:https://blog.csdn.net/m0_73888323/article/details/132994782
