-
vue-cli vue3
安装 cli
- npm i -g @vue/cli@4.5.13
- 查看版本:vue -V
- 升级版本:npm update -g @vue/cli
升级
- 在 v 3.0.0 版本中是不支持的最新的 script setup 语法
- 执行指令升级: npm i vue@3.2.8 vue-router@4.0.11 vuex@4.0.2
"vue": "^3.2.8", "vue-router": "^4.0.11", "vuex": "^4.0.2"- 1
- 2
- 3
初始化项目
- vue create 项目名称
> - ? Please pick a preset: Default ([Vue 2] babel, eslint) Default (Vue 3) ([Vue 3] babel, eslint) > Manually select features // 选择手动配置- 1
- 2
- 3
- 4
// ---------------------------------------------------------- ? Check the features needed for your project: (*) Choose Vue version // 选择 vue 版本 (*) Babel // 使用 babel ( ) TypeScript // 不使用 ts ( ) Progressive Web App (PWA) Support // 不使用 PWA (*) Router // 添加 vue-router (*) Vuex // 添加 vuex >(*) CSS Pre-processors // 使用 css 预处理器 (*) Linter / Formatter // 代码格式化 ( ) Unit Testing // 不配置测试 ( ) E2E Testing // // 不配置测试- 1
- 2
- 3
- 4
- 5
- 6
- 7
- 8
- 9
- 10
- 11
- 12
- 13
// ---------------------------------------------------------- Choose a version of Vue.js that you want to start the project with 2.x > 3.x // 选择 vue 3.0 版本- 1
- 2
- 3
- 4
- 5
// ---------------------------------------------------------- Use history mode for router? (Requires proper server setup for index fallback in production) (Y/n) n // 不使用 history模式 的路由- 1
- 2
- 3
// ---------------------------------------------------------- ? Pick a CSS pre-processor (PostCSS, Autoprefixer and CSS Modules are supported by default): > Sass/SCSS (with dart-sass) // 使用基于 dart-sass 的 scss 预处理器 Sass/SCSS (with node-sass) Less Stylus- 1
- 2
- 3
- 4
- 5
- 6
- 7
// ---------------------------------------------------------- ? Pick a linter / formatter config: ESLint with error prevention only ESLint + Airbnb config > ESLint + Standard config // 使用 ESLint 标准代码格式化方案 ESLint + Prettier- 1
- 2
- 3
- 4
- 5
- 6
- 7
// ---------------------------------------------------------- ? Pick additional lint features: (*) Lint on save // >(*) Lint and fix on commit // 保存时 && 提交时,都进行 lint- 1
- 2
- 3
- 4
- 5
Eslint 规范代码
常用的规则扩展:

- .eslintrc.js
- ESLint 配置文件遵循 commonJS 的导出规则,所导出的对象就是 ESLint 的配置对象
- 文档:https://eslint.bootcss.com/docs/user-guide/configuring
module.exports = { // 表示当前目录即为根目录,ESLint 规则将被限制到该目录下 root: true, // env 表示启用 ESLint 检测的环境 env: { // 在 node 环境下启动 ESLint 检测 node: true, }, // ESLint 中基础配置需要继承的配置 extends: [ /** vue/attribute-hyphenation:要求组件属性使用连字符命名,而不是驼峰命名。 vue/html-closing-bracket-newline:要求HTML标签的右括号放置在新的一行。 vue/html-closing-bracket-spacing:要求HTML标签的右括号前面有空格或换行符。 vue/html-end-tags:要求HTML标签有明确的结束标记。 vue/html-indent:要求HTML标签的缩进使用指定的空格数。 vue/html-self-closing:要求没有内容的HTML标签使用自闭合形式。 vue/max-attributes-per-line:要求每行最多只能有指定数量的属性。 vue/no-template-shadow:禁止在Vue模板中使用与父级作用域中已声明的变量相同的变量名。 */ "plugin:vue/vue3-essential", // vue3 校验规则 "@vue/standard", // vue 常规校验规则 ], // 解析器 parserOptions: { parser: "babel-eslint", }, // 启用的规则及其各自的错误级别 /** * 错误级别分为三种: * "off" 或 0 - 关闭规则 * "warn" 或 1 - 开启规则,使用警告级别的错误:warn (不会导致程序退出) * "error" 或 2 - 开启规则,使用错误级别的错误:error (当被触发的时候,程序会退出) */ rules: { "no-console": process.env.NODE_ENV === "production" ? "warn" : "off", "no-debugger": process.env.NODE_ENV === "production" ? "warn" : "off", // eslint 希望函数名和括号之间需要空格,和 prettier 产生冲突 "space-before-function-paren": "off", "no-unused-expressions": "off", "no-unused-vars": "off", }, };- 1
- 2
- 3
- 4
- 5
- 6
- 7
- 8
- 9
- 10
- 11
- 12
- 13
- 14
- 15
- 16
- 17
- 18
- 19
- 20
- 21
- 22
- 23
- 24
- 25
- 26
- 27
- 28
- 29
- 30
- 31
- 32
- 33
- 34
- 35
- 36
- 37
- 38
- 39
- 40
- 41
- 42
- 43
prettier 格式化代码
- 创建 .prettierrc 文件
- 安装 vscode 扩展 [
Prettier - Code formatter] - 测试地址:https://prettier.io/playground/
{ "semi":false, // 结尾不要分号 "singleQuote":true, // 使用单引号 "trailingComma":"none", // 尾随逗号、最后一行除外 }- 1
- 2
- 3
- 4
- 5
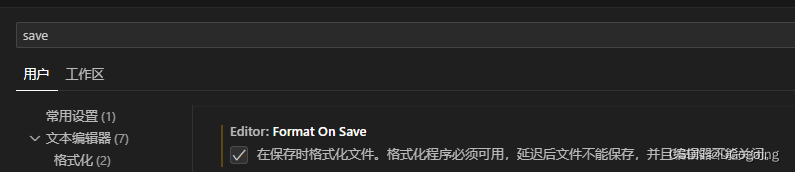
- 设置保存自动格式化
- vsCode 默认一个 tab === 4个空格,而 ESint 一个 tab 希望为两个空格

- 如果 vsCode 安装多个代码格式化工具,点击鼠标右键,选择 prettier

约定式提交
- 安装工具(提交时自动填写并生成符合规范的提交消息):
npm install -g commitizen@4.2.4- 1
- 安装插件(Commitizen 的插件,允许自定义提交消息的格式)
npm i cz-customizable@6.3.0 -D- 1
- package.json
"config": { "commitizen": { "path": "node_modules/cz-customizable" } }- 1
- 2
- 3
- 4
- 5
- 创建自定义提交内容,cz-config.js 文件
module.exports = { // 可选类型 types: [ { value: 'feat', name: 'feat: 新功能' }, { value: 'fix', name: 'fix: 修复' }, { value: 'docs', name: 'docs: 文档变更' }, { value: 'style', name: 'style: 样式' }, { value: 'refactor', name: 'refactor: 重构' }, { value: 'perf', name: 'perf: 性能优化' }, { value: 'test', name: 'test: 增加测试' }, { value: 'chore', name: 'chore: 构建过程或辅助工具的变动' }, { value: 'revert', name: 'revert: 回退' }, { value: 'build', name: 'build: 打包' } ], // 消息步骤 messages: { type: '请选择提交类型:', // commit 时选择以上 types 对应选择 customScope: '请输入修改范围(可选):', subject: '请简要描述提交(必填):', body: '请输入详细描述(可选):', footer: '请输入要关闭的issue(可选):', confirmCommit: '确认使用以上信息提交?(y/n/e/h)' }, skipQuestions: ['customScope', 'body', 'footer'], // 可以跳过的问题(对应 messages) subjectLimit: 72 // 文字长度 }- 1
- 2
- 3
- 4
- 5
- 6
- 7
- 8
- 9
- 10
- 11
- 12
- 13
- 14
- 15
- 16
- 17
- 18
- 19
- 20
- 21
- 22
- 23
- 24
- 25
- 26
- 指令:git cz 代替 git commit
commitlint 检查提交描述规范
- 安装工具:
- @commitlint/cli 用于在代码仓库中运行 commitlint,校验代码提交消息是否符合指定规范
- @commitlint/config-conventional 预设的 commitlint 配置包,基于常见 Git 提交约定提供了一套默认规则
npm i -D @commitlint/cli@12.1.4 @commitlint/config-conventional@12.1.4- 1
- 创建:commitlint.config.js 文件
// 使用 UTF-8 module.exports = { // 继承的规则 extends: ['@commitlint/config-conventional'], // 定义规则类型 rules: { // type 类型定义,表示 git 提交的 type 必须在以下类型范围内 'type-enum': [ // 验证的错误级别 类似 eslint warn 2, // 什么情况下验证 一直验证 'always', [ 'feat', // 新功能 feature 'fix', // 修复 bug 'docs', // 文档注释 'style', // 代码格式(不影响代码运行的变动) 'refactor', // 重构(既不增加新功能,也不是修复bug) 'perf', // 性能优化 'test', // 增加测试 'chore', // 构建过程或辅助工具的变动 'revert', // 回退 'build' // 打包 ] ], // subject 大小写不做校验 'subject-case': [0] } }- 1
- 2
- 3
- 4
- 5
- 6
- 7
- 8
- 9
- 10
- 11
- 12
- 13
- 14
- 15
- 16
- 17
- 18
- 19
- 20
- 21
- 22
- 23
- 24
- 25
- 26
- 27
- 28
- 29
- 30
husky
-1 安装:
npm i husky@7.0.1 -D- 1
- 生成
.husky文件
npx husky install- 1
- 初始化 husky 配置:
npm set-script prepare 'husky install'- 1
"scripts": { "prepare": "husky install" }- 1
- 2
- 3
npm run prepare- 1
- 检验提交规范( 通过 husky 监听 commit-msg 钩子 ):在 .husky 文件中生成 commit-msg 文件
- 使用 husky 提供的 add 命令来添加一个钩子类型 commit-msg,会在提交消息时触发
npx: 执行 npm 包中的命令。
–no-install: 不进行包的安装,即不会自动安装 commitlint。
commitlint: 是一个用于规范化提交消息格式的工具。
–edit: 表示编辑模式,命令会打开一个文本编辑器供用户编辑 commit message。
$1: 是一个占位符,表示第一个参数,通常用于指定待提交的文件或信息。npx husky add .husky/commit-msg 'npx --no-install commitlint --edit "$1"'- 1
- 检验代码规范( 通过 husky 监听 pre-commit 钩子 ):在 .husky 文件中生成 pre-commit 文件
npx husky add .husky/pre-commit "npx eslint --ext .js,.vue src"- 1
lint-staged 自动修正代码格式
- package.json
"lint-staged":{ "src/**/*.{js,vue}":[ "eslint --fix", "git add" ] }- 1
- 2
- 3
- 4
- 5
- 6
- .husky 文件 > pre-commit 将指令修改成 npx lint-staged
vetur
- 在 vue2 中,template 只允许存在一个根元素,但 vue3 发生变化,支持 template 存在多个根元素。
- 可以通过以下方案来 取消 vetur 对 template 的检测:
- 在 VSCode 的设置中,搜索 vetur,找到如下设置,取消勾选,重启 VSCode
element-plus
- plugins 文件夹 > element.js
import ElementPlus from 'element-plus' import 'element-plus/dist/index.css' export default app => { app.use(ElementPlus) }- 1
- 2
- 3
- 4
- 5
- 6
- main.js
import installElementPlus from './plugins/element' const app = createApp(App) installElementPlus(app)- 1
- 2
- 3
-
相关阅读:
Spring Boot 资源索引
【Vue基础十三】---Vuex的求和案例--map辅助函数的使用
并查集_find()_连通块_食物链
【知识总结】金九银十offer拿到手软的前端面试题——Web篇
Android 10.0 Settings 去掉打开开发者模式和USB调试模式的广播
力扣(LeetCode)2578. 最小和分割(C++)
xml特殊字符问题
敲了几万行源码后,我给Mybatis画了张“全地图”
手机进销存
apache服务器出现No input file specified.解决方案
- 原文地址:https://blog.csdn.net/DGogoing/article/details/132956441
