-
ajax day3


3、将普通对象转为查询参数字符串形式:
创建URLSearchParams参数,再用toString方法转为字符串
4、xhr对象
请求参数:body参数

5、promise


promise对象一旦被兑现或拒绝,就是已敲定了,状态无法再被改变。故此处先执行resolve,状态为兑现后,不会再改变。案例:使用xhr和promise获取省份列表
<!DOCTYPE html> <html lang="en"> <head> <meta charset="UTF-8"> <meta http-equiv="X-UA-Compatible" content="IE=edge"> <meta name="viewport" content="width=device-width, initial-scale=1.0"> <title>案例_使用Promise+XHR_获取省份列表</title> </head> <body> <p class="my-p"></p> <script> /** * 目标:使用Promise管理XHR请求省份列表 * 1. 创建Promise对象 * 2. 执行XHR异步代码,获取省份列表 * 3. 关联成功或失败函数,做后续处理 */ // 1. 创建Promise对象 const p = new Promise((resolve, reject) => { // 2. 执行XHR异步代码,获取省份列表 const xhr = new XMLHttpRequest() xhr.open('GET', 'http://hmajax.itheima.net/api/province') xhr.addEventListener('loadend', () => { // xhr如何判断响应成功还是失败的? // 2xx开头的都是成功响应状态码 if (xhr.status >= 200 && xhr.status < 300) { resolve(JSON.parse(xhr.response)) } else { reject(new Error(xhr.response)) } }) xhr.send() }) // 3. 关联成功或失败函数,做后续处理 p.then(result => { console.log(result) document.querySelector('.my-p').innerHTML = result.list.join('
') }).catch(error => { // 错误对象要用console.dir详细打印 console.dir(error) // 服务器返回错误提示消息,插入到p标签显示 document.querySelector('.my-p').innerHTML = error.message }) </script> </body> </html>- 1
- 2
- 3
- 4
- 5
- 6
- 7
- 8
- 9
- 10
- 11
- 12
- 13
- 14
- 15
- 16
- 17
- 18
- 19
- 20
- 21
- 22
- 23
- 24
- 25
- 26
- 27
- 28
- 29
- 30
- 31
- 32
- 33
- 34
- 35
- 36
- 37
- 38
- 39
- 40
- 41
- 42
- 43
- 44
- 45
- 46
- 47
- 48
- 49
- 50
- 51
重点:利用xhr和promise封装myAxios函数

(1)query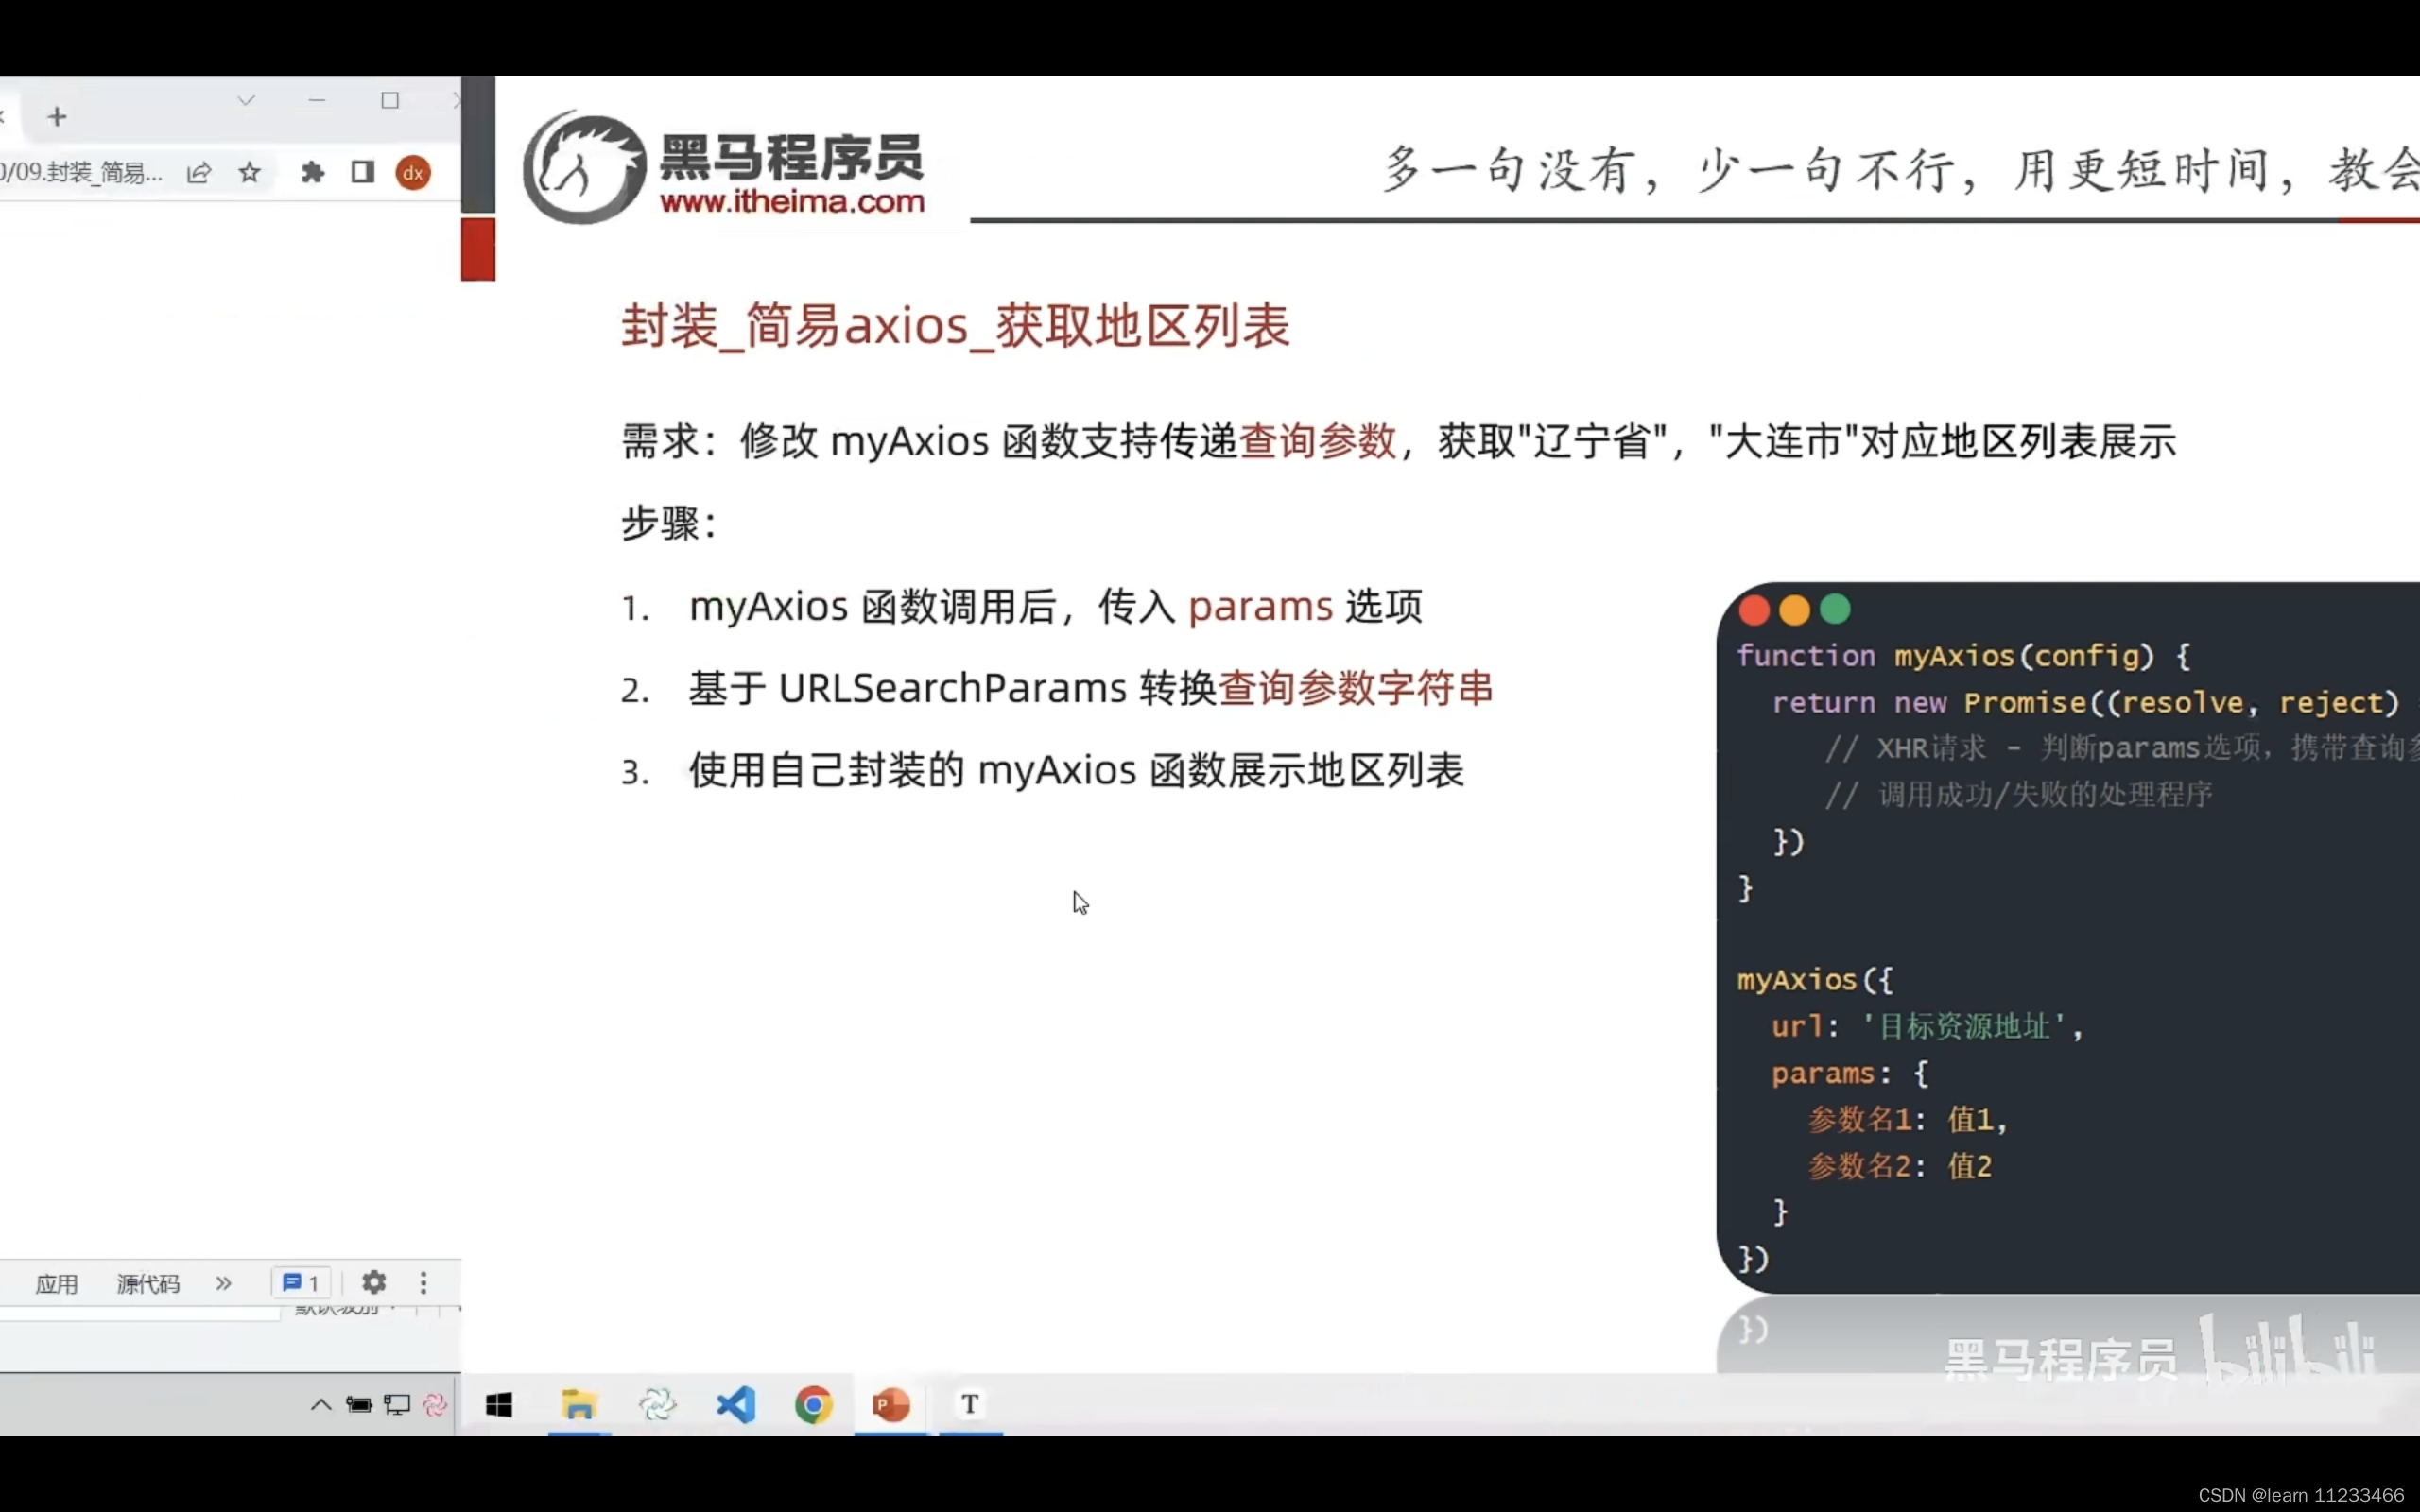
/** * 目标:封装_简易axios函数_获取地区列表 * 1. 判断有params选项,携带查询参数 * 2. 使用URLSearchParams转换,并携带到url上 * 3. 使用myAxios函数,获取地区列表 */ function myAxios(config) { //传入一个配置参数 return new Promise((resolve, reject) => { const xhr = new XMLHttpRequest() // 1. 判断有params选项,携带查询参数 if (config.params) { // 2. 使用URLSearchParams转换,并携带到url上 const paramsObj = new URLSearchParams(config.params) const queryString = paramsObj.toString() // 用模板字符串 因为url后面加上的字符串不止queryString 还有一个? // 把查询参数字符串,拼接在url?后面 config.url += `?${queryString}` } xhr.open(config.method || 'GET', config.url) xhr.addEventListener('loadend', () => { if (xhr.status >= 200 && xhr.status < 300) { resolve(JSON.parse(xhr.response)) } else { reject(new Error(xhr.response)) } }) xhr.send() }) } // 3. 使用myAxios函数,获取地区列表 myAxios({ url: 'http://hmajax.itheima.net/api/area', params: { pname: '辽宁省', cname: '大连市' } }).then(result => { console.log(result) document.querySelector('.my-p').innerHTML = result.list.join('
') })- 1
- 2
- 3
- 4
- 5
- 6
- 7
- 8
- 9
- 10
- 11
- 12
- 13
- 14
- 15
- 16
- 17
- 18
- 19
- 20
- 21
- 22
- 23
- 24
- 25
- 26
- 27
- 28
- 29
- 30
- 31
- 32
- 33
- 34
- 35
- 36
- 37
- 38
- 39
- 40
- 41
- 42
- 43
- 44
(2)body

/** * 目标:封装_简易axios函数_注册用户 * 1. 判断有data选项,携带请求体 * 2. 转换数据类型,在send中发送 * 3. 使用myAxios函数,完成注册用户 */ function myAxios(config) { return new Promise((resolve, reject) => { const xhr = new XMLHttpRequest() if (config.params) { const paramsObj = new URLSearchParams(config.params) const queryString = paramsObj.toString() config.url += `?${queryString}` } xhr.open(config.method || 'GET', config.url) xhr.addEventListener('loadend', () => { if (xhr.status >= 200 && xhr.status < 300) { resolve(JSON.parse(xhr.response)) } else { reject(new Error(xhr.response)) } }) // 1. 判断有data选项,携带请求体 if (config.data) { // 2. 转换数据类型,在send中发送 const jsonStr = JSON.stringify(config.data) // 请求头 xhr.setRequestHeader('Content-Type', 'application/json') xhr.send(jsonStr) } else { // 如果没有请求体数据,正常的发起请求 xhr.send() } }) } document.querySelector('.reg-btn').addEventListener('click', () => { // 3. 使用myAxios函数,完成注册用户 myAxios({ url: 'http://hmajax.itheima.net/api/register', method: 'POST', data: { username: 'itheima999', password: '666666' } }).then(result => { console.log(result) }).catch(error => { console.dir(error) }) })- 1
- 2
- 3
- 4
- 5
- 6
- 7
- 8
- 9
- 10
- 11
- 12
- 13
- 14
- 15
- 16
- 17
- 18
- 19
- 20
- 21
- 22
- 23
- 24
- 25
- 26
- 27
- 28
- 29
- 30
- 31
- 32
- 33
- 34
- 35
- 36
- 37
- 38
- 39
- 40
- 41
- 42
- 43
- 44
- 45
- 46
- 47
- 48
- 49
- 50
- 51
- 52
- 53
案例:天气预报
获取天气数据进行展示:一打开页面时,页面的显示;搜索城市后的显示。故应封装一个函数。//输入框内容改变时,不断触发该事件 document.querySelector('.search-city').addEventListener('input', e => { // console.log(e.target.value) myAxios({ url: 'http://hmajax.itheima.net/api/weather/city', params: { city: e.target.value } }).then(result => { // console.log(result) const arr = result.data // console.log(arr) // 给每个li标签绑定一个data-code 以便下面选中小li后 展示对应城市天气时 要向服务器传data-code document.querySelector('.search-list').innerHTML = arr.map(item => { return `- ${item.code}
">${item.name}` }).join('') }) }) // 给动态标签绑定事件时 要委托给它的父亲 并且记得判断是否选中的是城市小li document.querySelector('.search-list').addEventListener('click', e => { if (e.target.classList.contains('city-item')) { getWeather(e.target.dataset.code) } })- 1
- 2
- 3
- 4
- 5
- 6
- 7
- 8
- 9
- 10
- 11
- 12
- 13
- 14
- 15
- 16
- 17
- 18
- 19
- 20
- 21
- 22
- 23
- 24
- 25
- 26
- 27
-
相关阅读:
“微信小程序登录与用户信息获取详解“
JavaScript理论篇1之基础理论
【Python】初学者喜欢的Python入门笔记
Fork() 函数:“父” 与 “子” 进程的交互(进程的创建)
RF和SVM的特点
JavaBean的属性(Simple、Indexed、Bound、Constrained)
grpc设置连接存活时间及服务端健康检查
【Django学习笔记(三)】BootStrap介绍
记录:c++生成json
并查集维护集合 ac240食物链
- 原文地址:https://blog.csdn.net/weixin_52005267/article/details/132699835
