1.quarkus实战之一:准备工作2.quarkus实战之二:应用的创建、构建、部署3.quarkus实战之三:开发模式(Development mode)4.quarkus实战之四:远程热部署5.quarkus实战之五:细说maven插件6.quarkus实战之六:配置7.quarkus实战之七:使用配置8.quarkus实战之八:profile9.quarkus依赖注入之一:创建bean10.quarkus依赖注入之二:bean的作用域11.quarkus依赖注入之三:用注解选择注入bean12.quarkus依赖注入之四:选择注入bean的高级手段13.quarkus依赖注入之五:拦截器(Interceptor)14.quarkus依赖注入之六:发布和消费事件15.quarkus依赖注入之七:生命周期回调16.quarkus依赖注入之八:装饰器(Decorator)17.quarkus依赖注入之九:bean读写锁18.quarkus依赖注入之十:学习和改变bean懒加载规则
19.quarkus依赖注入之十一:拦截器高级特性上篇(属性设置和重复使用)
20.quarkus依赖注入之十二:禁用类级别拦截器21.quarkus依赖注入之十三:其他重要知识点大串讲(终篇)22.quarkus数据库篇之二:无需数据库也能运行增删改查(dev模式)23.quarkus数据库篇之三:单应用同时操作多个数据库24.quarkus数据库篇之四:本地缓存欢迎访问我的GitHub
这里分类和汇总了欣宸的全部原创(含配套源码):https://github.com/zq2599/blog_demos
本篇概览
- 本篇是《quarkus依赖注入》系列的第十一篇,之前的[《拦截器》]学习了拦截器的基础知识,现在咱们要更加深入的了解拦截器,掌握两种高级用法:拦截器属性和重复使用拦截器
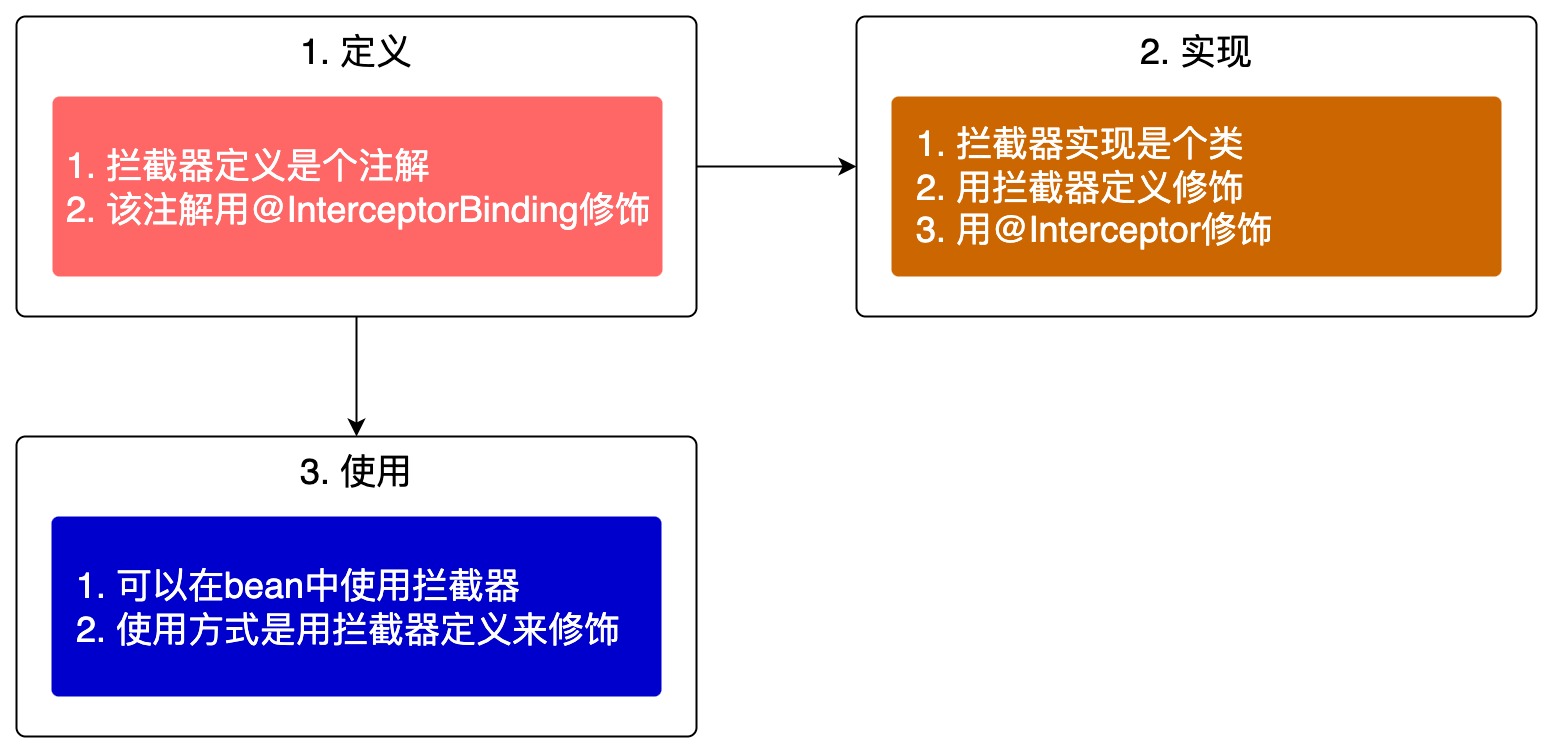
- 先来回顾拦截器的基本知识,定义一个拦截器并用来拦截bean中的方法,总共需要完成以下三步
业务需求设定
- 为了让本篇所学知识点显得有实用型,这里假定一个业务需求,然后咱们用拦截器来满足这个需求
- 假设有个名为SayHello的普通接口,此接口有三个实现类:SayHelloA、SayHelloB、SayHelloC,这些实现类都是bean,它们的源码如下
- 接口SayHello.java
public interface SayHello {
    String hello();
}
- 实现类SayHelloA.java
@ApplicationScoped
@Named("A")
public class SayHelloA implements SayHello {
    @Override
    public void hello() {
        Log.info("hello from A");
    }
}
- 实现类SayHelloB.java
@ApplicationScoped
@Named("B")
public class SayHelloB implements SayHello {
    @Override
    public void hello() {
        Log.info("hello from B");
    }
}
- 实现类SayHelloC.java
@ApplicationScoped
@Named("C")
public class SayHelloC implements SayHello {
    @Override
    public void hello() {
        Log.info("hello from C");
    }
}
- 以上是已知条件,现在来看业务需求
- 要求设计一个拦截器,名为SendMessage,功能是对外发送通知,通知的方式有短信和邮件两种,具体用哪种是可以设置的
- 用SendMessage拦截器拦截SayHelloA,通知类型是短信
- 用SendMessage拦截器拦截SayHelloB,通知类型是邮件
- 用SendMessage拦截器拦截SayHelloC,通知类型是短信和邮件都发送
功能实现分析
- 上述业务需求第二项和第三项,很显然拦截器的实现要同时支持短信通知和邮件通知两种功能,而问题的关键是:拦截器在工作的时候,如何知道当前应该发送短信还是邮件,或者说如何将通知类型准确的告诉拦截器?
- 这就牵扯到一个知识点:拦截器属性,拦截器自己是个注解,而注解是有属性的,咱们新增一个通知类型的属性(名为sendType),只要在使用注解的地方配置sendType,然后在拦截器实现中获取到sendType的值,就解决了通知类型的设置和获取的问题,业务需求2和3也就迎刃而解了,拦截器配置的效果大致如下
@ApplicationScoped
@SendMessage(sendType="sms")
public class SayHelloA implements SayHello {
- 再来看需求4,这又设计到拦截器的另一个知识点:同一个拦截器重复使用,只要连续两次用SendMessage注解修饰SayHelloC,而每个注解的sendType分别是短信和邮件,这样就能达到目的了,拦截器配置的效果大致如下
@ApplicationScoped
@SendMessage(sendType="sms")
@SendMessage(sendType="email")
public class SayHelloC implements SayHello {
- 以上就是解决问题的大致思路,接下来编码实现,将涉及的知识点在代码中体现出来
编码:定义拦截器
- 首先是拦截器定义SendMessage.java,有几处要注意的地方稍后会提到
package com.bolingcavalry.interceptor.define;

import javax.enterprise.util.Nonbinding;
import javax.interceptor.InterceptorBinding;
import java.lang.annotation.*;

@InterceptorBinding
@Repeatable(SendMessage.SendMessageList.class)
@Target({ElementType.TYPE, ElementType.METHOD})
@Retention(RetentionPolicy.RUNTIME)
public @interface SendMessage {

    /**
     * 消息类型 : "sms"表示短信,"email"表示邮件
     * @return
     */
    @Nonbinding
    String sendType() default "sms";

    @Target({ElementType.TYPE, ElementType.METHOD})
    @Retention(RetentionPolicy.RUNTIME)
    @interface SendMessageList {
        SendMessage[] value();
    }
}
- 上述代码有以下几处需要注意
- 允许在同一位置重复使用同一个注解,这是java注解的通用功能,并非quarkus独有
- 重复使用注解时,必须定义注解容器,用来放置重复的注解,这里的容器是SendMessageList
- 使用Repeatable修饰SendMessage,这样就能在同一位置重复使用SendMessage注解了,注意Repeatable的属性值是容器SendMessageList
- sendType是注解属性,用来保存通知类型,任何使用SendMessage注解的地方都能通过设置sendType来指定通知类型,如果不指定则使用默认值sms
- 要注意sendType的注解Nonbinding,此注解非常重要,如果不添加此注解,在使用SendMessage的时候,设置sendType为email时拦截器不会生效
quarkus对重复使用同一拦截器注解的限制
- 虽然可以在同一位置重复使用SendMessage拦截器,但是要注意quarkus的限制
- 可以作用在方法上
- 不能作用在类上
- 不能作用在stereotypes上
- 关于2和3,官方的说法是将来会解决(This might be added in the future)
编码:实现拦截器
- 接下来是实现具体拦截功能的SendMessageInterceptor.java,代码如下,有几处要注意的地方稍后会提到
package com.bolingcavalry.interceptor.impl;

import com.bolingcavalry.interceptor.define.SendMessage;
import com.bolingcavalry.interceptor.define.TrackParams;
import io.quarkus.arc.Priority;
import io.quarkus.arc.runtime.InterceptorBindings;
import io.quarkus.logging.Log;
import javax.interceptor.AroundInvoke;
import javax.interceptor.Interceptor;
import javax.interceptor.InvocationContext;
import java.lang.annotation.Annotation;
import java.util.*;
import static io.quarkus.arc.ArcInvocationContext.KEY_INTERCEPTOR_BINDINGS;

@SendMessage
@Interceptor
public class SendMessageInterceptor {

    @AroundInvoke
    Object execute(InvocationContext context) throws Exception {
        // 先执行被拦截的方法
        Object rlt = context.proceed();

        // 获取被拦截方法的类名
        String interceptedClass = context.getTarget().getClass().getSimpleName();

        // 代码能走到这里,表示被拦截的方法已执行成功,未出现异常
        // 从context中获取通知类型,由于允许重复注解,因此通知类型可能有多个
        List allTypes = getAllTypes(context);

        // 将所有消息类型打印出来
        Log.infov("{0} messageTypes : {1}", interceptedClass, allTypes);

        // 遍历所有消息类型,调用对应的方法处理
        for (String type : allTypes) {
            switch (type) {
                // 短信
                case "sms":
                    sendSms();
                    break;
                // 邮件
                case "email":
                    sendEmail();
                    break;
            }
        }

        // 最后再返回方法执行结果
        return rlt;
    }

    /**
     * 从InvocationContext中取出所有注解,过滤出SendMessage类型的,将它们的type属性放入List中返回
     * @param invocationContext
     * @return
     */
    private List getAllTypes(InvocationContext invocationContext) {
        // 取出所有注解
        Set bindings = InterceptorBindings.getInterceptorBindings(invocationContext);

        List allTypes = new ArrayList<>();

        // 遍历所有注解,过滤出SendMessage类型的
        for (Annotation binding : bindings) {
            if (binding instanceof SendMessage) {
               allTypes.add(((SendMessage) binding).sendType());
            }
        }

        return allTypes;
    }

    /**
     * 模拟发送短信
     */
    private void sendSms() {
        Log.info("operating success, from sms");
    }

    /**
     * 模拟发送邮件
     */
    private void sendEmail() {
        Log.info("operating success, from email");
    }
}
- 上述代码,有以下几处需要注意
- 发送短信和邮件不是本篇的重点,因此,对应的sendSms和sendEmail方法中只是日志打印,表示代码已经走到了此处
- getAllTypes方法是重点,演示了如何从拦截器上下文对象invocationContext中获取所有注解,并过滤出所有SendMessage类型,再取其type属性
- 对取出的sendType属性逐一处理,这样就做到了每个设置的类型都会被处理
- 在某个方法上多次用SendMessage注解修饰,最终只会执行一次SendMessageInterceptor#execute方法,这是关键!试想,如果SendMessageInterceptor#execute方法执行了多次,而每次都会取出所有SendMessage类型去处理,那么每种SendMessage类型都会重复处理
编码:使用拦截器
- 拦截器的定义和实现都已经完成,接下来就是使用拦截器了,注意前面提到的限制,这里要用SendMessage去修饰方法,而不能修饰类
- 首先是SayHelloA,拦截它的时候,业务需求是发送短信,修改后的完整源码如下,用SendMessage注解修饰hello方法,这里的SendMessage没有指定其sendType的值,因此会使用默认值sms
@ApplicationScoped
@Named("A")
public class SayHelloA implements SayHello {

    @SendMessage
    @Override
    public void hello() {
        Log.info("hello from A");
    }
}
- 然后是SayHelloB,拦截它的时候,业务需求是发送邮件,注意sendType值等于email
@ApplicationScoped
@Named("B")
public class SayHelloB implements SayHello {

    @SendMessage(sendType = "email")
    @Override
    public void hello() {
        Log.info("hello from B");
    }
}
- 最后是SayHelloC,拦截它的时候,也无需求是短信和邮件都要发送,注意这里使用了两次SendMessage
@ApplicationScoped
@Named("C")
public class SayHelloC implements SayHello {

    @SendMessage
    @SendMessage(sendType = "email")
    @Override
    public void hello() {
        Log.info("hello from C");
    }
}
- 拦截器的定义、实现、使用都已经完成,接下来考虑如何验证,还是用单元测试吧,简单方便
编码:单元测试
- 单元测试类的逻辑很简单,运行几个bean的hello方法即可
@QuarkusTest
public class SendMessageTest {

    @Named("A")
    SayHello sayHelloA;

    @Named("B")
    SayHello sayHelloB;

    @Named("C")
    SayHello sayHelloC;

    @Test
    public void testSendMessage() {
        sayHelloA.hello();
        sayHelloB.hello();
        sayHelloC.hello();
    }
}
- 编码完成,可以运行起来验证结果了
运行单元测试
- 单元测试类SendMessageTestd的执行结果如下图,红黄蓝三个框中,分别是SayHelloA、SayHelloB、SayHelloC的拦截结果,可见全部符合预期

- 至此,拦截器的两个高级特性已经实战完成,希望这些知识点能够帮助您写出更强大和精准的拦截器,实现复杂的业务需求
源码下载
- 本篇实战的完整源码可在GitHub下载到,地址和链接信息如下表所示(https://github.com/zq2599/blog_demos)
| 名称 | 链接 | 备注 |
|---|---|---|
| 项目主页 | https://github.com/zq2599/blog_demos | 该项目在GitHub上的主页 |
| git仓库地址(https) | https://github.com/zq2599/blog_demos.git | 该项目源码的仓库地址,https协议 |
| git仓库地址(ssh) | git@github.com:zq2599/blog_demos.git | 该项目源码的仓库地址,ssh协议 |
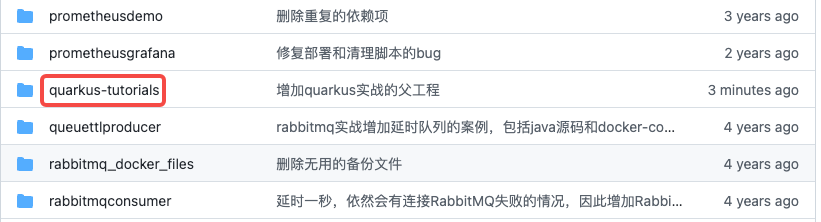
- 这个git项目中有多个文件夹,本次实战的源码在quarkus-tutorials文件夹下,如下图红框
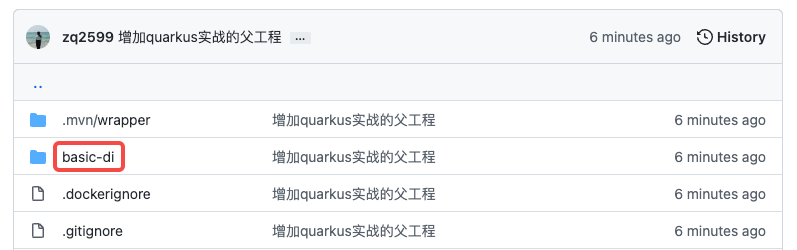
- quarkus-tutorials是个父工程,里面有多个module,本篇实战的module是basic-di,如下图红框