-
opencv的使用(Ubuntu linux环境,AS jni,AS java)
最近要完成一个功能,就是把四个视频合成左右上下分布的一个视频。尝试很多方法,最终使用opencv来实现该功能。(通过opencv实现的视频好像没有声音。)研究的步骤,首先在Ubuntu环境测试,该功能是否实现。然后再将生成的库文件放到AS中,使用jni的方法调用,或者将源码放到AS中利用jni技术。在实现过程中遇到很多问题,下面记录。
一、在ubuntu linux环境使用opencv。
1、下载opencv安装包。
下载地址:官网:https://opencv.org/releases/
git地址:https://github.com/opencv/opencv/releases

2、将下载的安装包放到虚拟机根目录(新建software目录)。

3、安装包解压缩。
unzip opencv-4.8.0.zip- 1
4、下载相关软件。
进入 opencv-4.8.0 文件夹。
1)更新软件sudo apt-get update- 1

2)安装cmakesudo apt-get install cmake- 1

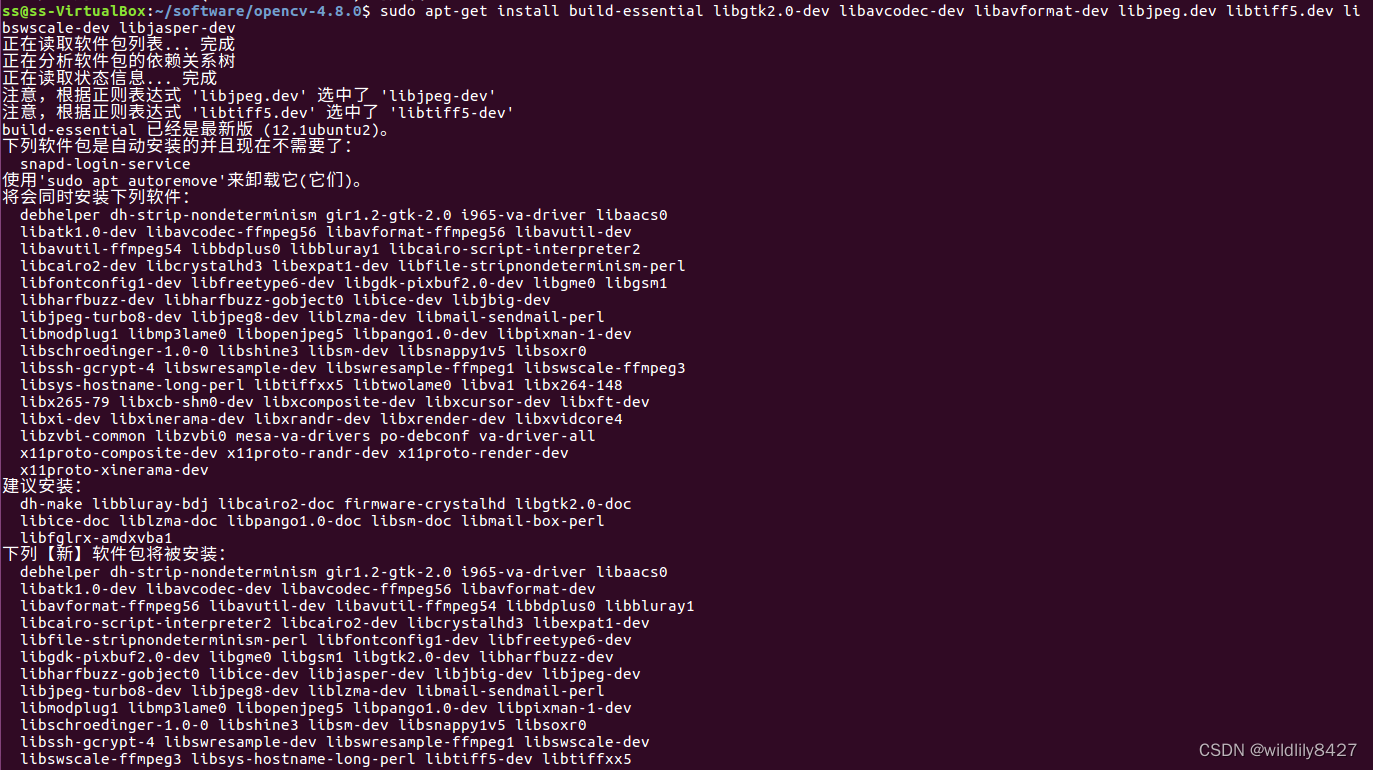
3) 安装依赖库sudo apt-get install build-essential libgtk2.0-dev libavcodec-dev libavformat-dev libjpeg.dev libtiff5.dev libswscale-dev libjasper-dev- 1
4)在 opencv-4.8.0 文件夹下新建build文件夹。mkdir build- 1

5)进入build文件夹,使用命令修改参数
sudo cmake -D CMAKE_BUILD_TYPE=Release -D CMAKE_INSTALL_PREFIX=/usr/local ..- 1

6)使用make编译
sudo make- 1


7)安装
sudo make install- 1

8)配置环境sudo gedit /etc/ld.so.conf.d/opencv.conf- 1
在新建的文档中添加:
/usr/local/lib- 1
sudo ldconfig- 1
配置路径生效。


9)配置bashsudo gedit /etc/bash.bashrc- 1
在最末尾添加
PKG_CONFIG_PATH=$PKG_CONFIG_PATH:/usr/local/lib/pkgconfig export PKG_CONFIG_PATH- 1
- 2
执行该步骤时,发现/usr/local/lib/路径下没有pkgconfig文件夹。并且执行命令
pkg-config --cflags openc- 1
报一下错误。

解决:首先创建opencv.pc文件,这里要注意它的路径信息:cd /usr/local/lib sudo mkdir pkgconfig cd pkgconfig sudo touch opencv.pc- 1
- 2
- 3
- 4
然后在opencv.pc中添加以下信息,注意这些信息需要与自己安装opencv时的库路径对应:(一下是我自己的内容)
prefix=/usr/local exec_prefix=${prefix} libdir=${exec_prefix}/lib includedir=${prefix}/include/opencv4 Name: OpenCV Description: Open Source Computer Vision Library Version: 4.8.0 Libs: -L${exec_prefix}/lib -lopencv_highgui -lopencv_shape -lopencv_objdetect -lopencv_ml -lopencv_superres -lopencv_dnn -lopencv_stitching -lopencv_videostab -lopencv_calib3d -lopencv_videoio -lopencv_imgcodecs -lopencv_features2d -lopencv_video -lopencv_photo -lopencv_imgproc -lopencv_flann -lopencv_core Libs.private: -ldl -lm -lpthread -lrt Cflags: -I${includedir}- 1
- 2
- 3
- 4
- 5
- 6
- 7
- 8
- 9
- 10
- 11
- 12
- 13
保存退出,添加环境:
export PKG_CONFIG_PATH=/usr/local/lib/pkgconfig- 1
执行.cpp编译命令:
g++ videotest.cpp -o videotest `pkg-config --cflags --libs opencv`- 1
报错:

再执行编译命令:g++ videotest.cpp -o videotest `pkg-config --cflags --libs opencv` -std=gnu++11- 1
报错:

查看/usr/local/lib/lib文件下没有libopencv_shape.so等这三个库,再次打开/usr/local/lib/pkgconfig/opencv.pc文件,将-lopencv_shape 等三个路径删除掉。保存退出。执行命令:g++ videotest.cpp -o videotest `pkg-config --cflags --libs opencv` -std=gnu++11- 1
编译成功。

最后的opencv.pc文件:# Package Information for pkg-config prefix=/usr/local exec_prefix=${prefix} libdir=${exec_prefix}/lib includedir=${prefix}/include/opencv4 Name: OpenCV Description: Open Source Computer Vision Library Version: 4.8.0 Libs: -L${exec_prefix}/lib -lopencv_highgui -lopencv_objdetect -lopencv_ml -lopencv_dnn -lopencv_stitching -lopencv_calib3d -lopencv_videoio -lopencv_imgcodecs -lopencv_features2d -lopencv_video -lopencv_photo -lopencv_imgproc -lopencv_flann -lopencv_core Libs.private: -ldl -lm -lpthread -lrt Cflags: -I${includedir}- 1
- 2
- 3
- 4
- 5
- 6
- 7
- 8
- 9
- 10
- 11
- 12
- 13
注意:1、该opencv源码编译的对应so库文件只是linux系统平台文件(我的是x86_64),如果想将该库编译为其他平台,例如arm64需要交叉编译。(我没整明白)
注意:2、上述配置bash后,使用以下命令使得配置文件生效。若没有生效,重启电脑试试。(如果没有生效,执行 编译生成的可执行文件,报错 找不到opencv库)source /etc/bash.bashrc sudo updatedb- 1
- 2
注意:3 我这里编译的是opencv4.8.0版本,编译过程中使用python3.x版本,opencv.pc需要自己创建。链接http://www.taodudu.cc/news/show-3639538.html?action=onClick#google_vignette 编译的opencv3.4.1版本,使用python2.x版本,opencv.pc自动生成。按照链接中配置,就可以成功编译安装opencv。
最后是测试代码,功能将代码中的video.mp4合成上下左右分布的一个视频。生成视频为mergevideo.avi 或mergevideo.mkv
#include#include #include #include #include #include #include #include #include #include #include #include #include #include #include #include #include #include #include using namespace std; using namespace cv; int main(int argc, char ** argv) { std::string videoFile = "video.mp4";//视频的路径 std::string videoFile1 = "video.mp4";//视频的路径 std::string videoFile2 = "video.mp4";//视频的路径 std::string videoFile3 = "video.mp4";//视频的路径 /** 打开第一个视频文件 */ VideoCapture cap; //视频句柄变量 cap.open(videoFile);//打开视频 if(!cap.isOpened()) //判断是否打开了 { printf("1cap.isOpened is error\n"); return -1; } /** 打开第二个视频文件 */ VideoCapture cap1; //视频句柄变量 cap1.open(videoFile1);//打开视频 if(!cap1.isOpened()) //判断是否打开了 { printf("2cap.isOpened is error\n"); return -1; } /** 打开第三个视频文件 */ VideoCapture cap2; //视频句柄变量 cap2.open(videoFile2);//打开视频 if(!cap2.isOpened()) //判断是否打开了 { printf("3cap.isOpened is error\n"); return -1; } /** 打开第四个视频文件 */ VideoCapture cap3; //视频句柄变量 cap3.open(videoFile3);//打开视频 if(!cap3.isOpened()) //判断是否打开了 { printf("4cap.isOpened is error\n"); return -1; } /** 打开第一个视频文件的帧数 */ int frame_num = cap.get(cv::CAP_PROP_FRAME_COUNT); std::cout << "videoFile total frame number is: " << frame_num << std::endl; /** 打开第二个视频文件的帧数 */ int frame_num1 = cap1.get(cv::CAP_PROP_FRAME_COUNT); std::cout << "videoFile1 total frame number is: " << frame_num1 << std::endl; /** 打开第三个视频文件的帧数 */ int frame_num2 = cap2.get(cv::CAP_PROP_FRAME_COUNT); std::cout << "videoFile2 total frame number is: " << frame_num2 << std::endl; /** 打开第四个视频文件的帧数 */ int frame_num3 = cap3.get(cv::CAP_PROP_FRAME_COUNT); std::cout << "videoFile3 total frame number is: " << frame_num3 << std::endl; /** 打开第一个视频文件的帧率 */ int fps = cap.get(cv::CAP_PROP_FPS); std::cout << "videoFile fps: " << fps << std::endl; /** 打开第二个视频文件的帧率 */ int fps1 = cap1.get(cv::CAP_PROP_FPS); std::cout << "videoFile1 fps1: " << fps1 << std::endl; /** 打开第三个视频文件的帧率 */ int fps2 = cap2.get(cv::CAP_PROP_FPS); std::cout << "videoFile fps2: " << fps2 << std::endl; /** 打开第四个视频文件的帧率 */ int fps3 = cap3.get(cv::CAP_PROP_FPS); std::cout << "videoFile1 fps3: " << fps3 << std::endl; /** 打开第一个视频文件的宽度 */ int image_width = cap.get(cv::CAP_PROP_FRAME_WIDTH); std::cout << "videoFile image width is: " << image_width << std::endl; /** 打开第二个视频文件的宽度 */ int image_width1 = cap1.get(cv::CAP_PROP_FRAME_WIDTH); std::cout << "videoFile1 image width is: " << image_width1 << std::endl; /** 打开第三个视频文件的宽度 */ int image_width2 = cap2.get(cv::CAP_PROP_FRAME_WIDTH); std::cout << "videoFile2 image width is: " << image_width2 << std::endl; /** 打开第四个视频文件的宽度 */ int image_width3 = cap3.get(cv::CAP_PROP_FRAME_WIDTH); std::cout << "videoFile3 image width is: " << image_width3 << std::endl; /** 打开第一个视频文件的高度 */ int image_height = cap.get(cv::CAP_PROP_FRAME_HEIGHT); std::cout << "videoFile image height: " << image_height << std::endl; /** 打开第二个视频文件的高度 */ int image_height1 = cap1.get(cv::CAP_PROP_FRAME_HEIGHT); std::cout << "videoFile1 image height: " << image_height1 << std::endl; /** 打开第三个视频文件的高度 */ int image_height2 = cap2.get(cv::CAP_PROP_FRAME_HEIGHT); std::cout << "videoFile2 image height: " << image_height2 << std::endl; /** 打开第四个视频文件的高度 */ int image_height3 = cap3.get(cv::CAP_PROP_FRAME_HEIGHT); std::cout << "videoFile3 image height: " << image_height3 << std::endl; /** 打开第一个视频文件的矩阵对象的格式*/ int frame_format = cap.get(cv::CAP_PROP_FORMAT); std::cout << "videoFile frame format: " << frame_format << std::endl; /** 打开第二个视频文件的矩阵对象的格式 */ int frame_format1 = cap1.get(cv::CAP_PROP_FORMAT); std::cout << "videoFile1 frame format: " << frame_format1 << std::endl; /** 打开第三个视频文件的矩阵对象的格式*/ int frame_format2 = cap2.get(cv::CAP_PROP_FORMAT); std::cout << "videoFile2 frame format: " << frame_format2 << std::endl; /** 打开第四个视频文件的矩阵对象的格式 */ int frame_format3 = cap3.get(cv::CAP_PROP_FORMAT); std::cout << "videoFile3 frame format: " << frame_format3 << std::endl; /** 合并视频初始化 */ //std::string mergeVideoFile = "mergeVideo.avi"; std::string mergeVideoFile = "mergeVideo.mkv"; VideooHeight = 720; int mergeVideooWidth = 1280; float mergeVideooFps = 10.0; int mergeVideooFpsFrameFormat = CV_8UC3; // CV_8UC3代表每个像素占8位 cv::VideoWriter track_writer; Mat img = cv::Mat::zeros(mergeVideooWidth, mergeVideooHeight, mergeVideooFpsFrameFormat); //track_writer.open (mergeVideoFile, cv::VideoWriter::fourcc('m', 'p', '4', '2'), mergeVideooFps, cv::Size(mergeVideooWidth, mergeVideooHeight));//.avi track_writer.open (mergeVideoFile, cv::VideoWriter::fourcc('m', 'p', '4', 'v'), mergeVideooFps, cv::Size(mergeVideooWidth, mergeVideooHeight));//.mkv if(!track_writer.isOpened()) { std::cout << "!track_writer.isOpened(): " << std::endl; assert("track writer open failed!\n"); } Mat frame; Mat frame1; Mat frame2; Mat frame3; while(1) { cap.read(frame);//从第一个视频获取一帧图片 cap1.read(frame1);//从第二个视频获取一帧图片 cap2.read(frame2);//从第三个视频获取一帧图片 cap3.read(frame3);//从第四个视频获取一帧图片 if(frame.empty()) break; //是否加载成功 if(frame1.empty()) break; //是否加载成功 if(frame2.empty()) break; //是否加载成功 if(frame3.empty()) break; //是否加载成功 // 设定ROI区域:截取一部分进行合并 Mat imageROI= frame(Rect(0,0,frame.cols,frame.rows)); // Rect(左上角横坐标,左上角纵坐标,宽度,高度) Mat imageROI1= frame1(Rect(0,0,frame1.cols,frame1.rows)); Mat imageROI2= frame2(Rect(0,0,frame2.cols,frame2.rows)); Mat imageROI3= frame3(Rect(0,0,frame3.cols,frame3.rows)); // 大小转换 Mat imageROIdst = Mat::zeros(mergeVideooHeight/2,mergeVideooWidth/2 , CV_8UC3); resize(imageROI, imageROIdst, imageROIdst.size()); Mat imageROI1dst = Mat::zeros(mergeVideooHeight/2,mergeVideooWidth/2 , CV_8UC3); resize(imageROI1, imageROI1dst, imageROI1dst.size()); Mat imageROI2dst = Mat::zeros(mergeVideooHeight/2,mergeVideooWidth/2 , CV_8UC3); resize(imageROI2, imageROI2dst, imageROI2dst.size()); Mat imageROI3dst = Mat::zeros(mergeVideooHeight/2,mergeVideooWidth/2 , CV_8UC3); resize(imageROI3, imageROI3dst, imageROI3dst.size()); // 视频写字 // putText(imageROIdst, videoFile, Point(5, 55),FONT_HERSHEY_PLAIN,2.0,(0, 255, 255),2); //创建目标Mat Mat des; des.create(mergeVideooHeight,mergeVideooWidth, imageROI1dst.type()); // Mat.create(高,宽,像素编码类型这里是CV_8UC3) // 视频帧合并 Mat r1 = des(Rect(0, 0, mergeVideooWidth/2, mergeVideooHeight/2)); imageROI1dst.copyTo(r1); Mat r = des(Rect(mergeVideooWidth/2, 0, mergeVideooWidth/2, mergeVideooHeight/2)); imageROIdst.copyTo(r); Mat r2 = des(Rect(0, mergeVideooHeight/2, mergeVideooWidth/2, mergeVideooHeight/2)); imageROI2dst.copyTo(r2); Mat r3 = des(Rect(mergeVideooWidth/2, mergeVideooHeight/2, mergeVideooWidth/2, mergeVideooHeight/2)); imageROI3dst.copyTo(r3); // 格式化要保存的视频帧 cv::resize(des, img , cv::Size(mergeVideooWidth, mergeVideooHeight)); // 保存视频 track_writer.write(img); } cap.release();//释放视频句柄 cap1.release();//释放视频句柄 cap2.release();//释放视频句柄 cap3.release();//释放视频句柄 track_writer.release(); return 0; } - 1
- 2
- 3
- 4
- 5
- 6
- 7
- 8
- 9
- 10
- 11
- 12
- 13
- 14
- 15
- 16
- 17
- 18
- 19
- 20
- 21
- 22
- 23
- 24
- 25
- 26
- 27
- 28
- 29
- 30
- 31
- 32
- 33
- 34
- 35
- 36
- 37
- 38
- 39
- 40
- 41
- 42
- 43
- 44
- 45
- 46
- 47
- 48
- 49
- 50
- 51
- 52
- 53
- 54
- 55
- 56
- 57
- 58
- 59
- 60
- 61
- 62
- 63
- 64
- 65
- 66
- 67
- 68
- 69
- 70
- 71
- 72
- 73
- 74
- 75
- 76
- 77
- 78
- 79
- 80
- 81
- 82
- 83
- 84
- 85
- 86
- 87
- 88
- 89
- 90
- 91
- 92
- 93
- 94
- 95
- 96
- 97
- 98
- 99
- 100
- 101
- 102
- 103
- 104
- 105
- 106
- 107
- 108
- 109
- 110
- 111
- 112
- 113
- 114
- 115
- 116
- 117
- 118
- 119
- 120
- 121
- 122
- 123
- 124
- 125
- 126
- 127
- 128
- 129
- 130
- 131
- 132
- 133
- 134
- 135
- 136
- 137
- 138
- 139
- 140
- 141
- 142
- 143
- 144
- 145
- 146
- 147
- 148
- 149
- 150
- 151
- 152
- 153
- 154
- 155
- 156
- 157
- 158
- 159
- 160
- 161
- 162
- 163
- 164
- 165
- 166
- 167
- 168
- 169
- 170
- 171
- 172
- 173
- 174
- 175
- 176
- 177
- 178
- 179
- 180
- 181
- 182
- 183
- 184
- 185
- 186
- 187
- 188
- 189
- 190
- 191
- 192
- 193
- 194
- 195
- 196
- 197
- 198
- 199
- 200
- 201
- 202
- 203
- 204
- 205
- 206
- 207
- 208
- 209
- 210
- 211
- 212
- 213
- 214
- 215
- 216
- 217
- 218
- 219
- 220
- 221
- 222
- 223
- 224
- 225
- 226
- 227
- 228
- 229
- 230
- 231
- 232
- 233
- 234
- 235
- 236
- 237
- 238
编译指令:
g++ videotest.cpp -o videotest `pkg-config --cflags --libs opencv` -std=gnu++11- 1
执行指令:
./videotest- 1
路径:

运行结果:

二、AS中集成opencv(jni环境)
上述已经说过,在linux编译的库文件为x86_64平台,我需要arm64平台。因此上述不满足我的需求。使用其他办法。在AS中集成opencv。
1、下载opencv 使用android平台的sdk包。
下载地址不变:下载地址:官网:https://opencv.org/releases/


2、AS中集成opencv库。查看文章"android studio 3.6.3 ndk开发-cpp文件中加载第三方.so库并生成新.so文件(二)"
链接:https://blog.csdn.net/zhuowalun8427/article/details/114294901 后半部分“AS中添加opencv环境”。
3、修改videotest.cpp。与linux环境的videotest.cpp文件相同,只是添加一些jni库文件等。在代码中详细指出。#include#include #include #include #include #include #include #include #include #include #include #include #include #include #include #include #include #include #include // 修改1:添加jni环境需要的头文件 #include #include // 修改2:jni 日志 #define TAG "lilitest" // 这个是自定义的LOG的标识 #define LOGI(...) __android_log_print(ANDROID_LOG_INFO,TAG ,__VA_ARGS__) using namespace std; using namespace cv; // 修改3:main() 方法改成接口,方便java层调用 int mergeVideo() { // 修改4:路径改成android路径,我这里是外置U盘 std::string videoFile = "/storage/udisk1/assets/video.mp4";//视频的路径 std::string videoFile1 = "/storage/udisk1/assets/video.mp4";//视频的路径 std::string videoFile2 = "/storage/udisk1/assets/video.mp4";//视频的路径 std::string videoFile3 = "/storage/udisk1/assets/video.mp4";//视频的路径 /** 打开第一个视频文件 */ VideoCapture cap; //视频句柄变量 cap.open(videoFile);//打开视频 if(!cap.isOpened()) //判断是否打开了 { // 修改5:所有打印日志改为LOGI LOGI("1cap.isOpened is error"); return -1; } /** 打开第二个视频文件 */ VideoCapture cap1; //视频句柄变量 cap1.open(videoFile1);//打开视频 if(!cap1.isOpened()) //判断是否打开了 { LOGI("2cap.isOpened is error\n"); return -1; } /** 打开第三个视频文件 */ VideoCapture cap2; //视频句柄变量 cap2.open(videoFile2);//打开视频 if(!cap2.isOpened()) //判断是否打开了 { LOGI("3cap.isOpened is error\n"); return -1; } /** 打开第四个视频文件 */ VideoCapture cap3; //视频句柄变量 cap3.open(videoFile3);//打开视频 if(!cap3.isOpened()) //判断是否打开了 { LOGI("4cap.isOpened is error\n"); return -1; } /** 打开第一个视频文件的帧数 */ int frame_num = cap.get(cv::CAP_PROP_FRAME_COUNT); LOGI("videoFile total frame number is: %d",frame_num); /** 打开第二个视频文件的帧数 */ int frame_num1 = cap1.get(cv::CAP_PROP_FRAME_COUNT); LOGI("videoFile1 total frame number is: %d",frame_num1); /** 打开第三个视频文件的帧数 */ int frame_num2 = cap2.get(cv::CAP_PROP_FRAME_COUNT); LOGI("videoFile2 total frame number is: %d",frame_num2); /** 打开第四个视频文件的帧数 */ int frame_num3 = cap3.get(cv::CAP_PROP_FRAME_COUNT); LOGI("videoFile3 total frame number is: %d",frame_num3); /** 打开第一个视频文件的帧率 */ int fps = cap.get(cv::CAP_PROP_FPS); LOGI("videoFile fps: %d",fps); /** 打开第二个视频文件的帧率 */ int fps1 = cap1.get(cv::CAP_PROP_FPS); LOGI("videoFile1 fps: %d",fps1); /** 打开第三个视频文件的帧率 */ int fps2 = cap2.get(cv::CAP_PROP_FPS); LOGI("videoFile2 fps: %d",fps2); /** 打开第四个视频文件的帧率 */ int fps3 = cap3.get(cv::CAP_PROP_FPS); LOGI("videoFile3 fps: %d",fps3); /** 打开第一个视频文件的宽度 */ int image_width = cap.get(cv::CAP_PROP_FRAME_WIDTH); LOGI("videoFile image width is: %d ",image_width); /** 打开第二个视频文件的宽度 */ int image_width1 = cap1.get(cv::CAP_PROP_FRAME_WIDTH); LOGI("videoFile1 image width is: %d ",image_width1); /** 打开第三个视频文件的宽度 */ int image_width2 = cap2.get(cv::CAP_PROP_FRAME_WIDTH); LOGI("videoFile2 image width is: %d",image_width2); /** 打开第四个视频文件的宽度 */ int image_width3 = cap3.get(cv::CAP_PROP_FRAME_WIDTH); LOGI("videoFile3 image width is: %d ",image_width3); /** 打开第一个视频文件的高度 */ int image_height = cap.get(cv::CAP_PROP_FRAME_HEIGHT); LOGI( "videoFile image height:%d ",image_height); /** 打开第二个视频文件的高度 */ int image_height1 = cap1.get(cv::CAP_PROP_FRAME_HEIGHT); LOGI( "videoFile1 image height: %d",image_height1); /** 打开第三个视频文件的高度 */ int image_height2 = cap2.get(cv::CAP_PROP_FRAME_HEIGHT); LOGI( "videoFile2 image height:%d ",image_height2); /** 打开第四个视频文件的高度 */ int image_height3 = cap3.get(cv::CAP_PROP_FRAME_HEIGHT); LOGI( "videoFile3 image height: %d",image_height3); /** 打开第一个视频文件的矩阵对象的格式*/ int frame_format = cap.get(cv::CAP_PROP_FORMAT); LOGI("videoFile frame format = %d",frame_format); /** 打开第二个视频文件的矩阵对象的格式 */ int frame_format1 = cap1.get(cv::CAP_PROP_FORMAT); LOGI("videoFile1 frame format = %d",frame_format1); /** 打开第三个视频文件的矩阵对象的格式*/ int frame_format2 = cap2.get(cv::CAP_PROP_FORMAT); LOGI("videoFile2 frame format = %d",frame_format2); /** 打开第四个视频文件的矩阵对象的格式 */ int frame_format3 = cap3.get(cv::CAP_PROP_FORMAT); LOGI("videoFile3 frame format = %d",frame_format3); // 修改6:合并视屏的路径改为android路径,后缀只能为.avi /** 合并视频初始化 */ std::string mergeVideooFile = "/storage/udisk1/assets/mergeVideotest30_1280_720.avi"; int mergeVideooHeight = 720; int mergeVideooWidth = 1280; float mergeVideooFps = 30.0; int mergeVideooFpsFrameFormat = CV_8UC3; // CV_8UC3代表每个像素占8位 cv::VideoWriter track_writer; Mat img = cv::Mat::zeros(mergeVideooWidth, mergeVideooHeight, mergeVideooFpsFrameFormat); // 修改7 对于android系统,fourcc只能是('M', 'J', 'P', 'G'),生成的视频格式只能是.avi否则报错 // 补充:fourcc为('M', 'J', 'P', 'G')生成.avi在android10不能播放,改为('H', '2', '6', '4')生成的 //.avi可以在android设备正常播放 track_writer.open (mergeVideooFile, cv::VideoWriter::fourcc('M', 'J', 'P', 'G'), mergeVideooFps, cv::Size(mergeVideooWidth, mergeVideooHeight),true);//.avi if(!track_writer.isOpened()) { LOGI("!track_writer.isOpened(): "); assert("track writer open failed!\n"); return -2; } Mat frame; Mat frame1; Mat frame2; Mat frame3; while(1) { cap.read(frame);//从第一个视频获取一帧图片 cap1.read(frame1);//从第二个视频获取一帧图片 cap2.read(frame2);//从第三个视频获取一帧图片 cap3.read(frame3);//从第四个视频获取一帧图片 if(frame.empty()) break; //是否加载成功 if(frame1.empty()) break; //是否加载成功 if(frame2.empty()) break; //是否加载成功 if(frame3.empty()) break; //是否加载成功 Mat imageROI= frame(Rect(0,0,frame.cols,frame.rows)); // Rect(左上角横坐标,左上角纵坐标,宽度,高度) Mat imageROI1= frame1(Rect(0,0,frame1.cols,frame1.rows)); Mat imageROI2= frame2(Rect(0,0,frame2.cols,frame2.rows)); Mat imageROI3= frame3(Rect(0,0,frame3.cols,frame3.rows)); // 大小转换 Mat imageROIdst = Mat::zeros(mergeVideooHeight/2,mergeVideooWidth/2 , CV_8UC3); //我要转化为850*600大小的 resize(imageROI, imageROIdst, imageROIdst.size()); Mat imageROI1dst = Mat::zeros(mergeVideooHeight/2,mergeVideooWidth/2 , CV_8UC3); //我要转化为850*600大小的 resize(imageROI1, imageROI1dst, imageROI1dst.size()); Mat imageROI2dst = Mat::zeros(mergeVideooHeight/2,mergeVideooWidth/2 , CV_8UC3); //我要转化为850*600大小的 resize(imageROI2, imageROI2dst, imageROI2dst.size()); Mat imageROI3dst = Mat::zeros(mergeVideooHeight/2,mergeVideooWidth/2 , CV_8UC3); //我要转化为850*600大小的 resize(imageROI3, imageROI3dst, imageROI3dst.size()); // 视频写字 // putText(imageROIdst, videoFile, Point(5, 55),FONT_HERSHEY_PLAIN,2.0,(0, 255, 255),2); //创建目标Mat Mat des; des.create(mergeVideooHeight,mergeVideooWidth, imageROI1dst.type()); // Mat.create(高,宽,像素编码类型这里是CV_8UC3) // 视频帧合并 Mat r1 = des(Rect(0, 0, mergeVideooWidth/2, mergeVideooHeight/2)); imageROI1dst.copyTo(r1); Mat r = des(Rect(mergeVideooWidth/2, 0, mergeVideooWidth/2, mergeVideooHeight/2)); imageROIdst.copyTo(r); Mat r2 = des(Rect(0, mergeVideooHeight/2, mergeVideooWidth/2, mergeVideooHeight/2)); imageROI2dst.copyTo(r2); Mat r3 = des(Rect(mergeVideooWidth/2, mergeVideooHeight/2, mergeVideooWidth/2, mergeVideooHeight/2)); imageROI3dst.copyTo(r3); // 格式化要保存的视频帧 cv::resize(des, img , cv::Size(mergeVideooWidth, mergeVideooHeight)); // 保存视频 track_writer.write(img); } cap.release();//释放视频句柄 cap1.release();//释放视频句柄 cap2.release();//释放视频句柄 cap3.release();//释放视频句柄 track_writer.release(); return 0; } extern "C" JNIEXPORT jint JNICALL Java_com_htkj_testproject_jni_opencvActivity_myMergeVideo(JNIEnv *env, jobject thiz) { return mergeVideo(); } - 1
- 2
- 3
- 4
- 5
- 6
- 7
- 8
- 9
- 10
- 11
- 12
- 13
- 14
- 15
- 16
- 17
- 18
- 19
- 20
- 21
- 22
- 23
- 24
- 25
- 26
- 27
- 28
- 29
- 30
- 31
- 32
- 33
- 34
- 35
- 36
- 37
- 38
- 39
- 40
- 41
- 42
- 43
- 44
- 45
- 46
- 47
- 48
- 49
- 50
- 51
- 52
- 53
- 54
- 55
- 56
- 57
- 58
- 59
- 60
- 61
- 62
- 63
- 64
- 65
- 66
- 67
- 68
- 69
- 70
- 71
- 72
- 73
- 74
- 75
- 76
- 77
- 78
- 79
- 80
- 81
- 82
- 83
- 84
- 85
- 86
- 87
- 88
- 89
- 90
- 91
- 92
- 93
- 94
- 95
- 96
- 97
- 98
- 99
- 100
- 101
- 102
- 103
- 104
- 105
- 106
- 107
- 108
- 109
- 110
- 111
- 112
- 113
- 114
- 115
- 116
- 117
- 118
- 119
- 120
- 121
- 122
- 123
- 124
- 125
- 126
- 127
- 128
- 129
- 130
- 131
- 132
- 133
- 134
- 135
- 136
- 137
- 138
- 139
- 140
- 141
- 142
- 143
- 144
- 145
- 146
- 147
- 148
- 149
- 150
- 151
- 152
- 153
- 154
- 155
- 156
- 157
- 158
- 159
- 160
- 161
- 162
- 163
- 164
- 165
- 166
- 167
- 168
- 169
- 170
- 171
- 172
- 173
- 174
- 175
- 176
- 177
- 178
- 179
- 180
- 181
- 182
- 183
- 184
- 185
- 186
- 187
- 188
- 189
- 190
- 191
- 192
- 193
- 194
- 195
- 196
- 197
- 198
- 199
- 200
- 201
- 202
- 203
- 204
- 205
- 206
- 207
- 208
- 209
- 210
- 211
- 212
- 213
- 214
- 215
- 216
- 217
- 218
- 219
- 220
- 221
- 222
- 223
- 224
- 225
- 226
- 227
- 228
- 229
- 230
- 231
- 232
- 233
- 234
- 235
- 236
- 237
- 238
- 239
- 240
- 241
- 242
- 243
- 244
- 245
- 246
- 247
- 248
- 249
- 250
- 251
- 252
- 253
- 254
- 255
- 256
- 257
- 258
- 259
- 260
- 261
- 262
- 263
- 264
- 265
- 266
- 267
- 268
- 269
- 270
- 271
- 272
- 273
- 274
- 275
- 276
- 277
- 278
- 279
- 280
- 281
- 282
- 283
- 284
- 285
- 286
- 287
- 288
- 289
- 290
- 291
- 292
- 293
- 294
- 295
- 296
- 297
- 298
- 299
- 300
- 301
- 302
- 303
- 304
- 305
- 306
- 307
代码中,fourcc与文件后缀不匹配,报错如下:

java调用接口省略。三、AS 中集成opencv(java环境)
在AS中新建一个android应用模块 “mergevideo”
1、下载sdk包,与上述相同。
2、导入sdk包。
1)在模块所在工程中导入opencv sdk模块。选择路径如下:


导入之后,在工程路径下的lib模块:

2)在mergevideo模块的build.gradle添加sdk模块,并同步:implementation project(':sdk')- 1

3、在java代码中引入adk库。// 没有这个加载不到opencv if (!OpenCVLoader.initDebug()) { Log.d(TAG, "Internal OpenCV library not found. Using OpenCV Manager for initialization"); OpenCVLoader.initAsync(OpenCVLoader.OPENCV_VERSION_3_0_0, this, mLoaderCallback); } else { Log.d(TAG, "OpenCV library found inside package. Using it!"); mLoaderCallback.onManagerConnected(LoaderCallbackInterface.SUCCESS); } //openCV4Android 需要加载用到 private BaseLoaderCallback mLoaderCallback = new BaseLoaderCallback(this) { @Override public void onManagerConnected(int status) { switch (status) { case LoaderCallbackInterface.SUCCESS: { Log.i(TAG, "OpenCV loaded successfully"); // mOpenCvCameraView.enableView(); // mOpenCvCameraView.setOnTouchListener(ColorBlobDetectionActivity.this); } break; default: { super.onManagerConnected(status); } break; } } };- 1
- 2
- 3
- 4
- 5
- 6
- 7
- 8
- 9
- 10
- 11
- 12
- 13
- 14
- 15
- 16
- 17
- 18
- 19
- 20
- 21
- 22
- 23
- 24
- 25
- 26
- 27
4、编写合并视频的主代码,将原来的c++ 代码修改为java代码。
// merge.java package com.htkj.mergevideo; import static org.opencv.imgproc.Imgproc.resize; import android.util.Log; import org.opencv.core.CvType; import org.opencv.core.Mat; import org.opencv.core.Rect; import org.opencv.core.Size; import org.opencv.videoio.VideoCapture; import org.opencv.videoio.VideoWriter; import org.opencv.videoio.Videoio; /** * @ClassName merge * @Description //TODO * @Author lili * @DATE 2023/8/28 9:34 */ public class merge { private final String TAG = "mergetest"; private String pathVido1 = "/storage/udisk1/assets/video.mp4";//视频的路径 private String pathVido2 = "/storage/udisk1/assets/paomo.mp4";//视频的路径 private String pathVido3 = "/storage/udisk1/assets/paomo.mp4";//视频的路径 private String pathVido4 = "/storage/udisk1/assets/video.mp4";//视频的路径 private VideoCapture mVideoCapture1; private VideoCapture mVideoCapture2; private VideoCapture mVideoCapture3; private VideoCapture mVideoCapture4; // 视屏拼接 private String mergeVideooFile = "/storage/udisk1/assets/mergepaomovideo.avi"; private int mergeVideooHeight = 640; private int mergeVideooWidth = 800; private double mergeVideooFps = 25.0; private int mergeVideooFpsFrameFormat = CvType.CV_8UC3; // CV_8UC3代表每个像素占8位 private VideoWriter track_writer; public int openVideo() { Log.d(TAG, "openVideo..."); // 打开第一个视频 if (mVideoCapture1 == null) { mVideoCapture1 = new VideoCapture(); } // Videoio.CAP_ANY 或者 Videoio.CAP_ANDROID才能正确加载视频 boolean open1 = mVideoCapture1.open(pathVido1, Videoio.CAP_ANDROID); Log.d(TAG, "open1 = " + open1); if (!open1) { return -1; } // 打开第二个视频 if (mVideoCapture2 == null) { mVideoCapture2 = new VideoCapture(); } boolean open2 = mVideoCapture2.open(pathVido2); Log.d(TAG, "open2 = " + open2); if (!open2) { return -2; } // 打开第三个视频 if (mVideoCapture3 == null) { mVideoCapture3 = new VideoCapture(); } boolean open3 = mVideoCapture3.open(pathVido3); Log.d(TAG, "open3 = " + open3); if (!open3) { return -3; } // 打开第三个视频 if (mVideoCapture4 == null) { mVideoCapture4 = new VideoCapture(); } boolean open4 = mVideoCapture4.open(pathVido4); Log.d(TAG, "open4 = " + open4); if (!open4) { return -4; } getVideoFrameCount(); getVideoFrameFps(); getVideoHeight(); getVideoWidth(); getVidewFormat(); merge(); return 0; } // 获取视频帧数 private int getVideoFrameCount() { // 第一个视屏 double frameNum1 = mVideoCapture1.get(Videoio.CAP_PROP_FRAME_COUNT); Log.d(TAG, "videoFile1 total frame number is: " + frameNum1); return 0; } // 获取视频帧率 private int getVideoFrameFps() { // 第一个视屏 double fps1 = mVideoCapture1.get(Videoio.CAP_PROP_FPS); Log.d(TAG, "videoFile1 FPS number is: " + fps1); return 0; } // 获取视频高度 private int getVideoHeight() { // 第一个视屏 double height1 = mVideoCapture1.get(Videoio.CAP_PROP_FRAME_HEIGHT); Log.d(TAG, "videoFile1 height is: " + height1); return 0; } // 获取视频宽度 private int getVideoWidth() { // 第一个视屏 double width1 = mVideoCapture1.get(Videoio.CAP_PROP_FRAME_WIDTH); Log.d(TAG, "videoFile1 width is: " + width1); return 0; } // 获取视频文件的矩阵对象的格式 private int getVidewFormat() { // 第一个视屏 double format1 = mVideoCapture1.get(Videoio.CAP_PROP_FORMAT); Log.d(TAG, "videoFile1 format is: " + format1); return 0; } private int merge() { int fourcc = VideoWriter.fourcc('M', 'J', 'P', 'G'); Mat img = Mat.zeros(mergeVideooWidth, mergeVideooHeight, mergeVideooFpsFrameFormat); if (track_writer == null) { track_writer = new VideoWriter(); } // 注意这里:https://zinyan.com/?p=498 track_writer.open(mergeVideooFile, fourcc, mergeVideooFps, new Size(mergeVideooWidth, mergeVideooHeight), true);//.avi if (!track_writer.isOpened()) { Log.d(TAG, "the track is open faild!!!"); return -5; } while (true) { Mat mFrame1 = Mat.zeros(mergeVideooWidth, mergeVideooHeight, mergeVideooFpsFrameFormat); Mat mFrame2 = Mat.zeros(mergeVideooWidth, mergeVideooHeight, mergeVideooFpsFrameFormat); Mat mFrame3 = Mat.zeros(mergeVideooWidth, mergeVideooHeight, mergeVideooFpsFrameFormat); Mat mFrame4 = Mat.zeros(mergeVideooWidth, mergeVideooHeight, mergeVideooFpsFrameFormat); // 读取原始视频帧 mVideoCapture1.read(mFrame1); if (mFrame1.empty()) { Log.d(TAG, "mFrame1 is empty!!!"); break; } mVideoCapture2.read(mFrame2); if (mFrame2.empty()) { Log.d(TAG, "mFrame2 is empty!!!"); break; } mVideoCapture3.read(mFrame3); if (mFrame3.empty()) { Log.d(TAG, "mFrame3 is empty!!!"); break; } mVideoCapture4.read(mFrame4); if (mFrame4.empty()) { Log.d(TAG, "mFrame4 is empty!!!"); break; } // 设定ROI区域:截取一部分进行合并 Mat mImageROI1 = new Mat(mFrame1, new Rect(0, 0, mFrame1.cols(), mFrame1.rows())); // Rect(左上角横坐标,左上角纵坐标,宽度,高度) Mat mImageROI2 = new Mat(mFrame2, new Rect(0, 0, mFrame2.cols(), mFrame2.rows())); Mat mImageROI3 = new Mat(mFrame3, new Rect(0, 0, mFrame3.cols(), mFrame3.rows())); Mat mImageROI4 = new Mat(mFrame4, new Rect(0, 0, mFrame4.cols(), mFrame4.rows())); // 转换大小 Mat mImageROIdst1 = Mat.zeros(mergeVideooHeight / 2, mergeVideooWidth / 2, mergeVideooFpsFrameFormat); resize(mImageROI1, mImageROIdst1, mImageROIdst1.size()); Mat mImageROIdst2 = Mat.zeros(mergeVideooHeight / 2, mergeVideooWidth / 2, mergeVideooFpsFrameFormat); resize(mImageROI2, mImageROIdst2, mImageROIdst2.size()); Mat mImageROIdst3 = Mat.zeros(mergeVideooHeight / 2, mergeVideooWidth / 2, mergeVideooFpsFrameFormat); resize(mImageROI3, mImageROIdst3, mImageROIdst3.size()); Mat mImageROIdst4 = Mat.zeros(mergeVideooHeight / 2, mergeVideooWidth / 2, mergeVideooFpsFrameFormat); resize(mImageROI4, mImageROIdst4, mImageROIdst4.size()); // 创建目标 Mat des = Mat.zeros(mergeVideooHeight, mergeVideooWidth, mergeVideooFpsFrameFormat); // 视频帧合并 Mat mMergeRoi1 = new Mat(des, new Rect(0, 0, mergeVideooWidth / 2, mergeVideooHeight / 2)); mImageROIdst1.copyTo(mMergeRoi1); Mat mMergeRoi2 = new Mat(des, new Rect(mergeVideooWidth / 2, 0, mergeVideooWidth / 2, mergeVideooHeight / 2)); mImageROIdst2.copyTo(mMergeRoi2); Mat mMergeRoi3 = new Mat(des, new Rect(0, mergeVideooHeight / 2, mergeVideooWidth / 2, mergeVideooHeight / 2)); mImageROIdst3.copyTo(mMergeRoi3); Mat mMergeRoi4 = new Mat(des, new Rect(mergeVideooWidth / 2, mergeVideooHeight / 2, mergeVideooWidth / 2, mergeVideooHeight / 2)); mImageROIdst4.copyTo(mMergeRoi4); // 格式化要保存的视频帧 resize(des, img, new Size(mergeVideooWidth, mergeVideooHeight)); // 保存视频 track_writer.write(img); if (mFrame1 != null) { mFrame1.release(); } if (mFrame2 != null) { mFrame2.release(); } if (mFrame3 != null) { mFrame3.release(); } if (mFrame4 != null) { mFrame4.release(); } if (mImageROI1 != null) { mImageROI1.release(); } if (mImageROI2 != null) { mImageROI2.release(); } if (mImageROI3 != null) { mImageROI3.release(); } if (mImageROI4 != null) { mImageROI4.release(); } if (mImageROIdst1 != null) { mImageROIdst1.release(); } if (mImageROIdst2 != null) { mImageROIdst2.release(); } if (mImageROIdst3 != null) { mImageROIdst3.release(); } if (mImageROIdst4 != null) { mImageROIdst4.release(); } if (mMergeRoi1 != null) { mMergeRoi1.release(); } if (mMergeRoi2 != null) { mMergeRoi2.release(); } if (mMergeRoi3 != null) { mMergeRoi3.release(); } if (mMergeRoi4 != null) { mMergeRoi4.release(); } } mVideoCapture1.release(); mVideoCapture2.release(); mVideoCapture3.release(); mVideoCapture4.release(); track_writer.release(); return 0; } }- 1
- 2
- 3
- 4
- 5
- 6
- 7
- 8
- 9
- 10
- 11
- 12
- 13
- 14
- 15
- 16
- 17
- 18
- 19
- 20
- 21
- 22
- 23
- 24
- 25
- 26
- 27
- 28
- 29
- 30
- 31
- 32
- 33
- 34
- 35
- 36
- 37
- 38
- 39
- 40
- 41
- 42
- 43
- 44
- 45
- 46
- 47
- 48
- 49
- 50
- 51
- 52
- 53
- 54
- 55
- 56
- 57
- 58
- 59
- 60
- 61
- 62
- 63
- 64
- 65
- 66
- 67
- 68
- 69
- 70
- 71
- 72
- 73
- 74
- 75
- 76
- 77
- 78
- 79
- 80
- 81
- 82
- 83
- 84
- 85
- 86
- 87
- 88
- 89
- 90
- 91
- 92
- 93
- 94
- 95
- 96
- 97
- 98
- 99
- 100
- 101
- 102
- 103
- 104
- 105
- 106
- 107
- 108
- 109
- 110
- 111
- 112
- 113
- 114
- 115
- 116
- 117
- 118
- 119
- 120
- 121
- 122
- 123
- 124
- 125
- 126
- 127
- 128
- 129
- 130
- 131
- 132
- 133
- 134
- 135
- 136
- 137
- 138
- 139
- 140
- 141
- 142
- 143
- 144
- 145
- 146
- 147
- 148
- 149
- 150
- 151
- 152
- 153
- 154
- 155
- 156
- 157
- 158
- 159
- 160
- 161
- 162
- 163
- 164
- 165
- 166
- 167
- 168
- 169
- 170
- 171
- 172
- 173
- 174
- 175
- 176
- 177
- 178
- 179
- 180
- 181
- 182
- 183
- 184
- 185
- 186
- 187
- 188
- 189
- 190
- 191
- 192
- 193
- 194
- 195
- 196
- 197
- 198
- 199
- 200
- 201
- 202
- 203
- 204
- 205
- 206
- 207
- 208
- 209
- 210
- 211
- 212
- 213
- 214
- 215
- 216
- 217
- 218
- 219
- 220
- 221
- 222
- 223
- 224
- 225
- 226
- 227
- 228
- 229
- 230
- 231
- 232
- 233
- 234
- 235
- 236
- 237
- 238
- 239
- 240
- 241
- 242
- 243
- 244
- 245
- 246
- 247
- 248
- 249
- 250
- 251
- 252
- 253
- 254
- 255
- 256
- 257
- 258
- 259
- 260
- 261
- 262
- 263
- 264
- 265
- 266
- 267
- 268
- 269
- 270
- 271
- 272
- 273
- 274
- 275
- 276
- 277
- 278
- 279
- 280
- 281
- 282
- 283
- 284
- 285
- 286
- 287
- 288
- 289
主应用代码:
// MainActivity.java package com.htkj.mergevideo; import android.app.Activity; import android.os.Bundle; import android.util.Log; import android.view.View; import android.widget.Button; import androidx.annotation.Nullable; import org.opencv.android.BaseLoaderCallback; import org.opencv.android.LoaderCallbackInterface; import org.opencv.android.OpenCVLoader; /** * @ClassName MainActivity * @Description //TODO * @Author lili * @DATE 2023/8/28 9:32 */ public class MainActivity extends Activity { private final String TAG = MainActivity.class.getSimpleName(); private Button mBtMerge; private merge mMerge; @Override protected void onCreate(@Nullable Bundle savedInstanceState) { super.onCreate(savedInstanceState); setContentView(R.layout.main_activity); mMerge = new merge(); mBtMerge = findViewById(R.id.bt_merge); mBtMerge.setOnClickListener(new View.OnClickListener() { @Override public void onClick(View view) { mergeVideoThread.start(); } }); } @Override protected void onResume() { super.onResume(); // 没有这个加载不到opencv if (!OpenCVLoader.initDebug()) { Log.d(TAG, "Internal OpenCV library not found. Using OpenCV Manager for initialization"); OpenCVLoader.initAsync(OpenCVLoader.OPENCV_VERSION_3_0_0, this, mLoaderCallback); } else { Log.d(TAG, "OpenCV library found inside package. Using it!"); mLoaderCallback.onManagerConnected(LoaderCallbackInterface.SUCCESS); } } Thread mergeVideoThread = new Thread(new Runnable() { @Override public void run() { int result = mMerge.openVideo(); Log.d(TAG,"result = " + result); } }); //openCV4Android 需要加载用到 private BaseLoaderCallback mLoaderCallback = new BaseLoaderCallback(this) { @Override public void onManagerConnected(int status) { switch (status) { case LoaderCallbackInterface.SUCCESS: { Log.i(TAG, "OpenCV loaded successfully"); // mOpenCvCameraView.enableView(); // mOpenCvCameraView.setOnTouchListener(ColorBlobDetectionActivity.this); } break; default: { super.onManagerConnected(status); } break; } } }; }- 1
- 2
- 3
- 4
- 5
- 6
- 7
- 8
- 9
- 10
- 11
- 12
- 13
- 14
- 15
- 16
- 17
- 18
- 19
- 20
- 21
- 22
- 23
- 24
- 25
- 26
- 27
- 28
- 29
- 30
- 31
- 32
- 33
- 34
- 35
- 36
- 37
- 38
- 39
- 40
- 41
- 42
- 43
- 44
- 45
- 46
- 47
- 48
- 49
- 50
- 51
- 52
- 53
- 54
- 55
- 56
- 57
- 58
- 59
- 60
- 61
- 62
- 63
- 64
- 65
- 66
- 67
- 68
- 69
- 70
- 71
- 72
- 73
- 74
- 75
- 76
- 77
- 78
- 79
- 80
- 81
- 82
// build.gradle plugins { id 'com.android.application' } android { compileSdk 33 defaultConfig { applicationId "com.htkj.mergevideo" minSdk 21 targetSdk 33 versionCode 1 versionName "1.0" testInstrumentationRunner "androidx.test.runner.AndroidJUnitRunner" } buildTypes { release { minifyEnabled false proguardFiles getDefaultProguardFile('proguard-android-optimize.txt'), 'proguard-rules.pro' } } compileOptions { sourceCompatibility JavaVersion.VERSION_1_8 targetCompatibility JavaVersion.VERSION_1_8 } signingConfigs { release { storeFile file("../platform.jks") storePassword '123456' keyAlias 'platform' keyPassword '123456' } debug { storeFile file("../platform.jks") storePassword '123456' keyAlias 'platform' keyPassword '123456' } } } dependencies { // implementation fileTree(dir: 'libs', include: ['*.jar']) implementation 'androidx.appcompat:appcompat:1.3.0' implementation 'com.google.android.material:material:1.4.0' testImplementation 'junit:junit:4.13.2' androidTestImplementation 'androidx.test.ext:junit:1.1.3' androidTestImplementation 'androidx.test.espresso:espresso-core:3.4.0' implementation project(':sdk') }- 1
- 2
- 3
- 4
- 5
- 6
- 7
- 8
- 9
- 10
- 11
- 12
- 13
- 14
- 15
- 16
- 17
- 18
- 19
- 20
- 21
- 22
- 23
- 24
- 25
- 26
- 27
- 28
- 29
- 30
- 31
- 32
- 33
- 34
- 35
- 36
- 37
- 38
- 39
- 40
- 41
- 42
- 43
- 44
- 45
- 46
- 47
- 48
- 49
- 50
- 51
- 52
- 53
- 54
布局文件省略。
效果图:

四、AS中集成opencv(java + jni环境)
在学习opencv过程中,首先以opencv自带的人脸识别demo学习,这里主要记录opencv模块的加载以及,cmake文件的编写。
1、新建一个模块,并添加jni配置。
2、java代码引入opencv。添加opencv sdk库。与上述相同。
3、添加jni所需配置。
1)build.gradle中添加:externalNativeBuild { cmake { cppFlags "-std=c++11 -frtti -fexceptions" arguments "-DOpenCV_DIR=" + "E:/work/xinchi/testProject/sdk/native/jni" // , "-DANDROID_ARM_NEON=TRUE" } } splits { abi { enable true universalApk false reset() include 'armeabi-v7a' // , 'x86', 'x86_64', 'arm64-v8a' } } implementation fileTree(dir: 'libs', include: ['*.jar'])- 1
- 2
- 3
- 4
- 5
- 6
- 7
- 8
- 9
- 10
- 11
- 12
- 13
- 14
- 15
- 16
- 17
- 18
- 19
完整build.gradle
plugins { id 'com.android.application' } android { compileSdk 33 defaultConfig { applicationId "com.htkj.facedetection1" minSdk 21 targetSdk 33 versionCode 1 versionName "1.0" testInstrumentationRunner "androidx.test.runner.AndroidJUnitRunner" externalNativeBuild { cmake { cppFlags "-std=c++11 -frtti -fexceptions" arguments "-DOpenCV_DIR=" + "E:/work/xinchi/testProject/sdk/native/jni" // , "-DANDROID_ARM_NEON=TRUE" } } splits { abi { enable true universalApk false reset() include 'armeabi-v7a' // , 'x86', 'x86_64', 'arm64-v8a' } } } buildTypes { release { minifyEnabled false proguardFiles getDefaultProguardFile('proguard-android-optimize.txt'), 'proguard-rules.pro' } } compileOptions { sourceCompatibility JavaVersion.VERSION_1_8 targetCompatibility JavaVersion.VERSION_1_8 } externalNativeBuild { cmake { path file('src/main/cpp/CMakeLists.txt') version '3.18.1' } } signingConfigs { release { storeFile file("../platform.jks") storePassword '123456' keyAlias 'platform' keyPassword '123456' } debug { storeFile file("../platform.jks") storePassword '123456' keyAlias 'platform' keyPassword '123456' } } // ndkVersion = "21.4.7075529" // e.g., ndkVersion "21.3.6528147" } dependencies { implementation fileTree(dir: 'libs', include: ['*.jar']) implementation 'androidx.appcompat:appcompat:1.3.0' implementation 'com.google.android.material:material:1.4.0' testImplementation 'junit:junit:4.13.2' androidTestImplementation 'androidx.test.ext:junit:1.1.3' androidTestImplementation 'androidx.test.espresso:espresso-core:3.4.0' implementation project(':sdk') }- 1
- 2
- 3
- 4
- 5
- 6
- 7
- 8
- 9
- 10
- 11
- 12
- 13
- 14
- 15
- 16
- 17
- 18
- 19
- 20
- 21
- 22
- 23
- 24
- 25
- 26
- 27
- 28
- 29
- 30
- 31
- 32
- 33
- 34
- 35
- 36
- 37
- 38
- 39
- 40
- 41
- 42
- 43
- 44
- 45
- 46
- 47
- 48
- 49
- 50
- 51
- 52
- 53
- 54
- 55
- 56
- 57
- 58
- 59
- 60
- 61
- 62
- 63
- 64
- 65
- 66
- 67
- 68
- 69
- 70
- 71
- 72
- 73
- 74
- 75
- 76
2) 修改cmakeList.txt文件:
cmake_minimum_required(VERSION 3.18.1) project("facedetection1" CXX) # 导入头文件ok include_directories(${CMAKE_SOURCE_DIR}/) #set(OpenCV_DIR "E:/work/xinchi/testProject/sdk/native/jni") # 设置OpenCV要加载的组件为opencv_java #set(ANDROID_OPENCV_COMPONENTS "opencv_java" CACHE STRING "") find_package(OpenCV 4.8.0 REQUIRED java) add_library( facedetection1 SHARED facedetection1.cpp ) find_library( # Sets the name of the path variable. log-lib log ) target_link_libraries( facedetection1 ${log-lib} ${OpenCV_LIBRARIES})- 1
- 2
- 3
- 4
- 5
- 6
- 7
- 8
- 9
- 10
- 11
- 12
- 13
- 14
- 15
- 16
- 17
- 18
- 19
- 20
- 21
- 22
- 23
- 24
- 25
- 26
- 27
- 28
- 29
- 30
- 31
- 32
模块结构:

-
相关阅读:
Hard negtive node(硬负样本节点)与 Easy negative nodes(简单样本节点)
阿里云-GPU/ASK/ACK/NAS/Docker
[架构之路-17]:目标系统 - 硬件平台 - ARM CPU架构与系列选型
【测试沉思录】7. 测试左移的一点思考
【重拾C语言】七、指针(三)指针与字符串(字符串与字符串数组;指针与字符串的遍历、拷贝、比较;反转字符串)
《ElementPlus 与 ElementUI 差异集合》el-select 差异点,如:高、宽、body插入等
计算机网络(第一章 概述)
在 .NET 中使用 FixedTimeEquals 应对计时攻击
SpringMVC笔记
视频批注软件哪个好用 分秒帧在线批注怎么用
- 原文地址:https://blog.csdn.net/zhuowalun8427/article/details/132231089
