-
SpringBoot开发实用篇2---与数据层技术有关的替换和整合
四、数据层解决方案
1.SQL
现有数据层解决方案技术选型:Druid+MyBatis-plus+MySQL
数据源:DruidDataSource
持久化技术:MyBatis-plus/MyBatis
数据库:MySql
内置数据源:
SpringBoot提供了3种内嵌的数据源对象供开发者选择:
HikariCP:默认内置数据源对象;
Tomcat提供DataSource:HikariCP不可用的情况下,且在web环境中,将使用tomcat服务器配置的数据源对象;
Commons DBCP:Hikari不可用,tomcat数据源也不可用,将使用dbcp数据源。

使用方式:先使用默认配置,再使用个性化配置。
通用配置无法设置具体的数据源配置信息,仅提供基本的连接相关配置,如需配置,在下一级配置中设置具体设定。

JdbcTemplate:Spring提供的默认的持久化技术(几乎没人用)
操作数据库的模板技术。
pom.xml:<dependency> <groupId>org.springframework.bootgroupId> <artifactId>spring-boot-starter-jdbcartifactId> dependency>- 1
- 2
- 3
- 4
@Autowired private JdbcTemplate jdbcTemplate; @Test void testJdbcTemplate(){ String sql="select * from tbl_book"; RowMapper<Book> rm=new RowMapper<Book>() { @Override public Book mapRow(ResultSet rs, int rowNum) throws SQLException { Book temp=new Book(); //查出来的放到结果集中,从结果集中得到,在set到对象中 temp.setId(rs.getInt("id")); temp.setName(rs.getString("name")); temp.setType(rs.getString("type")); temp.setDescription(rs.getString("description")); return temp; } }; List<Book> list = jdbcTemplate.query(sql, rm); System.out.println(list); } @Test void testJdbcTemplateSave(){ String sql="insert into tbl_book values(null,'springboot','springboot','springboot')"; jdbcTemplate.update(sql); }- 1
- 2
- 3
- 4
- 5
- 6
- 7
- 8
- 9
- 10
- 11
- 12
- 13
- 14
- 15
- 16
- 17
- 18
- 19
- 20
- 21
- 22
- 23
- 24
- 25
- 26
- 27
H2数据库:
SpringBoot提供了3种内嵌数据库供开发者选择,提高开发测试效率:
H2
HSQL
Derby
伴随着内存启动而启动的数据库,比较小巧。
pom.xml中:<dependency> <groupId>com.h2databasegroupId> <artifactId>h2artifactId> dependency> <dependency> <groupId>org.springframework.bootgroupId> <artifactId>spring-boot-starter-data-jpaartifactId> dependency>- 1
- 2
- 3
- 4
- 5
- 6
- 7
- 8
- 9
- 10
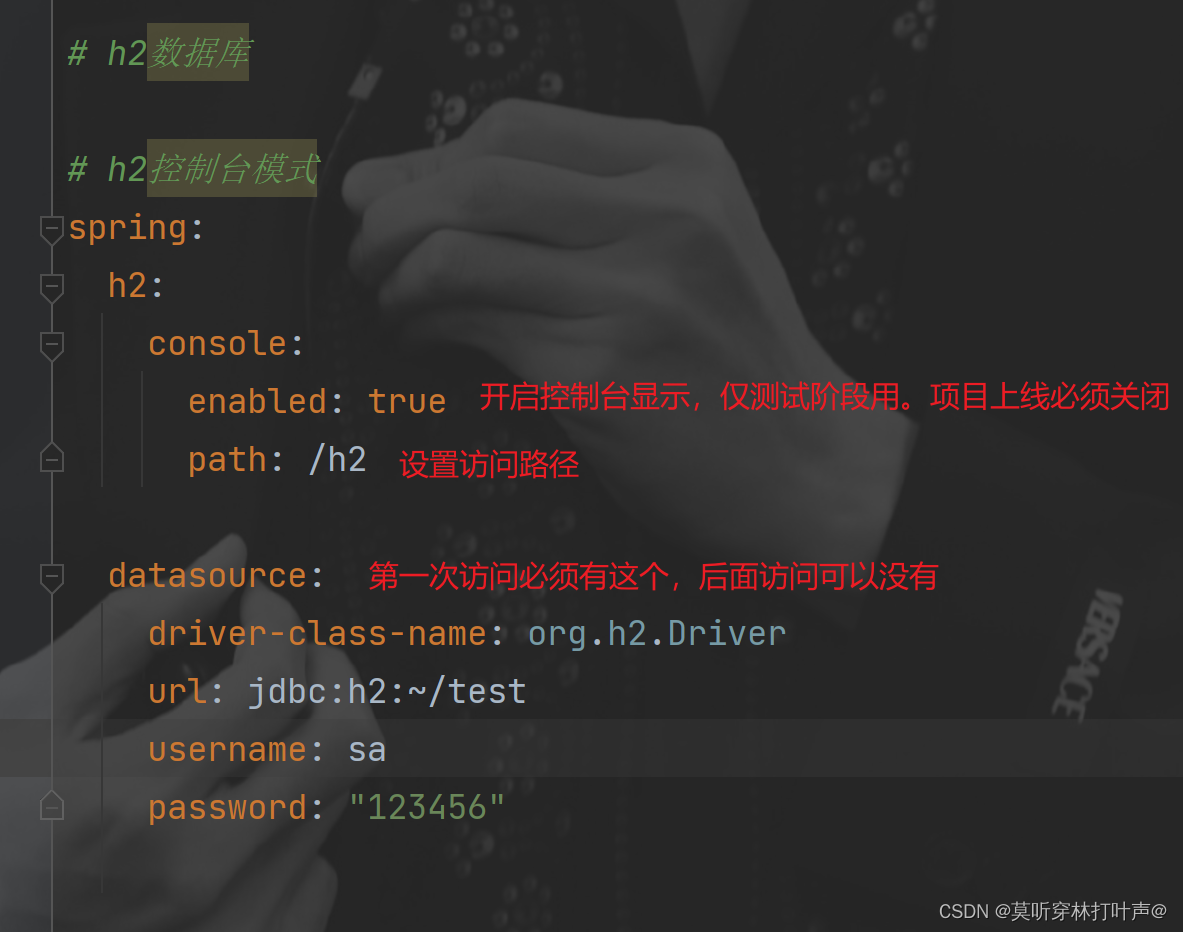
配置文件中:
开启服务后,在浏览器中就可以访问:
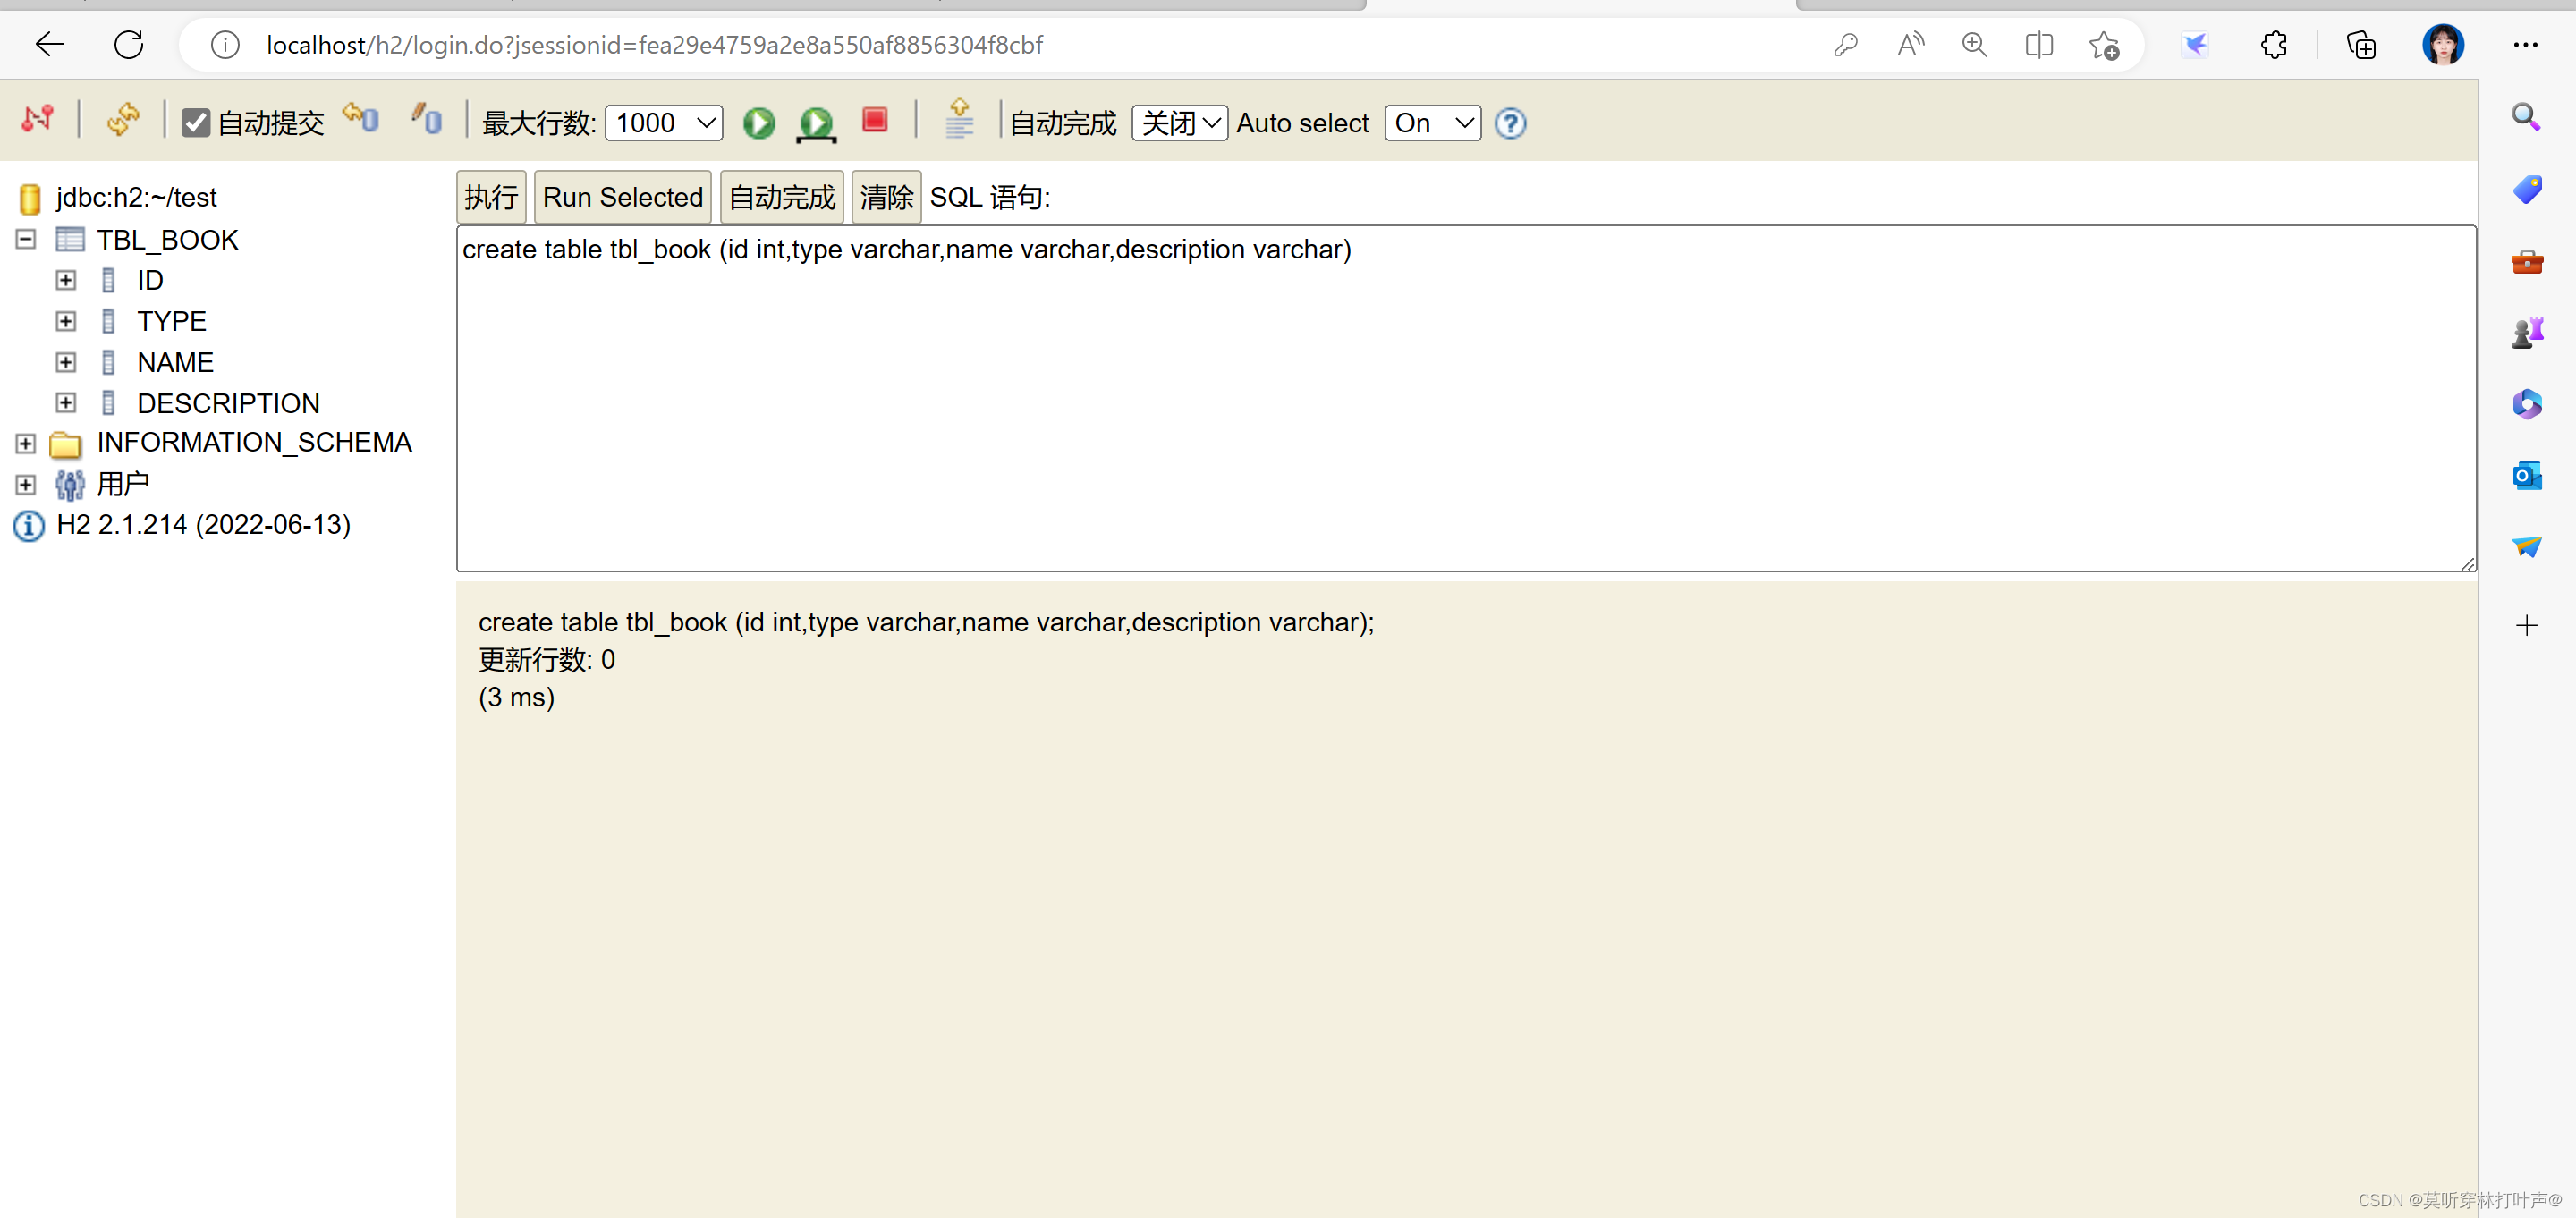
可以和持久层框架Mybatis-plus、JdbcTemplate搭配使用。2.NoSQL
(1)Redis
市面上常见的NoSQL解决方案:
Redis
MongoDB
ES
上述技术通常在Linux系统中安装部署。
在Windows安装,方便整合(整合都是一样的)。
Redis是一款key-value存储结构的内存级NoSQL数据库:
支持多种数据存储格式
支持持久化
支持集群
Redis的安装与启动(Windows版)
Windows解压安装或一键式安装
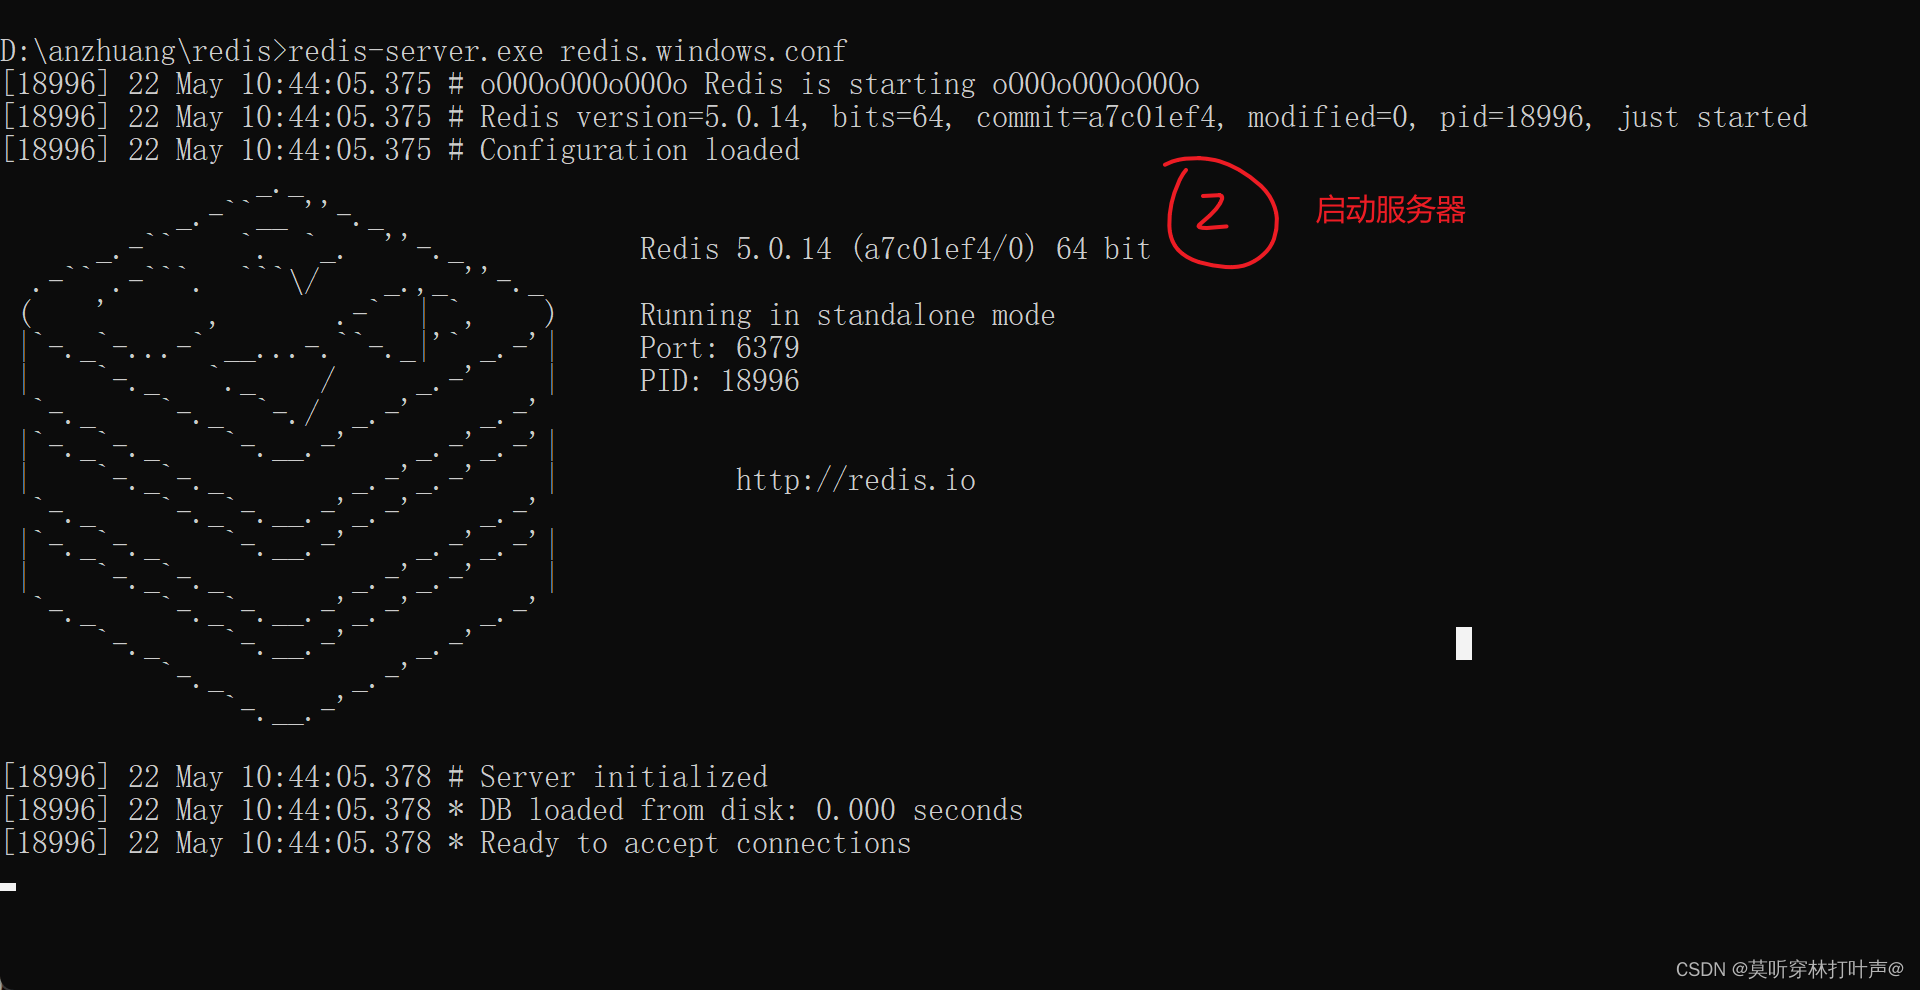
服务端启动命令redis-server.exe redis.windows.conf- 1
客户端启动命令
redis-cli.exe- 1
具体操作:先打开服务器,再用客户端去连接。
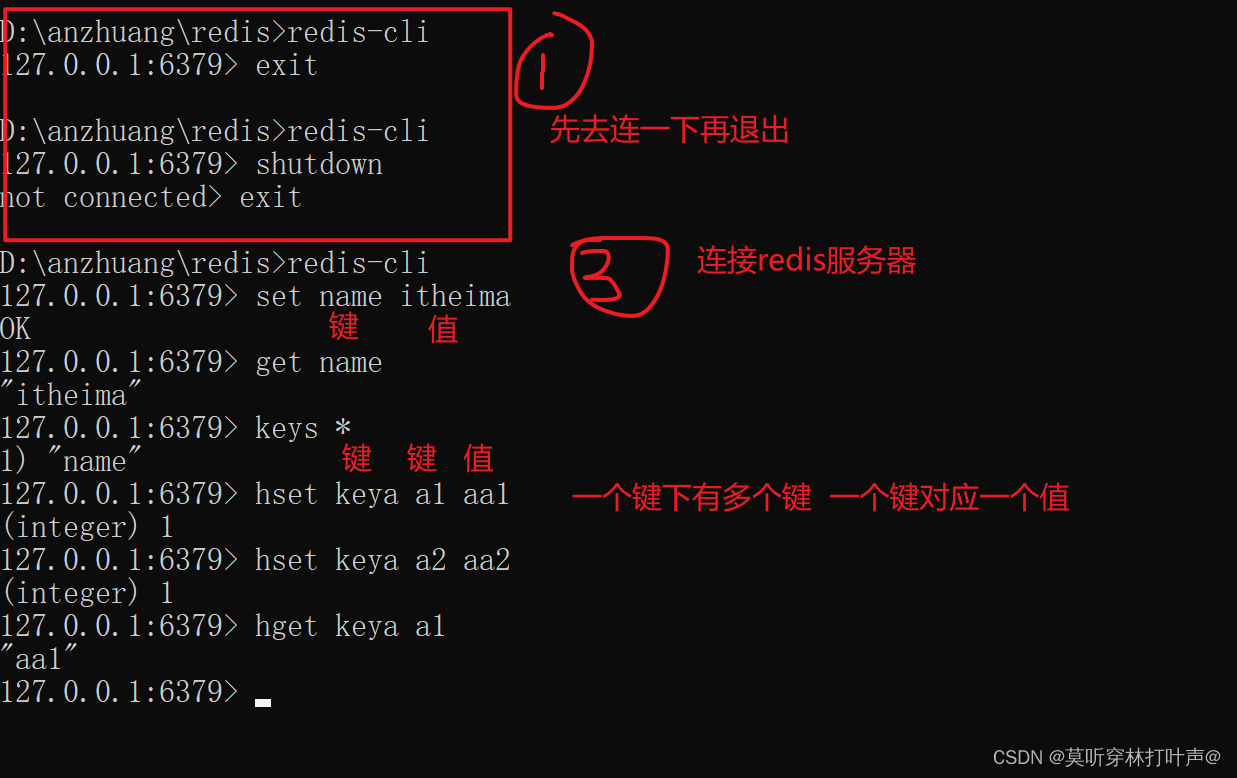
SpringBoot整合Redis:
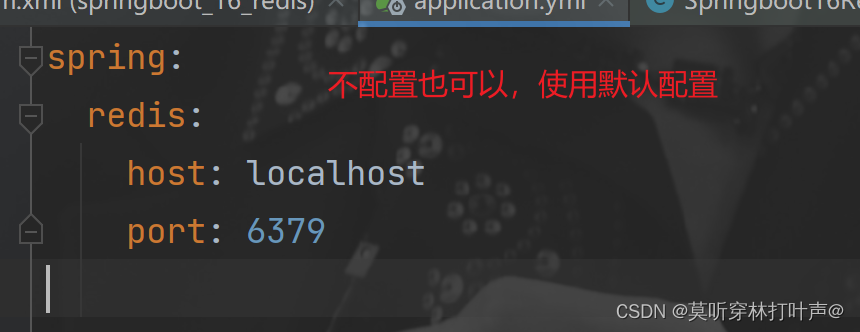
导入redis对应的starter,在创建工程的时候勾选。配置Redis(采用默认配置)
提供操作Redis接口对象RedisTemplate:@SpringBootTest class Springboot16RedisApplicationTests { @Resource private RedisTemplate redisTemplate; @Test void set() { ValueOperations ops = redisTemplate.opsForValue(); ops.set("age",41); } @Test void get(){ ValueOperations ops = redisTemplate.opsForValue(); Object age = ops.get("age"); System.out.println(age); } @Test void hset() { HashOperations ops = redisTemplate.opsForHash(); ops.put("info","a","aa"); } @Test void hget(){ HashOperations ops = redisTemplate.opsForHash(); Object val = ops.get("info", "a"); System.out.println(val); } }- 1
- 2
- 3
- 4
- 5
- 6
- 7
- 8
- 9
- 10
- 11
- 12
- 13
- 14
- 15
- 16
- 17
- 18
- 19
- 20
- 21
- 22
- 23
- 24
- 25
- 26
- 27
- 28
- 29
- 30
客户端:RedisTemplate以对象作为key和value,内部对数据进行序列化。
StringRedisTemplate以字符串作为key和value,与Redis客户端操作等效。@SpringBootTest public class StringRedisTemplateTest { @Autowired private StringRedisTemplate stringRedisTemplate; @Test void get(){ ValueOperations<String, String> ops = stringRedisTemplate.opsForValue(); String name = ops.get("name"); System.out.println(name); } }- 1
- 2
- 3
- 4
- 5
- 6
- 7
- 8
- 9
- 10
- 11
客户端使用jedis,加坐标,改配置文件。

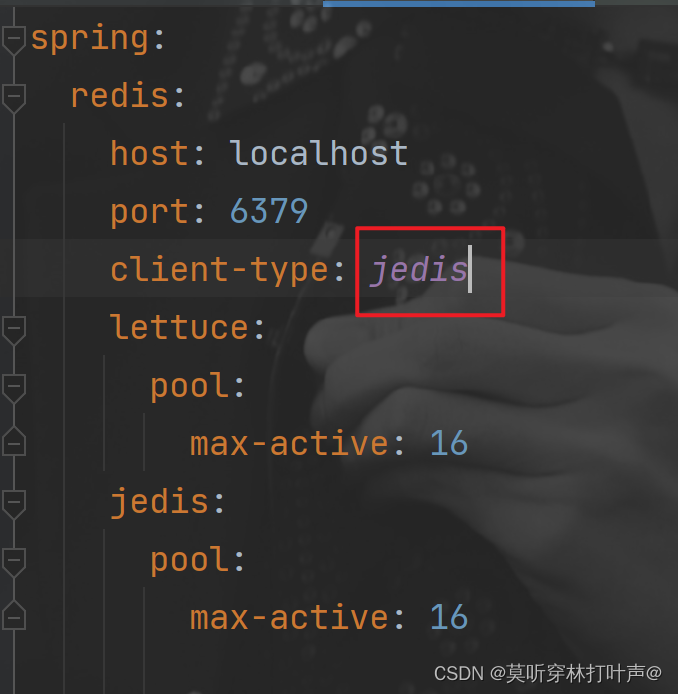
lettcus和jedis的区别:
jedis连接Redis服务器是直连模式,当多线程模式下使用jedis会存在线程安全问题,解决方案可以通过配置连接池使每个连接专用,这样整体性能就会大受影响。
lettcus基于Netty框架进行与Redis服务器连接,底层设计中采用StatefulRedisConnection。StatefulRedisConnection自身是线程安全的,可以保障并发访问安全问题,所以一个连接可以被多线程复用。当然lettcus也支持多连接实例一起工作。(2)MongoDB
需求:既能存储结构化数据,又高性能。数据有着很高的修改需求
MongoDB是一个开源、高性能、无模式的文档型数据库。NoSQL数据库产品的一种,是最像关系型数据库的非关系型数据库。
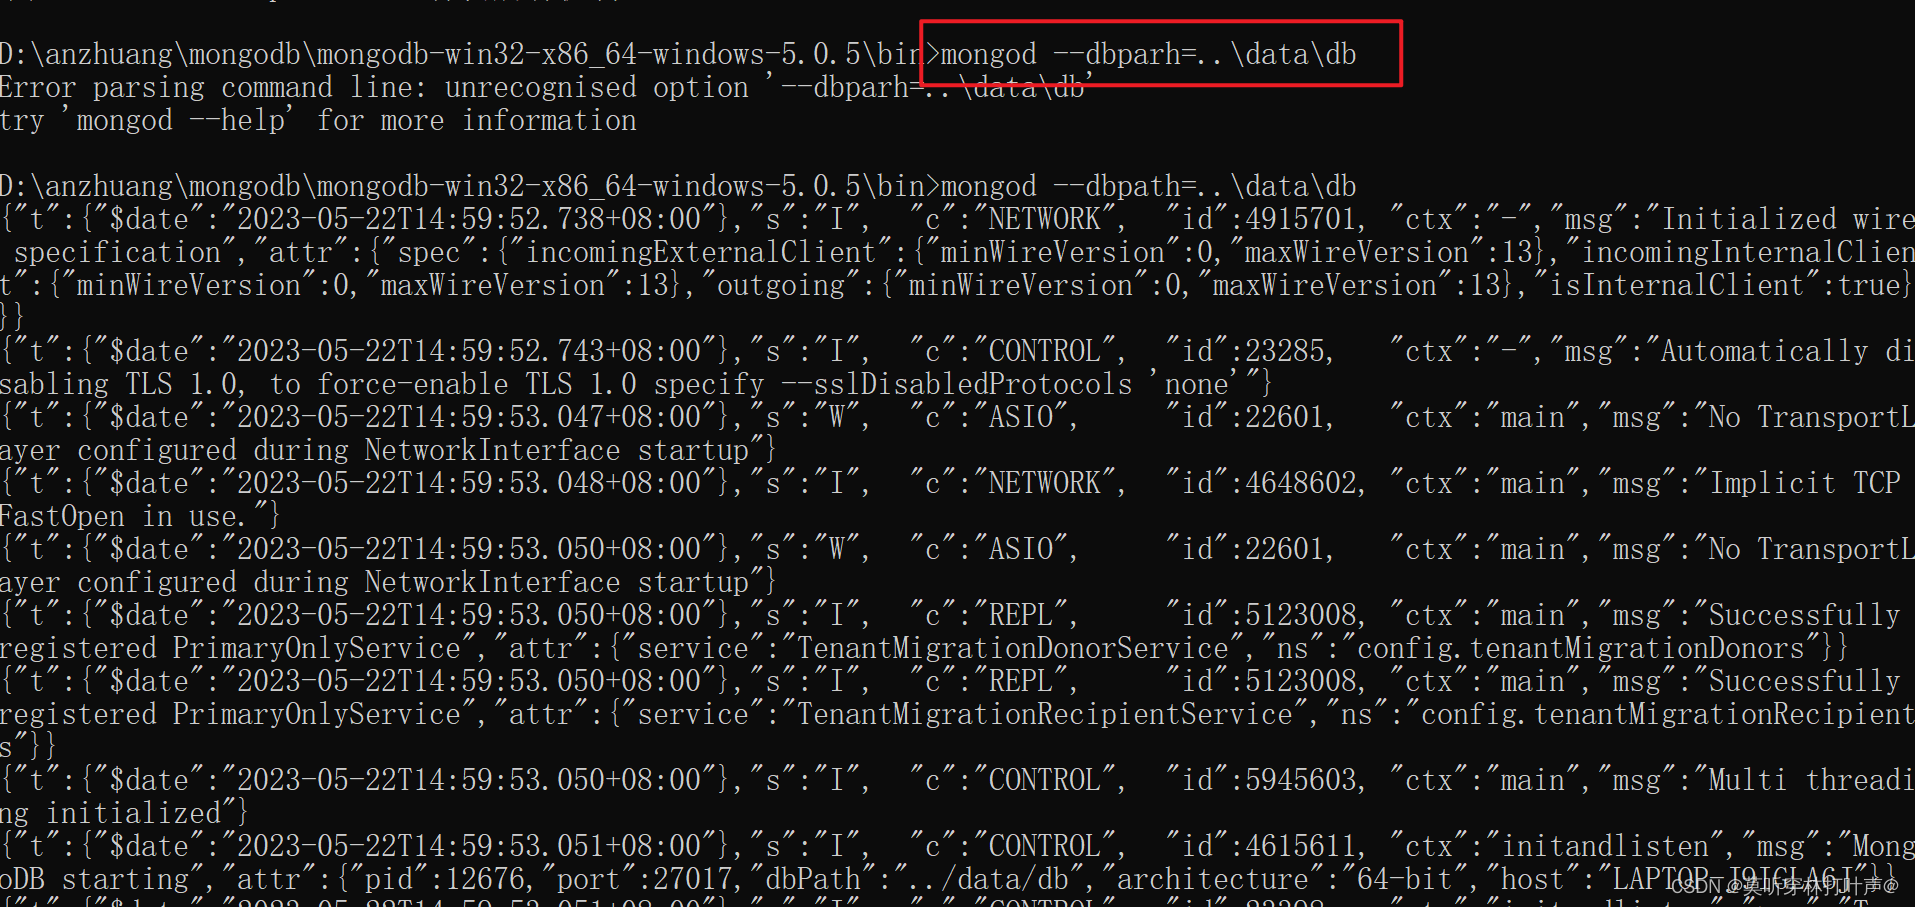
启动mongoDB服务:
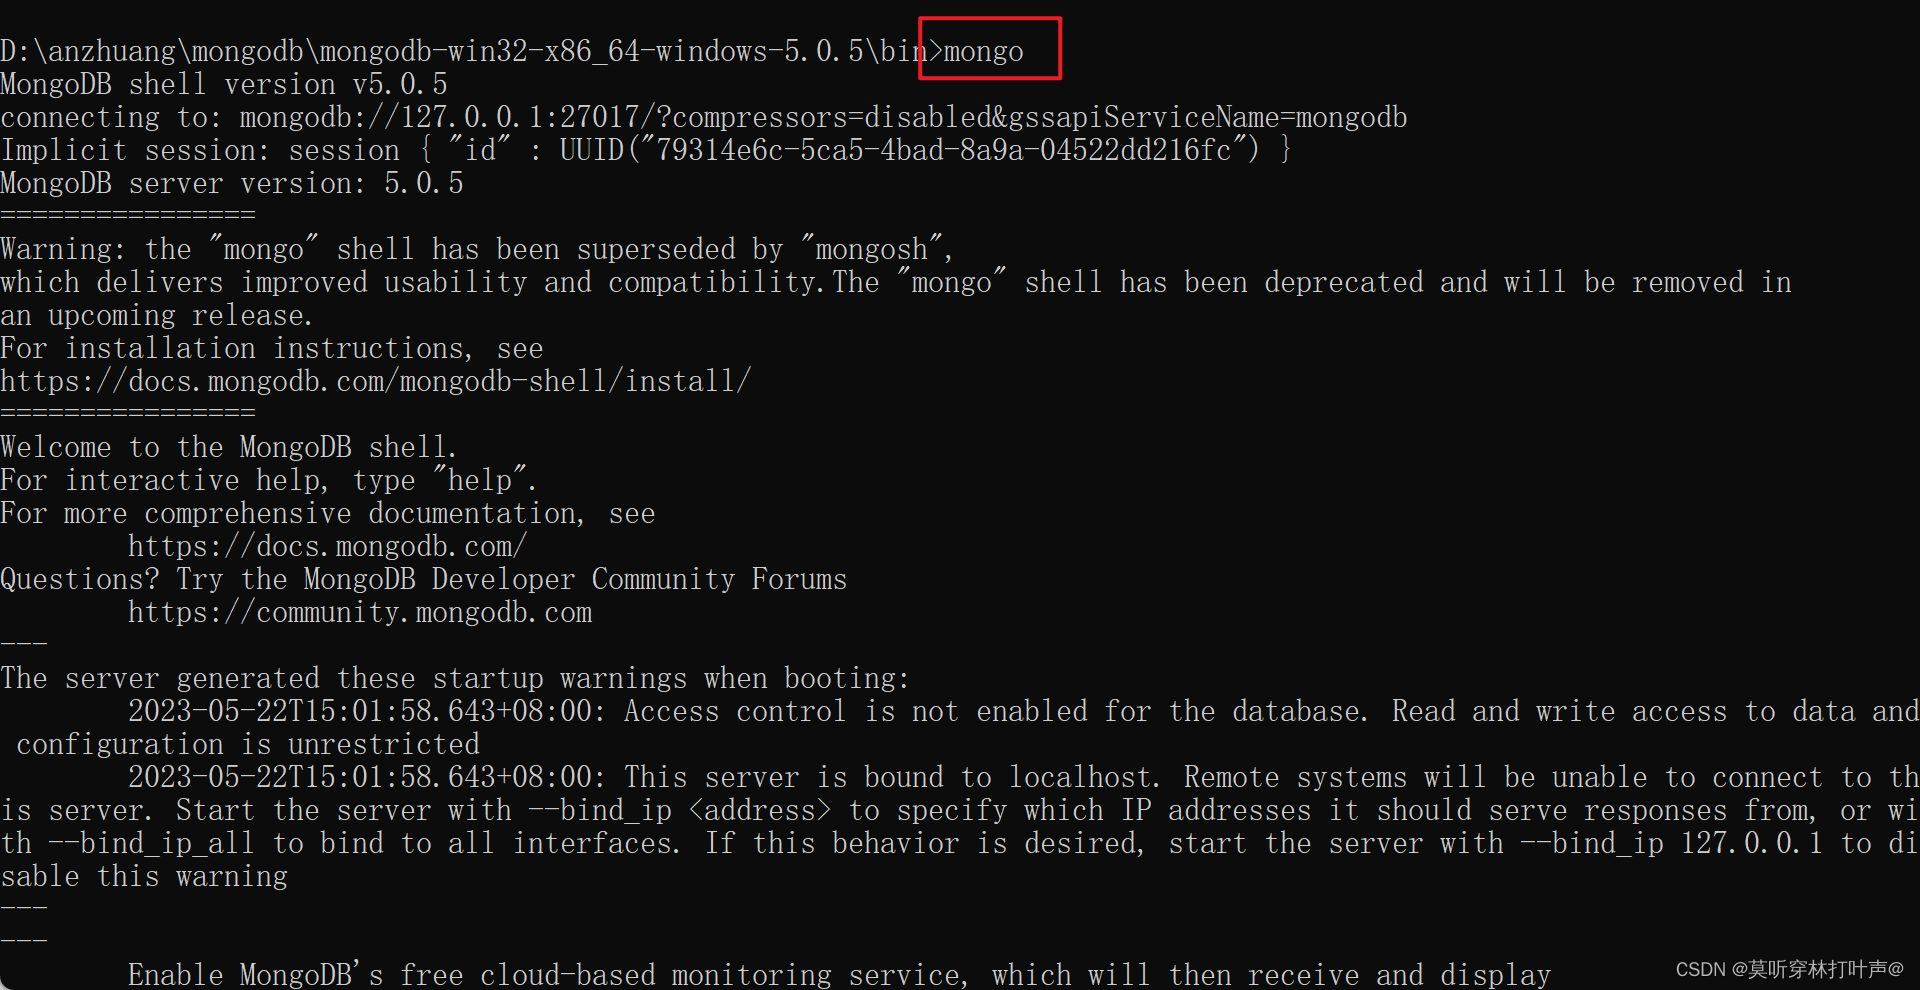
在客户端连接MongoDB服务:mongo --host=127.0.0.1 --port=27017- 1
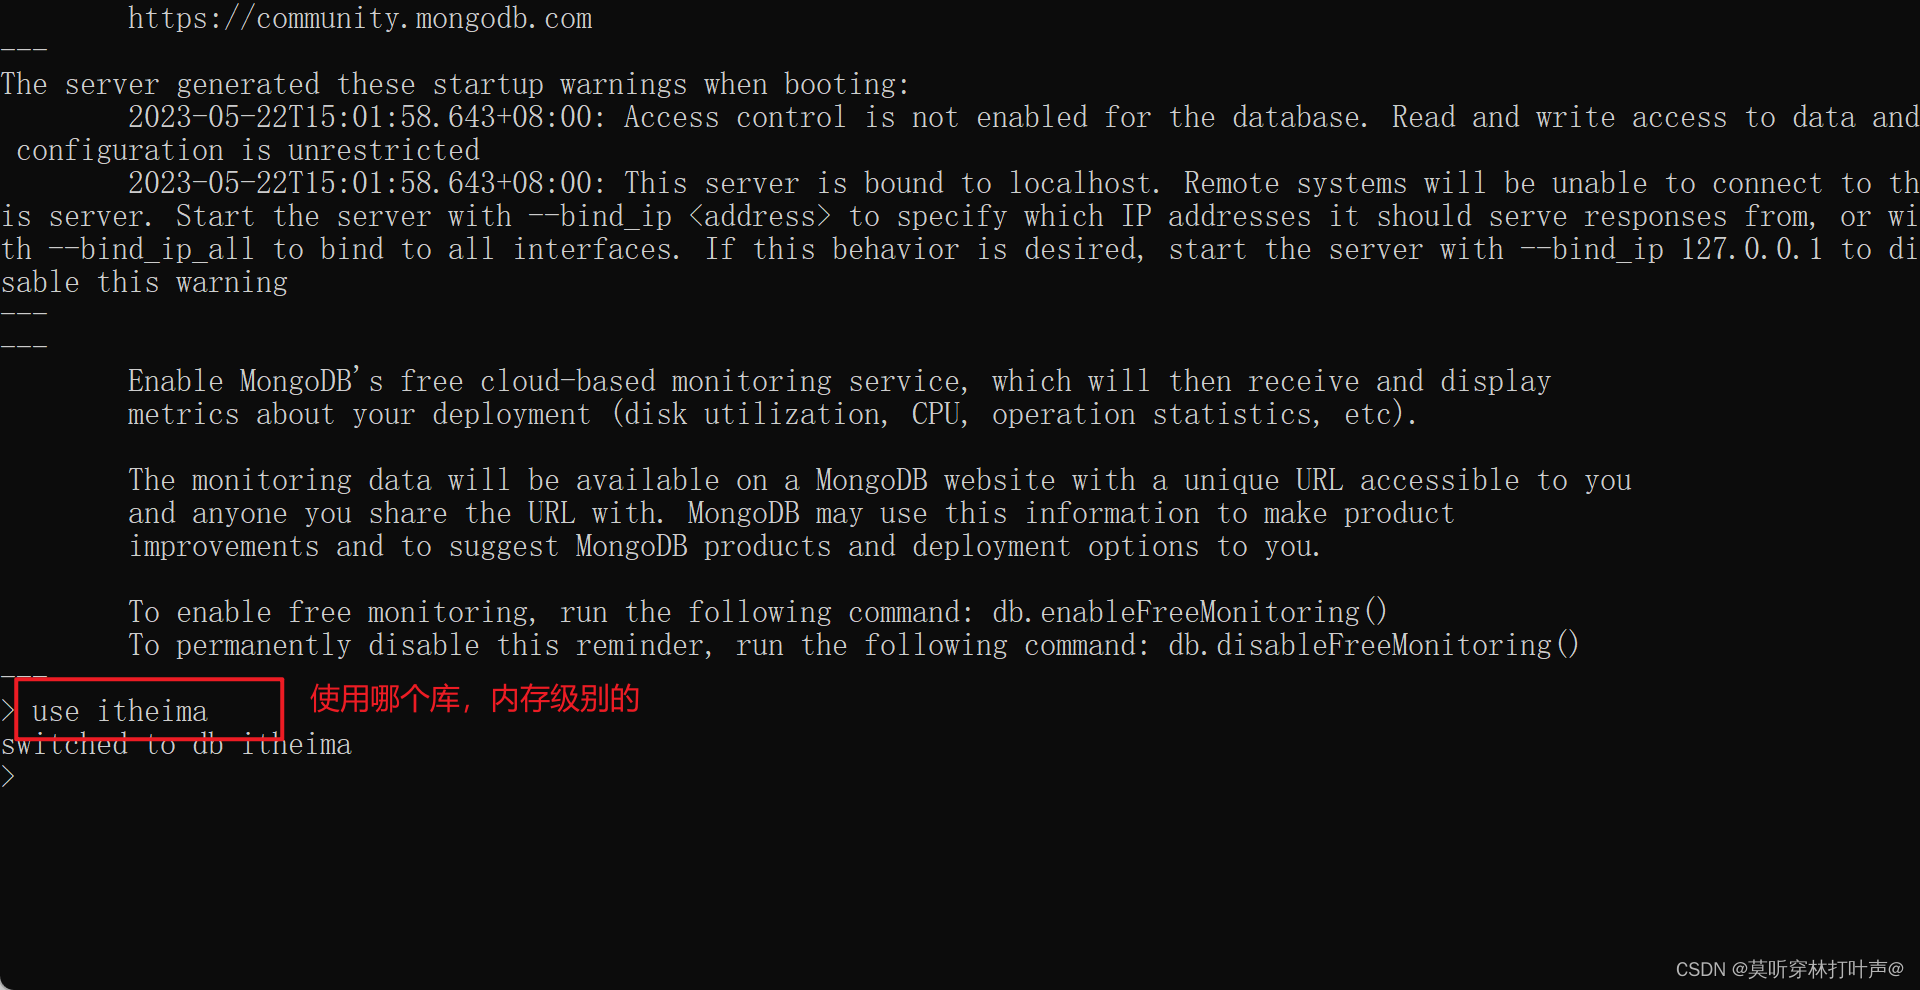
或者使用可视化客户端:
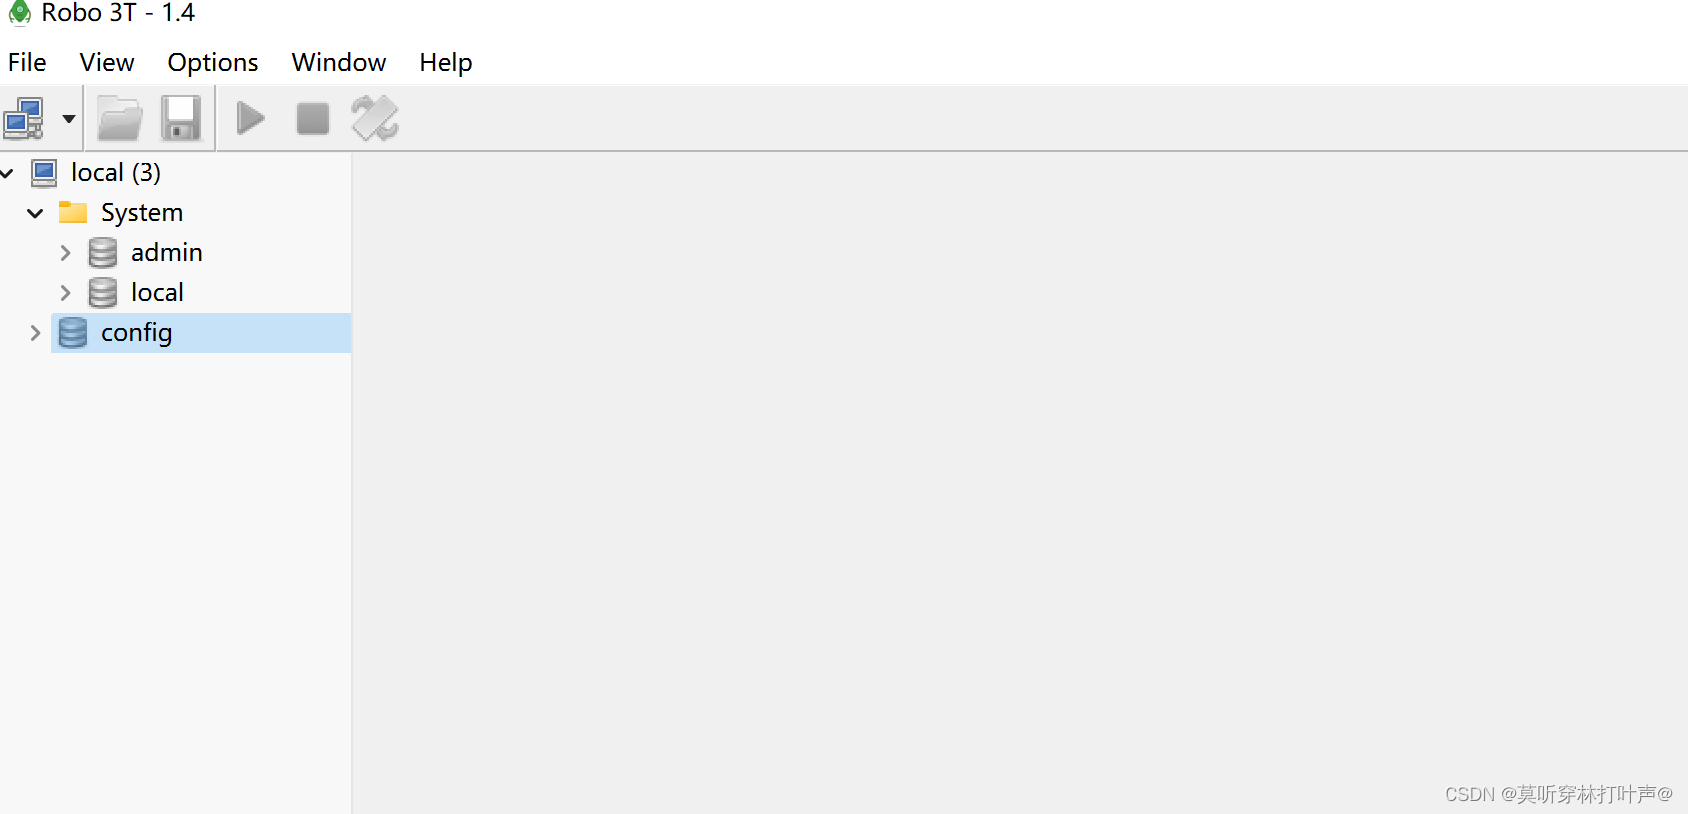
基础CRUD操作:


SpringBoot整合MongoDB:
1.导入Mongodb对应的starter:<dependency> <groupId>org.springframework.bootgroupId> <artifactId>spring-boot-starter-data-mongodbartifactId> dependency>- 1
- 2
- 3
- 4
2.配置mongodb访问uri:

3.提供操作Mongodb接口对象MongoTemplate@SpringBootTest class Springboot17MongdbApplicationTests { @Autowired private MongoTemplate mongoTemplate; @Test void contextLoads() { Book book=new Book(); book.setId(1); book.setName("springboot"); book.setType("springboot"); book.setDescription("springboot"); mongoTemplate.save(book); } /** * 类型转换的问题 把数据库中不是int的删了 */ @Test void find(){ List<Book> all = mongoTemplate.findAll(Book.class); System.out.println(all); } }- 1
- 2
- 3
- 4
- 5
- 6
- 7
- 8
- 9
- 10
- 11
- 12
- 13
- 14
- 15
- 16
- 17
- 18
- 19
- 20
- 21
- 22
- 23
- 24
- 25
- 26
(3)ES Elasticsearch
相关概念:
Elasticsearch是一个分布式全文搜索引擎。(分布式:架构可以做成分布式的)
要想做全文搜索:
1.通过所提供的数据进行分词,将关联数据保存起来。就有了一个一个的id对应一个一个的简要数据。
2.分词查出来先匹配一个一个的id,id再得到数据。(实际上查询的时候,是将输入这个id的数据展示出来)。
这种方式大幅度的提高了查询速度。
传统的索引:根据id查数据。
ES的索引(倒排索引):根据关键字(数据)查id,再根据id查数据。
一条:关键字—>1—>数据 对应的是一个文档,每一条都需要提前建立起来。当使用关键字后,就能找到对应的数据了。基础操作:
打开ES服务:双击这个批处理文件:
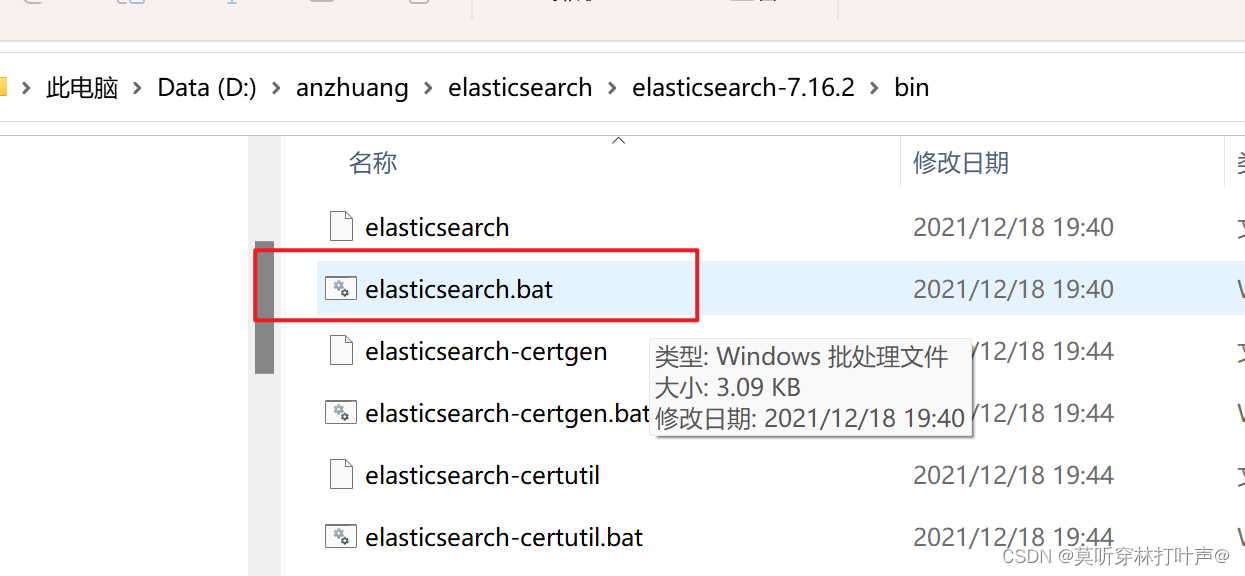
启动后,可以在浏览器直接创建。
创建/查询/删除索引:
PUT:http://localhost:9200/books
GET:http://localhost:9200/books
DELETE:http://localhost:9200/books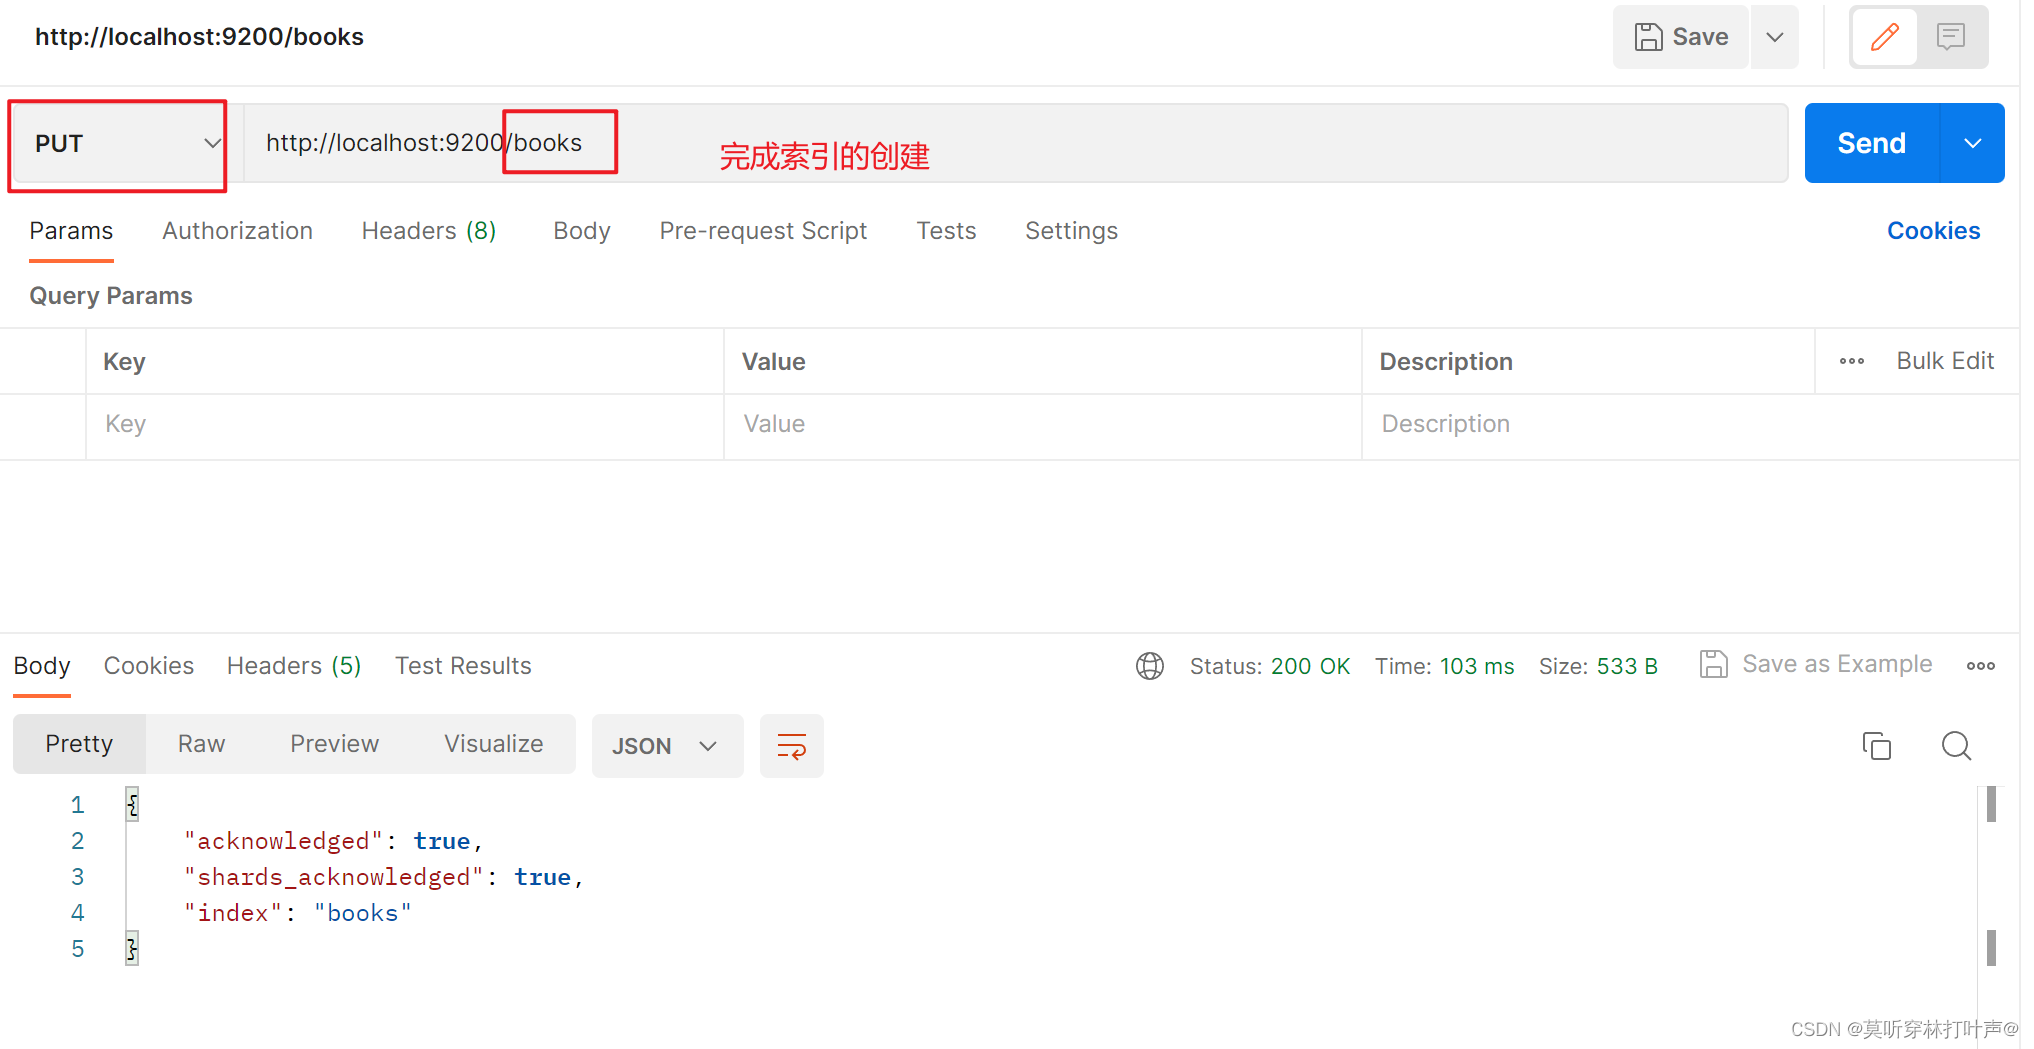
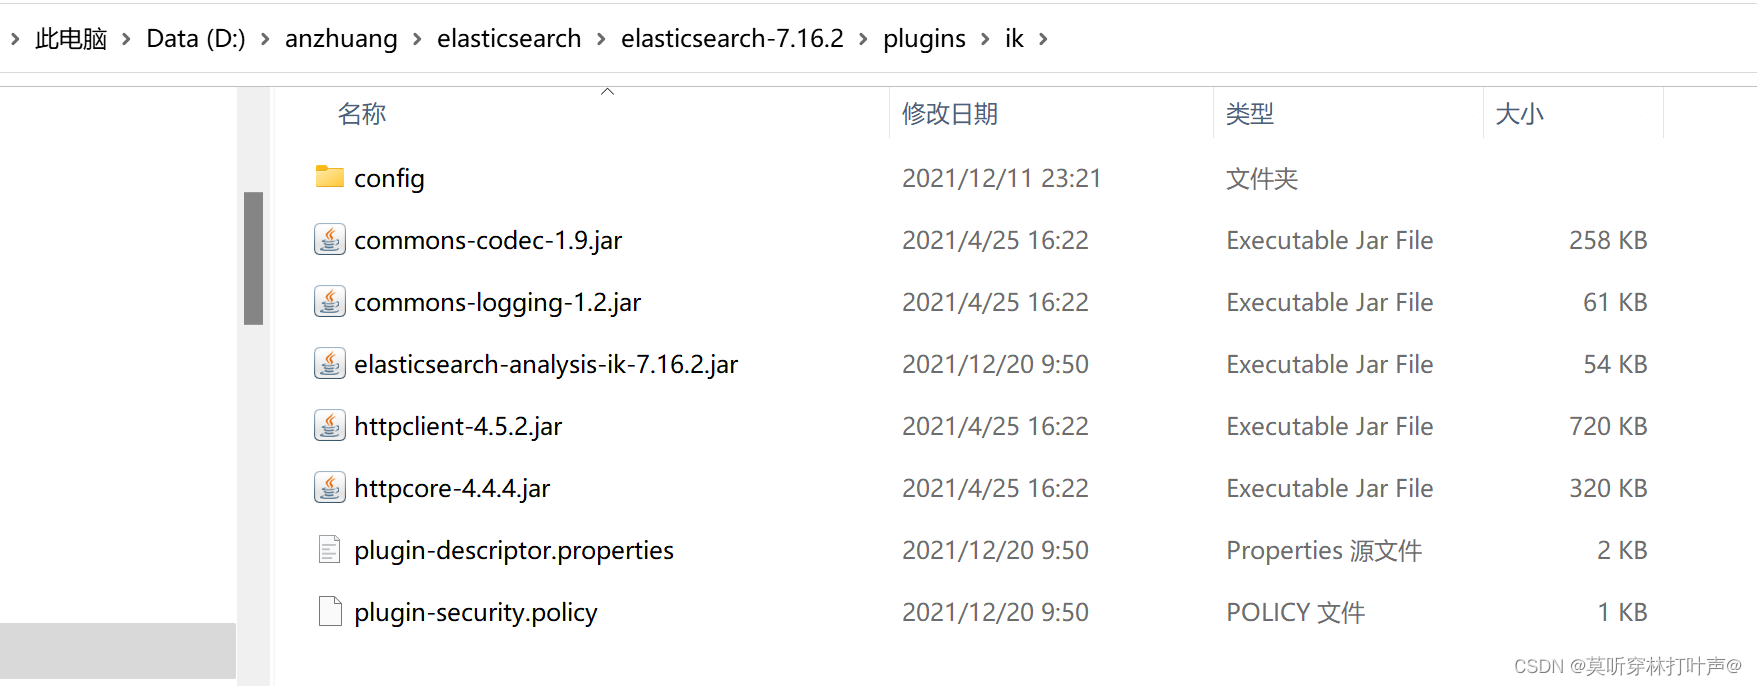
目前创建的这个索引是不支持分词的。要支持分词添加IK插件。再重启服务。
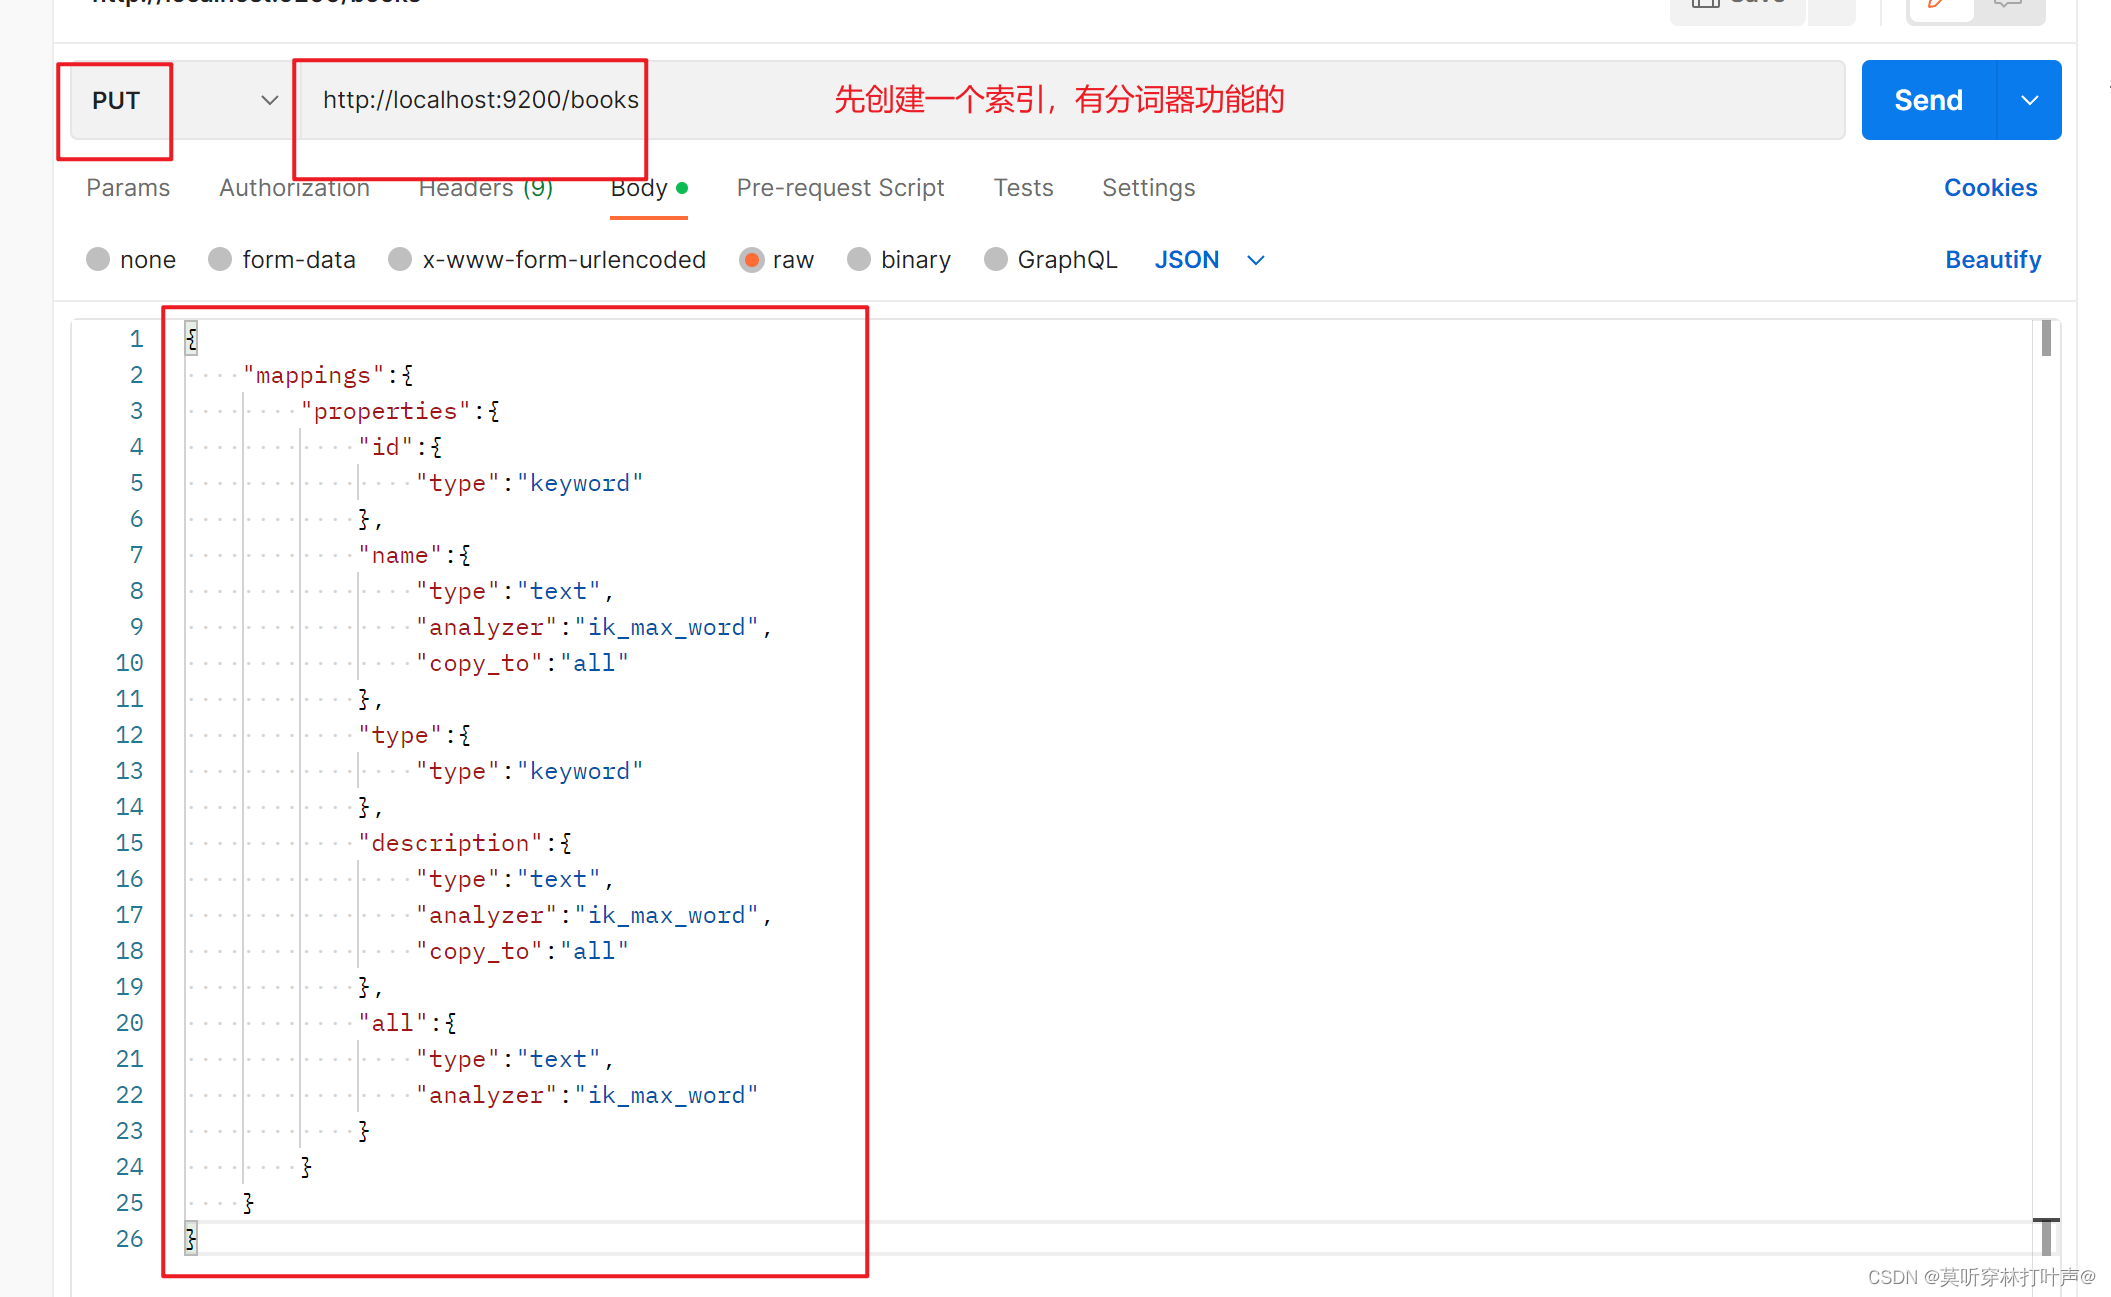
创建一个有分词功能的索引:
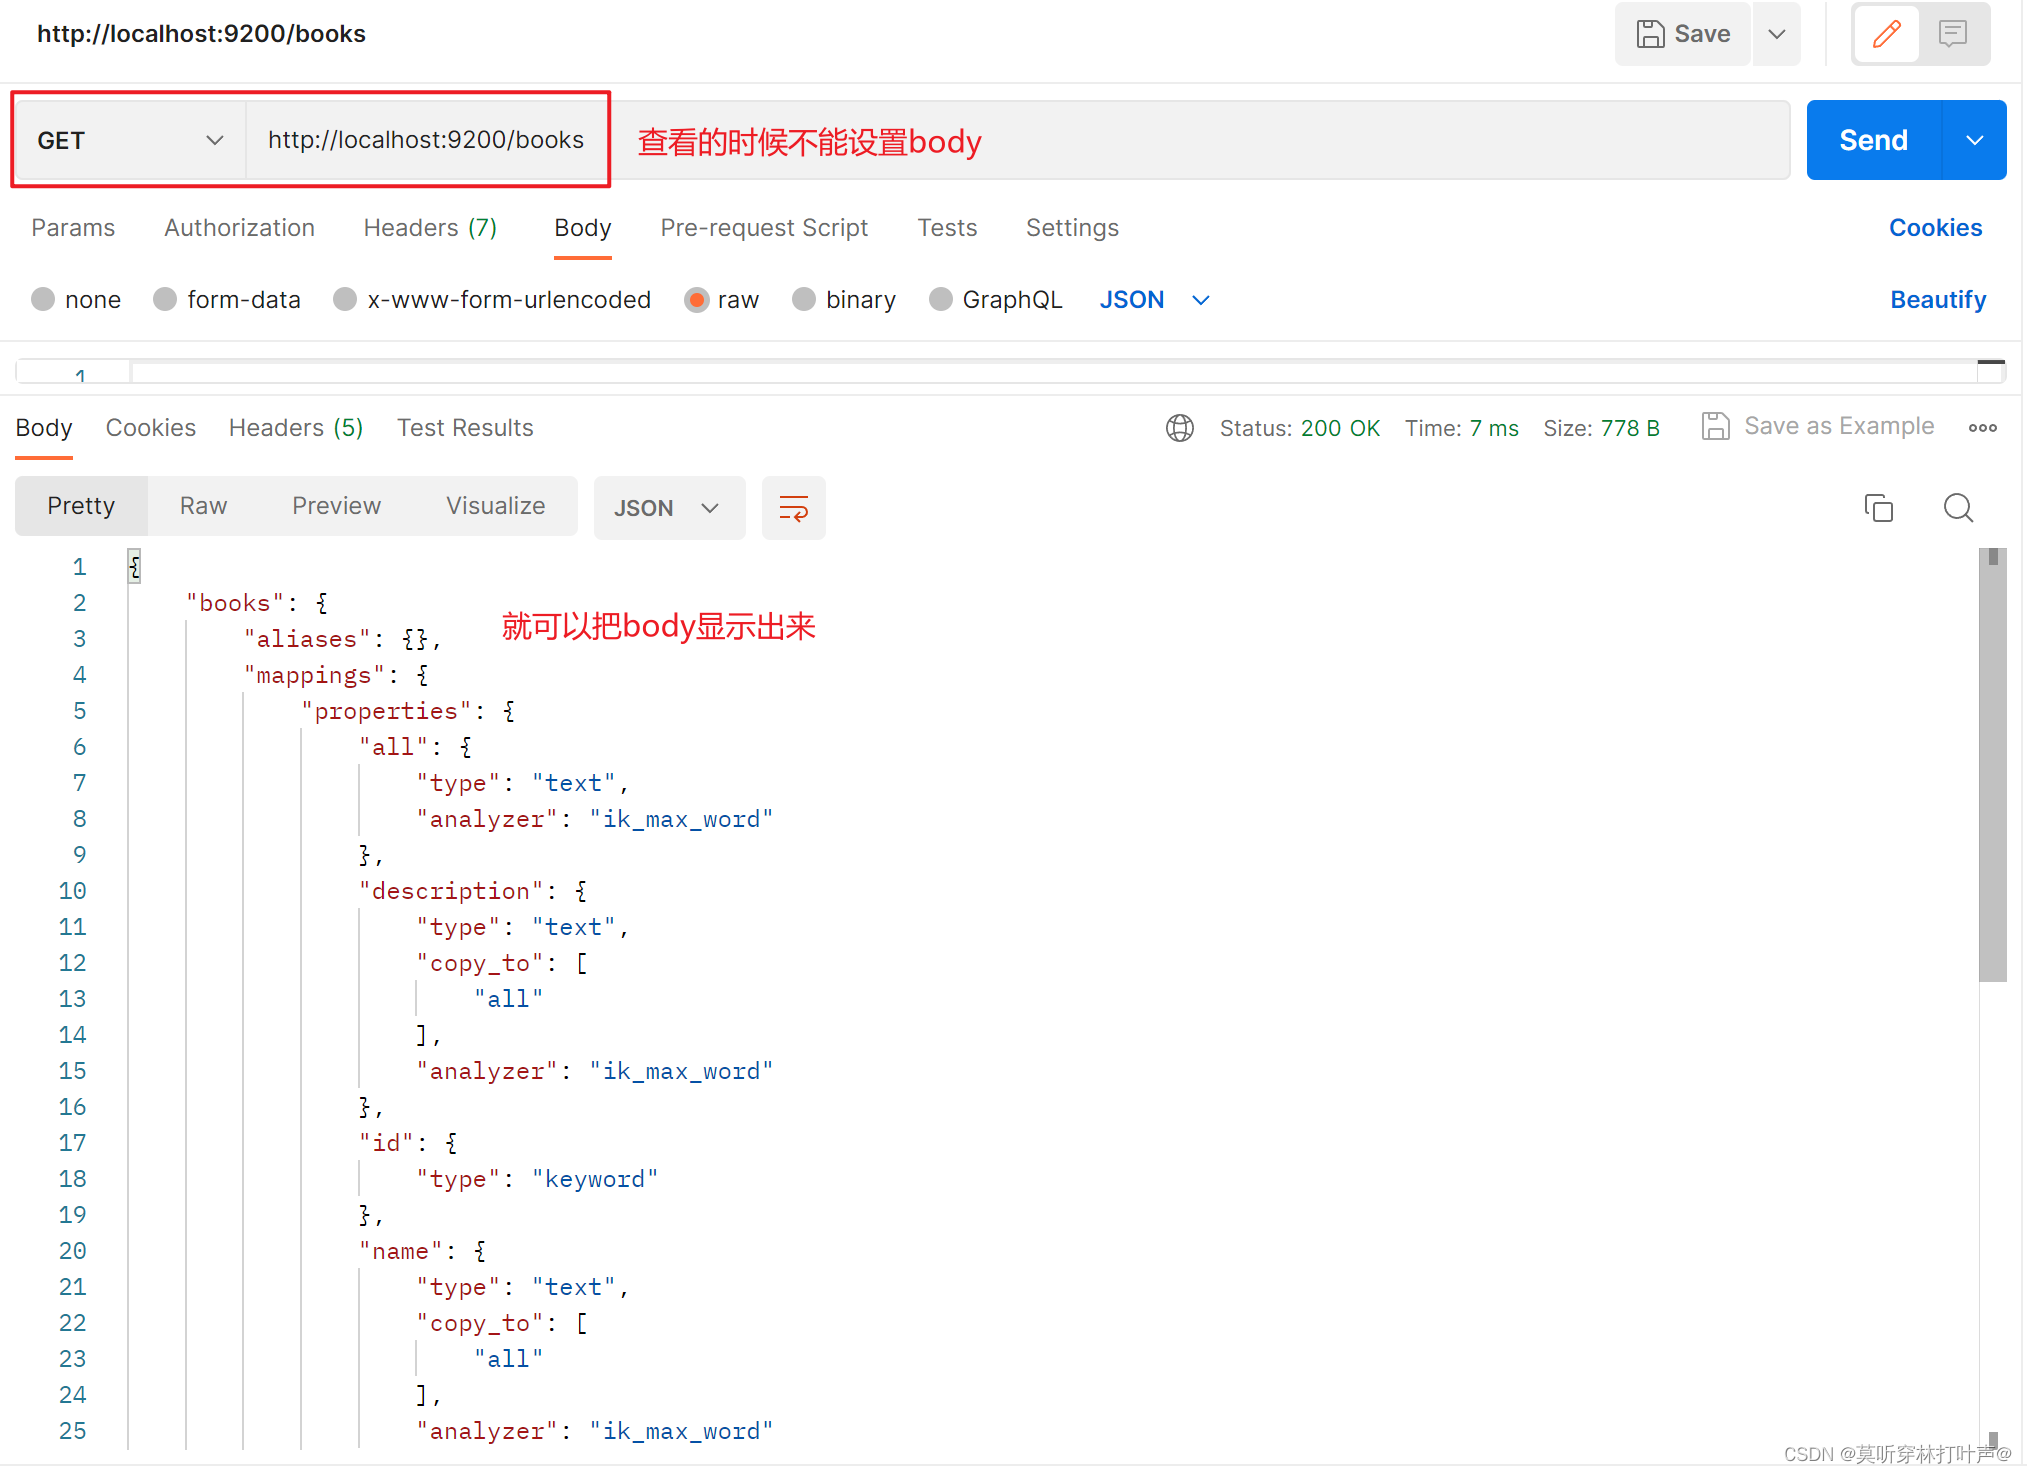
查看这个索引:
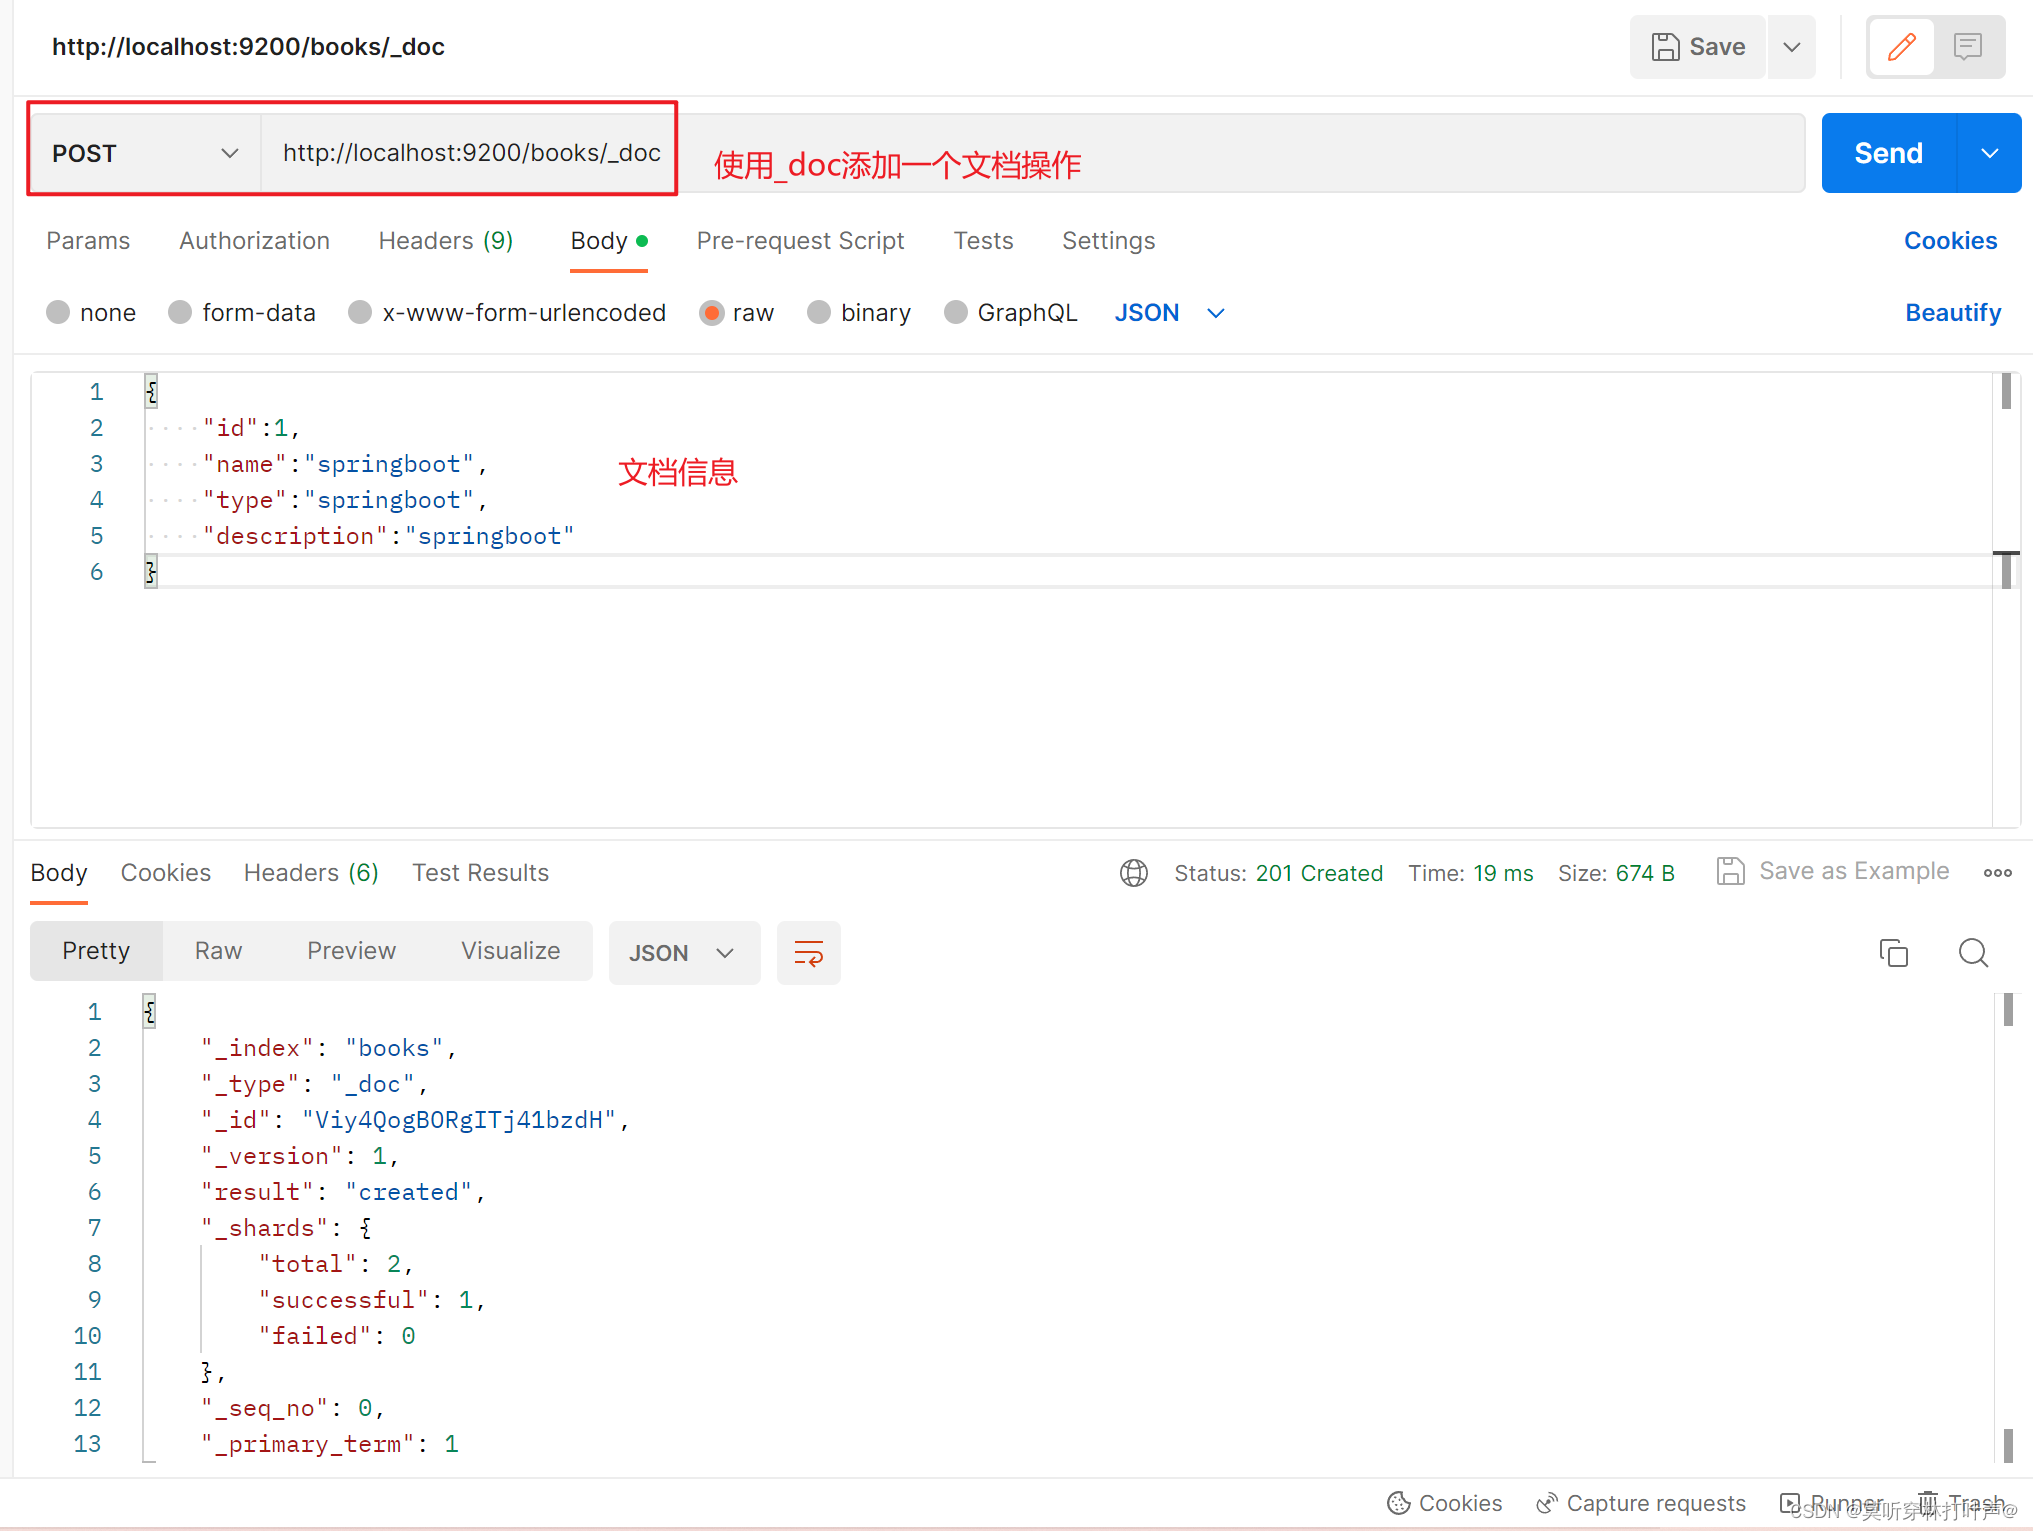
ES文档操作:
添加一条文档,相当于给数据库中添加一条数据,不需要指定表结构。文档结构是无模式的。使用_doc添加一个文档信息,id是自动生成的。
使用_create添加文档信息,后面需要加id号。

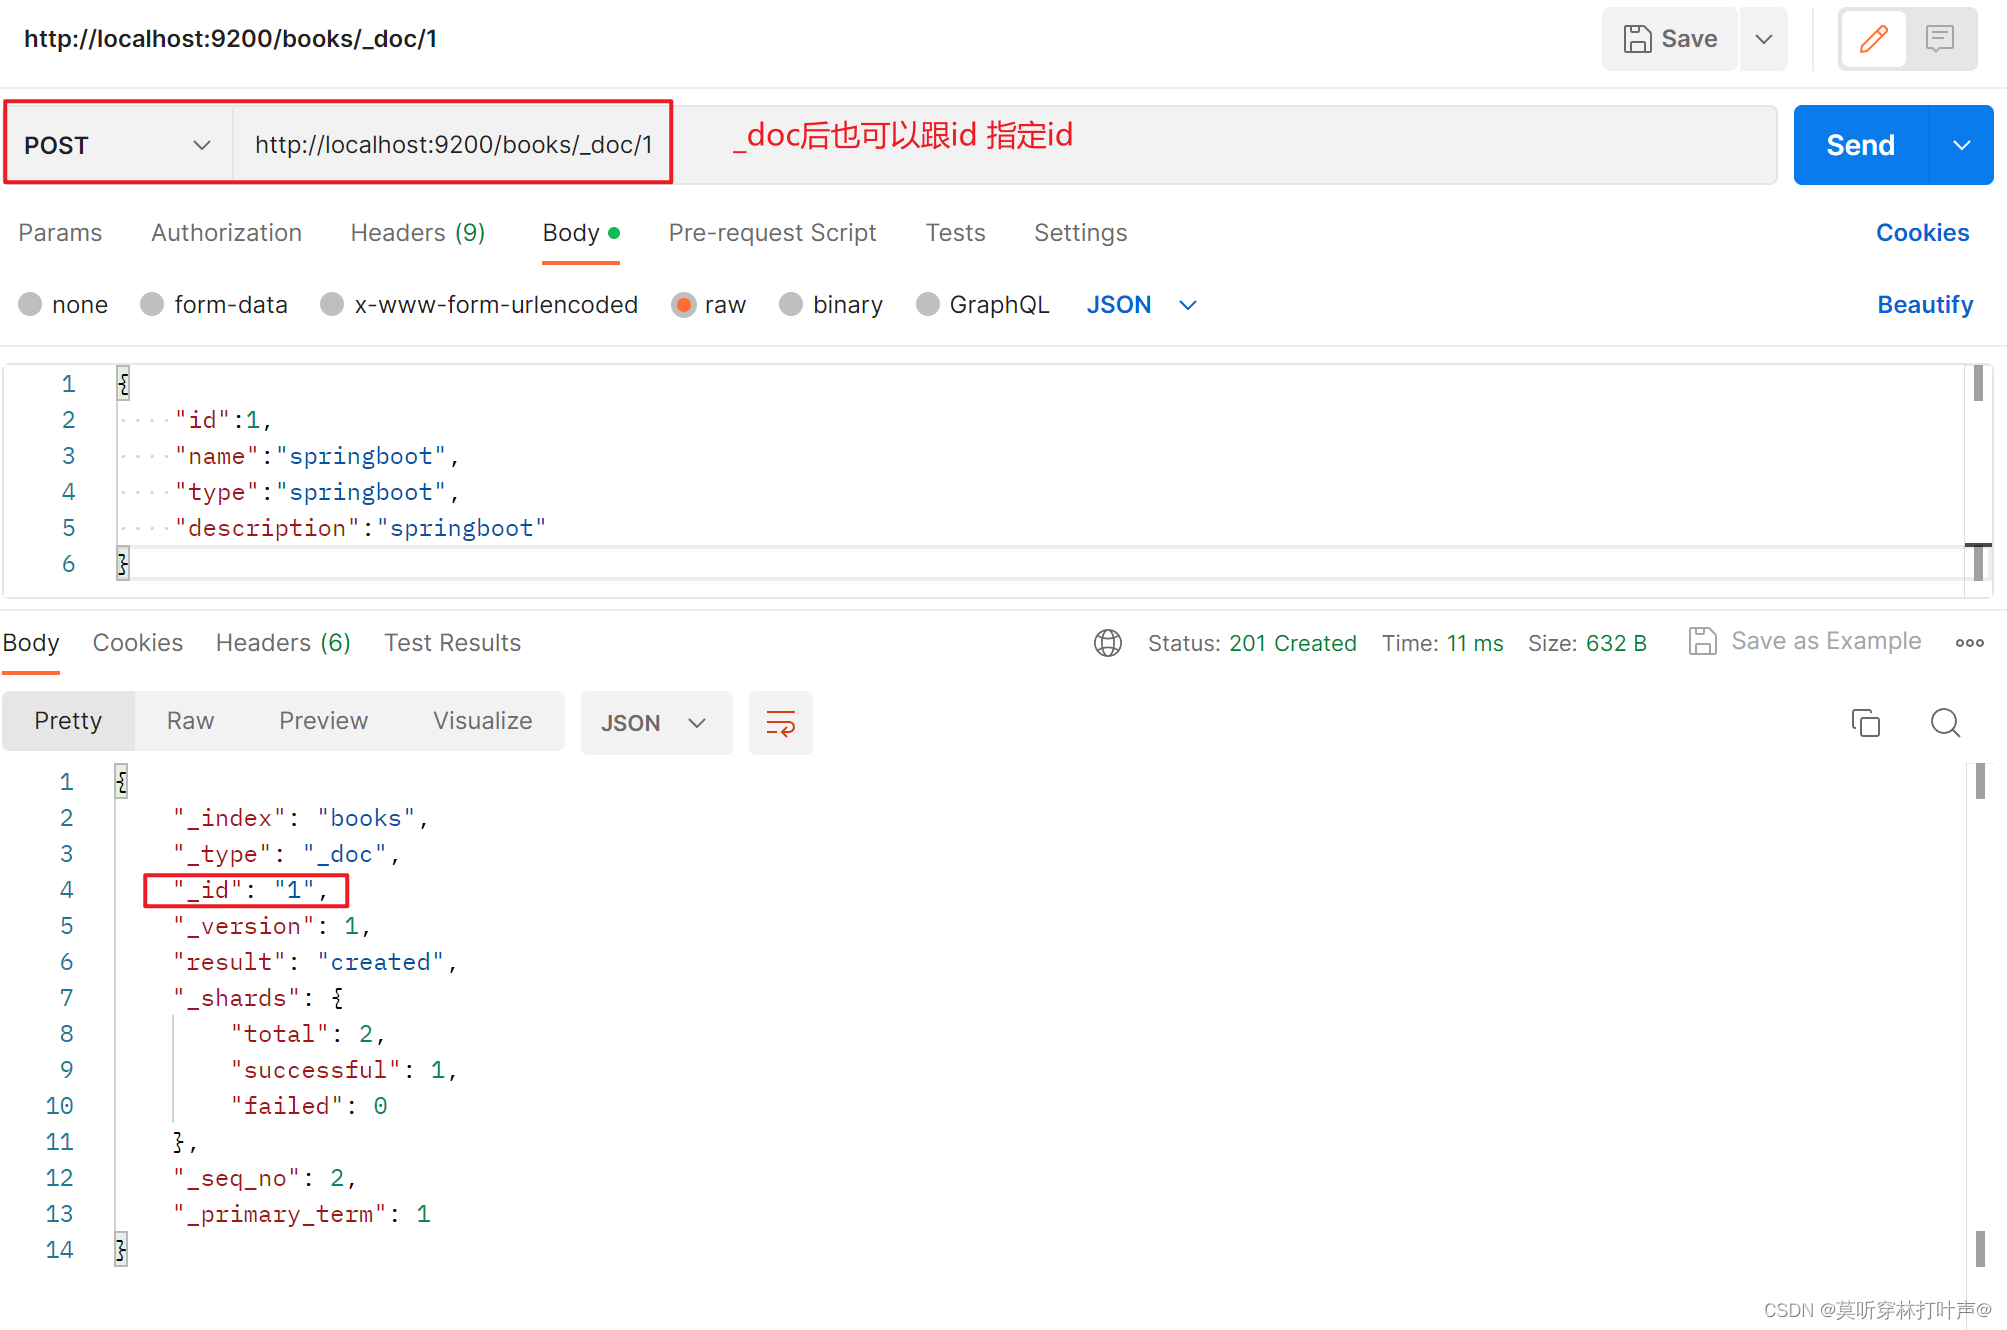
_doc后也可以加id号。
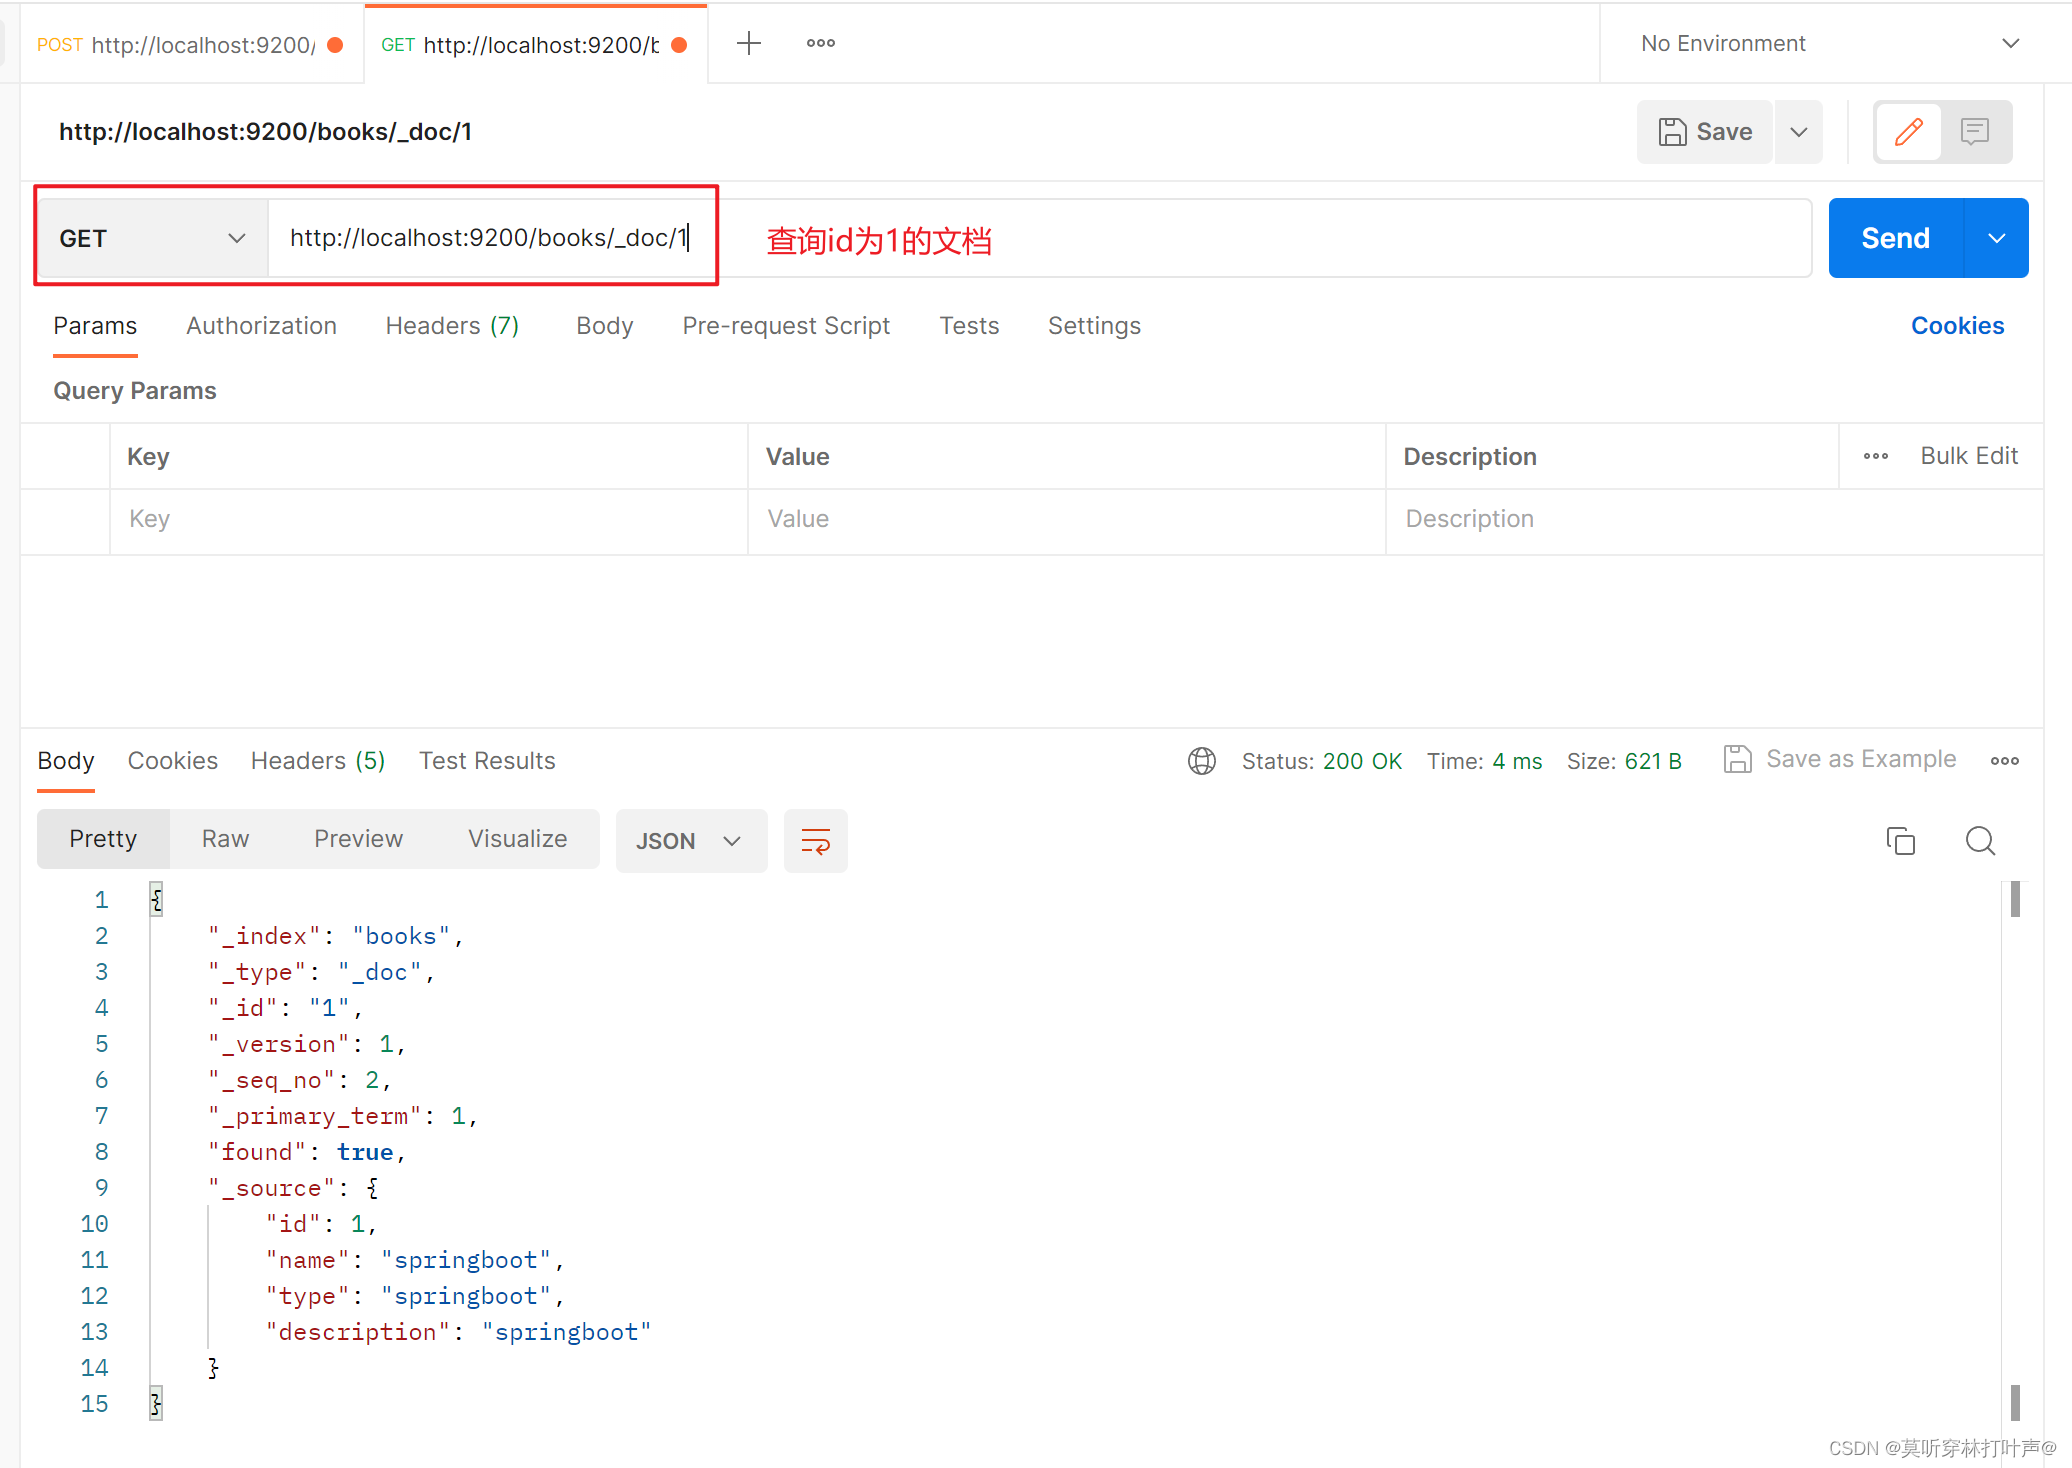
 查询文档:查询id为1的文档
查询所有文档:

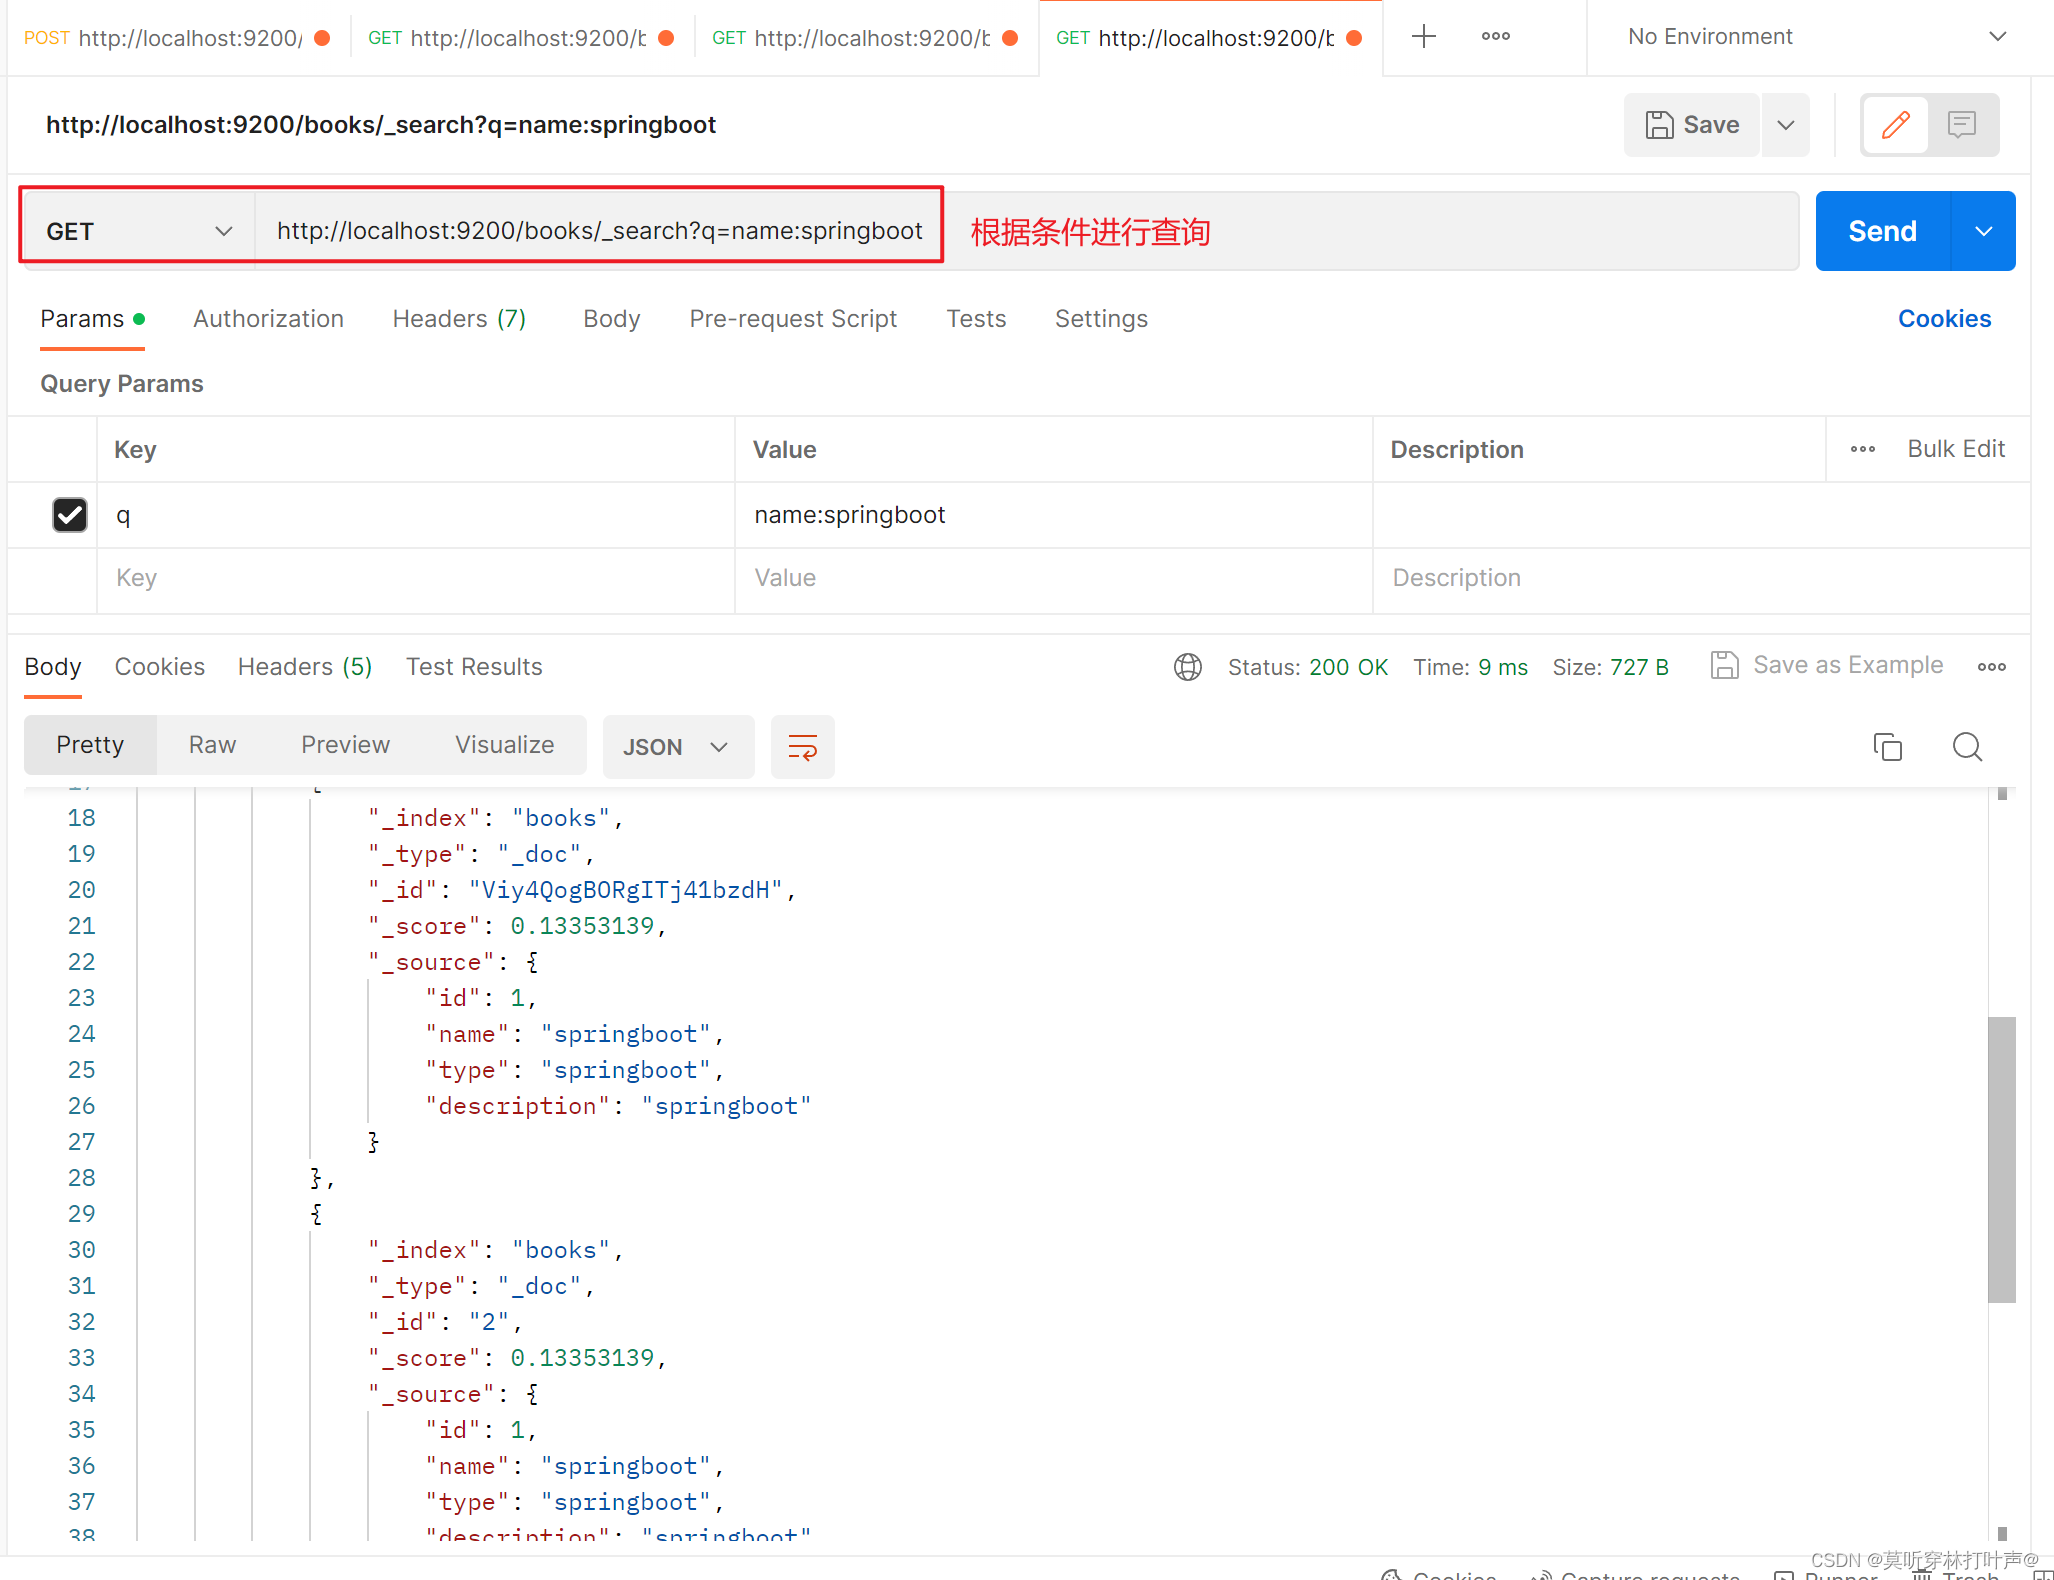
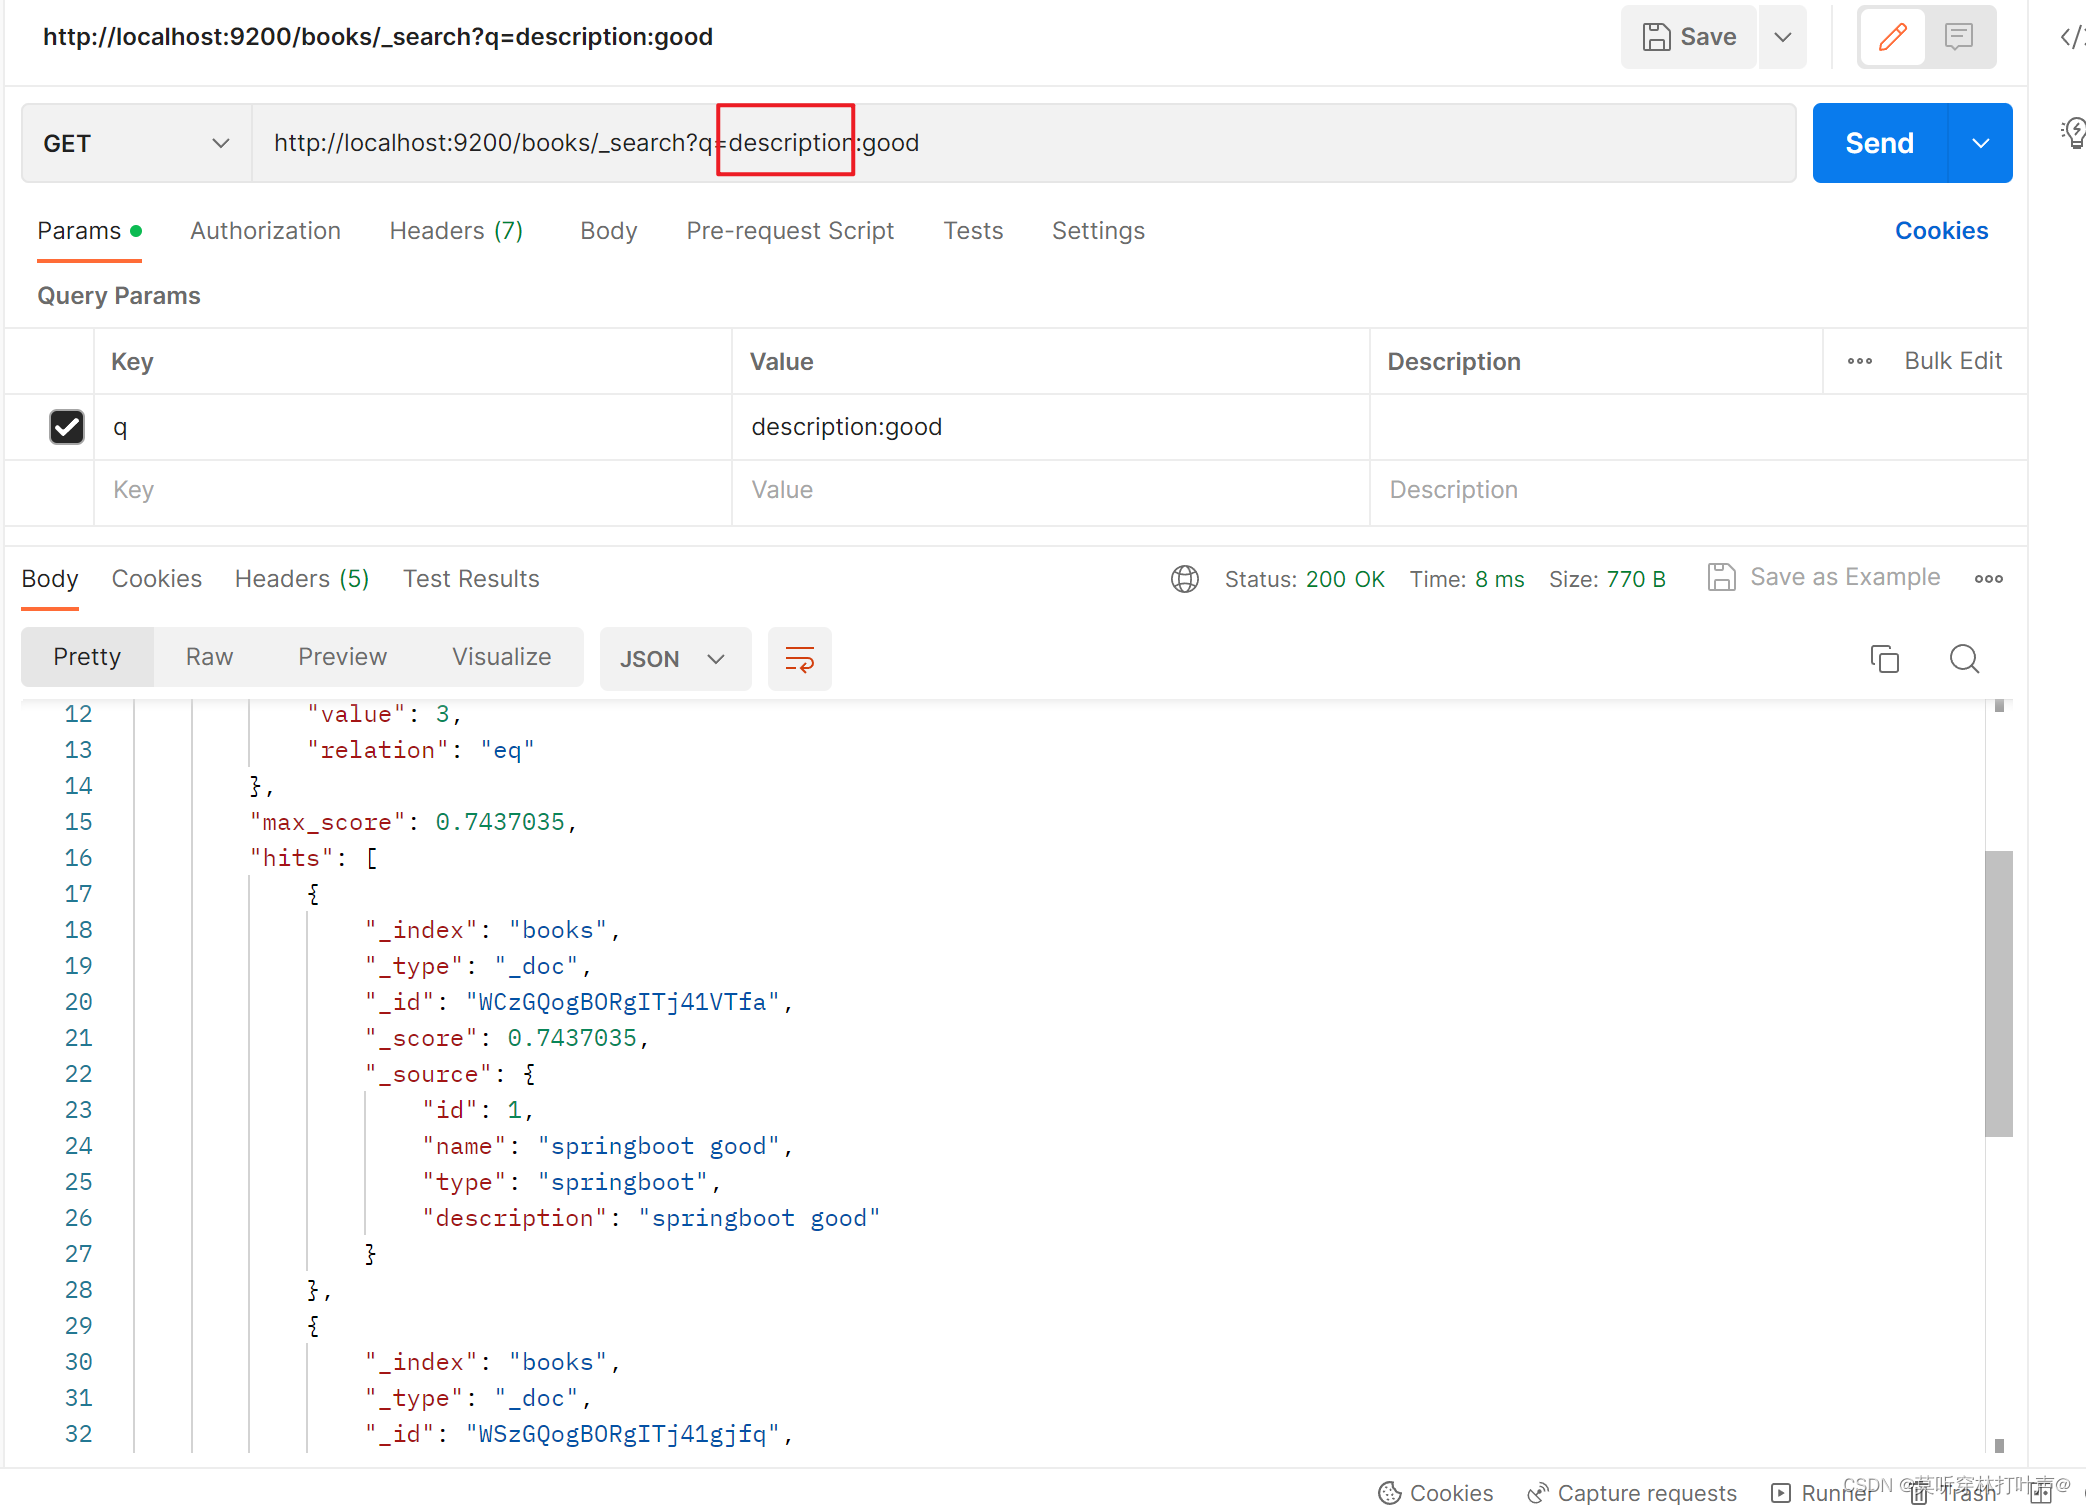
使用条件查询:
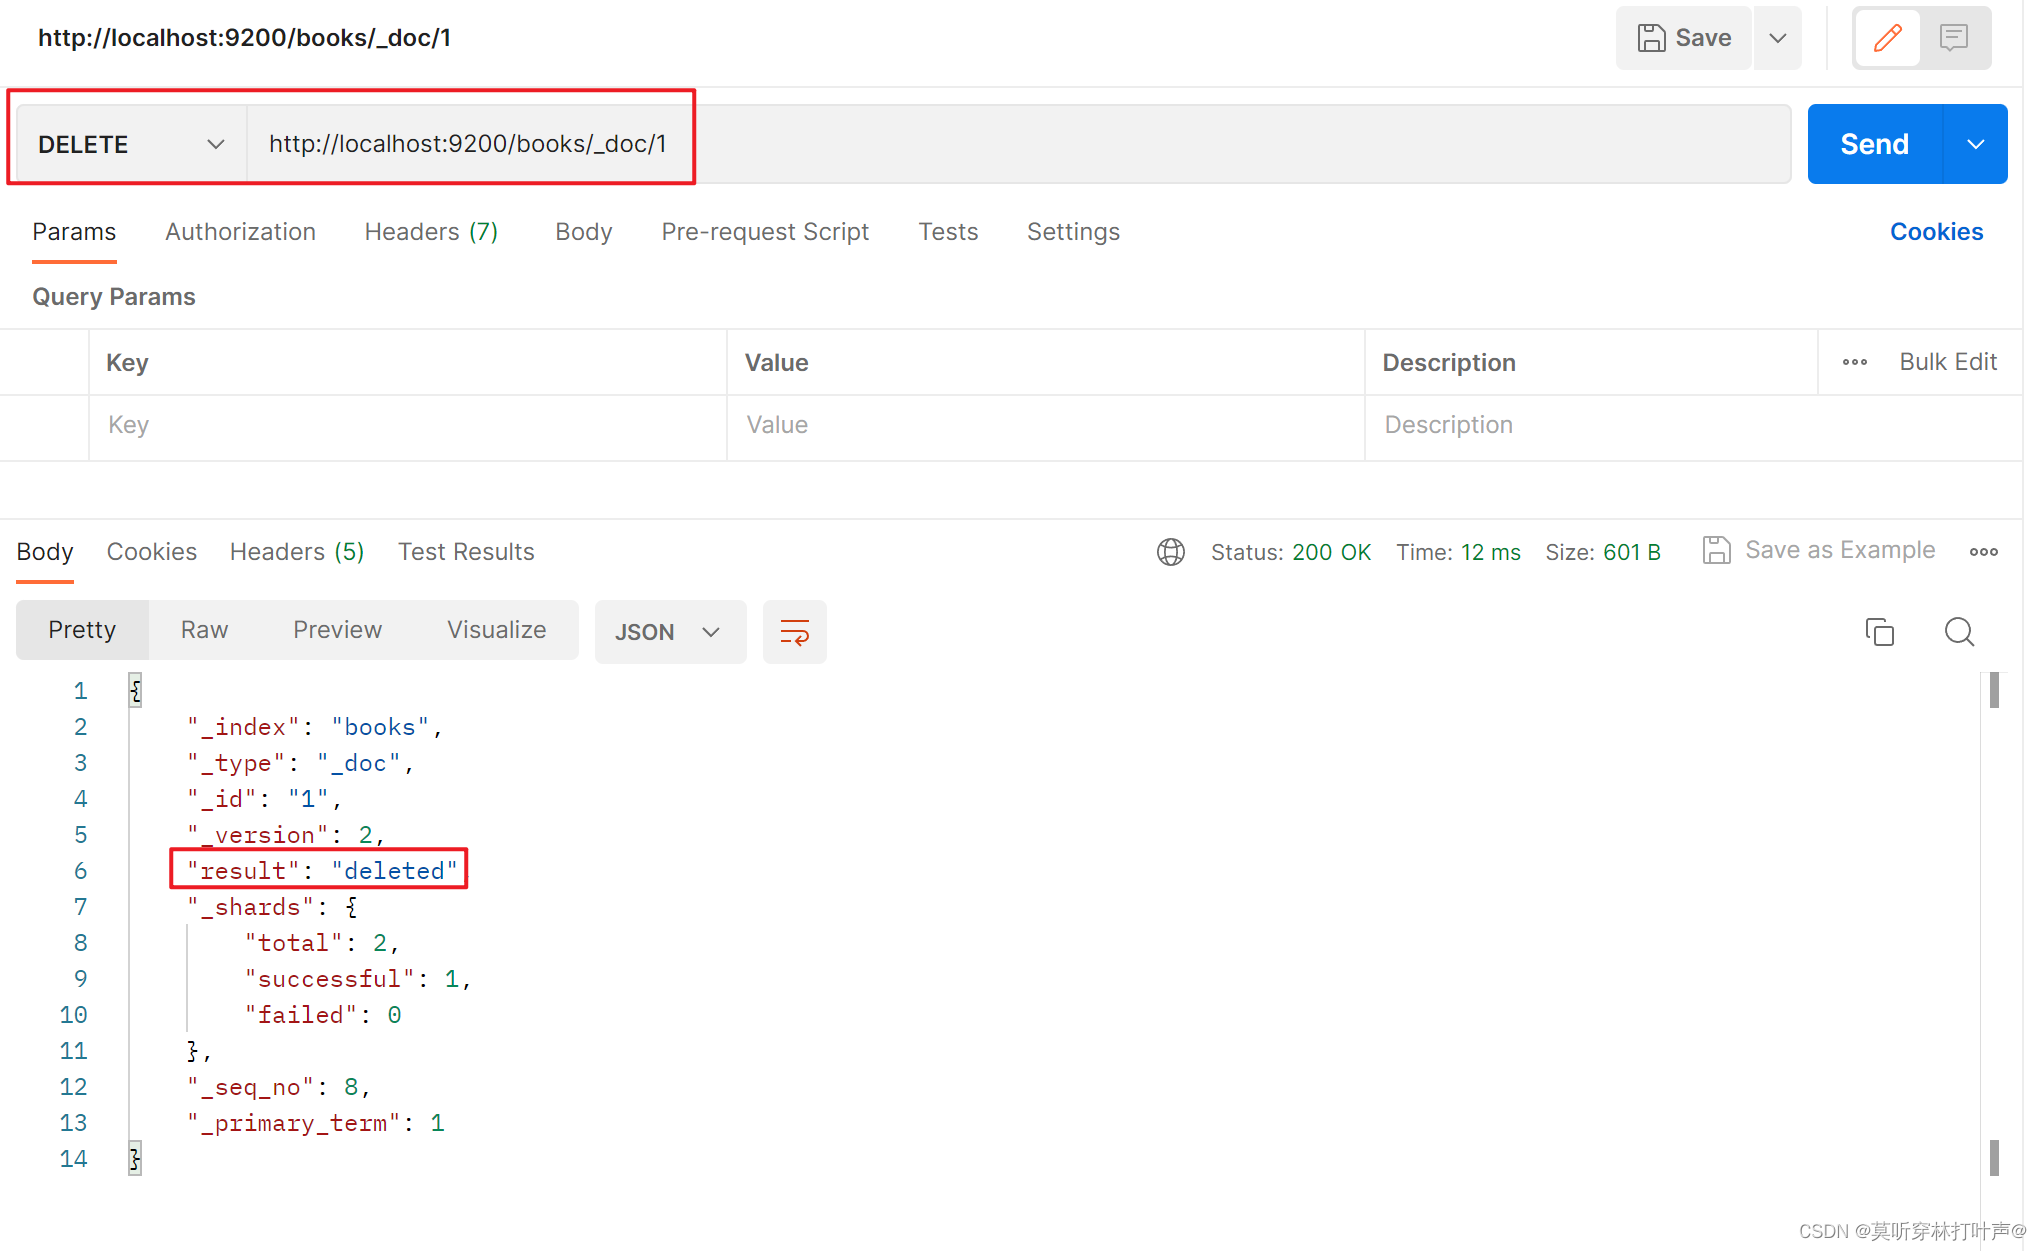
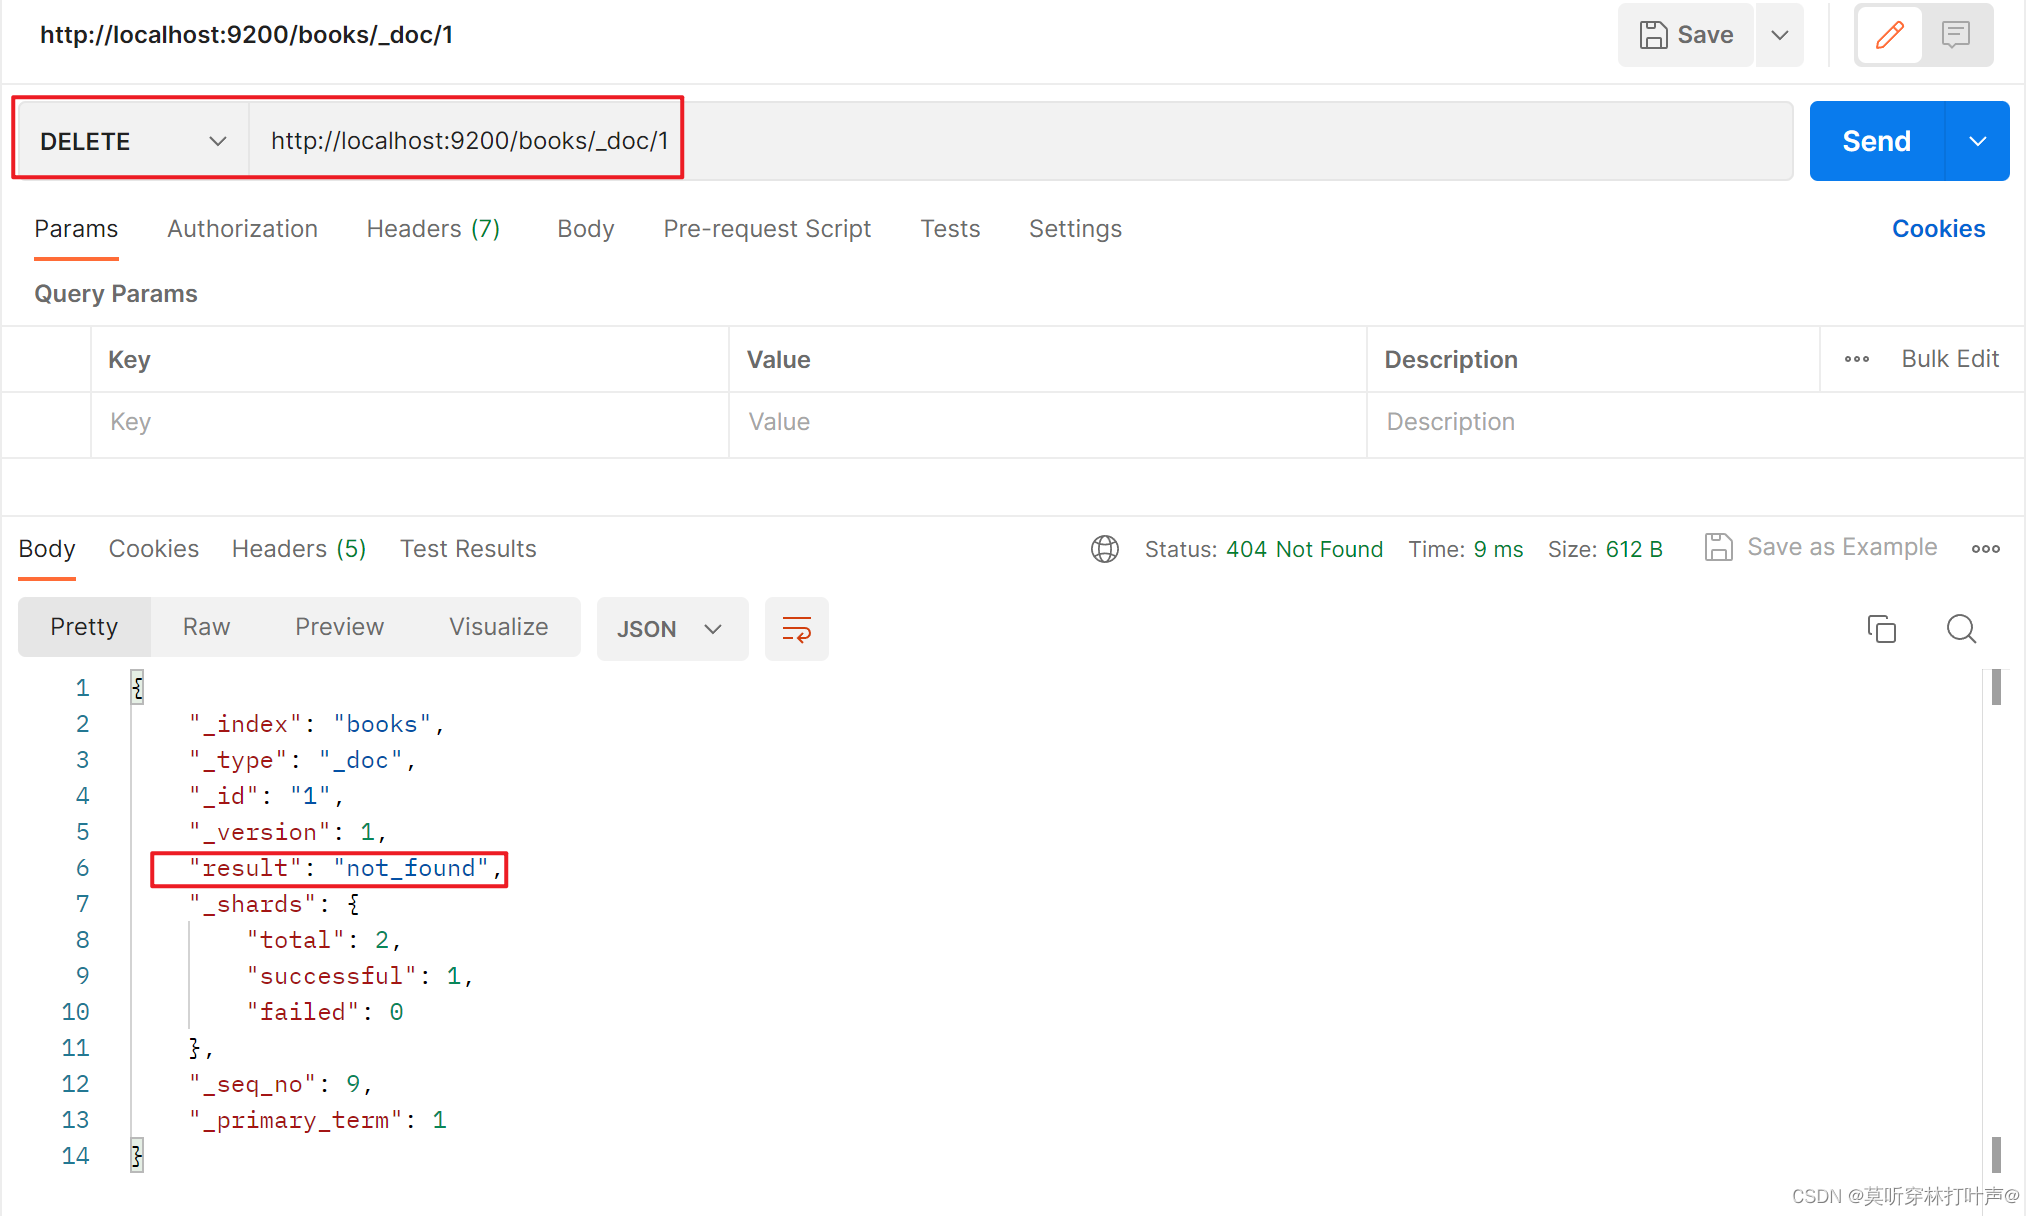
删除文档:
删除一个已经存在的:
删除一个不存在的:
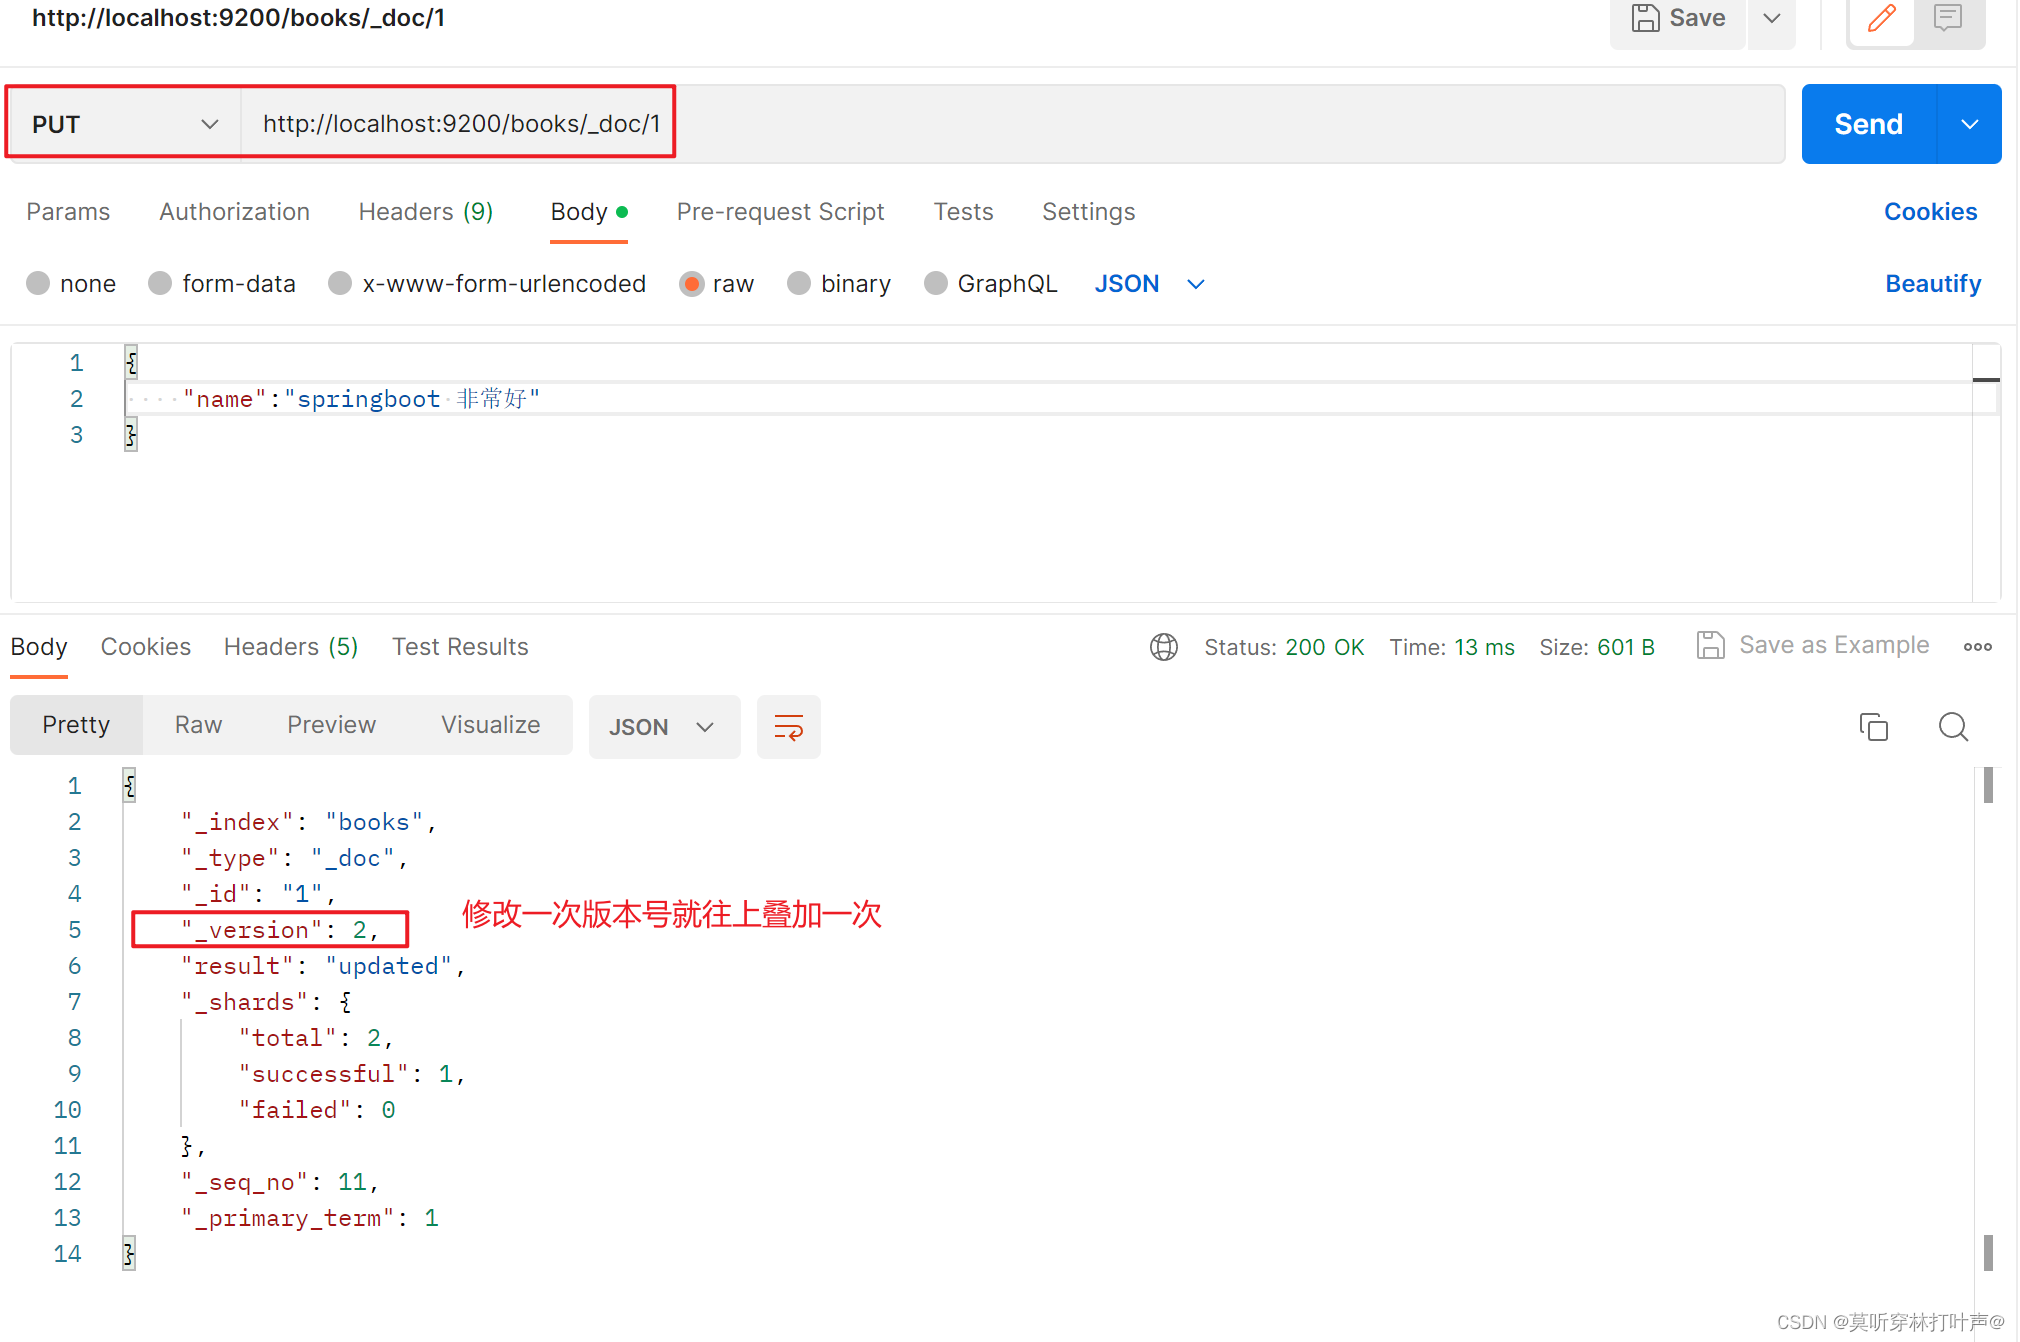
修改一个文档:
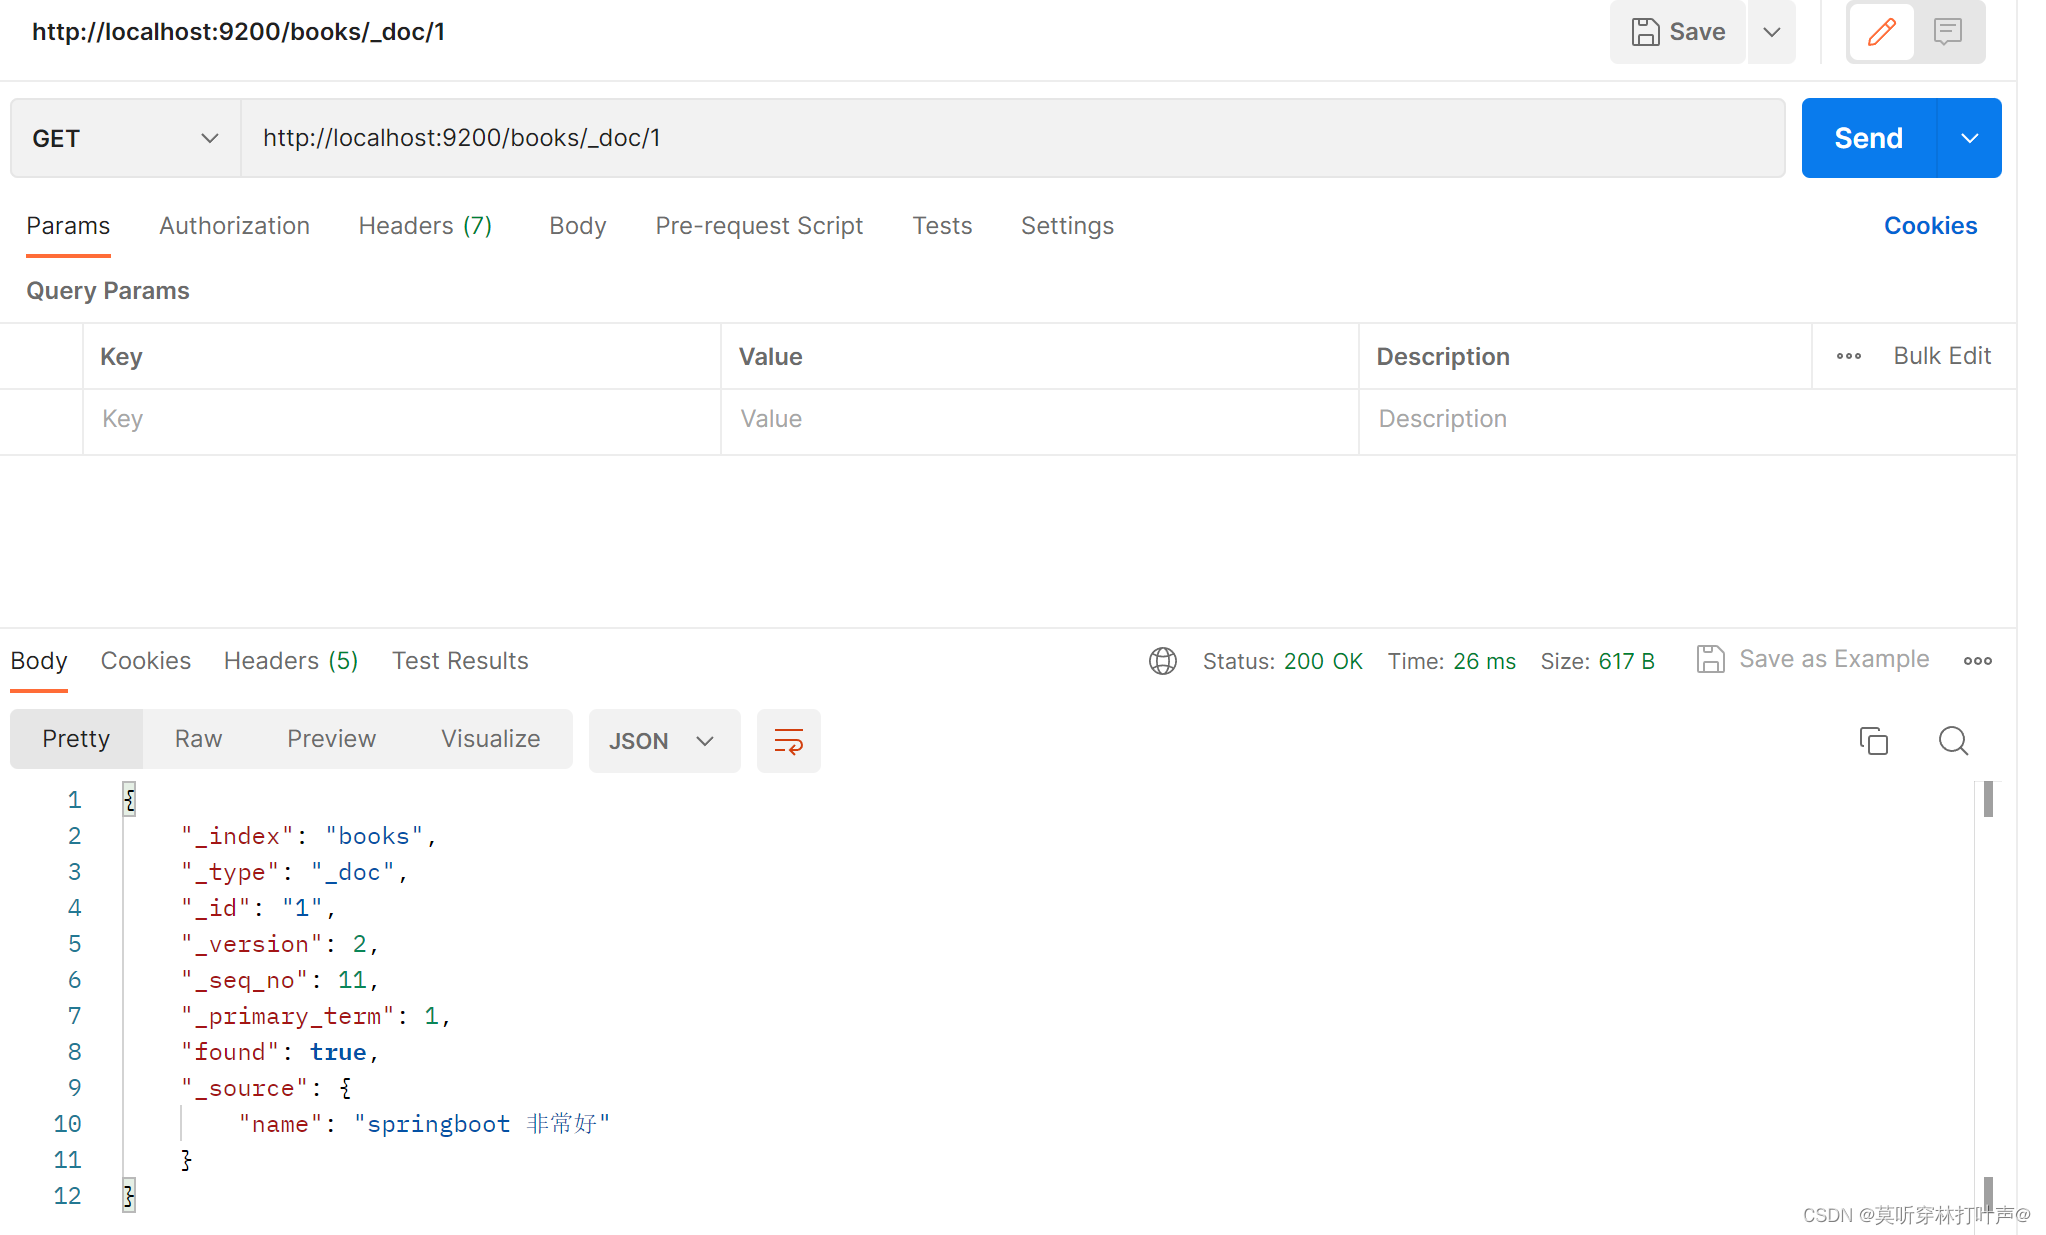
查询一下刚才修改的文档,发现只有name,是全覆盖。
如果不想全部修改,只想修改某一条属性信息:使用文档属性进行修改的。就不会覆盖其他的属性。
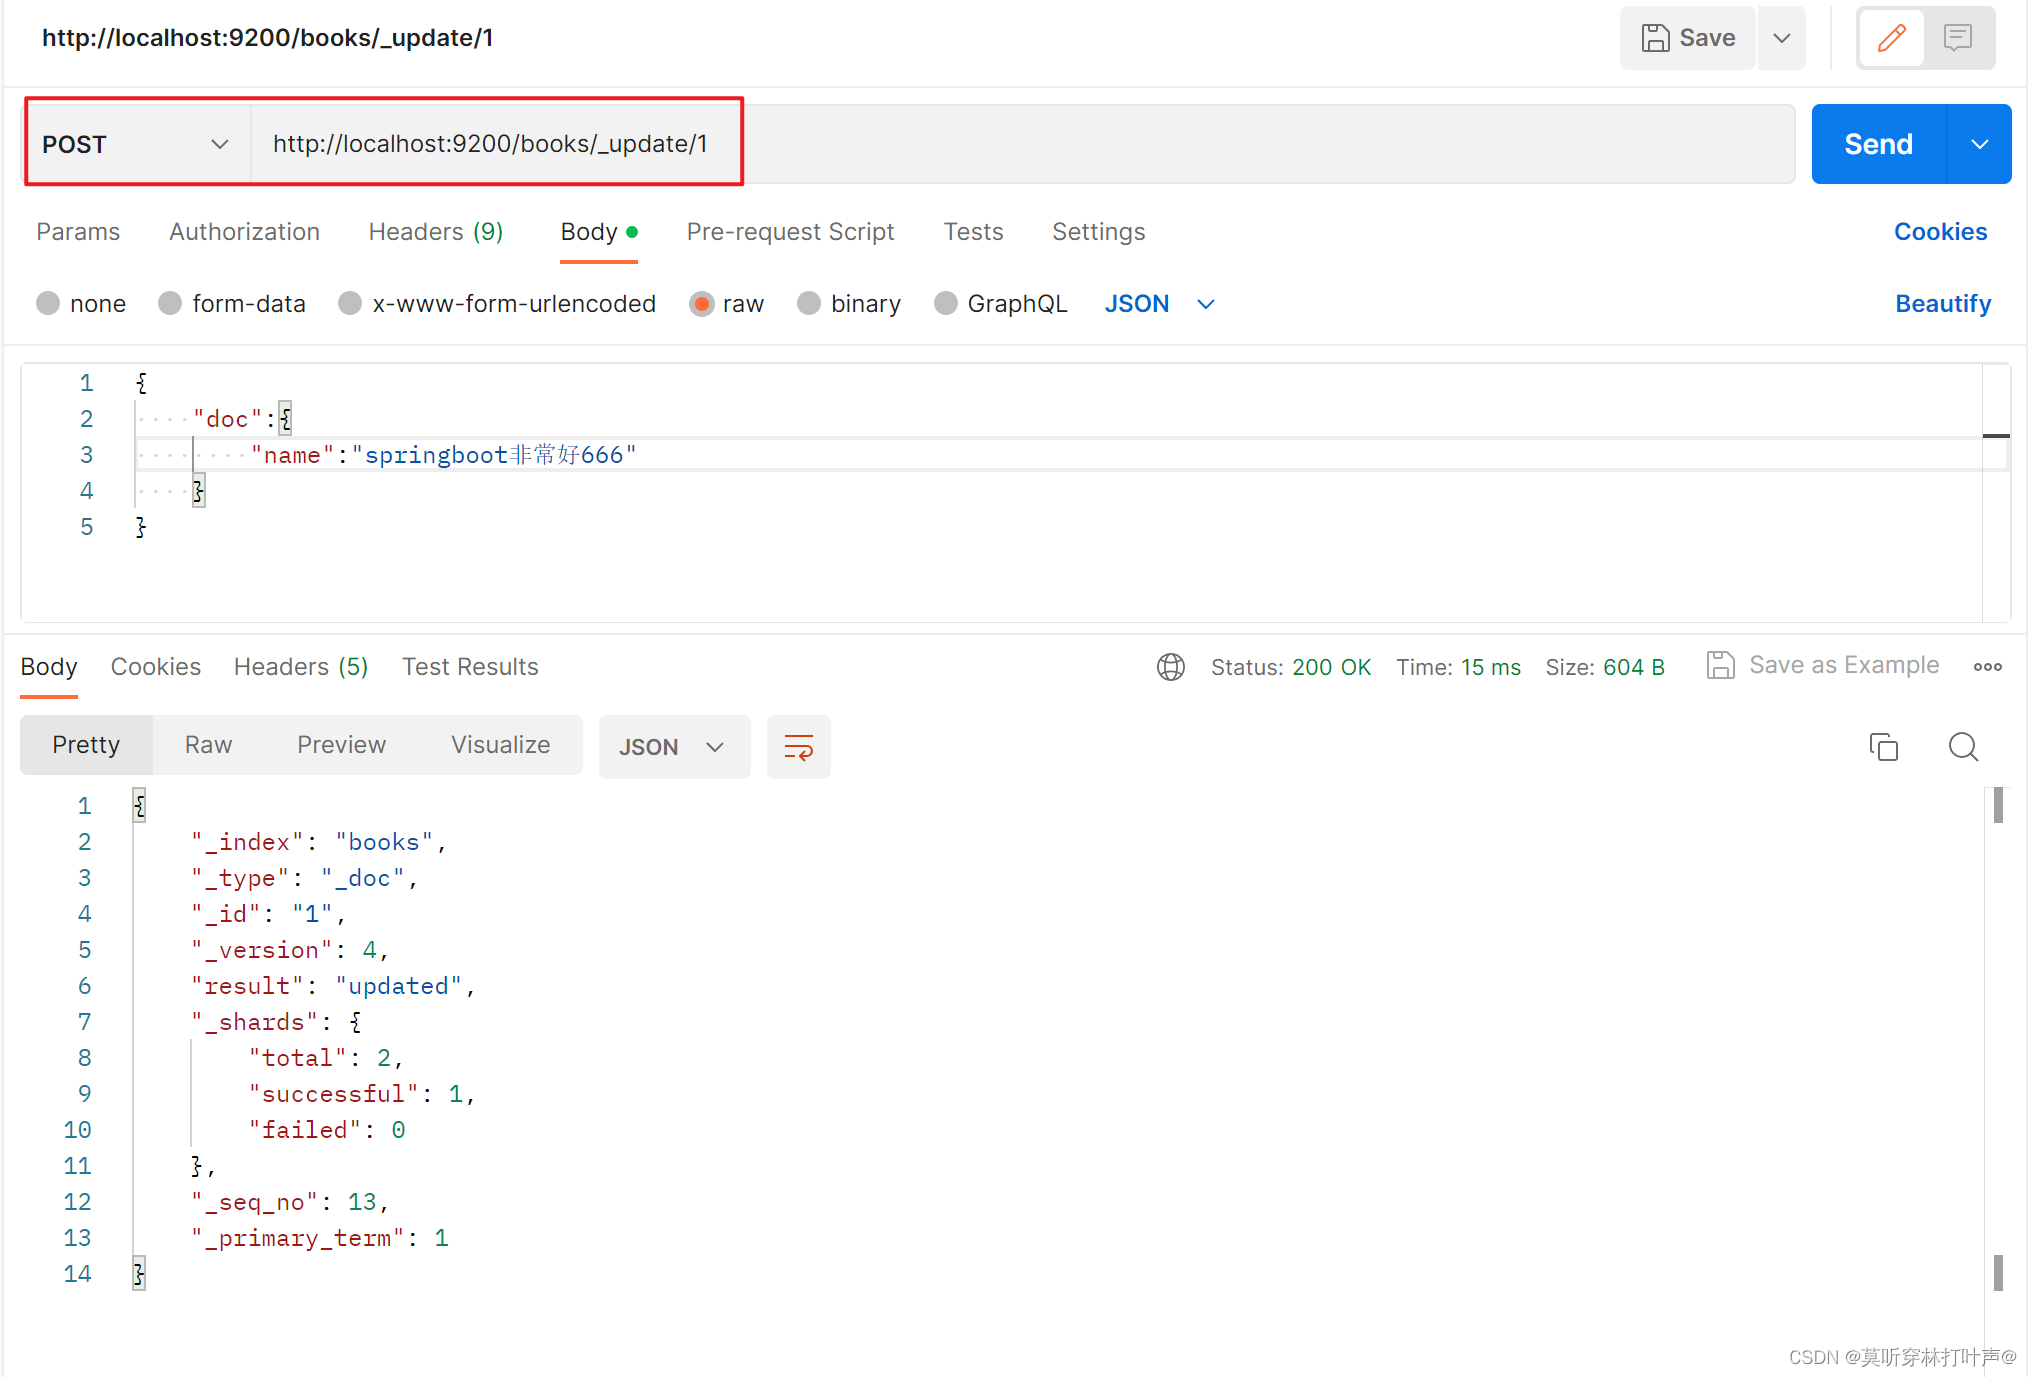
再次查询一下,只有修改的变了。
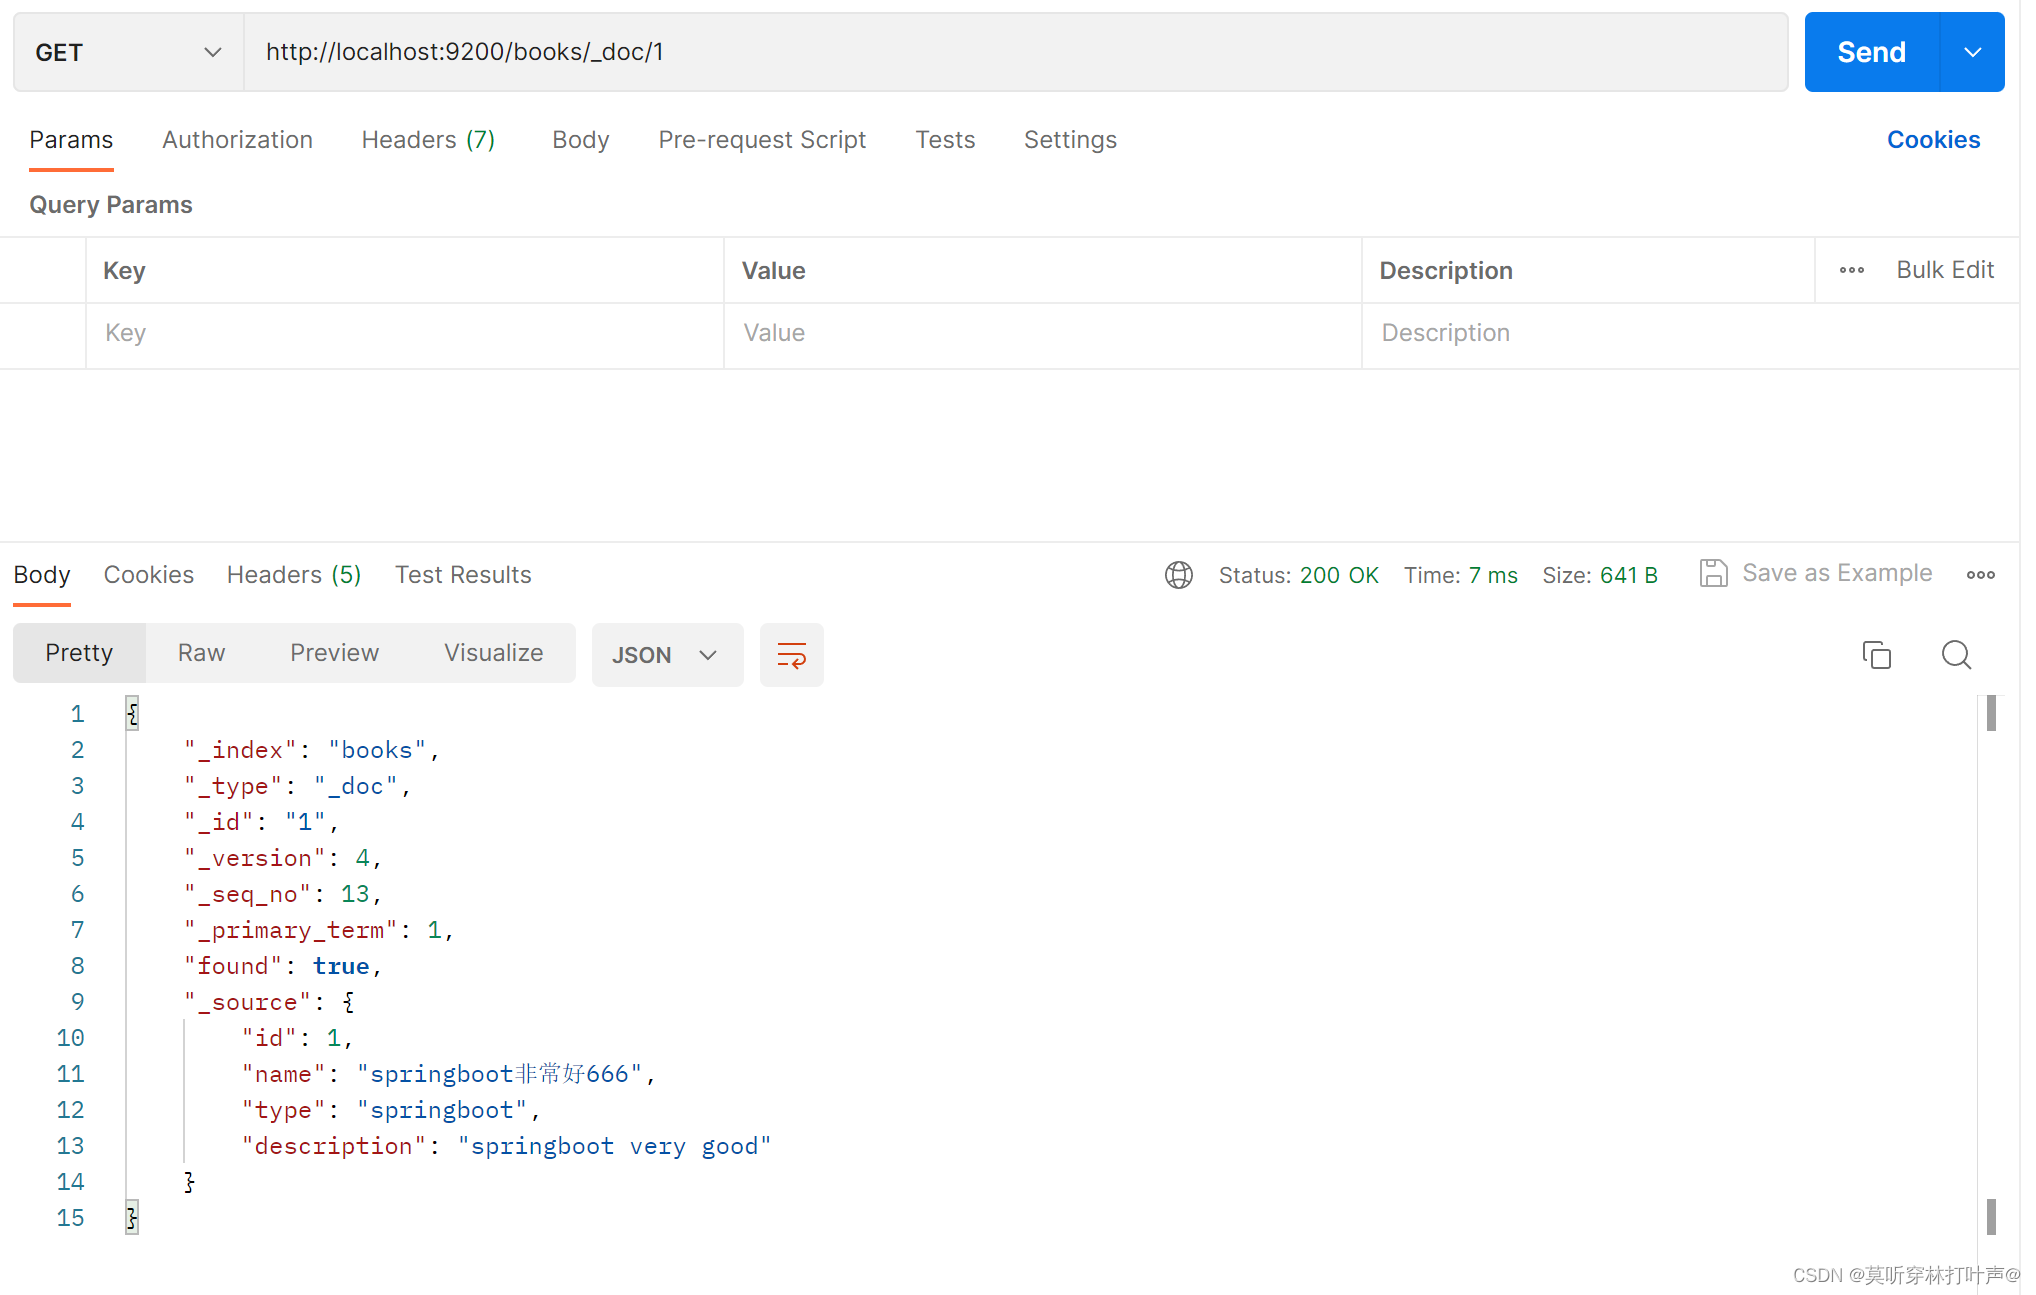
ElasticSearch(ES)总结:
创建文档:有三种方式。POST http://localhost:9200/books/_doc #使用系统生成id POST http://localhost:9200/books/_create/1 #使用指定id POST http://localhost:9200/books/_doc/1 #使用指定id,不存在创建,存在更新(版本递增)- 1
- 2
- 3
查询文档:
GET http://localhost:9200/books/_doc/1 #查询单个文档 GET http://localhost:9200/books/_search #查询全部文档- 1
- 2
条件查询:
GET http://localhost:9200/books/_search?q=name:springboot- 1
删除文档:
DELETE http://localhost:9200/books/_doc/1- 1
修改文档(全量修改)
PUT http://localhost:9200/books/_doc/1- 1
修改文档(部分修改):对文档中的某个属性,不是对整个文档进行操作(其余都是对一整个文档进行操作的)。
POST http://localhost:9200/books/_update/1- 1
SpringBoot整合ES客户端:
直接整合高级别的客户端:
先导入starter<dependency> <groupId>org.elasticsearch.clientgroupId> <artifactId>elasticsearch-rest-high-level-clientartifactId> dependency>- 1
- 2
- 3
- 4
再写配置文件:配置文件不用写,采用的是硬编码的方式。
在SpringBoot里创建ES客户端:@Test void testCreateIndex() throws IOException { //创建客户端 HttpHost host=HttpHost.create("http://localhost:9200"); RestClientBuilder builder=RestClient.builder(host); client= new RestHighLevelClient(builder); //使用客户端发送了一个请求,创建了一个名称为books的索引 CreateIndexRequest request=new CreateIndexRequest("books"); client.indices().create(request, RequestOptions.DEFAULT); //关闭客户端 client.close(); }- 1
- 2
- 3
- 4
- 5
- 6
- 7
- 8
- 9
- 10
- 11
- 12
- 13
- 14
在SpringBoot中创建索引:
@Test void testCreateIndexByIk() throws IOException { //创建客户端 HttpHost host=HttpHost.create("http://localhost:9200"); RestClientBuilder builder=RestClient.builder(host); client= new RestHighLevelClient(builder); //使用客户端发送了一个请求,创建了一个名称为books的索引 CreateIndexRequest request=new CreateIndexRequest("books"); String json="{\n" + " \"mappings\":{\n" + " \"properties\":{\n" + " \"id\":{\n" + " \"type\":\"keyword\"\n" + " },\n" + " \"name\":{\n" + " \"type\":\"text\",\n" + " \"analyzer\":\"ik_max_word\",\n" + " \"copy_to\":\"all\"\n" + " },\n" + " \"type\":{\n" + " \"type\":\"keyword\"\n" + " },\n" + " \"description\":{\n" + " \"type\":\"text\",\n" + " \"analyzer\":\"ik_max_word\",\n" + " \"copy_to\":\"all\"\n" + " },\n" + " \"all\":{\n" + " \"type\":\"text\",\n" + " \"analyzer\":\"ik_max_word\"\n" + " }\n" + " }\n" + " }\n" + "}"; //设置请求中的参数 request.source(json, XContentType.JSON); client.indices().create(request, RequestOptions.DEFAULT); //关闭客户端 client.close(); }- 1
- 2
- 3
- 4
- 5
- 6
- 7
- 8
- 9
- 10
- 11
- 12
- 13
- 14
- 15
- 16
- 17
- 18
- 19
- 20
- 21
- 22
- 23
- 24
- 25
- 26
- 27
- 28
- 29
- 30
- 31
- 32
- 33
- 34
- 35
- 36
- 37
- 38
- 39
- 40
- 41
- 42
添加单个文档:
//添加文档 @Test void testCreateDoc() throws IOException { //创建客户端 HttpHost host=HttpHost.create("http://localhost:9200"); RestClientBuilder builder=RestClient.builder(host); client= new RestHighLevelClient(builder); Book book = bookDao.selectById(1); IndexRequest request=new IndexRequest("books").id(book.getId().toString()); String json= JSON.toJSONString(book); request.source(json,XContentType.JSON); client.index(request,RequestOptions.DEFAULT); //关闭客户端 client.close(); }- 1
- 2
- 3
- 4
- 5
- 6
- 7
- 8
- 9
- 10
- 11
- 12
- 13
- 14
- 15
- 16
- 17
- 18
- 19
添加多个文档:
//添加全部文档 @Test void testCreateDocAll() throws IOException { //创建客户端 HttpHost host=HttpHost.create("http://localhost:9200"); RestClientBuilder builder=RestClient.builder(host); client= new RestHighLevelClient(builder); //把所有东西都查出来,造一个批处理请求的容器 List<Book> bookList = bookDao.selectList(null); BulkRequest bulk=new BulkRequest(); for (Book book : bookList) { IndexRequest request=new IndexRequest("books").id(book.getId().toString()); String json= JSON.toJSONString(book); request.source(json,XContentType.JSON); bulk.add(request); } client.bulk(bulk,RequestOptions.DEFAULT); //关闭客户端 client.close(); }- 1
- 2
- 3
- 4
- 5
- 6
- 7
- 8
- 9
- 10
- 11
- 12
- 13
- 14
- 15
- 16
- 17
- 18
- 19
- 20
- 21
- 22
查询文档:
//按id查询 @Test void testGet() throws IOException { //创建客户端 HttpHost host=HttpHost.create("http://localhost:9200"); RestClientBuilder builder=RestClient.builder(host); client= new RestHighLevelClient(builder); GetRequest request=new GetRequest("books","1"); GetResponse response = client.get(request, RequestOptions.DEFAULT); String json = response.getSourceAsString(); System.out.println(json); //关闭客户端 client.close(); } //按条件查询 @Test void testSearch() throws IOException { //创建客户端 HttpHost host=HttpHost.create("http://localhost:9200"); RestClientBuilder builder=RestClient.builder(host); client= new RestHighLevelClient(builder); //查books索引 SearchRequest request=new SearchRequest("books"); //设置条件 如果还有条件继续往里排就行 SearchSourceBuilder builder1=new SearchSourceBuilder(); builder1.query(QueryBuilders.termQuery("all","1")); request.source(builder1); SearchResponse response = client.search(request, RequestOptions.DEFAULT); //查询到的结果如何显示出来 SearchHits hits = response.getHits(); for (SearchHit hit : hits) { String source = hit.getSourceAsString(); // System.out.println(source); Book book = JSON.parseObject(source, Book.class); System.out.println(book); } //关闭客户端 client.close(); }- 1
- 2
- 3
- 4
- 5
- 6
- 7
- 8
- 9
- 10
- 11
- 12
- 13
- 14
- 15
- 16
- 17
- 18
- 19
- 20
- 21
- 22
- 23
- 24
- 25
- 26
- 27
- 28
- 29
- 30
- 31
- 32
- 33
- 34
- 35
- 36
- 37
- 38
- 39
- 40
- 41
- 42
- 43
- 44
- 45
- 46
- 47
- 48
- 49
-
相关阅读:
springboot面向园区管理的物联网云平台设计与实现毕业设计源码150916
最大流之上下界可行流
Csgo 控制台——代码
85:第七章:开发前台首页、作家个人展示页、粉丝等功能:6:作家个人展示页,展示该作者的可展示文章列表,近期佳文;
【代码随想录】-栈和队列专栏(Java)
豆瓣图书评分数据的可视化分析
分布式链路追踪系统zipkin【杭州多测师_王sir】
支付分账户系统——新美业连锁的交易数字化破局之道
详解JVM垃圾回收
Linux的iproute2 : ip address ip route ip link 笔记221103
- 原文地址:https://blog.csdn.net/weixin_45703331/article/details/130770094
