前言
这是一篇ChatGPT插件开发教程,描述如何使用 ASP.NET Core Minimal API 开发 ChatGPT 插件,以最简单的 Todo List 指导示例作为入门教程。
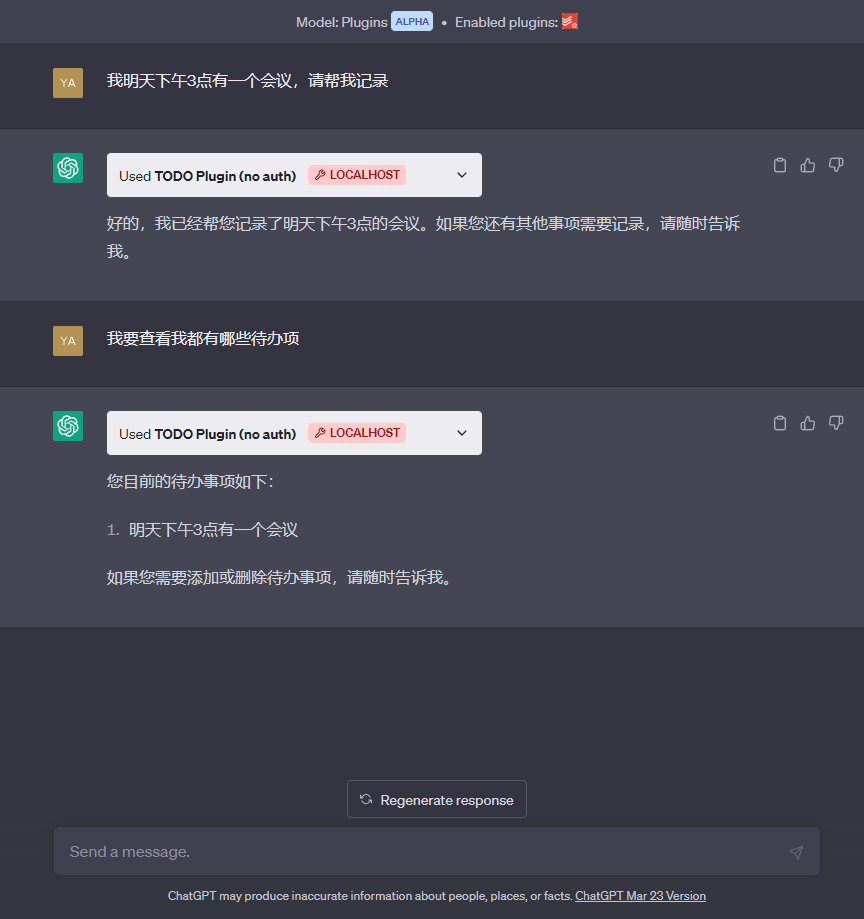
这个Todo List插件主要功能是以自然语言的方式向ChatGPT发起指令,ChatGPT将根据合适的时机选择调用此插件。例如:我明天下午3点有一个会议,请帮我记录。此时 ChatGPT将会根据插件的元数据功能描述,然后选择调用插件,将明天下午3点有一个会议通过API记录到待办列表中。
环境准备
首先你需要有一个开通了 Plugins 模块的账号,然后你才能进行调试使用。如果你没有可以在这里申请加入等待列表。说明一下,我是Plus用户,我在提交了申请列表大概过了2-3周左右收到的开通邮件。
在提交申请的时候,最好选择 "I am a developer and want to build a plugin",然后填写较为充分的理由,这样更容易通过一些。
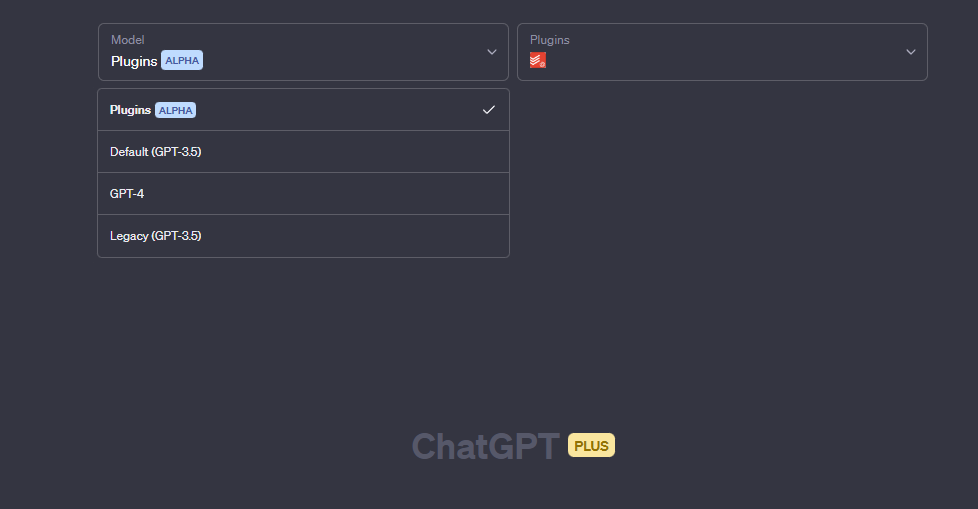
开通完成后,你可以在界面上看到列表中出现 Model 中可以选择 Plugins 选项。

概念说明
整体上,构建 ChatGPT 插件需要3个步骤,
- 构建服务端 API
- 启用 Swagger OpenApi 接口描述
- 创建一个插件清单文件,描述插件元数据信息
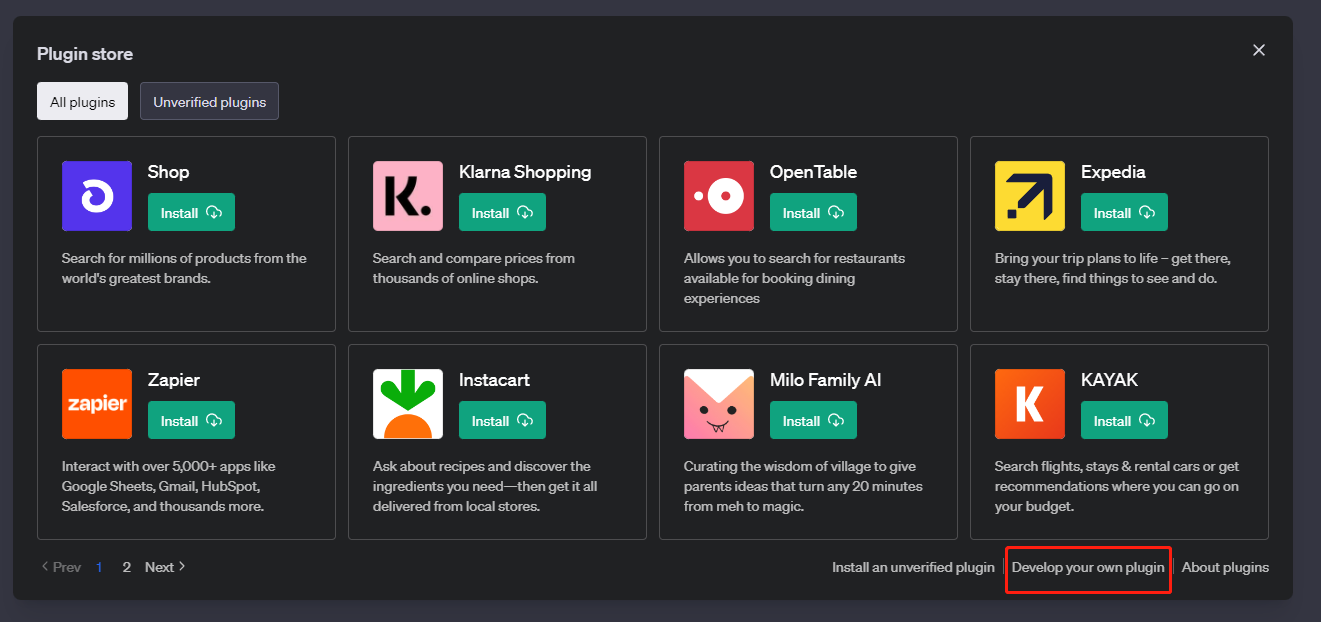
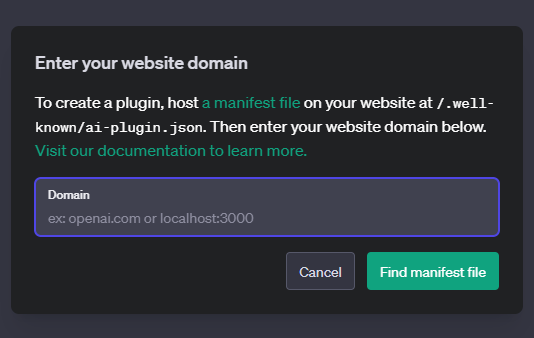
完成之后,你可以在界面上打开 Plugin Store,然后选择 Develop your own Plugin,填入本地 Api 地址即可。


使用 ASP.NET Core Minimal 开发服务端 API
为了简单起见,我们的接口不进行授权(No Auth),主要分为几个部分:
- 编写ai-plugin.json元数据文件
- 启用跨域
- 启用Swagger,并详细描述接口参数
- 编写接口代码
编写 ai-plugin.json元数据文件
每个插件都需要一个 ai-plugin.json 文件,该文件需要托管在API的域中。例如,一家名为 example.com 的公司将通过 https://example.com 域访问插件JSON文件,因为这是他们的API托管的地方。
当通过ChatGPT UI安装插件时,ChatGPT会查找位于 /.well-known/ai-plugin.json 的文件,以便和插件进行连接。如果找不到文件,则无法安装插件。对于本地开发,可以使用HTTP,要指向远程服务器,则需要HTTPS。
新建一个 ai-plugin.json 清单文件,填入以下内容:
{
  "schema_version": "v1",
  "name_for_human": "TODO Plugin (no auth)",
  "name_for_model": "todo",
  "description_for_human": "Plugin for managing a TODO list, you can add, remove and view your TODOs.",
  "description_for_model": "Plugin for managing a TODO list, you can add, remove and view your TODOs.",
  "auth": {
    "type": "none"
  },
  "api": {
    "type": "openapi",
    "url": "http://localhost:5000/openapi.yaml",
    "is_user_authenticated": false
  },
  "logo_url": "http://localhost:5000/logo.png",
  "contact_email": "legal@example.com",
  "legal_info_url": "http://example.com/legal"
}
内容很简单,需要说明的有2处。
- api:url 这个是指向 swagger 的 openapi描述文件,需要在服务端暴露出来。
- description_for_model 这个是当用户的指令可能有插件的潜在请求查询时,模型会查看该描述,您可能测试多个提示和描述,以查看哪些最有效。
description_for_model 属性让你可以自由地指导模型如何使用你的插件。总的来说,ChatGPT背后的语言模型非常能够理解自然语言并遵循指令。因此,这是一个很好的地方,可以放置关于插件功能以及模型应该如何正确使用它的一般说明。使用自然语言,最好使用简洁、描述性和客观的语气。您可以查看一些示例,以了解这应该是什么样子。我们建议以“Plugin for ...”,然后枚举API提供的所有功能。
启用跨域
由于是在网页前端调用的本地localhost接口,所以需要接口启用跨域以支持 chat.openai.com 的访问。
在 ASP.NET Core启用跨域很简单。
builder.Services.AddCors(x => x.AddDefaultPolicy(policyBuilder =>
    policyBuilder.WithOrigins("https://chat.openai.com").AllowAnyHeader().AllowAnyMethod()));

// 省略部分代码

app.UseCors();
启用Swagger,并详细描述接口参数
ChatGPT需要使用OpenAi V3版本,所以需要确保你引用了最新的 Swashbuckle.AspNetCore NuGet包。
builder.Services.AddSwaggerGen(c =>
{
    c.SwaggerDoc("openapi", new OpenApiInfo
    {
        Description = "A plugin that allows the user to create and manage a TODO list using ChatGPT. If you do not know the user's username, ask them first before making queries to the plugin. Otherwise, use the username \"global\".",
        Version = "v1",
        Title = "TODO Plugin"
    });
    c.AddServer(new OpenApiServer() { Url = "http://localhost:5000" });

    var xmlFilename = $"{Assembly.GetExecutingAssembly().GetName().Name}.xml";
    c.IncludeXmlComments(Path.Combine(AppContext.BaseDirectory, xmlFilename));
});

//省略部分代码

if (app.Environment.IsDevelopment())
{
    app.UseSwagger(x => x.RouteTemplate = "{documentName}.yaml");
    app.UseSwaggerUI(x =>
    {
        x.RoutePrefix = "";
        x.SwaggerEndpoint("/openapi.yaml", "TODO Plugin");
    });
}
我们配置 RoutePrefix=""以使主页即为swagger默认地址,配置 x.SwaggerEndpoint("/openapi.yaml", "TODO Plugin") 为 OpenAPI文件的访问地址,该地址和 ai-plgion.json中的地址要对应。
API 接口代码
我们使用 Minimal Api 来构建,代码中需要使用 OpenApi规范对参数进行详细描述,这样ChatGPT才能识别的更加准确。
var todos = new Dictionary<string, List<string>>();
app.MapPost("/todos/{username}", (string username, [FromBody] AddTodoRequest request) =>
{
var todo = request.Todo;
if (!todos.ContainsKey(username))
{
todos[username] = new List<string>();
}
todos[username].Add(todo);
return todo;
})
.Produces<string>()
.WithOpenApi(operation =>
{
operation.OperationId = "addTodo";
operation.Summary = "Add a todo to the list";
var parameter = operation.Parameters[0];
parameter.Description = "The name of the user.";
return operation;
});
app.MapGet("/todos/{username}", (string username) =>
Results.Json(todos.TryGetValue(username, out var todo) ? todo : Array.Empty<string>())
)
.Producesstring>>()
.WithOpenApi(operation =>
{
operation.OperationId = "getTodos";
operation.Summary = "Get the list of todos";
var parameter = operation.Parameters[0];
parameter.Description = "The name of the user.";
operation.Responses["200"].Description = "The list of todos";
return operation;
});
app.MapDelete("/todos/{username}", (string username, [FromBody] DeleteTodoRequest request) =>
{
var todoIdx = request.TodoIdx;
if (todos.ContainsKey(username) && 0 <= todoIdx && todoIdx < todos[username].Count)
{
todos[username].RemoveAt(todoIdx);
}
})
.Producesstring>>()
.WithOpenApi(operation =>
{
operation.OperationId = "getTodos";
operation.Summary = "Delete a todo from the list";
operation.Parameters[0].Description = "The name of the user.";
return operation;
});
app.MapGet("/logo.png", () => Results.File("logo.png", contentType: "image/png"))
.ExcludeFromDescription();
app.MapGet("/.well-known/ai-plugin.json", () => Results.File("ai-plugin.json", contentType: "text/json"))
.ExcludeFromDescription();
app.Run();
/// 测试插件

总结
以上,就是简单的使用 ASP.NET Core minimal api 开发的一个 Todo List插件,功能比较简单,基本上看下代码就懂了。
完整的代码我已经上传到了Github,大家可自行查看。
https://github.com/yang-xiaodong/chatgpt-aspnetcore-plugin
如果你觉得本篇文章对您有帮助的话,感谢您的【推荐】。