-
在线文档协同办公-开箱即用demo
服务安装(略)
下面开始集成
打开文件
1.创建一个空的html文件。
添加div元素,如下所示。<div id="placeholder">div>- 1
2.使用将用于您的网站的 JavaScript API 指定您的文档服务器链接。
<script type="text/javascript" src="文档服务器链接">script>- 1
3.添加脚本,使用要打开的文档的配置为 div 元素 初始化文档编辑器。
new DocsAPI.DocEditor( “placeholder” , {
“document” : {
“fileType” : “docx” ,
“key” : “Khirz6zTPdfd7” ,
“title” : “Example Document Title.docx” ,
“url” : “https: //example.com/url-to-example-document.docx”
}, “documentType” : “word”
});
4.在浏览器中打开您的html文件。保存文件
1.在文档编辑器初始化的配置脚本中,使用参数行中的回调处理程序指定文件的 URL
new DocsAPI.DocEditor( "placeholder" , { "document" : { "fileType" : "docx" , "key" : "Khirz6zTPdfd7" , "title" : "Example Document Title.docx" , "url" : "https: //example.com/url-to-example-document.docx" }, "documentType":"word", "editorConfig":{ "callbackUrl":"https://example.com/url-to-callback.ashx" } });- 1
- 2
- 3
- 4
- 5
- 6
- 7
- 8
- 9
- 10
- 11
- 12
2.回调示例(也可参考源码中的)
javapublic class IndexServlet extends HttpServlet { @Override protected void doPost(HttpServletRequest request, HttpServletResponse response) throws ServletException, IOException { PrintWriter writer = response.getWriter(); Scanner scanner = new Scanner(request.getInputStream()).useDelimiter("\\A"); String body = scanner.hasNext() ? scanner.next() : ""; JSONObject jsonObj = (JSONObject) new JSONParser().parse(body); if((long) jsonObj.get("status") == 2) { String downloadUri = (String) jsonObj.get("url"); URL url = new URL(downloadUri); java.net.HttpURLConnection connection = (java.net.HttpURLConnection) url.openConnection(); InputStream stream = connection.getInputStream(); File savedFile = new File(pathForSave); try (FileOutputStream out = new FileOutputStream(savedFile)) { int read; final byte[] bytes = new byte[1024]; while ((read = stream.read(bytes)) != -1) { out.write(bytes, 0, read); } out.flush(); } connection.disconnect(); } writer.write("{\"error\":0}"); } }- 1
- 2
- 3
- 4
- 5
- 6
- 7
- 8
- 9
- 10
- 11
- 12
- 13
- 14
- 15
- 16
- 17
- 18
- 19
- 20
- 21
- 22
- 23
- 24
- 25
- 26
- 27
- 28
- 29
- 30
- 31
- 32
- 33
- 34
共同编辑
##参考图和以下步骤说明了在文档服务器中共同编辑文档的过程。
[外链图片转存失败,源站可能有防盗链机制,建议将图片保存下来直接上传(img-HnOI7DGy-1670305691236)(img_2.png)]
1.用户 1 和用户 2 在文档编辑器中打开了一个相同的文档,即打开文件时使用了相同的document.key。
2.用户 1 对打开的文档进行更改。
3.文档编辑器将用户 1 所做的更改发送到文档编辑服务。
4.文档编辑服务将用户 1 所做的更改发送给用户 2文档编辑器。
5.现在这些更改对用户 2 可见。
##示例
1.创建一个空的html文件。
添加div元素,如下所示。<div id="placeholder">div>- 1
2.使用将用于您的网站的 JavaScript API 指定您的文档服务器链接。
<script type="text/javascript" src="文档服务器链接">script>- 1
3.添加脚本,使用要打开的文档的配置为 div 元素 初始化文档编辑器
new DocsAPI.DocEditor( "placeholder" , { "document" : { "fileType" : "docx" , "key" : "Khirz6zTPdfd7" , "title" : "Example Document Title.docx" , "url" : "https: //example.com/url-to-example-document.docx" }, "documentType":"word", "editorConfig":{ "user":{ "id":"78e1e841", "name":"John Smith" } } });- 1
- 2
- 3
- 4
- 5
- 6
- 7
- 8
- 9
- 10
- 11
- 12
- 13
- 14
- 15
4.在浏览器中打开您的html文件。
5.现在复制上面创建的html文件。
6.在复制的html文件中更改初始化文档编辑器的脚本。new DocsAPI.DocEditor( "placeholder" , { "document" : { "fileType" : "docx" , "key" : "Khirz6zTPdfd7" , "title" : "Example Document Title.docx" , "url" : "https: //example.com/url-to-example-document.docx" }, "documentType":"word", "editorConfig":{ "user":{ "id":"F89d8069ba2b", "name":"Kate Cage" } } });- 1
- 2
- 3
- 4
- 5
- 6
- 7
- 8
- 9
- 10
- 11
- 12
- 13
- 14
- 15
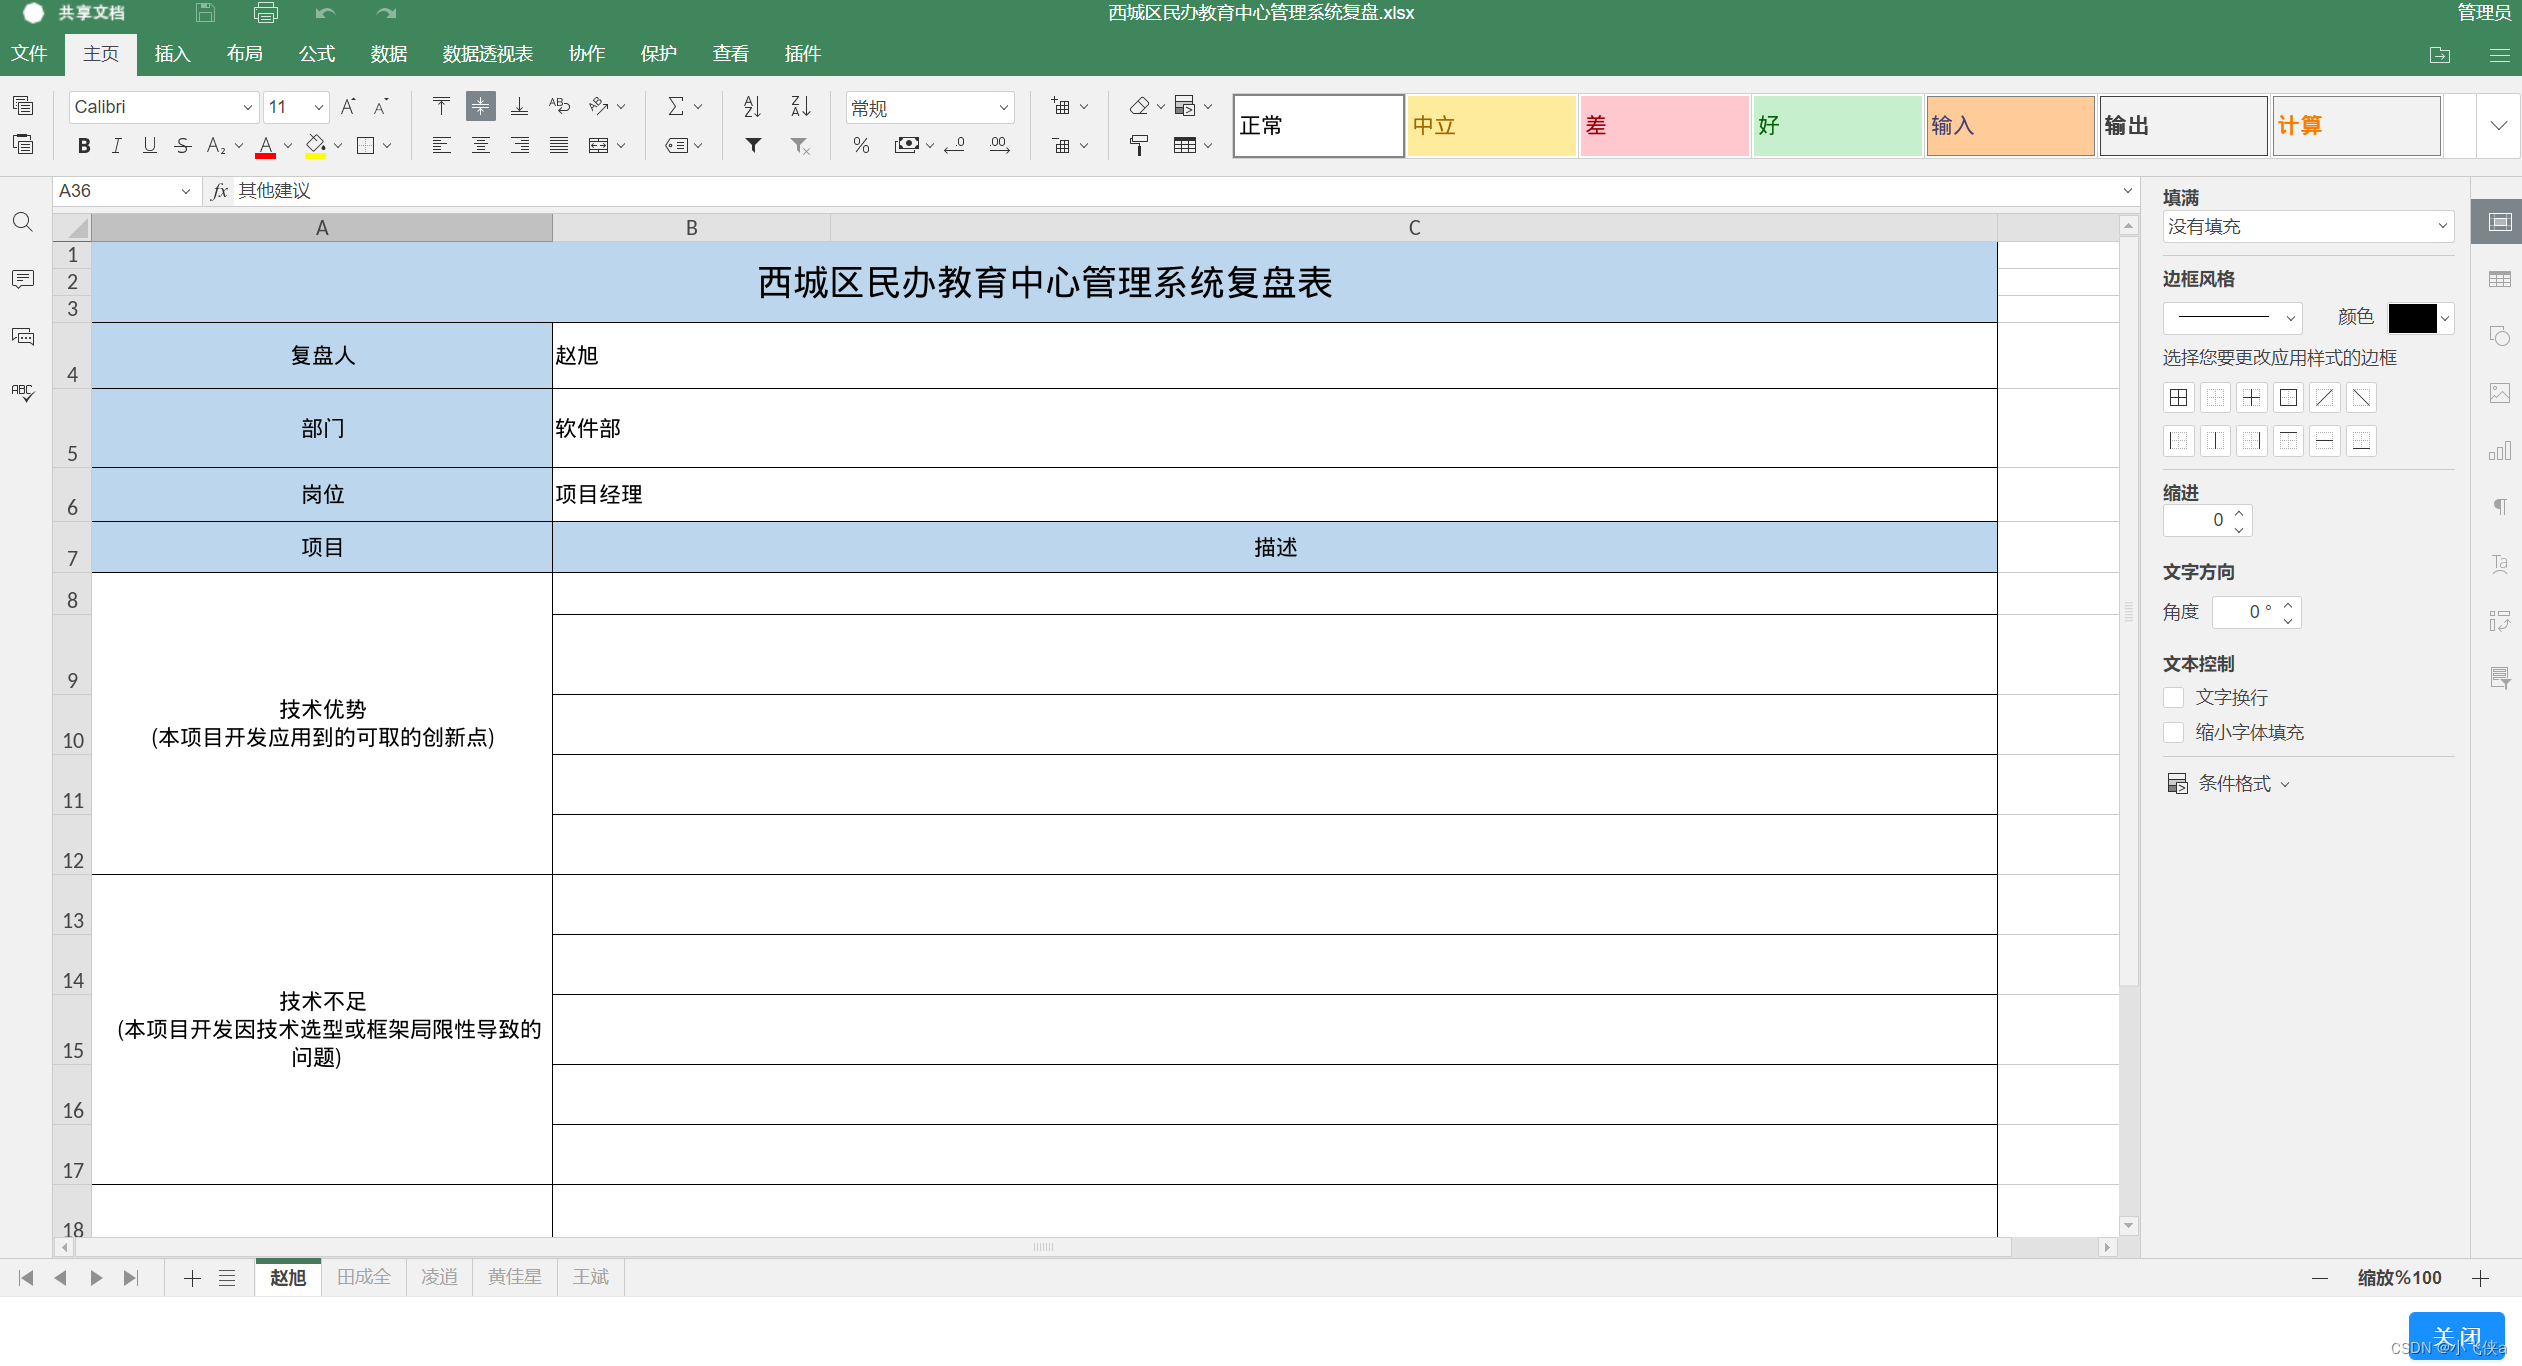
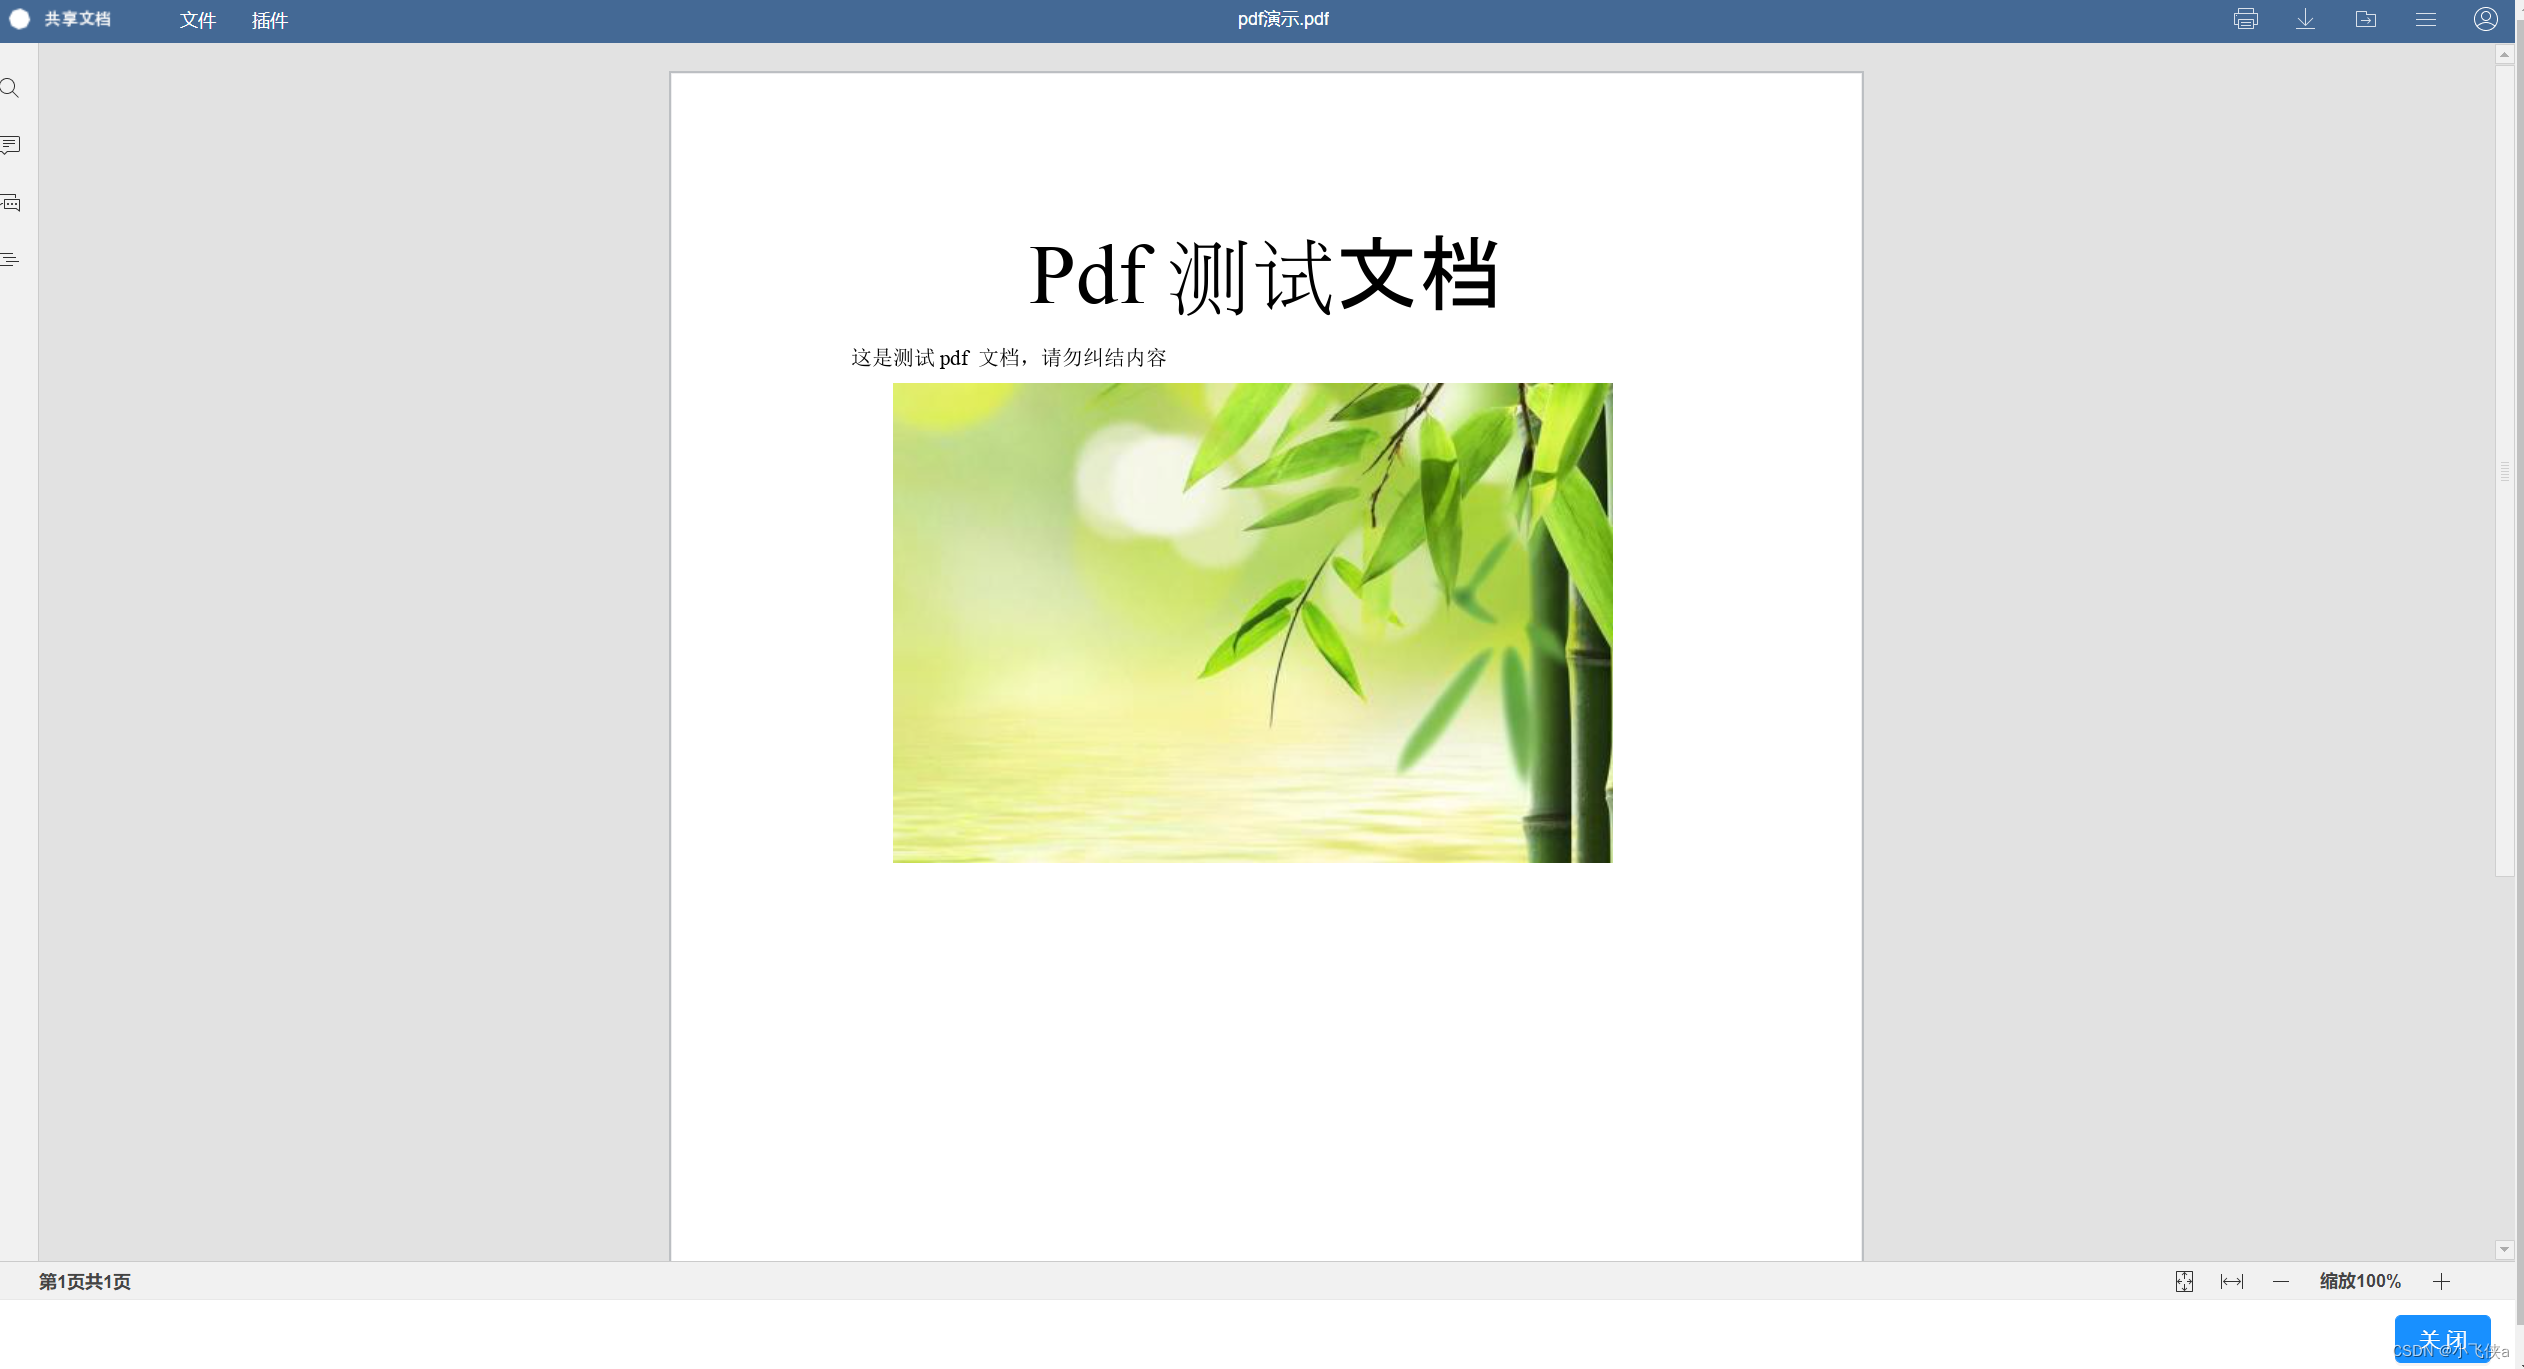
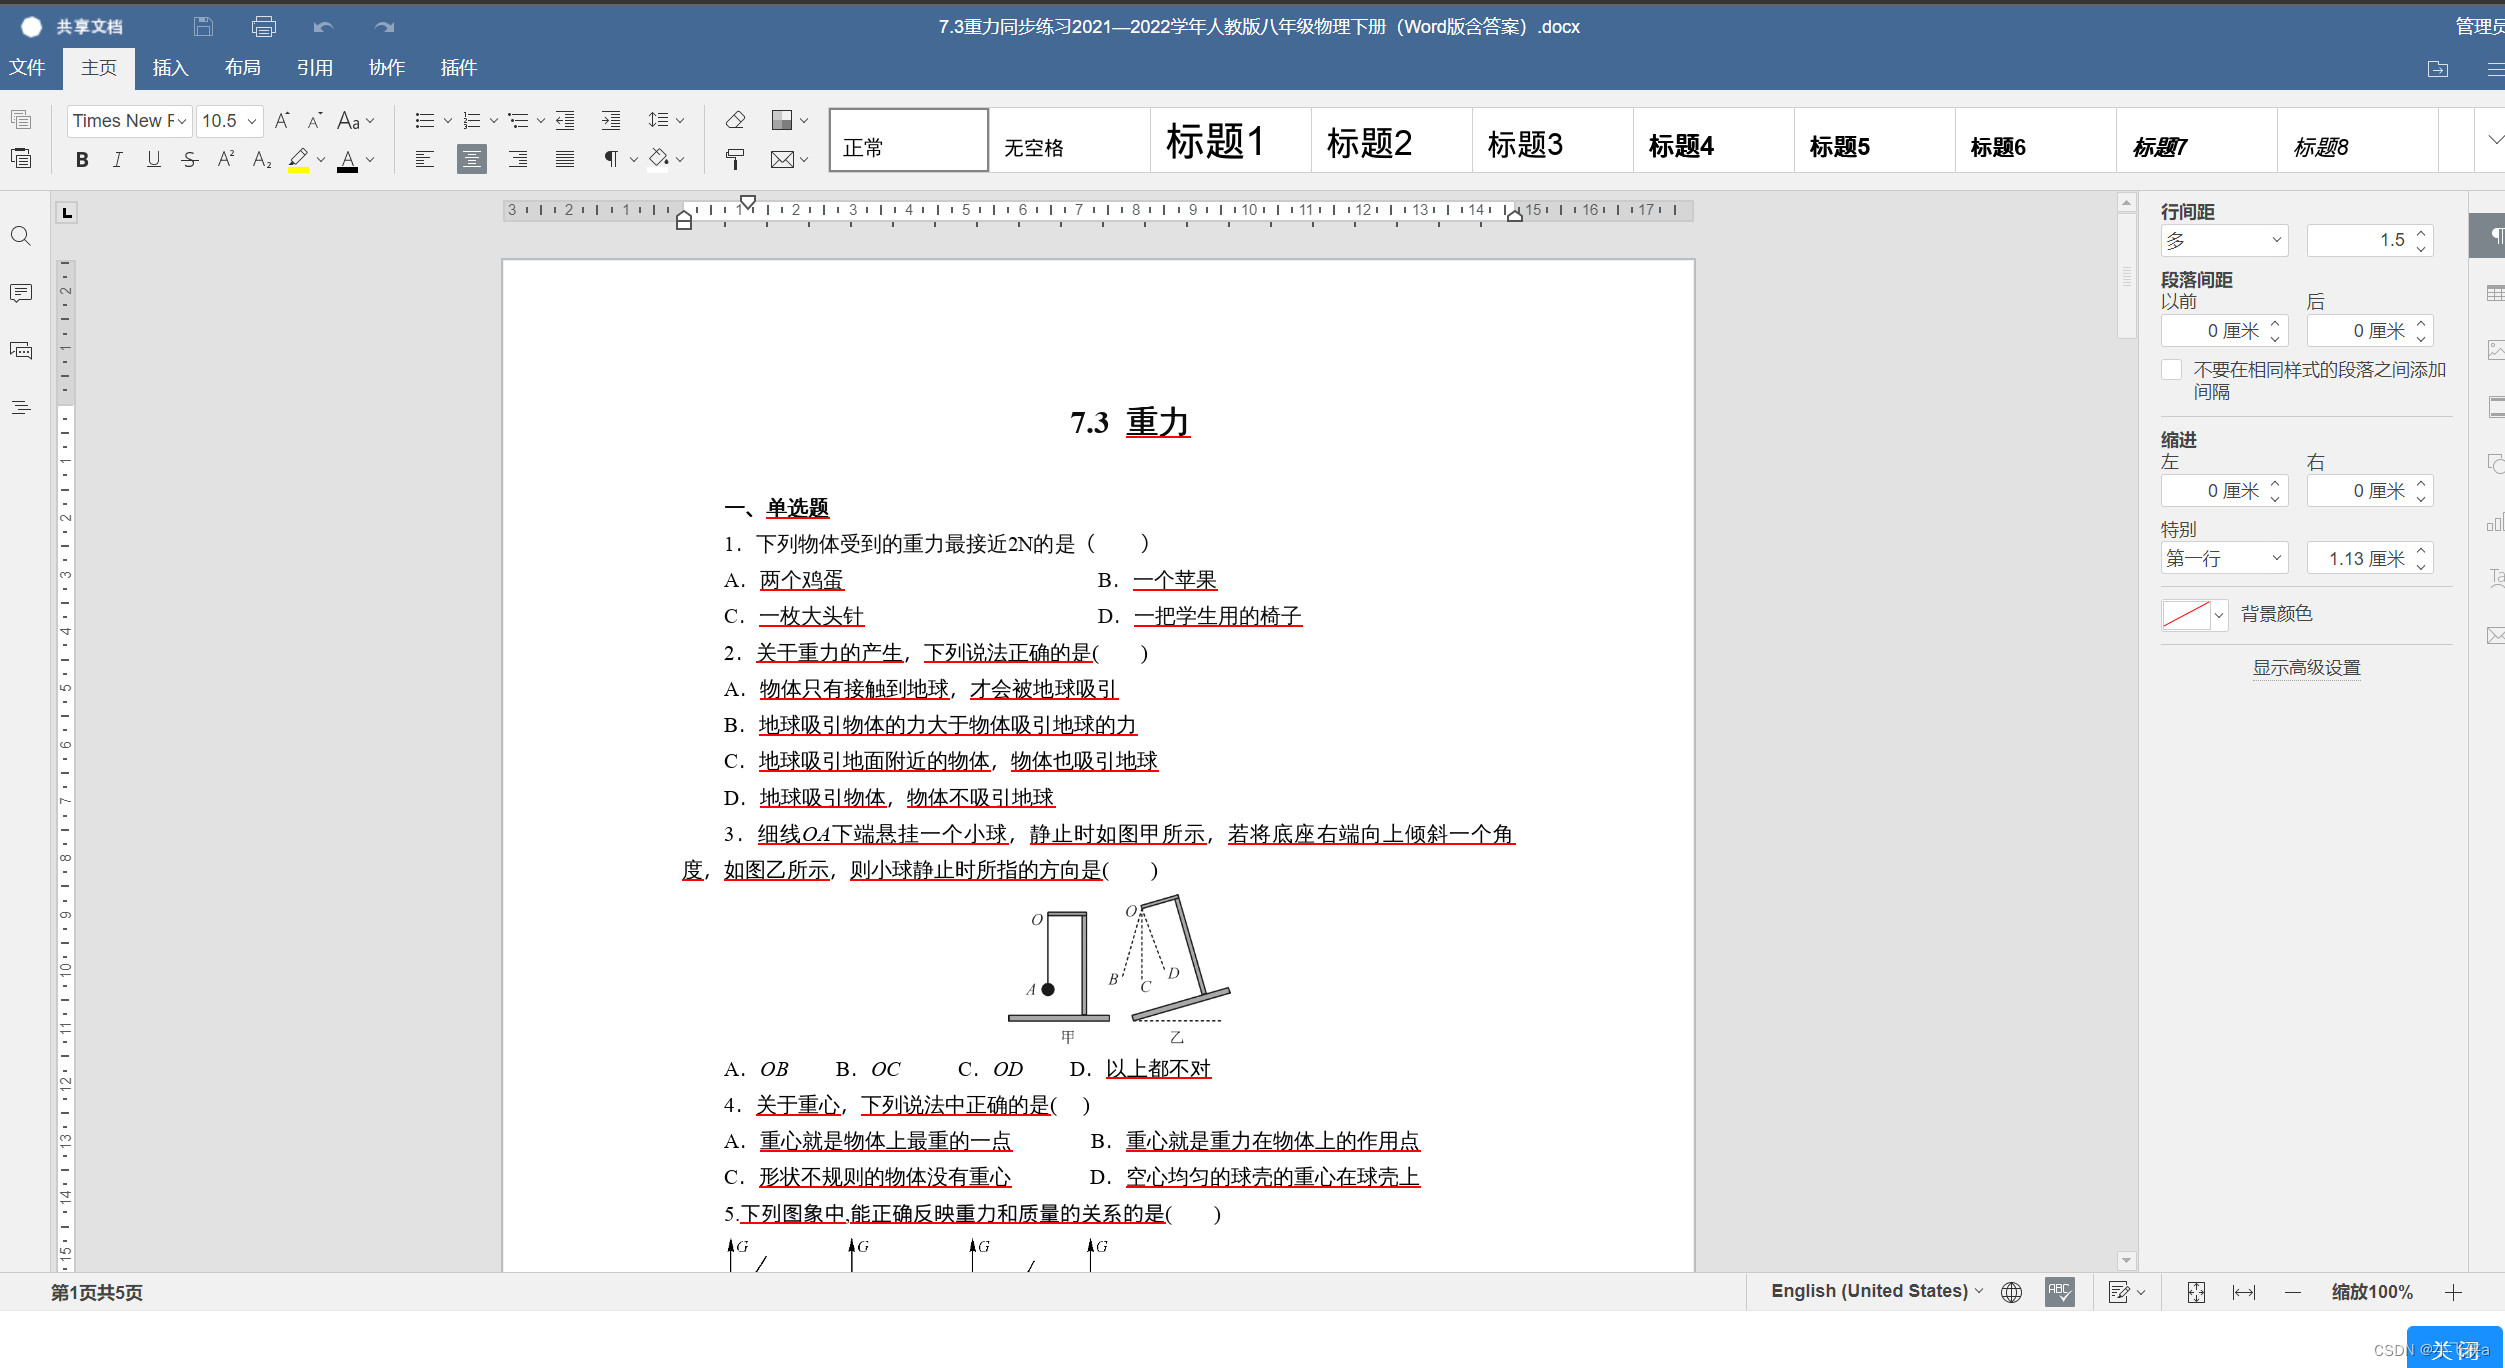
展示一下集成后的效果图
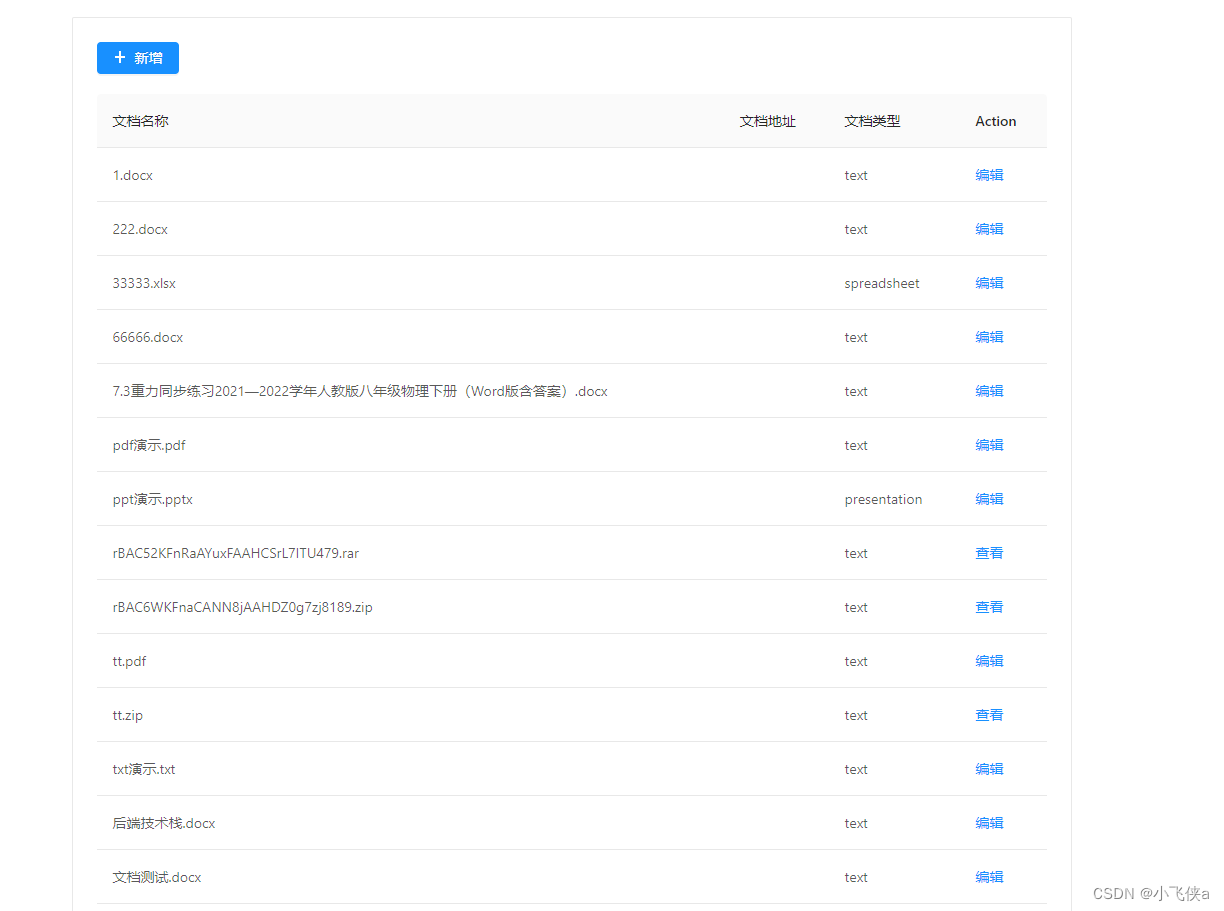
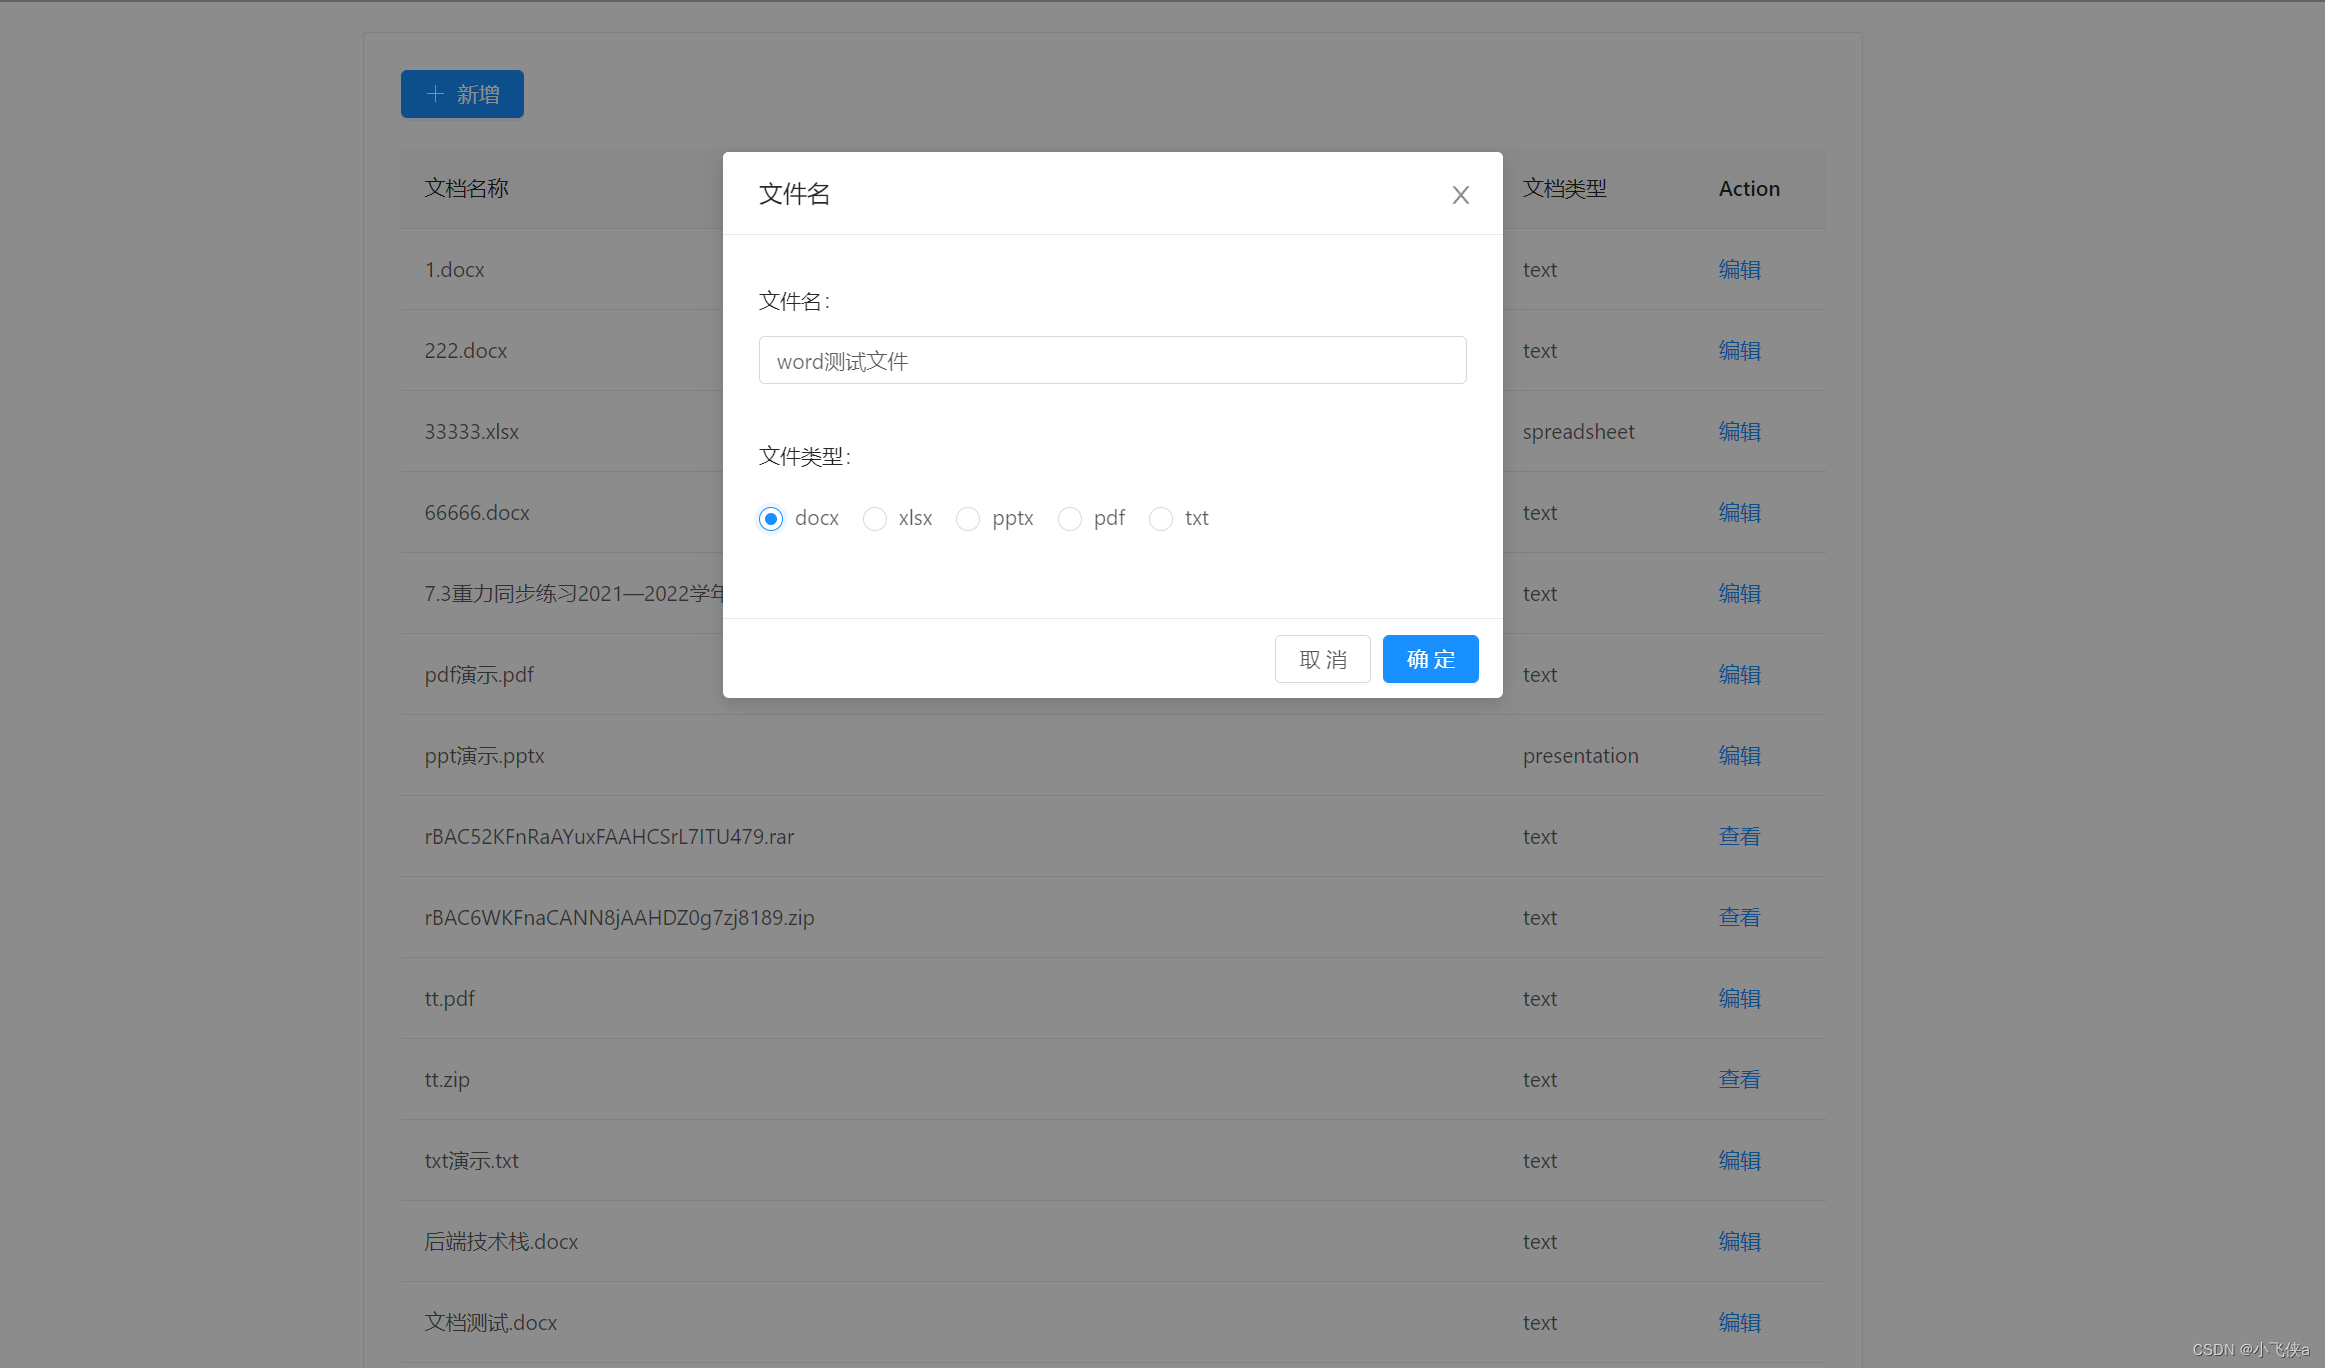
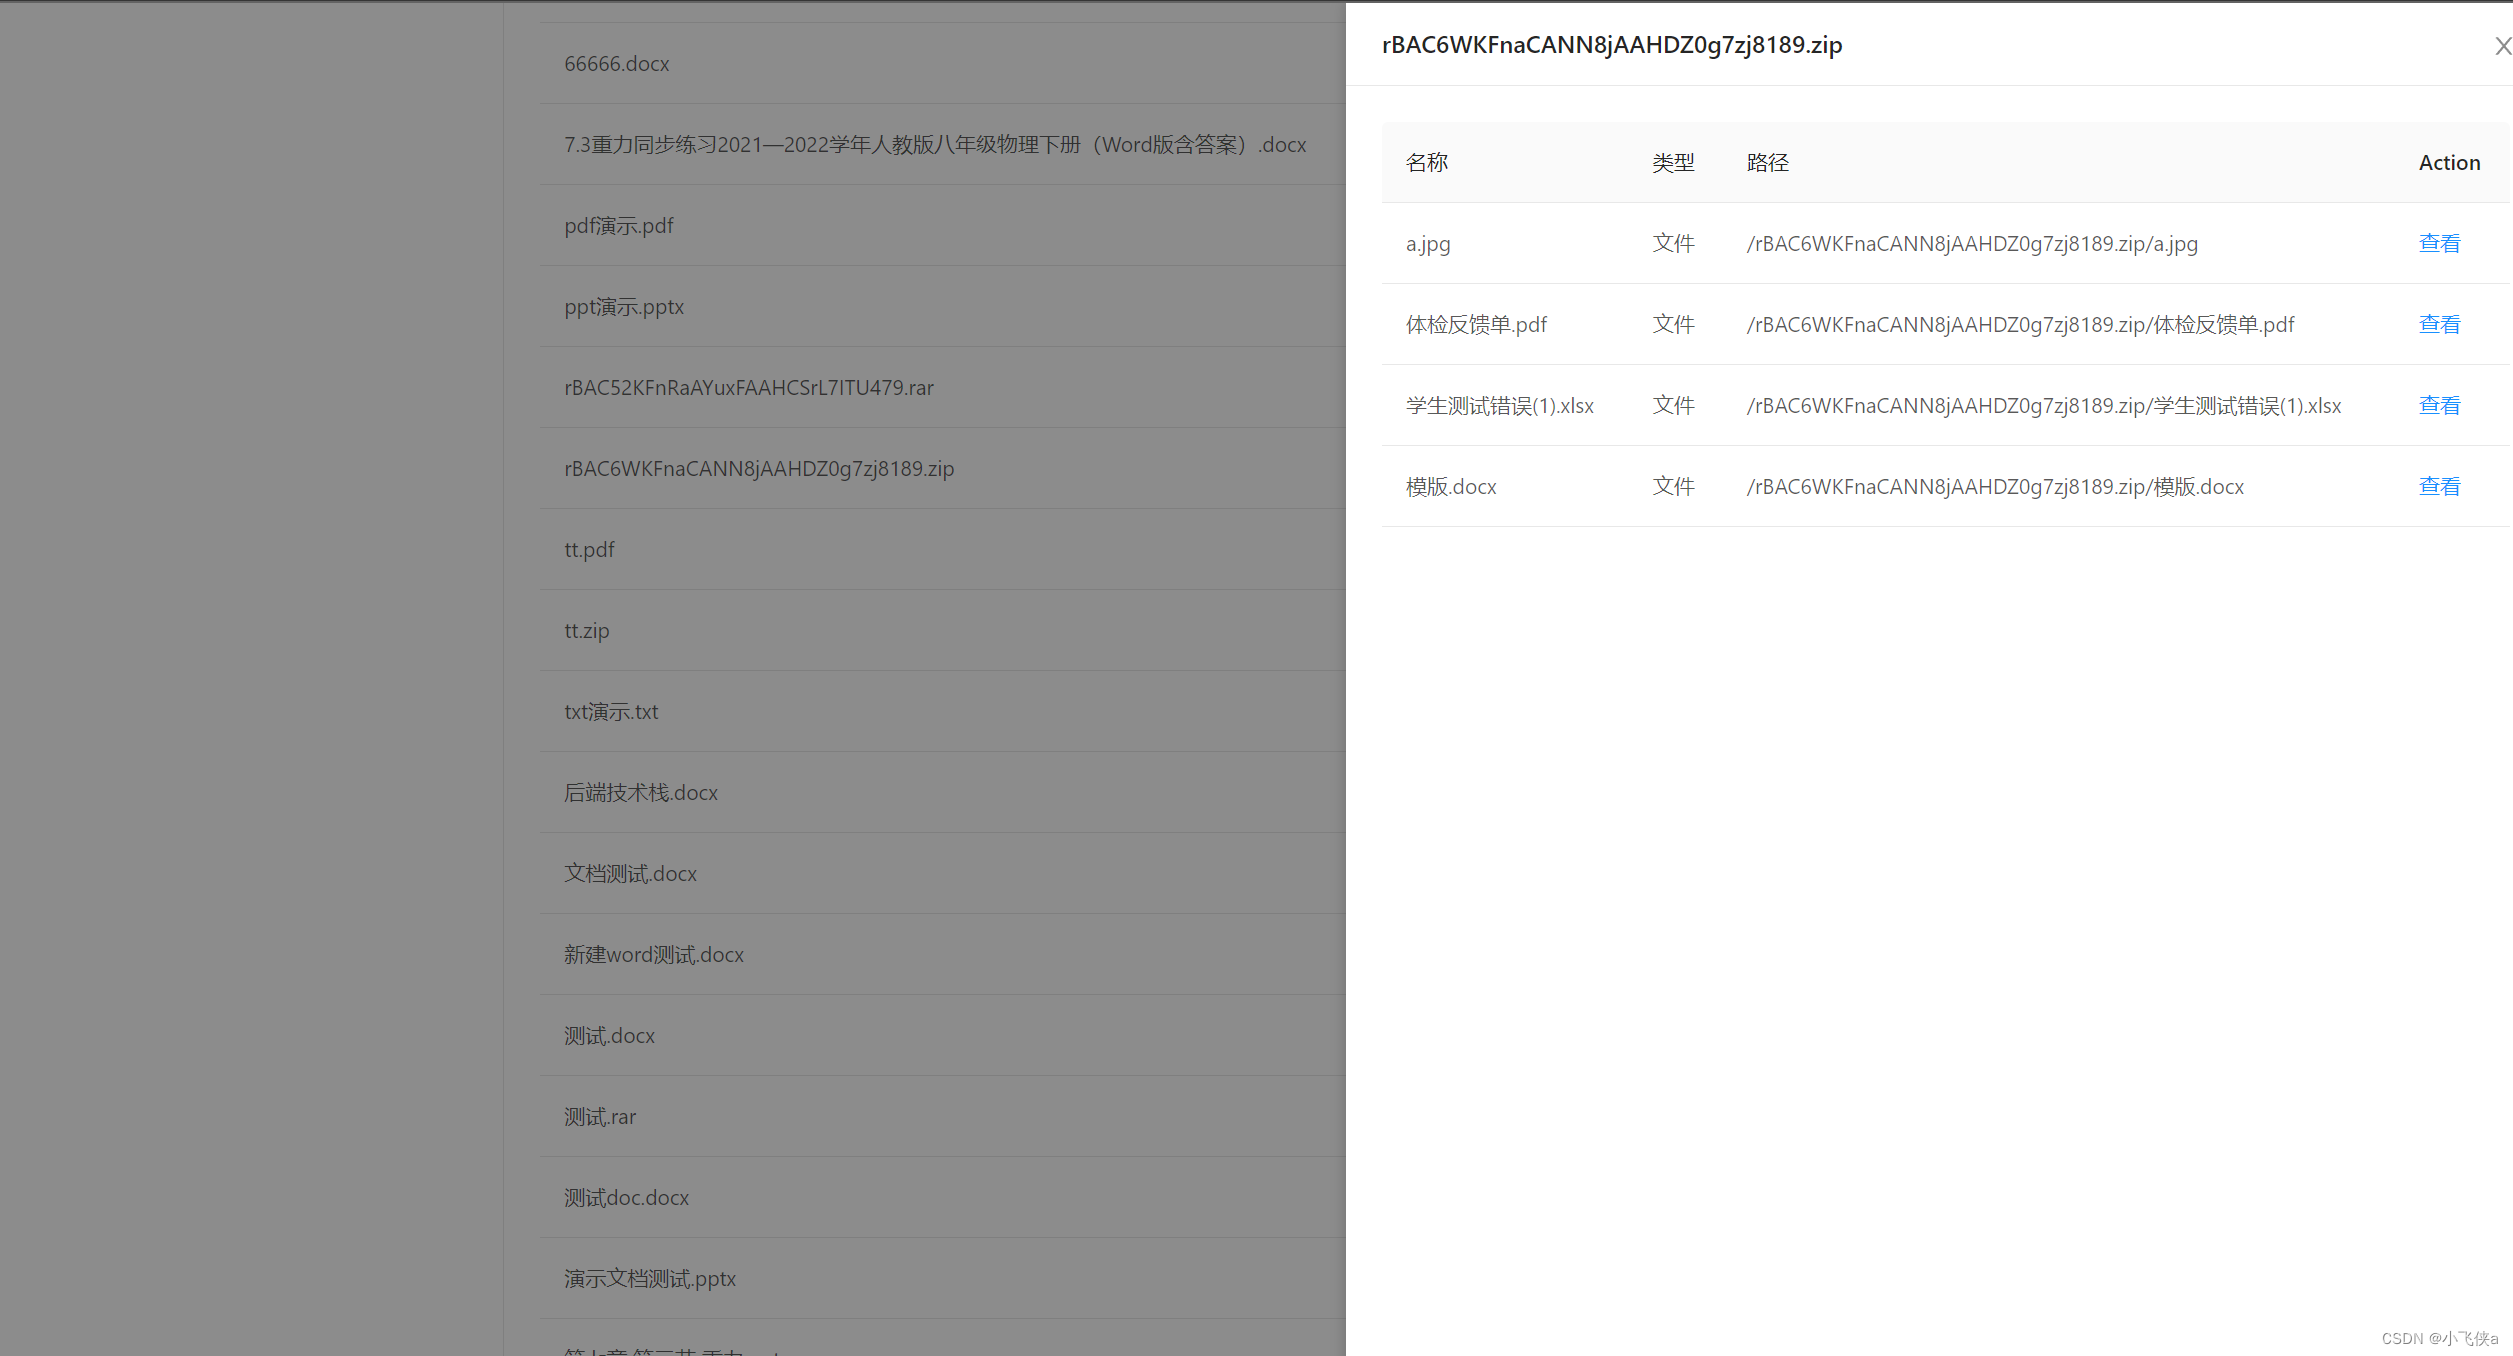
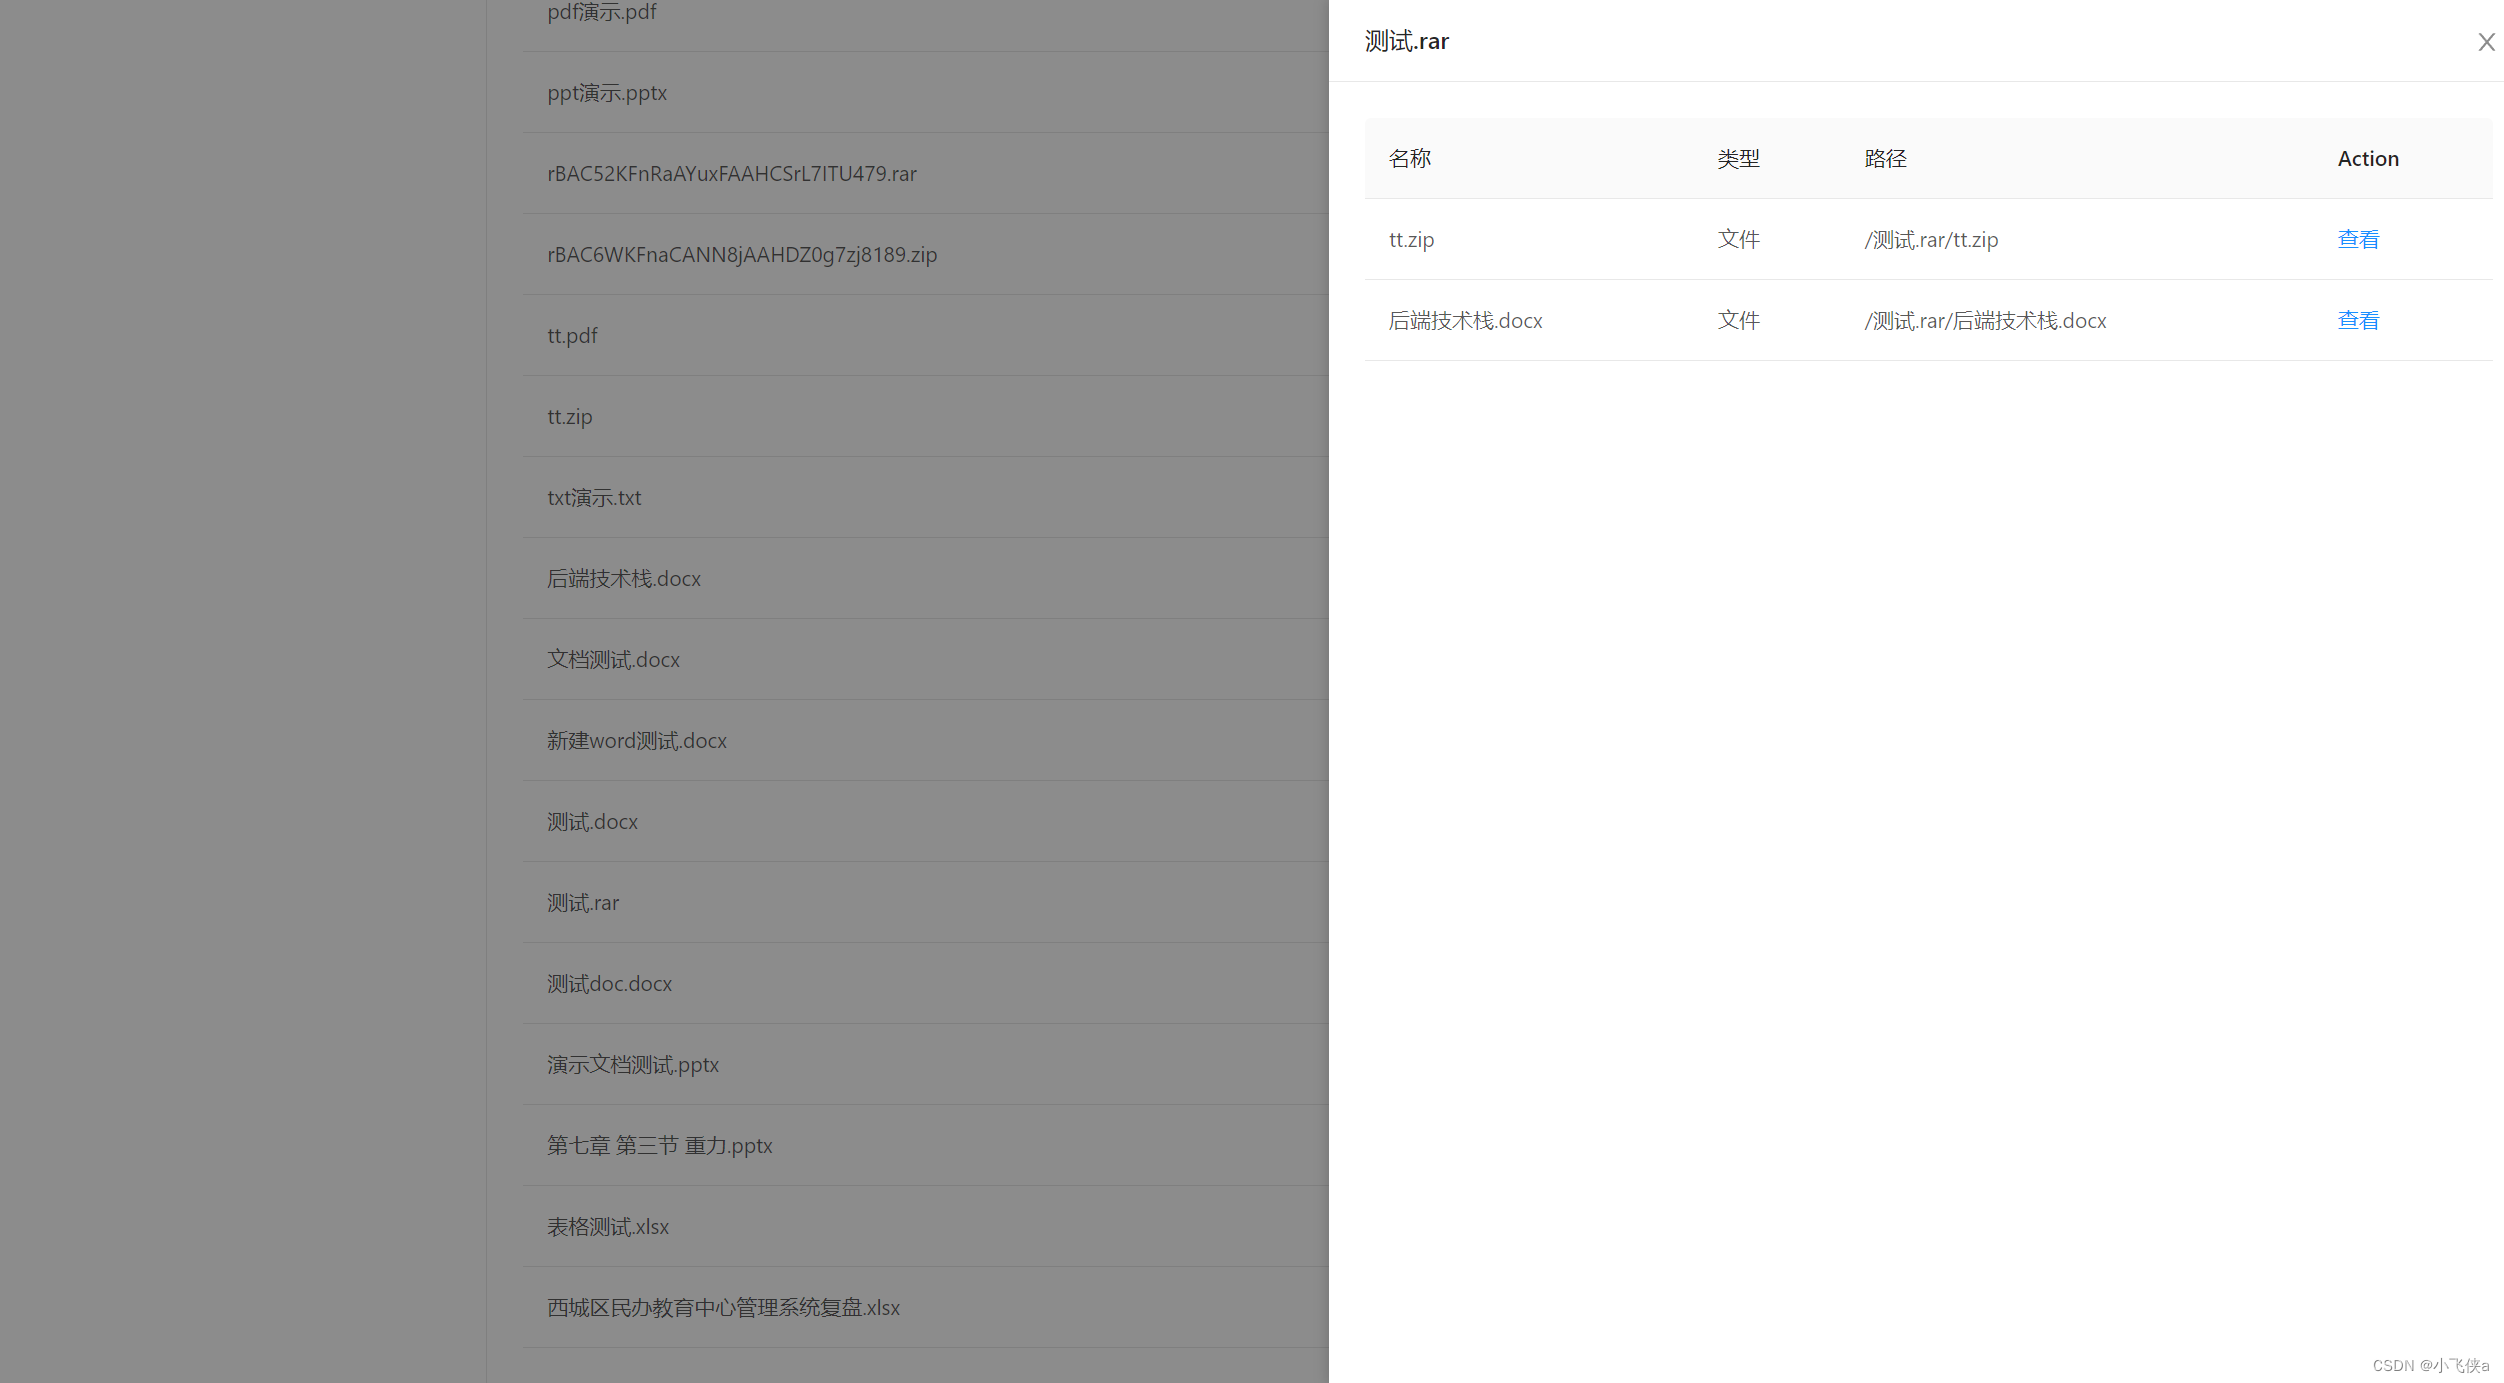
演示地址
账号密码:admin/123456 -
相关阅读:
【网络是怎么连接的】第二章(中):一个网络包的发出
day30_servlet
数据分析案例-基于sklearn随机森林算法探究影响预期寿命的因素
00Hadoop数据仓库平台
docker
【DaVinci Developer专题】-41-APP SWC如何读取写入NVM Block数据
RabbitMQ, DelayQueue, Redis的介绍以及IDEA的实现
停止线程的方法
MMKV(3)
Java多线程之8锁案例
- 原文地址:https://blog.csdn.net/xiaonanshidai123/article/details/125905171
