-
最全面的Spring教程(四)——Controller 与 RestFul
前言

本文为 【SpringMVC教程】Controller 与 RestFul 相关内容介绍,具体将对
控制器Controller,实现Controller接口,使用注解@Controller,RequestMapping及RestFul 风格(包括:Rest架构的主要原则、什么是Restful、数据过滤、RequestMapping中指定请求方法、Ajax方式发送请求)等进行详尽介绍~📌博主主页:小新要变强 的主页
👉Java全栈学习路线可参考:【Java全栈学习路线】最全的Java学习路线及知识清单,Java自学方向指引,内含最全Java全栈学习技术清单~
👉算法刷题路线可参考:算法刷题路线总结与相关资料分享,内含最详尽的算法刷题路线指南及相关资料分享~
👉Java微服务开源项目可参考:企业级Java微服务开源项目(开源框架,用于学习、毕设、公司项目、私活等,减少开发工作,让您只关注业务!)↩️本文上接:最全面的SpringMVC教程(三)——跨域问题
目录

一、控制器Controller
- 控制器复杂提供访问应用程序的行为,通常通过接口定义或注解定义两种方法实现
- 控制器负责解析用户的请求并将其转换为一个模型
- 在Spring MVC中一个控制器类可以包含多个方法
- 在Spring MVC中,对于Controller的配置方式有很多种
二、实现Controller接口
Controller是一个接口,在
org.springframework.web.servlet.mvc包下,接口中只有一个方法://实现该接口的类获得控制器功能 public interface Controller { //处理请求且返回一个模型与视图对象 ModelAndView handleRequest(HttpServletRequest var1, HttpServletResponse var2) throws Exception; }- 1
- 2
- 3
- 4
- 5
测试:
🍀(1)新建一个Moudle:springmvc-controller ,mvc的配置文件只留下 视图解析器。
🍀(2)编写一个Controller类,ControllerTest1。
//定义控制器 //注意点:不要导错包,实现Controller接口,重写方法; public class ControllerTest1 implements Controller { public ModelAndView handleRequest(HttpServletRequest httpServletRequest, HttpServletResponse httpServletResponse) throws Exception { //返回一个模型视图对象 ModelAndView mv = new ModelAndView(); mv.addObject("msg","Test1Controller"); mv.setViewName("test"); return mv; } }- 1
- 2
- 3
- 4
- 5
- 6
- 7
- 8
- 9
- 10
- 11
🍀(3)到Spring配置文件中注册请求的bean;name对应请求路径;class对应处理请求的类
<bean name="/t1" class="com.kuang.controller.ControllerTest1"/>- 1
🍀(4)编写前端test.jsp,要在WEB-INF/jsp目录下编写,对应我们的视图解析器
<%@ page contentType="text/html;charset=UTF-8" language="java" %> <html> <head> <title>Kuangshentitle> head> <body> ${msg} body> html>- 1
- 2
- 3
- 4
- 5
- 6
- 7
- 8
- 9
🍀(5)配置Tomcat运行测试,没有项目发布名配置的就是一个 / ,所以请求不用加项目名

说明:
- 实现接口Controller定义控制器是较老的办法
- 缺点是:一个控制器中只有一个方法,如果要多个方法则需要定义多个Controller;定义的方式比较麻烦。
三、使用注解@Controller
@Controller注解类型用于声明Spring类的实例是一个控制器(在讲IOC时还提到了另外3个注解);- Spring可以使用扫描机制来找到应用程序中所有基于注解的控制器类,为了保证Spring能找到你的控制器,需要在配置文件中声明组件扫描。
<context:component-scan base-package="com.wang.controller"/>- 1
- 2
增加一个ControllerTest2类,使用注解实现:
//@Controller注解的类会自动添加到Spring上下文中 @Controller public class ControllerTest2{ //映射访问路径 @RequestMapping("/t2") public String index(Model model){ //Spring MVC会自动实例化一个Model对象用于向视图中传值 model.addAttribute("msg", "ControllerTest2"); //返回视图位置 return "test"; } }- 1
- 2
- 3
- 4
- 5
- 6
- 7
- 8
- 9
- 10
- 11
- 12
运行tomcat测试:
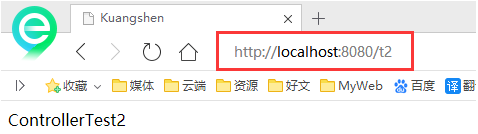
可以发现,我们的两个请求都可以指向一个视图,但是页面结果的结果是不一样的,从这里可以看出视图是被复用的,而控制器与视图之间是弱偶合关系。
四、RequestMapping
@RequestMapping注解用于映射url到控制器类或一个特定的处理程序方法。可用于类或方法上。用于类上,表示类中的所有响应请求的方法都是以该地址作为父路径。为了测试结论更加准确,我们可以加上一个项目名进行测试。
🍀
@RequestMapping只注解在方法上面。@Controller public class TestController { @RequestMapping("/h1") public String test(){ return "test"; } }- 1
- 2
- 3
- 4
- 5
- 6
- 7
访问路径: http://localhost:8080 / 项目名 / h1
🍀
@RequestMapping同时注解在类与方法上@Controller @RequestMapping("/admin") public class TestController { @RequestMapping("/h1") public String test(){ return "test"; } }- 1
- 2
- 3
- 4
- 5
- 6
- 7
- 8
访问路径: http://localhost:8080 / 项目名/ admin /h1 , 需要先指定类的路径再指定方法的路径。
五、RestFul 风格
Restful是一种风格,可以遵循,也可以不遵循,但是现在它已经变成主流。
1️⃣Rest架构的主要原则
- 网络上的所有事物都被抽象为资源。
- 每个资源都有一个唯一的资源标识符。
- 同一个资源具有多种表现形式他可能是xml,也可能是json等。
- 对资源的各种操作不会改变资源标识符。
- 所有的操作都是无状态的。
- 符合REST原则的架构方式即可称为RestFul。
2️⃣什么是Restful
Restful web service是一种常见的rest的应用,是遵守了rest风格的web服务,rest式的web服务是一种ROA(The Resource-Oriented Architecture)(面向资源的架构).
在Restful风格中,我们将互联网的资源抽象成资源,将获取资源的方式定义为方法,从此请求再也不止get和post了:
客户端请求 原来风格URL地址 RESTful风格URL地址 查询所有用户 /user/findAll GET /user 查询编号为1的用户 /user/findById?id=1 GET /user/1 新增一个用户 /user/save POST /user 修改编号为1的用户 /user/update PUT /user/1 删除编号为1的用户 /user/delete?id=1 DELETE /user/1 Spring MVC 对 RESTful应用提供了以下支持:
- 利用
@RequestMapping指定要处理请求的URI模板和HTTP请求的动作类型 - 利用
@PathVariable将URI请求模板中的变量映射到处理方法参数上 - 利用Ajax,在客户端发出PUT、DELETE动作的请求
3️⃣数据过滤
我们想获取所有用户,使用如下url即可
/user。但是真是场景下,我们可能需要需要一些条件进行过滤:例如:我们需要查询名字叫张三的前10条数据,使用以下场景即可:
/user?name=jerry&pageSize=10&page=1- 1
查询的url不变,变的是条件,我们只需要同伙url获取对应的参数就能实现复杂的多条件查询。
4️⃣RequestMapping中指定请求方法
@RequestMapping(value = "/{id}", method = RequestMethod.GET) @RequestMapping(value = "/add", method = RequestMethod.POST) @RequestMapping(value = "/{id}", method = RequestMethod.DELETE) @RequestMapping(value = "/{id}", method = RequestMethod.PUT)- 1
- 2
- 3
- 4
当然还有更好用的:
@GetMapping("/user/{id}") @PostMapping("/user") @DeleteMapping("/user/{id}") @PutMapping("/user/{id}")- 1
- 2
- 3
- 4
5️⃣Ajax方式发送请求
可以采用Ajax方式发送PUT和DELETE请求。
我们可以使用当下比较流行的axios组件测试:
<script src="https://unpkg.com/axios/dist/axios.min.js"></script> <script> const instance = axios.create({ baseURL: 'http://127.0.0.1:8088/app/' }); // 为给定 ID 的 user 创建请求 instance.get('goods') .then(function (response) { console.log(response); }).catch(function (error) { console.log(error); }); instance.get('goods/1') .then(function (response) { console.log(response); }) .catch(function (error) { console.log(error); }); instance.post('goods', { name: '洗发露', price: 25454 }).then(function (response) { console.log(response); }).catch(function (error) { console.log(error); }); instance.put('goods', { name: '洗发露', price: 25454 }).then(function (response) { console.log(response); }).catch(function (error) { console.log(error); }); instance.delete('goods/1') .then(function (response) { console.log(response); }).catch(function (error) { console.log(error); }); </script>- 1
- 2
- 3
- 4
- 5
- 6
- 7
- 8
- 9
- 10
- 11
- 12
- 13
- 14
- 15
- 16
- 17
- 18
- 19
- 20
- 21
- 22
- 23
- 24
- 25
- 26
- 27
- 28
- 29
- 30
- 31
- 32
- 33
- 34
- 35
- 36
- 37
- 38
- 39
- 40
- 41
- 42
- 43
- 44
- 45
- 46
- 47
使用jquery同样可以发送如下请求:
$.ajax( { type : "GET", url : "http://localhost:8080/springmvc/user/rest/1", dataType : "json", success : function(data) { console.log("get请求!---------------------") console.log(data) } }); $.ajax( { type : "DELETE", url : "http://localhost:8080/springmvc/user/rest/1", dataType : "json", success : function(data) { console.log("delete请求!---------------------") console.log(data) } }); $.ajax( { type : "put", url : "http://localhost:8080/springmvc/user/rest/1", dataType : "json", data: {id:12,username:"楠哥",password:"123"}, success : function(data) { console.log("get请求!---------------------") console.log(data) } }); $.ajax( { type : "post", url : "http://localhost:8080/springmvc/user/rest", dataType : "json", data: {id:12,username:"楠哥",password:"123"}, success : function(data) { console.log("get请求!---------------------") console.log(data) } });- 1
- 2
- 3
- 4
- 5
- 6
- 7
- 8
- 9
- 10
- 11
- 12
- 13
- 14
- 15
- 16
- 17
- 18
- 19
- 20
- 21
- 22
- 23
- 24
- 25
- 26
- 27
- 28
- 29
- 30
- 31
- 32
- 33
- 34
- 35
- 36
- 37
- 38
- 39
- 40
- 41
后记

👉Java全栈学习路线可参考:【Java全栈学习路线】最全的Java学习路线及知识清单,Java自学方向指引,内含最全Java全栈学习技术清单~
👉算法刷题路线可参考:算法刷题路线总结与相关资料分享,内含最详尽的算法刷题路线指南及相关资料分享~ -
相关阅读:
开发工具安装
图片转文字怎么转?这些方法我只告诉你
docker启动MySQL报错:退出状态码1
电脑重装系统word从第二页开始有页眉页脚如何设置
source /etc/profile 自动生效
Java--String--原理--intern方法
Allegro Design Entry HDL(OrCAD Capture HDL)原理图是设计快速入门图文教程
【LeetCode刷题日志】189.轮转数组
数据化运营18 营收:如何通过交叉营销提升用户营收贡献?
计算机网络简答题
- 原文地址:https://blog.csdn.net/qq_42146402/article/details/128045747
