-
Vite+Vue3+TS项目创建及基本环境搭建
1.vite项目搭建
可以按照vite官网操作:https://cn.vitejs.dev/guide/features.html#typescript
npm create vite@latest- 1
自定义template模板
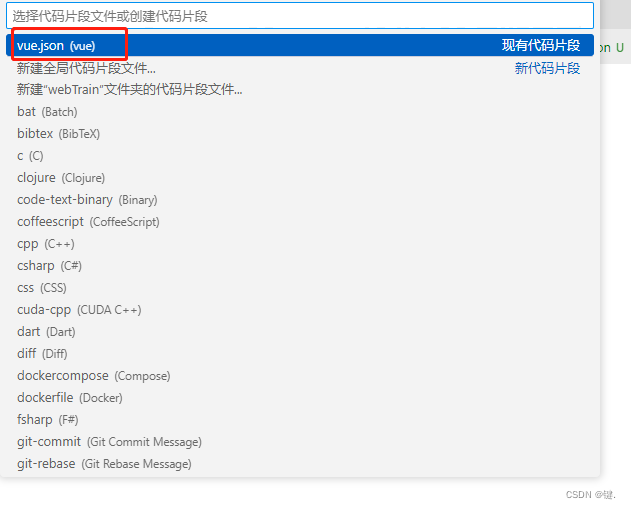
vscode-文件-首选项-配置用户代码片段-vue.json

添加如下代码即可快速创建vue模板{ "template": { "prefix": "vue", "body": [ "", "", "" ] } }- 1
- 2
- 3
- 4
- 5
- 6
- 7
- 8
- 9
- 10
- 11
element ui
element官网:https://element-plus.gitee.io/zh-CN/guide/design.html
npm install element-plus --save- 1
// main.ts import { createApp } from 'vue' import ElementPlus from 'element-plus' import 'element-plus/dist/index.css' import App from './App.vue' const app = createApp(App) app.use(ElementPlus) app.mount('#app')- 1
- 2
- 3
- 4
- 5
- 6
- 7
- 8
- 9
- 10
Volar支持,请在 tsconfig.json 中通过 compilerOptions.type 指定全局组件类型。
// tsconfig.json { "compilerOptions": { // ... "types": ["element-plus/global"] } }- 1
- 2
- 3
- 4
- 5
- 6
- 7
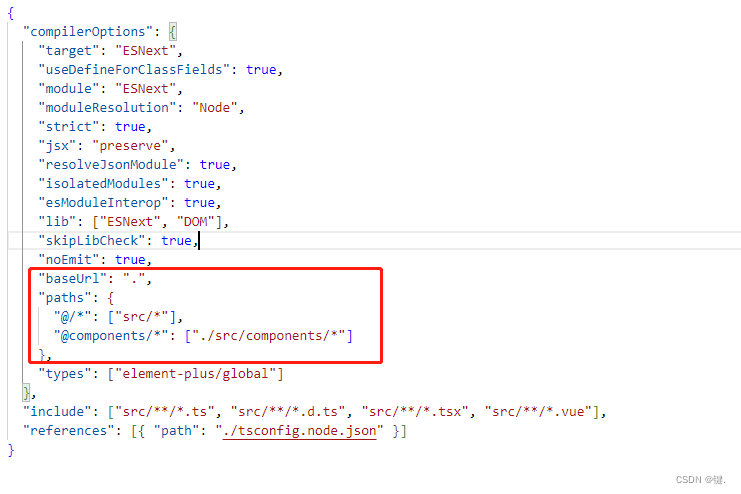
配置@别名
vite.config.ts
compilerOptions中配置如下"baseUrl": ".", "paths": { "@/*": ["src/*"], "@components/*": ["./src/components/*"] },- 1
- 2
- 3
- 4
- 5

安装 path 和 @types/nodenpm install path --save- 1
npm install @types/node --save-dev- 1
vite.config.ts 配置如下
import { defineConfig } from "vite"; import vue from "@vitejs/plugin-vue"; import path from "path"; // https://vitejs.dev/config/ export default defineConfig({ resolve: { // 配置路径别名 alias: { "@": path.resolve(__dirname, "./src"), "@components": path.resolve(__dirname, "./src/components"), }, }, plugins: [vue()], });- 1
- 2
- 3
- 4
- 5
- 6
- 7
- 8
- 9
- 10
- 11
- 12
- 13
- 14
配置路由
npm i vue-router@4- 1
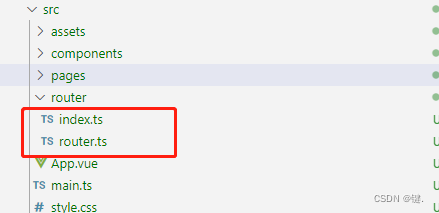
在src根目录创建router文件夹并新建两个ts文件,index.ts、router.ts

router.tsconst routes = [ { name: "Home", path: "/", component: () => import("@/pages/Home.vue"), }, { name: "About", path: "/about", component: () => import("@/pages/About.vue"), }, { name: "Apple", path: "/apple", component: () => import("@/components/Apple/Apple.vue"), }, ]; export default routes; //导出- 1
- 2
- 3
- 4
- 5
- 6
- 7
- 8
- 9
- 10
- 11
- 12
- 13
- 14
- 15
- 16
- 17
- 18
index.ts
import { createRouter, createWebHistory } from "vue-router"; import routes from "./router"; const router = createRouter({ history: createWebHistory(), routes, }); export default router;- 1
- 2
- 3
- 4
- 5
- 6
- 7
- 8
将vite自动创建的页面删除,并在app.vue增加router-view视图出口
app.vue<script setup lang="ts"> // This starter template is using Vue 3