-
Idea+maven+spring-cloud项目搭建系列--8整合Zookeeper
本文为 Idea+maven+spring-cloud项目搭建系列,maven项目的创建可以参考:
https://blog.csdn.net/l123lgx/article/details/121467823
本文使用了nacos 作为微服务的注册与发现,nacos 阿里云服务器的安装可以参考:https://blog.csdn.net/l123lgx/article/details/121421431
nacos 服务端的配置和使用可以参考:
https://blog.csdn.net/l123lgx/article/details/121491529
本文使用默认已经在服务端安装了zookeeper服务,阿里云轻量服务器–Docker–Zookeeper参考:
https://blog.csdn.net/l123lgx/article/details/1220476591 pom 文件引入依赖jar包:
<dependency> <groupId>org.apache.zookeepergroupId> <artifactId>zookeeperartifactId> <version>3.7.0version> <exclusions> <exclusion> <groupId>org.slf4jgroupId> <artifactId>slf4j-log4j12artifactId> exclusion> <exclusion> <groupId>log4jgroupId> <artifactId>log4jartifactId> exclusion> exclusions> dependency> <dependency> <groupId>org.apache.curatorgroupId> <artifactId>curator-frameworkartifactId> <version>5.3.0version> <exclusions> <exclusion> <groupId>org.apache.zookeepergroupId> <artifactId>zookeeperartifactId> exclusion> exclusions> dependency> <dependency> <groupId>org.apache.curatorgroupId> <artifactId>curator-recipesartifactId> <version>5.3.0version> <exclusions> <exclusion> <groupId>org.apache.curatorgroupId> <artifactId>curator-frameworkartifactId> exclusion> exclusions> dependency>- 1
- 2
- 3
- 4
- 5
- 6
- 7
- 8
- 9
- 10
- 11
- 12
- 13
- 14
- 15
- 16
- 17
- 18
- 19
- 20
- 21
- 22
- 23
- 24
- 25
- 26
- 27
- 28
- 29
- 30
- 31
- 32
- 33
- 34
- 35
- 36
- 37
- 38
- 39
- 40
2 zookeeper 配置文件:
WrapperZK:@Data @Component @ConfigurationProperties(prefix = "curator") public class WrapperZK { private int retryCount; private int elapsedTimeMs; private String connectString; private int sessionTimeoutMs; private int connectionTimeoutMs; }- 1
- 2
- 3
- 4
- 5
- 6
- 7
- 8
- 9
- 10
- 11
CuratorConfig:
@Configuration public class CuratorConfig { @Autowired WrapperZK wrapperZk; /** * 这里的start就是创建完对象放到容器后,需要调用他的start方法 * * @return */ @Bean(initMethod = "start", destroyMethod = "close") public CuratorFramework curatorFramework() { return CuratorFrameworkFactory.newClient( wrapperZk.getConnectString(), wrapperZk.getSessionTimeoutMs(), wrapperZk.getConnectionTimeoutMs(), new RetryNTimes(wrapperZk.getRetryCount(), wrapperZk.getElapsedTimeMs())); } }- 1
- 2
- 3
- 4
- 5
- 6
- 7
- 8
- 9
- 10
- 11
- 12
- 13
- 14
- 15
- 16
- 17
- 18
- 19
- 20
3 测试类:
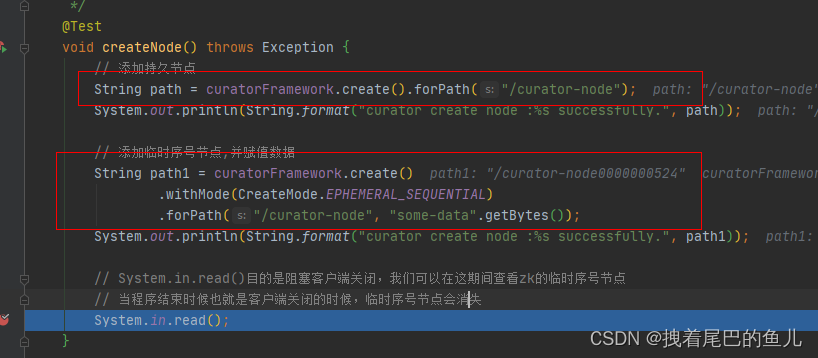
@SpringBootTest public class ZookeeperTest { @Autowired CuratorFramework curatorFramework; /** * 创建节点 * * @throws Exception */ @Test void createNode() throws Exception { // 添加持久节点 String path = curatorFramework.create().forPath("/curator-node"); System.out.println(String.format("curator create node :%s successfully.", path)); // 添加临时序号节点,并赋值数据 String path1 = curatorFramework.create() .withMode(CreateMode.EPHEMERAL_SEQUENTIAL) .forPath("/curator-node", "some-data".getBytes()); System.out.println(String.format("curator create node :%s successfully.", path1)); // System.in.read()目的是阻塞客户端关闭,我们可以在这期间查看zk的临时序号节点 // 当程序结束时候也就是客户端关闭的时候,临时序号节点会消失 System.in.read(); } /** * 获取节点 * * @throws Exception */ @Test public void testGetData() throws Exception { // 在上面的方法执行后,创建了curator-node节点,但是我们并没有显示的去赋值 // 通过这个方法去获取节点的值会发现,当我们通过Java客户端创建节点不赋值的话默认就是存储的创建节点的ip byte[] bytes = curatorFramework.getData().forPath("/curator-node"); System.out.println("节点数据:"); System.out.println(new String(bytes)); } /** * 修改节点数据 * * @throws Exception */ @Test public void testSetData() throws Exception { curatorFramework.setData().forPath("/curator-node", "changed!".getBytes()); byte[] bytes = curatorFramework.getData().forPath("/curator-node"); System.out.println("修改节点数据:"); System.out.println(new String(bytes)); } /** * 创建节点同时创建⽗节点 * * @throws Exception */ @Test public void testCreateWithParent() throws Exception { String pathWithParent = "/node-parent/sub-node-1"; String path = curatorFramework.create().creatingParentsIfNeeded().forPath(pathWithParent); System.out.println(String.format("curator create node :%s successfully.", path)); } /** * 删除节点(包含子节点) * * @throws Exception */ @Test public void testDelete() throws Exception { String pathWithParent = "/curator-node"; curatorFramework.delete().guaranteed().deletingChildrenIfNeeded().forPath(pathWithParent); } }- 1
- 2
- 3
- 4
- 5
- 6
- 7
- 8
- 9
- 10
- 11
- 12
- 13
- 14
- 15
- 16
- 17
- 18
- 19
- 20
- 21
- 22
- 23
- 24
- 25
- 26
- 27
- 28
- 29
- 30
- 31
- 32
- 33
- 34
- 35
- 36
- 37
- 38
- 39
- 40
- 41
- 42
- 43
- 44
- 45
- 46
- 47
- 48
- 49
- 50
- 51
- 52
- 53
- 54
- 55
- 56
- 57
- 58
- 59
- 60
- 61
- 62
- 63
- 64
- 65
- 66
- 67
- 68
- 69
- 70
- 71
- 72
- 73
- 74
- 75
- 76
- 77
4 创建节点查询节点信息:
4.1 进入zookeeper 容器 :
docker exec -it 容器id /bin/bash
4.2 进入bin 目录启动客户端:
cd bin/
zkCli.sh
4.3 查看节点:
ls /
可以看到测试类中创建的持久和临时节点:


-
相关阅读:
Java中树形(层次)结构数据库MySql设计方案(类似目录)
【点云数据集介绍】
八大学习方法(金字塔模型、费曼学习法、布鲁姆学习模型)
盘点UWB人员定位系统的特点
停车场系统源码
uniapp小程序之一键使用手机号登录
表格数据管理的新视角:JVS低代码的两大应用场景
Spring的常见注解
Redis全量同步和增量同步原理
vue2双向绑定原理:深入响应式原理defineProperty、watcher、get、set
- 原文地址:https://blog.csdn.net/l123lgx/article/details/128082454
