-
Spring Boot自定义Namespace
Spring Boot 自定义Namespace
在学些Spring Boot 自定义Namespace之前,先来看一个简单的案例。在Spring Boot出现之前,所有的bean都是在XML文件的格式
中定义。为了管理方便,一些大型复杂的应用系统,通常定个多个xml文件来共同满足业务需求,如业务bean、datasource 定义、业务拦
截bean定义等等。
为了弄清楚Spring Boot Namespace的运行原理,先从一个最简单的demo开始
基础应用
bean class
定义一个普通的学员类,包含学员id、姓名、年龄、专业属性,并使用lombok生成get、set方法
@Data @ToString public class Student implements Serializable { private Long id; // 姓名 private String name; // 年龄 private byte age; // 专业 private String major; }- 1
- 2
- 3
- 4
- 5
- 6
- 7
- 8
- 9
- 10
- 11
- 12
- 13
- 14
- 15
bean xml 定义
在resources目录下创建 xml/spring-beans.xml 文件,内容如下
<beans xmlns:xsi="http://www.w3.org/2001/XMLSchema-instance" xmlns="http://www.springframework.org/schema/beans" xsi:schemaLocation="http://www.springframework.org/schema/beans http://www.springframework.org/schema/beans/spring-beans-4.3.xsd"> <bean id="student" class="com.springboot.study.springbootstudy.bean.Student"> <property name="id" value="1000"/> <property name="name" value="科比"/> <property name="age" value="38"/> <property name="major" value="篮球"/> bean> beans>- 1
- 2
- 3
- 4
- 5
- 6
- 7
- 8
- 9
- 10
- 11
bean 应用
在Spring Boot 启动类中使用 @ImportResource 引入xml 配置文件,就可以使用bean了
@SpringBootApplication @ImportResource(locations= {"classpath:xml/spring-beans.xml"}) public class SpringbootStudyApplication { public static void main(String[] args) { ConfigurableApplicationContext app = SpringApplication.run(SpringbootStudyApplication.class, args); final Student student = app.getBean(Student.class); System.out.println("Spring Boot Student =================: " + student); // 输出如下 // Spring Boot Student =================: Student(id=1000, name=科比, age=38, major=篮球) } }- 1
- 2
- 3
- 4
- 5
- 6
- 7
- 8
- 9
- 10
- 11
- 12
- 13
- 14
至此,已经完成了bean的定义到应用的基本流程,简单吧。相信学习过dubbo框架的同学对下面的代码特别熟悉
<dubbo:application name="demo-consumer"/> <dubbo:registry address="zookeeper://localhost:2181"/> <dubbo:reference id="demoService" check="false" interface="com.alibaba.dubbo.demo.DemoService"/>- 1
- 2
- 3
- 4
- 5
通过自定义dubbo命名空间, 完成bean的装载与逻辑处理。那么我们了解其内部原理后,也可以开发出自己的开源框架了。
bean 解析原理

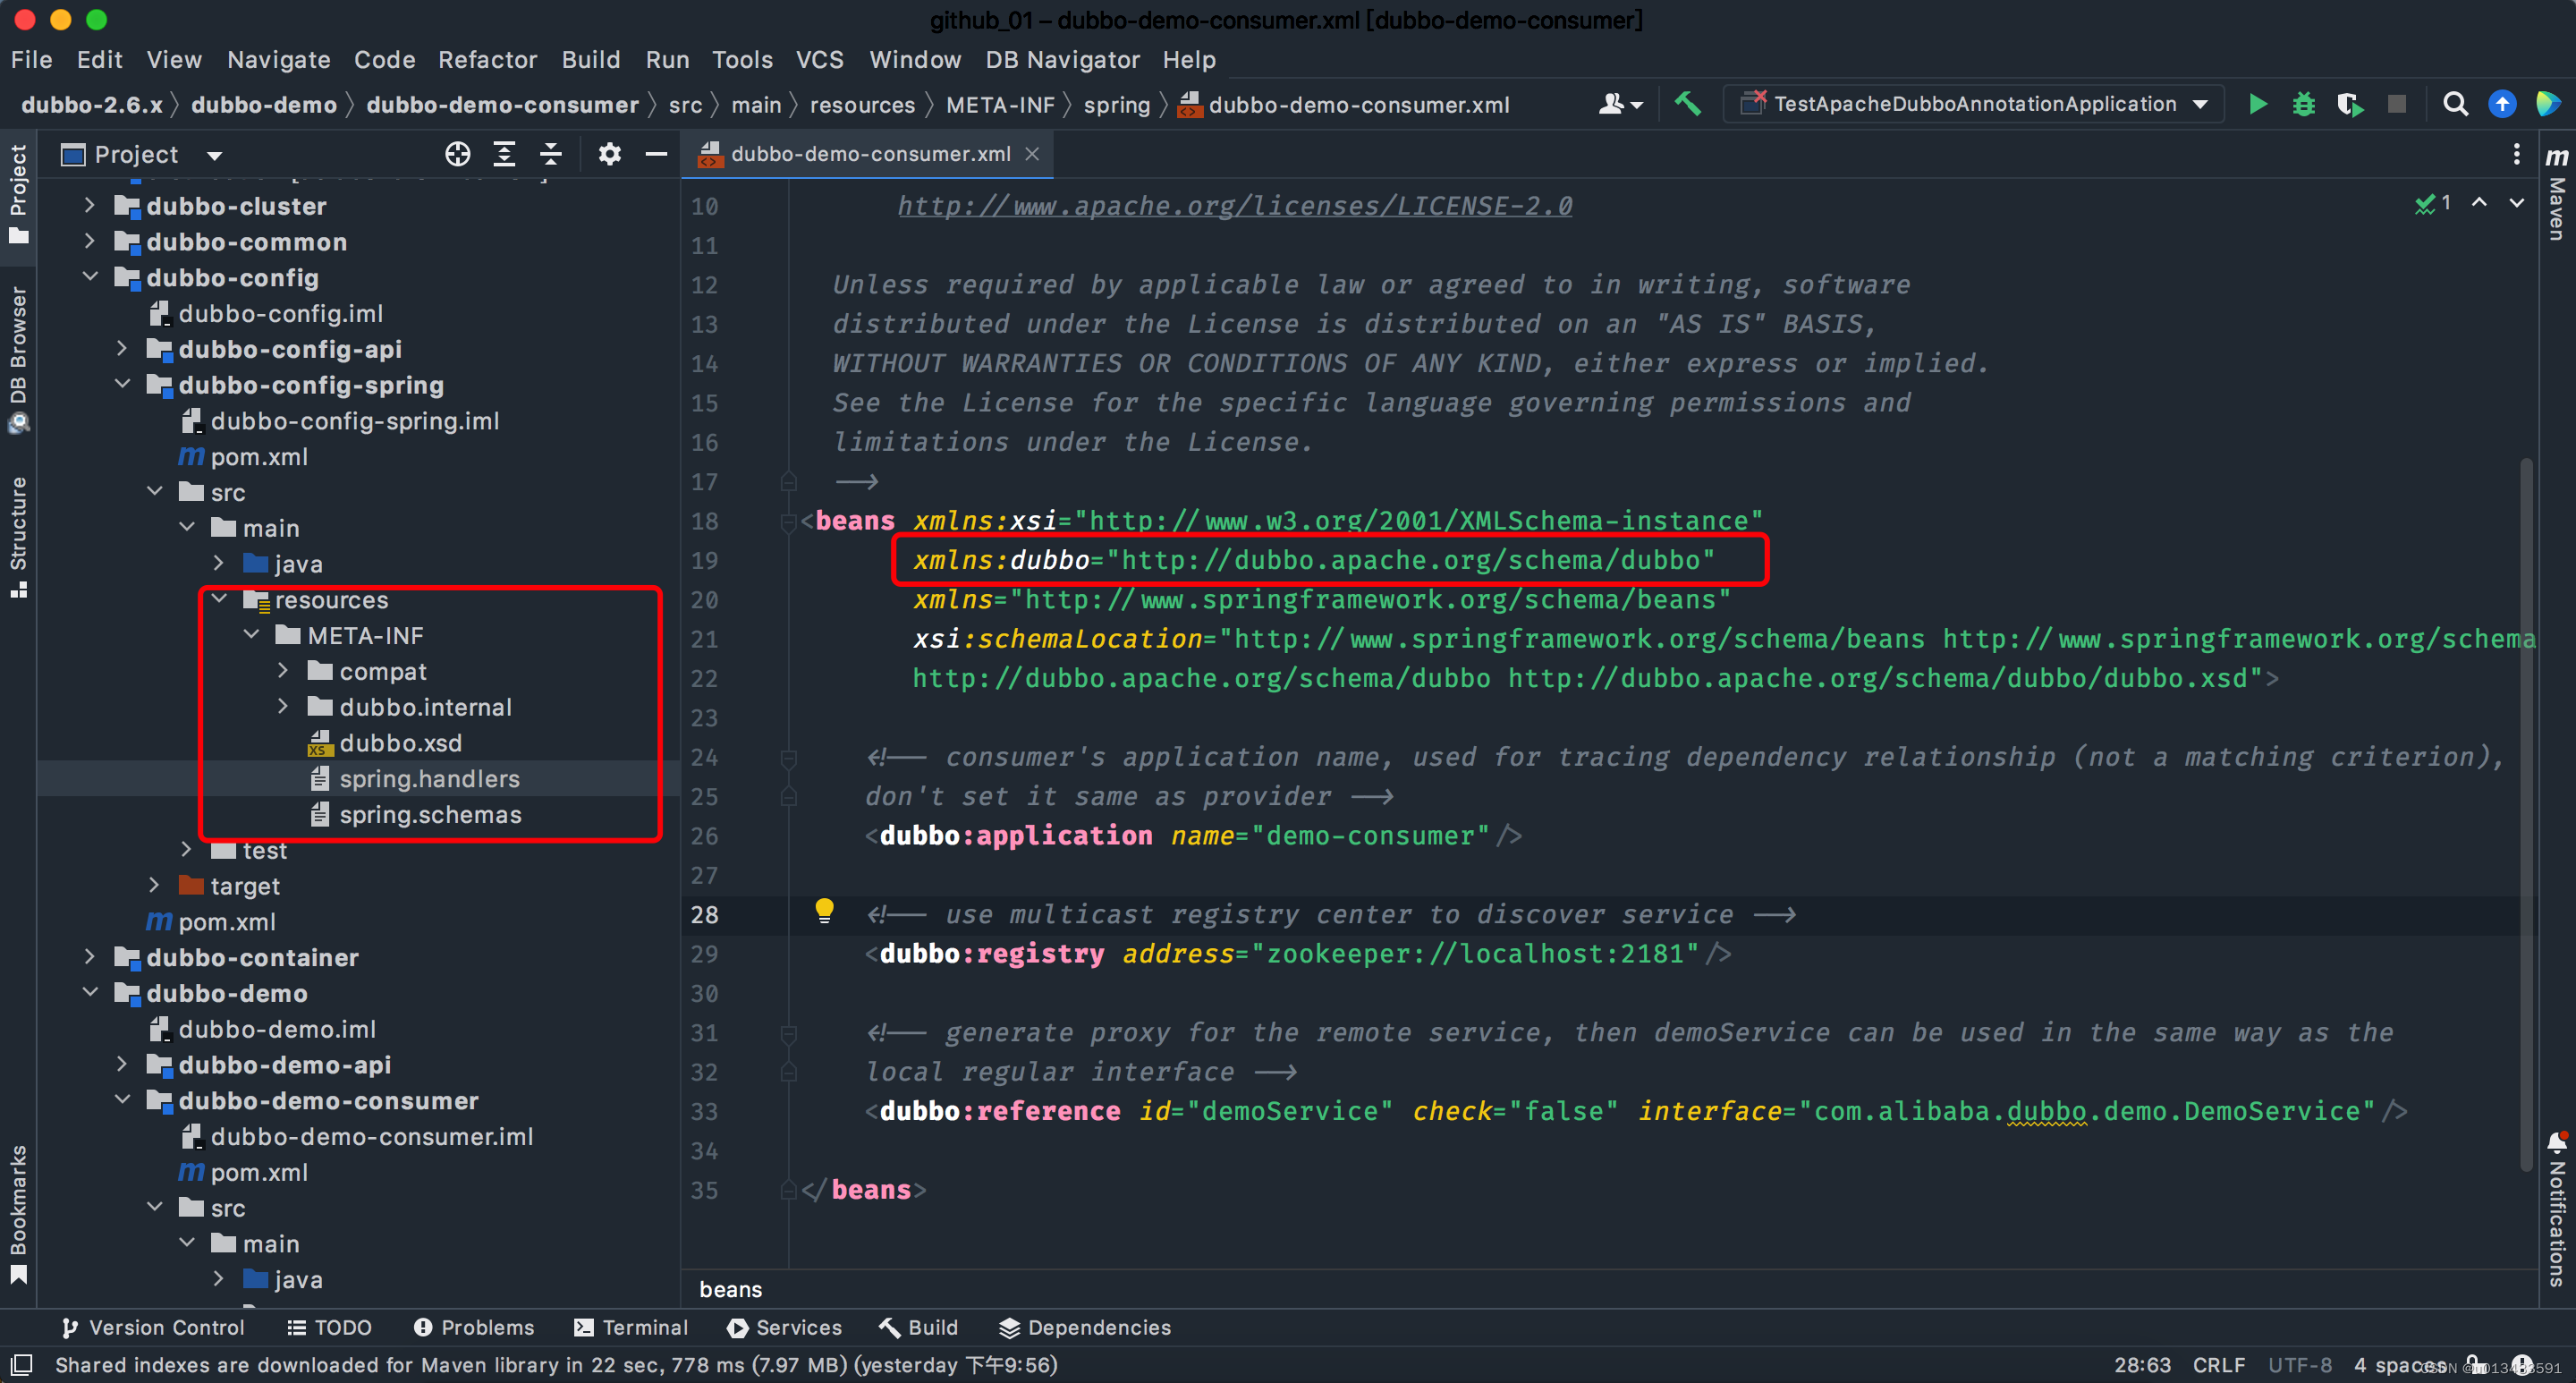
点击右侧的URL后,定位到dubbo.xsd文件和以两个spring开头的文件信息
-
dubbo.xsd - 定义了以dubbo为命名空间的语法,对里面的内容做了限定
-
spring.handlers - 里面定义了dubbo.xsd 解析类,在运行时使用SPI的方式动态加载
http\://dubbo.apache.org/schema/dubbo=com.alibaba.dubbo.config.spring.schema.DubboNamespaceHandler http\://code.alibabatech.com/schema/dubbo=com.alibaba.dubbo.config.spring.schema.DubboNamespaceHandler- 1
- 2
-
spring.schemas - 将xsd文件、与命名空间关联起来
http\://dubbo.apache.org/schema/dubbo/dubbo.xsd=META-INF/dubbo.xsd http\://code.alibabatech.com/schema/dubbo/dubbo.xsd=META-INF/compat/dubbo.xsd- 1
- 2
现在来梳理下这三部分之间的关系
定义xsd文件 —> xsd文件关联schemas ----> 定义解析处理类

需要注意的是,dubbo中的每个模块都一一对应一个xml 解析器,这里如果不一致则会报以下错误
org.springframework.beans.factory.parsing.BeanDefinitionParsingException: Configuration problem: Cannot locate BeanDefinitionParser for element [application]- 1
接下来,我们依葫芦画瓢实现一个自定义的Namespace处理流程
自定义Namespace
xsd 定义
<xsd:schema xmlns:xsd="http://www.w3.org/2001/XMLSchema" xmlns:beans="http://www.springframework.org/schema/beans" xmlns:tool="http://www.springframework.org/schema/tool" xmlns="http://xml.definition.com/schema/custom" targetNamespace="http://xml.definition.com/schema/custom"> <xsd:import namespace="http://www.w3.org/XML/1998/namespace"/> <xsd:import namespace="http://www.springframework.org/schema/beans"/> <xsd:import namespace="http://www.springframework.org/schema/tool"/> <xsd:complexType name="applicationType"> <xsd:attribute name="id" type="xsd:long"/> <xsd:attribute name="name" type="xsd:string" use="required"/> <xsd:attribute name="age" type="xsd:byte"/> <xsd:attribute name="major" type="xsd:string"/> xsd:complexType> <xsd:element name="application" type="applicationType"/> xsd:schema>- 1
- 2
- 3
- 4
- 5
- 6
- 7
- 8
- 9
- 10
- 11
- 12
- 13
- 14
- 15
- 16
- 17
- 18
- 19
- 20
schemas 定义
http\://xml.definition.com/schema/custom.xsd=META-INF/student.xsd- 1
handlers 定义
http\://xml.definition.com/schema/custom=com.springboot.study.springbootstudy.handler.CustomNamespaceHandler- 1
关联代码
-
CustomNamespaceHandler - 自定义的Namespace的处理代码如下
public class CustomNamespaceHandler extends NamespaceHandlerSupport { /** * 自定义标签解析 生成bean 对象 */ @Override public void init() { System.out.println("==================================== CustomNamespaceHandler execute"); this.registerBeanDefinitionParser("application",new CustomBeanDefinitionParser()); } }- 1
- 2
- 3
- 4
- 5
- 6
- 7
- 8
- 9
- 10
-
CustomBeanDefinitionParser - xml 解析代码如下
package com.springboot.study.springbootstudy.handler; import com.springboot.study.springbootstudy.bean.Student; import org.springframework.beans.factory.config.BeanDefinition; import org.springframework.beans.factory.support.RootBeanDefinition; import org.springframework.beans.factory.xml.BeanDefinitionParser; import org.springframework.beans.factory.xml.ParserContext; import org.w3c.dom.Element; public class CustomBeanDefinitionParser implements BeanDefinitionParser { /** * 解析xml文件 动态注册bean 至ioc容器中 * @param element * @param parserContext * @return */ public BeanDefinition parse(Element element, ParserContext parserContext) { //beanDefinition RootBeanDefinition beanDefinition = new RootBeanDefinition(); beanDefinition.setBeanClass(Student.class); beanDefinition.setLazyInit(false); //beanDefinition.setScope(); //解析id String id = element.getAttribute("id"); beanDefinition.getPropertyValues().add("id", id); //解析name beanDefinition.getPropertyValues().add("name", element.getAttribute("name")); //解析 age beanDefinition.getPropertyValues().add("age", element.getAttribute("age")); //major beanDefinition.getPropertyValues().add("major", element.getAttribute("major")); parserContext.getRegistry().registerBeanDefinition(id, beanDefinition); return beanDefinition; } }- 1
- 2
- 3
- 4
- 5
- 6
- 7
- 8
- 9
- 10
- 11
- 12
- 13
- 14
- 15
- 16
- 17
- 18
- 19
- 20
- 21
- 22
- 23
- 24
- 25
- 26
- 27
- 28
- 29
- 30
- 31
- 32
- 33
- 34
- 35
- 36
- 37
- 38
- 39
- 40
- 41
至此已经完成了一个简单版的自定义Namespace所有功能开发,接下来测试一下。
测试验证
修改spring-beans.xml 文件,现在使用自定义Namespace的方式注册bean
<beans xmlns:xsi="http://www.w3.org/2001/XMLSchema-instance" xmlns="http://www.springframework.org/schema/beans" xmlns:custom="http://xml.definition.com/schema/custom" xsi:schemaLocation="http://www.springframework.org/schema/beans http://www.springframework.org/schema/beans/spring-beans-4.3.xsd http://xml.definition.com/schema/custom http://xml.definition.com/schema/custom.xsd"> <custom:application id="1000" name="科比" age="38" major="篮球"/> beans>- 1
- 2
- 3
- 4
- 5
- 6
- 7
- 8
- 9
- 10
- 11
- 12
- 13
- 14
- 15
- 16
- 17
然后重新启动应用程序,依然可以获取xml中 student bean 定义的内容。
-
相关阅读:
python(48): 进程,线程 ,协程
c++ vector erase
IO day2
从零实现深度学习框架——LSTM从理论到实战【理论】
ICommand命令 mvvm模式事件
查看进程:让查看进程变得才貌双绝 - procs
docker kafka
现代企业架构框架 — 业务架构
GO结构体
浅谈HTTP缓存与CDN缓存的那点事
- 原文地址:https://blog.csdn.net/u013433591/article/details/128068915
