-
【目标检测】图像裁剪/标签可视化/图像拼接处理脚本
前言
无人机拍摄的图像分辨率往往较大,做目标检测时,需要进行裁剪再标注。
本文就来记录从图像裁剪到图像拼接的处理脚本思路。图像裁剪
图像编码规则设定
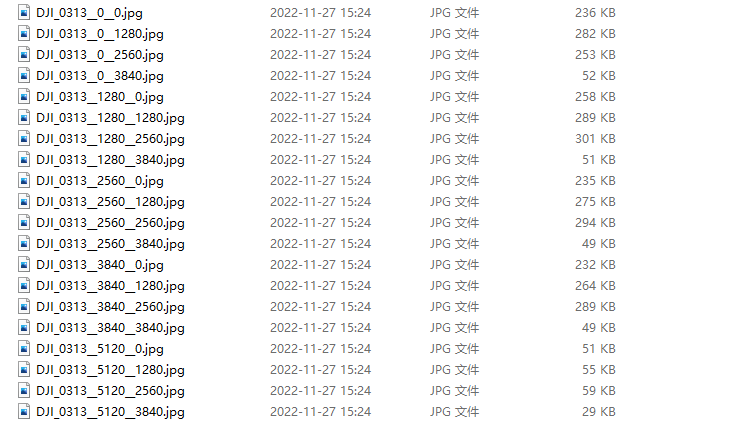
因为后面需要将标注好的图片进行融合拼接,因此需要对图片方位进行编码,我这里直接将图片裁剪时左上角的宽高坐标写在文件名中,裁剪结果如下图所示:
裁剪脚本
我这里以每张小图为1280x1280进行裁剪,同时记录原图宽高信息,写入yaml文件,后续拼接时会用到。
import shutil from pathlib import Path import yaml from PIL import Image import os.path from tqdm import tqdm rootdir = r'D:\Data\i1' # 原始图片文件夹 savedir = r'D:\Data\i2' # 保存图片文件夹 ConfigPath = "../config.yaml" # 配置文件(记录图片尺寸) dis = 1280 leap = 1280 if __name__ == '__main__': # 创建输出文件夹 if Path(savedir).exists(): shutil.rmtree(savedir) os.mkdir(savedir) for parent, dirnames, filenames in os.walk(rootdir): # 遍历每一张图片 filenames.sort() for filename in tqdm(filenames): currentPath = os.path.join(parent, filename) suffix = currentPath.split('.')[-1] if suffix == 'jpg' or suffix == 'png' or suffix == 'JPG' or suffix == 'PNG': img = Image.open(currentPath) width = img.size[0] height = img.size[1] i = j = 0 for i in range(0, width, leap): for j in range(0, height, leap): box = (i, j, i+dis, j+dis) image = img.crop(box) # 图像裁剪 image.save(savedir + '/' + filename.split(".")[0] + "__" + str(i) + "__" + str(j) + ".jpg") # 将图片长宽写入配置文件 pic_context = { 'width': width, 'height': height } with open(ConfigPath, "w", encoding="utf-8") as f: yaml.dump(pic_context, f)- 1
- 2
- 3
- 4
- 5
- 6
- 7
- 8
- 9
- 10
- 11
- 12
- 13
- 14
- 15
- 16
- 17
- 18
- 19
- 20
- 21
- 22
- 23
- 24
- 25
- 26
- 27
- 28
- 29
- 30
- 31
- 32
- 33
- 34
- 35
- 36
- 37
- 38
- 39
- 40
- 41
- 42
- 43
- 44
- 45
标签可视化
标签可视化在我之前的博文有写到过,这里又进行了一些优化,可以将txt格式的YOLO标签映射回裁剪之后的小图,并进行中文标签显示,下面根据是否需要舍弃无目标的图片,分成两个版本。
小图标签可视化:舍弃无目标的图片
''' 直接在小图上还原标签(舍弃无目标图片) ''' import os import random import shutil from pathlib import Path import numpy as np import cv2 from PIL import ImageDraw, ImageFont from PIL import Image from tqdm import tqdm input_folder = "D:/Data/i2" output_folder = "D:/Data/i3" input_list = os.listdir(input_folder) input_list.sort() labels = ['类别一', '类别二'] # colormap = [(0, 255, 0), (132, 112, 255), (255, 255, 255)] # 色盘,可根据类别添加新颜色 colors = [[random.randint(0, 255) for _ in range(3)] for _ in labels] def cv2ImgAddText(img, text, left, top, textColor=(0, 255, 0), textSize=20): # 图像从OpenCV格式转换成PIL格式 if isinstance(img, np.ndarray): # 判断是否OpenCV图片类型 img = Image.fromarray(cv2.cvtColor(img, cv2.COLOR_BGR2RGB)) draw = ImageDraw.Draw(img) fontText = ImageFont.truetype("Font/simhei.ttf", textSize, encoding="utf-8") draw.text((left, top - 2), text, textColor, font=fontText) return cv2.cvtColor(np.asarray(img), cv2.COLOR_RGB2BGR) # 坐标转换 def xywh2xyxy(x, w1, h1, img): label, x, y, w, h = x label = int(label) # print("原图宽高:\nw1={}\nh1={}".format(w1, h1)) # 边界框反归一化 x_t = x * w1 y_t = y * h1 w_t = w * w1 h_t = h * h1 # print("反归一化后输出:\n第一个:{}\t第二个:{}\t第三个:{}\t第四个:{}\t\n\n".format(x_t, y_t, w_t, h_t)) # 计算坐标 top_left_x = x_t - w_t / 2 top_left_y = y_t - h_t / 2 bottom_right_x = x_t + w_t / 2 bottom_right_y = y_t + h_t / 2 # print('标签:{}'.format(labels[int(label)])) # print("左上x坐标:{}".format(top_left_x)) # print("左上y坐标:{}".format(top_left_y)) # print("右下x坐标:{}".format(bottom_right_x)) # print("右下y坐标:{}".format(bottom_right_y)) p1, p2 = (int(top_left_x), int(top_left_y)), (int(bottom_right_x), int(bottom_right_y)) # 绘制矩形框 color_index = label # colors = [random.randint(0, 255) for _ in range(3)] cv2.rectangle(img, p1, p2, colors[color_index], thickness=2, lineType=cv2.LINE_AA) label = labels[label] if label: tl = round(0.002 * (img.shape[0] + img.shape[1]) / 2) + 1 # line/font thickness tf = max(tl - 1, 1) t_size = cv2.getTextSize(label, 0, fontScale=tl / 3, thickness=tf)[0] # 两个字类别 if label.split()[0] == "卡车" or label.split()[0] == "坦克": sublength = 100 # 缩减方框的长度 p2 = p1[0] + t_size[0] - sublength, p1[1] - t_size[1] # 三个字类别 else: sublength = 140 # 缩减方框的长度 p2 = p1[0] + t_size[0] - sublength, p1[1] - t_size[1] # 绘制矩形框填充 cv2.rectangle(img, p1, p2, colors[color_index], -1, cv2.LINE_AA) # 绘制标签 img_text = cv2ImgAddText(img, label, p1[0], p2[1], (255, 255, 255), 25) return img_text def main(): # 创建输出文件夹 if Path(output_folder).exists(): shutil.rmtree(output_folder) os.mkdir(output_folder) img_path = [] label_path = [] for i in range(len(input_list)): dir_path = input_folder + "/" + input_list[i] # 先对文件中jpg和txt进行分类 if input_list[i].split('.')[-1] == 'jpg': img_path.append(dir_path) else: label_path.append(dir_path) for i in tqdm(img_path): # 读取图像文件 img = cv2.imread(str(i)) h, w = img.shape[:2] label_name = i.split('.')[0] + '.txt' if label_name in label_path: with open(label_name, 'r') as f: lb = np.array([x.split() for x in f.read().strip().splitlines()], dtype=np.float32) # 绘制每一个目标 for x in lb: # 反归一化并得到左上和右下坐标,画出矩形框 img = xywh2xyxy(x, w, h, img) """ # 直接查看生成结果图 cv2.imshow('show', img) cv2.waitKey(0) """ cv2.imwrite(output_folder + '/' + '{}.jpg'.format(label_name.split('/')[-1][:-4]), img) if __name__ == '__main__': main()- 1
- 2
- 3
- 4
- 5
- 6
- 7
- 8
- 9
- 10
- 11
- 12
- 13
- 14
- 15
- 16
- 17
- 18
- 19
- 20
- 21
- 22
- 23
- 24
- 25
- 26
- 27
- 28
- 29
- 30
- 31
- 32
- 33
- 34
- 35
- 36
- 37
- 38
- 39
- 40
- 41
- 42
- 43
- 44
- 45
- 46
- 47
- 48
- 49
- 50
- 51
- 52
- 53
- 54
- 55
- 56
- 57
- 58
- 59
- 60
- 61
- 62
- 63
- 64
- 65
- 66
- 67
- 68
- 69
- 70
- 71
- 72
- 73
- 74
- 75
- 76
- 77
- 78
- 79
- 80
- 81
- 82
- 83
- 84
- 85
- 86
- 87
- 88
- 89
- 90
- 91
- 92
- 93
- 94
- 95
- 96
- 97
- 98
- 99
- 100
- 101
- 102
- 103
- 104
- 105
- 106
- 107
- 108
- 109
- 110
- 111
- 112
- 113
- 114
- 115
- 116
- 117
- 118
- 119
- 120
小图标签可视化:保留无目标的图片
''' 直接在小图上还原标签(保留无目标图片) ''' import os import random import shutil from pathlib import Path import numpy as np import cv2 from PIL import ImageDraw, ImageFont from PIL import Image from tqdm import tqdm input_folder = "D:/Data/i2" # 输出图片文件夹位置 output_folder = "D:/Data/i3" input_list = os.listdir(input_folder) input_list.sort() labels = ['类别一', '类别二'] # colormap = [(0, 255, 0), (132, 112, 255), (255, 255, 255)] # 色盘,可根据类别添加新颜色 colors = [[random.randint(0, 255) for _ in range(3)] for _ in labels] # 随机颜色 def cv2ImgAddText(img, text, left, top, textColor=(0, 255, 0), textSize=20): # 图像从OpenCV格式转换成PIL格式 if isinstance(img, np.ndarray): # 判断是否OpenCV图片类型 img = Image.fromarray(cv2.cvtColor(img, cv2.COLOR_BGR2RGB)) draw = ImageDraw.Draw(img) fontText = ImageFont.truetype("Font/simhei.ttf", textSize, encoding="utf-8") draw.text((left, top - 2), text, textColor, font=fontText) return cv2.cvtColor(np.asarray(img), cv2.COLOR_RGB2BGR) # 坐标转换 def xywh2xyxy(x, w1, h1, img): label, x, y, w, h = x label = int(label) # print("原图宽高:\nw1={}\nh1={}".format(w1, h1)) # 边界框反归一化 x_t = x * w1 y_t = y * h1 w_t = w * w1 h_t = h * h1 # print("反归一化后输出:\n第一个:{}\t第二个:{}\t第三个:{}\t第四个:{}\t\n\n".format(x_t, y_t, w_t, h_t)) # 计算坐标 top_left_x = x_t - w_t / 2 top_left_y = y_t - h_t / 2 bottom_right_x = x_t + w_t / 2 bottom_right_y = y_t + h_t / 2 # print('标签:{}'.format(labels[int(label)])) # print("左上x坐标:{}".format(top_left_x)) # print("左上y坐标:{}".format(top_left_y)) # print("右下x坐标:{}".format(bottom_right_x)) # print("右下y坐标:{}".format(bottom_right_y)) p1, p2 = (int(top_left_x), int(top_left_y)), (int(bottom_right_x), int(bottom_right_y)) # 绘制矩形框 color_index = label cv2.rectangle(img, p1, p2, colors[color_index], thickness=2, lineType=cv2.LINE_AA) label = labels[label] if label: tl = round(0.002 * (img.shape[0] + img.shape[1]) / 2) + 1 # line/font thickness tf = max(tl - 1, 1) t_size = cv2.getTextSize(label, 0, fontScale=tl / 3, thickness=tf)[0] # 两个字类别 if label.split()[0] == "卡车" or label.split()[0] == "坦克": sublength = 100 # 缩减方框的长度 p2 = p1[0] + t_size[0] - sublength, p1[1] - t_size[1] # 三个字类别 else: sublength = 140 # 缩减方框的长度 p2 = p1[0] + t_size[0] - sublength, p1[1] - t_size[1] # 绘制矩形框填充 cv2.rectangle(img, p1, p2, colors[color_index], -1, cv2.LINE_AA) # 绘制标签 img_text = cv2ImgAddText(img, label, p1[0], p2[1], (255, 255, 255), 25) return img_text def main(): # 创建输出文件夹 if Path(output_folder).exists(): shutil.rmtree(output_folder) os.mkdir(output_folder) img_path = [] label_path = [] for i in range(len(input_list)): dir_path = input_folder + "/" + input_list[i] # 先对文件中jpg和txt进行分类 if input_list[i].split('.')[-1] == 'jpg': img_path.append(dir_path) else: label_path.append(dir_path) for i in tqdm(img_path): # 读取图像文件 img = cv2.imread(str(i)) h, w = img.shape[:2] img_name = i.split('/')[-1].split('.')[0] label_name = i.split('.')[0] + '.txt' if label_name in label_path: with open(label_name, 'r') as f: lb = np.array([x.split() for x in f.read().strip().splitlines()], dtype=np.float32) # 绘制每一个目标 for x in lb: # 反归一化并得到左上和右下坐标,画出矩形框 img = xywh2xyxy(x, w, h, img) """ # 直接查看生成结果图 cv2.imshow('show', img) cv2.waitKey(0) """ cv2.imwrite(output_folder + '/' + '{}.jpg'.format(label_name.split('/')[-1][:-4]), img) else: cv2.imwrite(output_folder + '/' + img_name + '.jpg', img) if __name__ == '__main__': main()- 1
- 2
- 3
- 4
- 5
- 6
- 7
- 8
- 9
- 10
- 11
- 12
- 13
- 14
- 15
- 16
- 17
- 18
- 19
- 20
- 21
- 22
- 23
- 24
- 25
- 26
- 27
- 28
- 29
- 30
- 31
- 32
- 33
- 34
- 35
- 36
- 37
- 38
- 39
- 40
- 41
- 42
- 43
- 44
- 45
- 46
- 47
- 48
- 49
- 50
- 51
- 52
- 53
- 54
- 55
- 56
- 57
- 58
- 59
- 60
- 61
- 62
- 63
- 64
- 65
- 66
- 67
- 68
- 69
- 70
- 71
- 72
- 73
- 74
- 75
- 76
- 77
- 78
- 79
- 80
- 81
- 82
- 83
- 84
- 85
- 86
- 87
- 88
- 89
- 90
- 91
- 92
- 93
- 94
- 95
- 96
- 97
- 98
- 99
- 100
- 101
- 102
- 103
- 104
- 105
- 106
- 107
- 108
- 109
- 110
- 111
- 112
- 113
- 114
- 115
- 116
- 117
- 118
- 119
- 120
- 121
- 122
- 123
- 124
- 125
图像拼接
图像拼接是将标签映射上的小图还原成大图,具体思路是通过读取yaml文件,获得图片的尺寸,然后计算出一张大图有几行几列,先将每一列进行拼接,之后拼接一行,得到大图,最后根据原图尺寸进行裁剪,除掉黑边。
''' 将小图还原出大图 ''' import shutil from pathlib import Path import numpy as np import cv2 import yaml import os.path from tqdm import tqdm rootdir = 'D:/Data/i3' # 原始图片文件夹 savedir = 'D:/Data/i4' # 保存图片文件夹 ConfigPath = "../config.yaml" # 配置文件(记录图片尺寸) # 拼接每一列的图片 def pix_v_img(v_pic): img_stack = [] for i in v_pic: temp_img = cv2.imread(i) img_stack.append(temp_img) imgStackV = np.vstack(img_stack) return imgStackV if __name__ == '__main__': # 创建输出文件夹 if Path(savedir).exists(): shutil.rmtree(savedir) os.mkdir(savedir) h_pic = [] v_pic = [] with open(file=ConfigPath, mode="rb") as f: infos = yaml.load(f, Loader=yaml.FullLoader) pic_width = infos['width'] pic_height = infos['height'] x_max = int(pic_width / 1280) y_max = int(pic_height / 1280) for filename in tqdm(os.listdir(rootdir)): currentPath = os.path.join(rootdir, filename) name_x_y = currentPath.split('.')[0].split('__') name = name_x_y[0] x = int(int(name_x_y[1]) / 1280) y = int(int(name_x_y[2]) / 1280) if (x != x_max and y != y_max) or (x == x_max and y != y_max): v_pic.append(currentPath) if x != x_max and y == y_max: v_pic.append(currentPath) temp_img = pix_v_img(v_pic) h_pic.append(temp_img) v_pic = [] if x == x_max and y == y_max: v_pic.append(currentPath) temp_img = pix_v_img(v_pic) h_pic.append(temp_img) v_pic = [] imgStackH = np.hstack(h_pic) saveFile = savedir + '/' + filename.split('.')[0].split('__')[0] + '.jpg' imgROI = imgStackH[0: pic_height, 0: pic_width] # 裁剪图片,去掉黑边 cv2.imwrite(saveFile, imgROI) # 保存图像文件 h_pic = []- 1
- 2
- 3
- 4
- 5
- 6
- 7
- 8
- 9
- 10
- 11
- 12
- 13
- 14
- 15
- 16
- 17
- 18
- 19
- 20
- 21
- 22
- 23
- 24
- 25
- 26
- 27
- 28
- 29
- 30
- 31
- 32
- 33
- 34
- 35
- 36
- 37
- 38
- 39
- 40
- 41
- 42
- 43
- 44
- 45
- 46
- 47
- 48
- 49
- 50
- 51
- 52
- 53
- 54
- 55
- 56
- 57
- 58
- 59
- 60
- 61
- 62
- 63
- 64
- 65
- 66
- 67
- 68
- 69
-
相关阅读:
使用vim对比两个文件
初识React
又一个千亿市场,冰淇淋也成了创新试验田
清华计算几何大作业(十):CG2017 PA5-2 FruitNinja(水果忍者)· 下
优化算法 - RMSProp算法
UE4动作游戏实例RPG Action解析一:角色移动,旋转,动画创建,创建武器,及武器配置
linux(四) -- 常用基本命令
ABB机器人欧拉角与四元数的相互转化以及旋转矩阵的求法
【HCIE】01.IGP高级特性
FreeRTOS中PendSV和SysTick的中断优先级和SVC系统调用
- 原文地址:https://blog.csdn.net/qq1198768105/article/details/128064881