-
Hive数据操纵语言-DML(Load、insert、事务表)
1. Load加载数据
1.1 概述
- 主要为将数据文件移动到Hive表对应的位置,即复制、移动操作
1.2 语法

1.2.1 filepath
- 表示待移动数据的路径
- 文件路径支持下面三种形式,要结合LOCAL关键字一起考虑:
- 相对路径,例如:project/data1
- 绝对路径,例如:/user/hive/project/data1
- 具有schema的完整的URI,例如:hdfs://namenode:9000/user/hive/project/data1
1.2.2 LOCAL
- 指定LOCAL,将在本地文件系统中查找文件路径。
- 没有指定LOCAL关键字
- 如果filepath指向的是一个完整的URI,会直接使用这个URI;
- 如果没有指定schema,Hive会使用在hadoop配置文件中参数fs.default.name指定的。
1.2.3 OVERWRITE
- 如果使用了OVERWRITE关键字,则目标表(或者分区)中的已经存在的数据会被删除,然后再将filepath指向的文件/目录中的内容添加到表/分区中。
1.3 练习
建表:
-- 1.1: 建表,从本地加载数据 create table student_local( num int, name string, sex string, age int, dept string ) row format delimited fields terminated by ','; -- 1.2: 建表,从HDFS加载数据 create external table student_HDFS( num int, name string, sex string, age int, dept string ) row format delimited fields terminated by ','; -- 1.3 建表,从HDFS加载数据到分区表 create table student_HDFS_p ( num int, name string, sex string, age int, dept string ) partitioned by (country string) row format delimited fields terminated by ',';- 1
- 2
- 3
- 4
- 5
- 6
- 7
- 8
- 9
- 10
- 11
- 12
- 13
- 14
- 15
- 16
- 17
- 18
- 19
- 20
- 21
- 22
- 23
- 24
- 25
- 26
- 27
1.3.1 练习Load Data From Local FS
-- 2. 本地加载数据 load data local inpath '/root/hivedata/students.txt' into table student_local;- 1
- 2
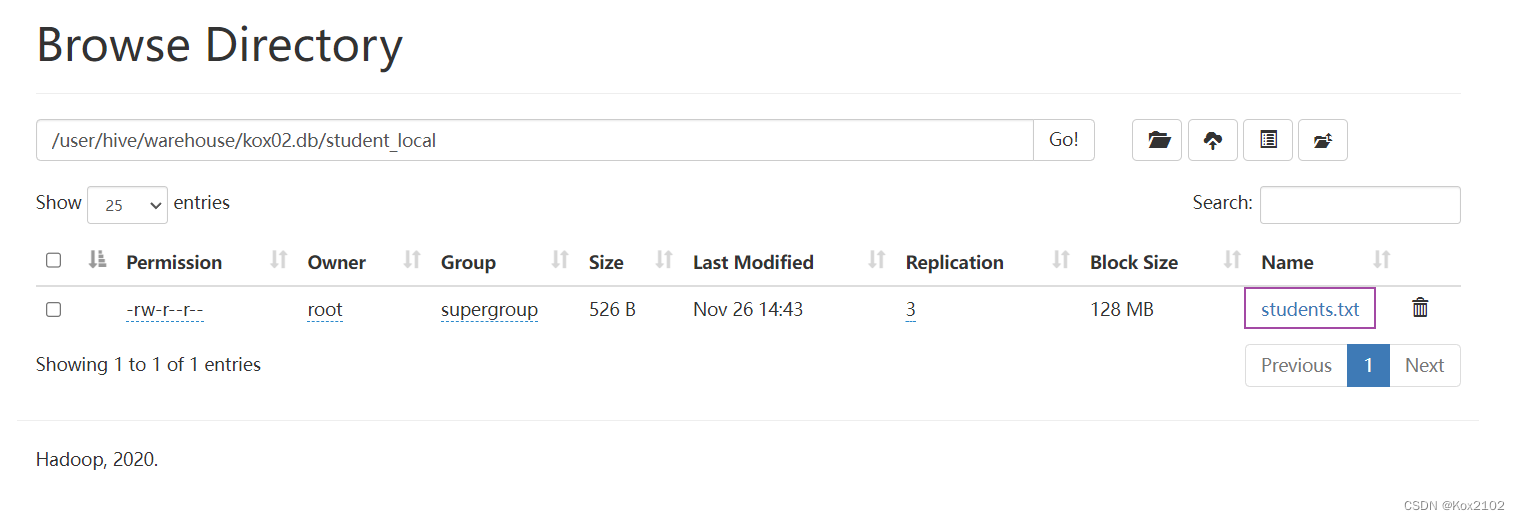
1.3.2 练习Load Data From HDFS
-- 3. 从HDFS加载数据 -- 先将数据上传至HDFS上,hadoop fs -put /root/hivedata/students.txt load data inpath '/students.txt' into table student_hdfs;- 1
- 2
- 3

1.3.3 练习Load Data To Partitoin Table
-- 4. 从HDFS加载数据并制定分区 -- 先将数据上传至HDFS上,hadoop fs -put /root/hivedata/students.txt load data inpath 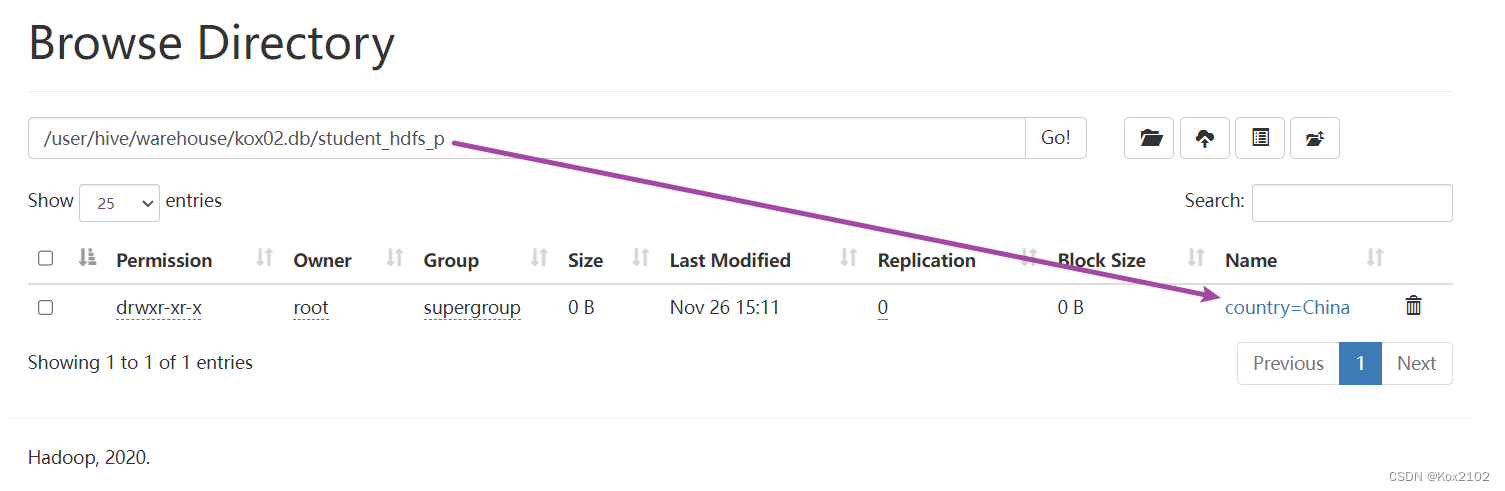 '/students.txt' into table student_HDFS_p partition (country = 'China');- 1
- 2
- 3
- 4

2. insert插入数据
2.1 insert使用方式
2.1.1 insert+value
create table t_test_insert(id int,name string,age int); insert into table t_test_insert values(1,"allen",18); select * from t_test_insert;- 1
- 2
- 3
- 4
- 5
2.1.2 insert+select
- insert+select表示:将后面查询返回的结果作为内容插入到指定表中,注意OVERWRITE将覆盖已有数据。
- 需要保证查询结果列的数目和需要插入数据表格的列数目一致。
- 如果查询出来的数据类型和插入表格对应的列数据类型不一样,将会进行转换,失败数据将会成为NULL。
- 语法:
INSERT OVERWRITE TABLE tablename1 [PARTITION (partcol1=val1, partcol2=val2 ...) [IF NOT EXISTS]] select_statement1 FROM from_statement; INSERT INTO TABLE tablename1 [PARTITION (partcol1=val1, partcol2=val2 ...)] select_statement1 FROM from_statement;- 1
- 2
- 3
- 示例:
--step1:创建一张源表student drop table if exists student; create table student(num int,name string,sex string,age int,dept string) row format delimited fields terminated by ','; --加载数据 load data local inpath '/root/hivedata/students.txt' into table student; select * from student; --step2:创建一张目标表 只有两个字段 create table student_from_insert(sno int,sname string); --使用insert+select插入数据到新表中 insert into table student_from_insert select num,name from student; select * from student_from_insert;- 1
- 2
- 3
- 4
- 5
- 6
- 7
- 8
- 9
- 10
- 11
- 12
- 13
- 14
- 15
- 16
- 17
- 18
2.2 多重插入
multiple inserts多重插入
- 核心功能:一次扫描多次插入
- 主要目的:减少扫描,在一次扫描中,完成多次insert操作
--当前库下已有一张表student select * from student; --创建两张新表 create table student_insert1(sno int); create table student_insert2(sname string); --多重插入 一次扫描 多次插入 from student insert overwrite table student_insert1 select num insert overwrite table student_insert2 select name;- 1
- 2
- 3
- 4
- 5
- 6
- 7
- 8
- 9
- 10
- 11
2.3 动态分区插入
2.3.1 概述
- 动态分区插入指的是:分区的值是由后续的select查询语句的结果来动态确定的。
- 根据查询结果自动分区。
2.3.2 示例
- 首先设置动态分区模式为非严格模式 默认已经开启了动态分区功能
set hive.exec.dynamic.partition = true; set hive.exec.dynamic.partition.mode = nonstrict;- 1
- 2
- 当前库下已有一张表student
select * from student;- 1

- 创建分区表 以sdept作为分区字段
create table student_partition(Sno int,Sname string,Sex string,Sage int) partitioned by(Sdept string);- 1
- 执行动态分区插入操作
insert into table student_partition partition(Sdept) select num,name,sex,age,dept from student; --其中,num,name,sex,age作为表的字段内容插入表中 --dept作为分区字段值- 1
- 2
- 3
- 4
- 查询验证

2.4 Directory导出数据
2.4.1 语法
- Hive支持将select查询的结果导出成文件存放在文件系统中。语法如下:
--标准语法: INSERT OVERWRITE [LOCAL] DIRECTORY directory1 [ROW FORMAT row_format] [STORED AS file_format] (Note: Only available starting with Hive 0.11.0) SELECT ... FROM ... --Hive extension (multiple inserts): FROM from_statement INSERT OVERWRITE [LOCAL] DIRECTORY directory1 select_statement1 [INSERT OVERWRITE [LOCAL] DIRECTORY directory2 select_statement2] ... --row_format : DELIMITED [FIELDS TERMINATED BY char [ESCAPED BY char]] [COLLECTION ITEMS TERMINATED BY char] [MAP KEYS TERMINATED BY char] [LINES TERMINATED BY char]- 1
- 2
- 3
- 4
- 5
- 6
- 7
- 8
- 9
- 10
- 11
- 12
- 13
- 14
- 目录可以是完整的URI。
- 使用LOCAL关键字,则Hive会将数据写入本地文件系统上的目录。
2.4.2 示例
--当前库下已有一张表student select * from student; --1、导出查询结果到HDFS指定目录下 insert overwrite directory '/tmp/hive_export/e1' select num,name,age from student limit 2; --2、导出时指定分隔符和文件存储格式 insert overwrite directory '/tmp/hive_export/e2' row format delimited fields terminated by ',' stored as orc select * from student; --3、导出数据到本地文件系统指定目录下 insert overwrite local directory '/root/hive_export/e1' select * from student;- 1
- 2
- 3
- 4
- 5
- 6
- 7
- 8
- 9
- 10
- 11
- 12
- 13
3. 事务表
- 开启事务配置
set hive.support.concurrency = true; --Hive是否支持并发 set hive.enforce.bucketing = true; --从Hive2.0开始不再需要 是否开启分桶功能 set hive.exec.dynamic.partition.mode = nonstrict; --动态分区模式 非严格 set hive.txn.manager = org.apache.hadoop.hive.ql.lockmgr.DbTxnManager; -- set hive.compactor.initiator.on = true; --是否在Metastore实例上运行启动压缩合并 set hive.compactor.worker.threads = 1; --在此metastore实例上运行多少个压缩程序工作线程。- 1
- 2
- 3
- 4
- 5
- 6
- 事务表的创建
CREATE TABLE emp (id int, name string, salary int) STORED AS ORC TBLPROPERTIES ('transactional' = 'true');- 1
- 2
- 插入数据
INSERT INTO emp VALUES (1, 'Jerry', 5000), (2, 'Tom', 8000), (3, 'Kate', 6000);- 1
- 2
- 3
- 4
- 查询验证
select * from emp;- 1
- 再次插入
INSERT INTO emp VALUES(4, 'Allen', 8000);- 1
- 删除数据
delete from emp where id =2;- 1
-
相关阅读:
IT入门知识大纲(0/10)
JS 读取excel文件内容 和 将json数据导出excel文件
Android常用Qualifiers(限定符)
Redis----布隆过滤器
16-python之认识爬虫
蓝桥杯备赛-上学迟到
PSP - 蛋白质复合物结构预测 Template Pair 特征 Mask 可视化
基于萤火虫算法优化的BP神经网络预测模型(Matlab代码实现)
Java中枚举类(enum)的实用小技巧
Android四大组件之BroadcastReceiver(二)
- 原文地址:https://blog.csdn.net/Kox_233/article/details/128047903
