-
【JSP/Servlet】基于WEB的通讯录系统
注意:通讯单词是mail,但我自己写的时候写成了tail,然后快写完才发现,所以这里就假装tail是mail吧。系统开发描述步骤
这边是从前端往后端的方式开发。
系统功能描述
- 首先有一个登录页面,登录页面需要输入用户名和密码,有记住选项(如果选择了记住下回就直接跳转到我的通讯录,无需登录),然后登录。
- 正确登录后就跳转到通讯录系统的欢迎界面,欢迎界面有个“我的通讯录”的超链接;
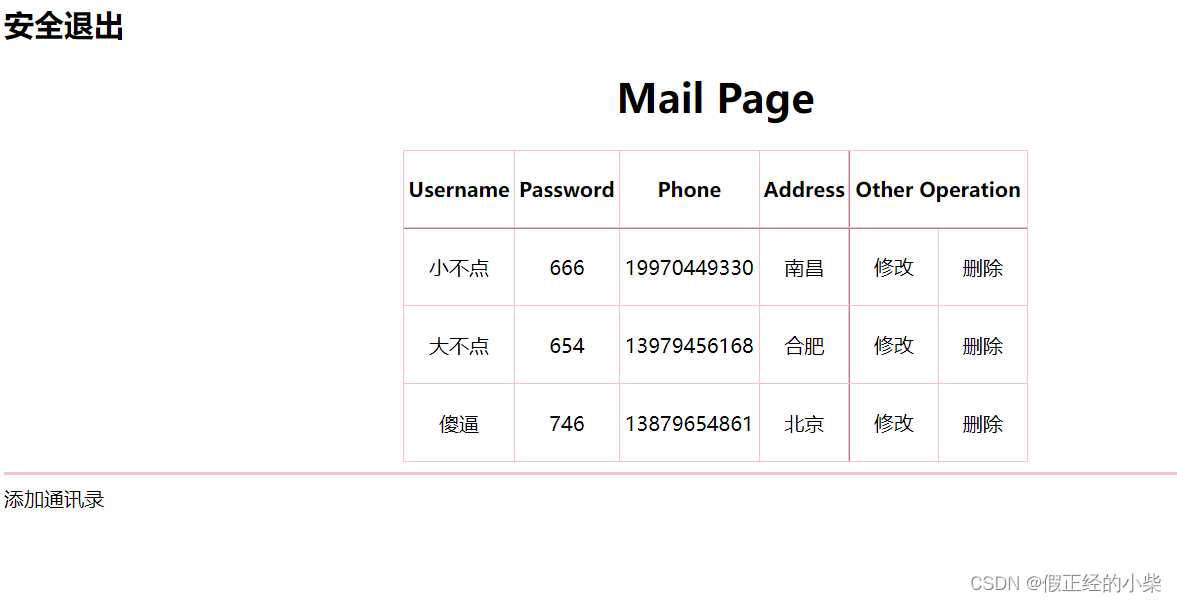
- 点击它会以表格的方式展示所有联系人的信息;
- 然后我们可以对这个通讯录进行增删改;
- 可以选择退出登录其他用户。
一、创建一个登录页面
首先我们创建一个
index.jsp文件,然后在里面编写登录页面的代码:<%@ page contentType="text/html;charset=UTF-8" language="java" %> <html> <head> <title>welcome</title> </head> <body> <form action="" method="post"> 用户名: <input type="text" name="username" ><br> 密码 : <input type="password" name="password" ><br> <input type="checkbox" name="res" value="1" >保存用户名和密码<br> <input type="submit" value="登录" > </form> </body> </html>- 1
- 2
- 3
- 4
- 5
- 6
- 7
- 8
- 9
- 10
- 11
- 12
- 13
- 14
- 15
页面效果图:

二、模拟数据(用数据库模拟用户名和密码还有用户的通讯录)
写SQL把用户名和密码模拟出来:
drop table if exists user; create table user( id int primary key auto_increment, username varchar(255), password varchar(255) ); insert into user(username,password) values('admin','admin'); insert into user(username,password) values('zhangsan','258'); insert into user(username,password) values('xmq','369');- 1
- 2
- 3
- 4
- 5
- 6
- 7
- 8
- 9
- 10
- 11
写SQL把用户的通讯录模拟出来:
drop table if exists tail; create table tail( id int primary key auto_increment, name varchar(255), password varchar(255), phone varchar(255), address varchar(255) ); insert into tail(name,password,phone,address) values("xmq","123","13979463154","beijing"); insert into tail(name,password,phone,address) values("zhangsan","654","13979658754","nanjing"); insert into tail(name,password,phone,address) values("lisi","156","13974873154","tianjing");- 1
- 2
- 3
- 4
- 5
- 6
- 7
- 8
- 9
- 10
- 11
- 12
- 13
以下是得到的通讯录(当然可以通过外键让每个用户拥有不同的通讯录,但这里为了方便让每个用户都使用同一个通讯录):

三、创建一个JDBC工具类
接下来创建一个JDBC工具类,方便操作:
package javaweb.tail.util; import java.sql.*; import java.util.ResourceBundle; public class DBUtil { private static ResourceBundle bundle = ResourceBundle.getBundle("jdbc"); private static String driver = bundle.getString("driver"); private static String url = bundle.getString("url"); private static String name = bundle.getString("name"); private static String password = bundle.getString("password"); static { try { Class.forName(driver); } catch (ClassNotFoundException e) { throw new RuntimeException(e); } } /** * 返回连接数据库对象 * * @return * @throws SQLException */ public static Connection getConnection() throws SQLException { return DriverManager.getConnection(url, name, password); } /** * 关闭所用的资源 * * @param conn * @param sta * @param rs */ public static void close(Connection conn, Statement sta, ResultSet rs) { if (rs != null) { try { rs.close(); } catch (SQLException e) { throw new RuntimeException(e); } } if (sta != null) { try { sta.close(); } catch (SQLException e) { throw new RuntimeException(e); } } if (conn != null) { try { conn.close(); } catch (SQLException e) { throw new RuntimeException(e); } } } }- 1
- 2
- 3
- 4
- 5
- 6
- 7
- 8
- 9
- 10
- 11
- 12
- 13
- 14
- 15
- 16
- 17
- 18
- 19
- 20
- 21
- 22
- 23
- 24
- 25
- 26
- 27
- 28
- 29
- 30
- 31
- 32
- 33
- 34
- 35
- 36
- 37
- 38
- 39
- 40
- 41
- 42
- 43
- 44
- 45
- 46
- 47
- 48
- 49
- 50
- 51
- 52
- 53
- 54
- 55
- 56
- 57
- 58
- 59
- 60
- 61
- 62
- 63
配置文件中的属性可以自行设置;
四、判断在登录页面输入的用户名和密码是否正确
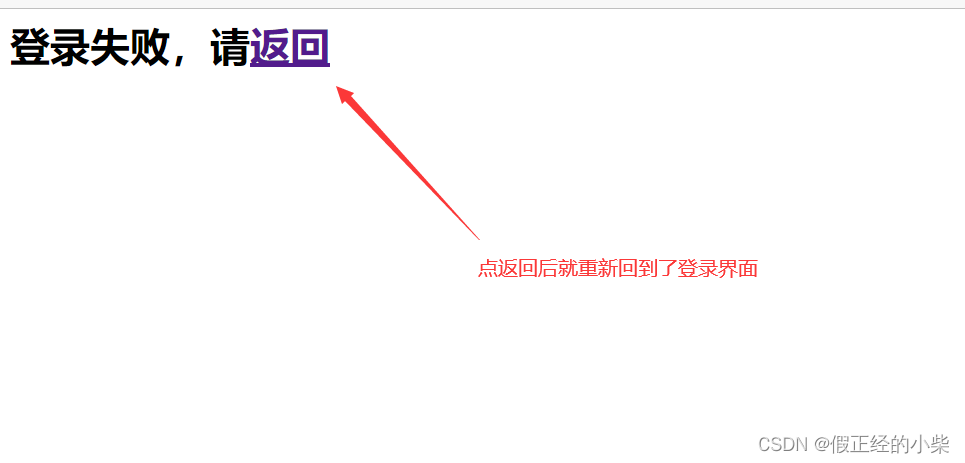
如果正确的话跳转到“我的通讯录”页面,如果失败的话就提示“重新登录,请返回”:
所以我们得创建一个Servlet,如果登录成功需要跳转到我的通讯录的话,就得存取数据,然后利用request进行转发显示到页面上:package javaweb.tail; import jakarta.servlet.ServletException; import jakarta.servlet.annotation.WebServlet; import jakarta.servlet.http.HttpServlet; import jakarta.servlet.http.HttpServletRequest; import jakarta.servlet.http.HttpServletResponse; import javaweb.tail.util.DBUtil; import java.io.IOException; import java.sql.Connection; import java.sql.PreparedStatement; import java.sql.ResultSet; import java.sql.SQLException; @WebServlet("/user/login") public class UserServlet extends HttpServlet { /** * 使用模板方法模式实现登录和退出检验 * @param request * @param response * @throws ServletException * @throws IOException */ @Override protected void service(HttpServletRequest request, HttpServletResponse response) throws ServletException, IOException { String servletPath = request.getServletPath(); if("/user/login".equals(servletPath)){ doLogin(request,response); } } private void doLogin(HttpServletRequest request, HttpServletResponse response) throws ServletException, IOException{ String username = request.getParameter("username"); String password = request.getParameter("password"); Connection conn = null; PreparedStatement ps = null; ResultSet rs = null; //设置一个标志变量,判断是否登录成功 boolean flag = false; try{ conn = DBUtil.getConnection(); String sql = "select * from user where username=? and password=?"; ps = conn.prepareStatement(sql); ps.setString(1,username); ps.setString(2,password); rs = ps.executeQuery(); if(rs.next()){ flag = true; } }catch(SQLException e){ e.getClass().getName(); }finally{ DBUtil.close(conn,ps,rs); } if(flag){ // 登录成功跳转到“我的通讯录”页面 response.sendRedirect(request.getContextPath()+"/mytail.jsp"); }else{ // 登录失败,请重新登录 response.sendRedirect(request.getContextPath() + "/error.jsp"); } } }- 1
- 2
- 3
- 4
- 5
- 6
- 7
- 8
- 9
- 10
- 11
- 12
- 13
- 14
- 15
- 16
- 17
- 18
- 19
- 20
- 21
- 22
- 23
- 24
- 25
- 26
- 27
- 28
- 29
- 30
- 31
- 32
- 33
- 34
- 35
- 36
- 37
- 38
- 39
- 40
- 41
- 42
- 43
- 44
- 45
- 46
- 47
- 48
- 49
- 50
- 51
- 52
- 53
- 54
- 55
- 56
- 57
- 58
- 59
- 60
- 61
- 62
- 63
- 64
- 65
- 66
- 67
- 68
- 69
- 70
- 71
- 72

这里的error.jsp代码:<%@ page contentType='text/html;charset=UTF-8' language='java' %> <html> <head> <title>error</title> </head> <body> <h1>登录失败,请<a href='<%=request.getContextPath()%>/index.jsp'>返回</a></h1> </body> </html>- 1
- 2
- 3
- 4
- 5
- 6
- 7
- 8
- 9
- 10
登录成功效果展示:

登录失败效果展示:

五、利用cookie实现保存
这里重新定义一个欢迎页面,写一个
servlet判断浮现在浏览器的首个页面,如果cookie存在且符合,那么直接跳转到我的通讯录,如果不符合且没有就跳转到登录页面为欢迎页面。
在web.xml先部署一波:

在何时创建cookie呢?
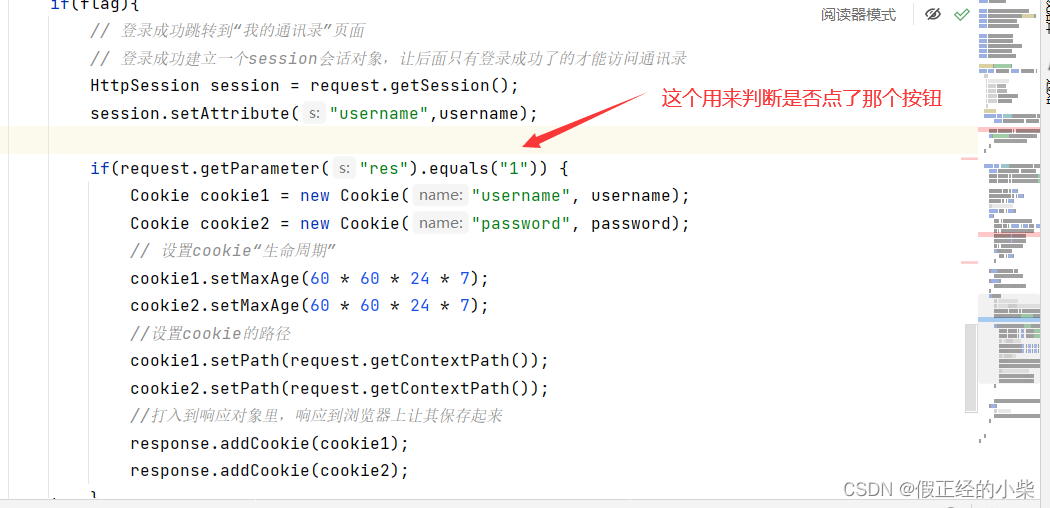
在首次登录成功且选择了保存的UserServlet里,因为创建成功才有的保存:

下面是判断首页面的代码:
package javaweb.tail; import jakarta.servlet.ServletException; import jakarta.servlet.annotation.WebServlet; import jakarta.servlet.http.*; import javaweb.tail.util.DBUtil; import java.io.IOException; import java.sql.Connection; import java.sql.PreparedStatement; import java.sql.ResultSet; import java.sql.SQLException; @WebServlet("/welcome") public class WelcomeServlet extends HttpServlet { @Override protected void doGet(HttpServletRequest request, HttpServletResponse response) throws ServletException, IOException { String username = null; String password = null; // 获取Cookie对象集 Cookie[] cookies = request.getCookies(); if(cookies!=null){ for(Cookie cookie:cookies){ if(cookie.getName().equals("username")){ username = cookie.getValue(); }else if(cookie.getName().equals("password")){ password = cookie.getValue(); } } } // 如果存在判断用户名和密码是否正确,错误则直接返回到登录页面 if(username!=null&&password!=null){ Connection conn = null; PreparedStatement ps =null; ResultSet rs = null; boolean flag = false; try{ conn = DBUtil.getConnection(); String sql = "select * from user where password=? and username=?"; ps = conn.prepareStatement(sql); ps.setString(1,password); ps.setString(2,username); rs = ps.executeQuery(); if(rs.next()){ flag = true; } }catch (SQLException e){ e.printStackTrace(); }finally { DBUtil.close(conn,ps,rs); } if(flag){ //这里登录成功也要建一下session会话对象 //因为session对象浏览器关了就找不着了,而cookie是还在的 HttpSession session = request.getSession(); session.setAttribute("username",username); response.sendRedirect(request.getContextPath() + "/mytail.jsp"); }else { response.sendRedirect(request.getContextPath() + "/index.jsp"); } }else{ response.sendRedirect(request.getContextPath() + "/index.jsp"); } } }- 1
- 2
- 3
- 4
- 5
- 6
- 7
- 8
- 9
- 10
- 11
- 12
- 13
- 14
- 15
- 16
- 17
- 18
- 19
- 20
- 21
- 22
- 23
- 24
- 25
- 26
- 27
- 28
- 29
- 30
- 31
- 32
- 33
- 34
- 35
- 36
- 37
- 38
- 39
- 40
- 41
- 42
- 43
- 44
- 45
- 46
- 47
- 48
- 49
- 50
- 51
- 52
- 53
- 54
- 55
- 56
- 57
- 58
- 59
- 60
- 61
- 62
- 63
- 64
- 65
- 66
- 67
- 68
- 69
- 70
测验一波:
测验最后的结果是点击了保存后,关闭浏览器直接输入登录网址直接跳转到我的通讯录页面!六、以表格形式显示出我的通讯录
首先创建一个
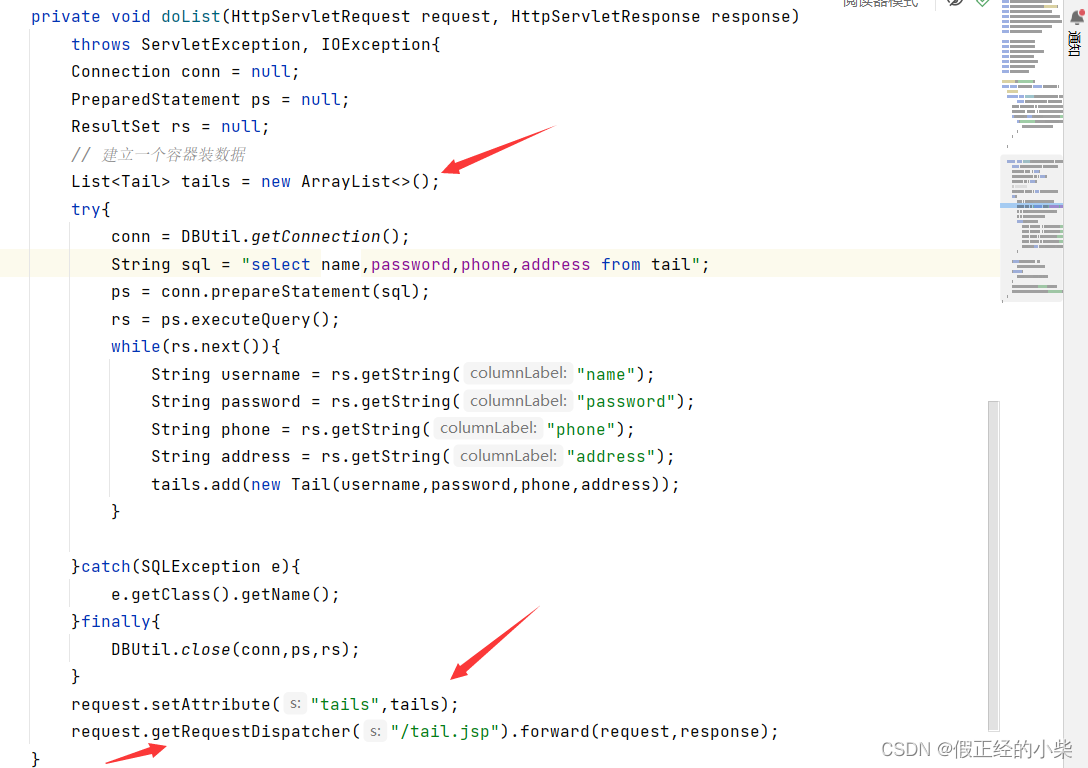
JavaBean用来表示一个通讯录里人,将数据保存在请求域中,通过转发来实现数据的转移,然后在list.jsp中显示出数据。

这里也是JDBC代码,区别就是建立了一个容器,然后放到请求域转发到要显示数据的.jsp中显示出来,以下是tail.jsp的代码,用来以列表形式显示:<%@ page import='bean.Tail' %> <%@ page import='java.util.List' %> <%@ page contentType='text/html;charset=UTF-8' language='java' %> <html> <head> <title>tail</title> <style type='text/css'> a{ text-decoration: none; color:black; } a:hover{ text-decoration: underline; color:pink; cursor:pointer; text-align: center; } table{ border: 1px solid pink; border-collapse: collapse; height: 250px; width: 500px; } </style> </head> <body> <h1 align='center'>Mail Page</h1> <table align='center' border='1px'> <tr> <th align='center'>Username</th> <th align='center'>Password</th> <th align='center'>Phone</th> <th align='center'>Address</th> <th align='center' colspan='3'>Other Operation</th> </tr> <% List<Tail> tails = (List)request.getAttribute("tails"); for(Tail tail:tails){ String username = tail.getUsername(); String password = tail.getPassword(); String phone = tail.getPhone(); String address = tail.getAddress(); %> <tr> <td align='center'><%=username%></td> <td align='center'><%=password%></td> <td align='center'><%=phone%></td> <td align='center'><%=address%></td> <td align='center'>a</td> <td align='center'>b</td> <td align='center'>c</td> </tr> <% } %> </table> <hr color='pink'> <a href=''>添加通讯录</a> </body> </html>- 1
- 2
- 3
- 4
- 5
- 6
- 7
- 8
- 9
- 10
- 11
- 12
- 13
- 14
- 15
- 16
- 17
- 18
- 19
- 20
- 21
- 22
- 23
- 24
- 25
- 26
- 27
- 28
- 29
- 30
- 31
- 32
- 33
- 34
- 35
- 36
- 37
- 38
- 39
- 40
- 41
- 42
- 43
- 44
- 45
- 46
- 47
- 48
- 49
- 50
- 51
- 52
- 53
- 54
- 55
- 56
- 57
- 58
- 59
- 60
- 61
- 62
- 63
- 64
- 65
效果展示:

七、实现增删改功能
增删改功能这里就不详写代码了,大概就是Servlet就jsp之间的转换,多次使用
JDBC,Servlet用来操作数据,jsp用来显示数据!他们显示数据都是显示表格,也就是都跳转到**/tail/list**就可以了
效果图:

八、实现退出功能

然后跳转到登录页面即可!具体代码
具体代码的话需要可以去我的gitee获取就行;
CRUD -
相关阅读:
294_C++_报警状态bit与(&)上通道bit,然后检测置位的通道,得到对应置位通道的告警信息,适用于多通道告警,组成string字符串发送
R语言将向量横向转换为单行数据框,随后整合数量不确定的数据框
计算机毕业设计Java网上鲜花店网站(源码+系统+mysql数据库+Lw文档)
C语言之婚礼上的谎言
LLM 中的参数单位
汉诺塔问题(java)
归并排序及其时间复杂度分析
[DP] DP优化总结
数据结构(11)图的遍历,DFS、BFS的JAVA实现
Android拦截HOME键
- 原文地址:https://blog.csdn.net/qq_63691275/article/details/128003482