-
python之爬虫的学习
为什么要学习爬虫
现如今,浏览器可以更方便的进行网页交互以人们适合阅读的方式展示数据;但爬虫或者网页抓取对数据的收集和处理更为卓越,如果我们可以再将这些处理过的数据存储到数据库中,自然也能实现其可视化
浏览器背后的秘密
既然是网络抓取,首先我们要对当我们输入网址后回车,浏览器到底都干了什么:
假设有两台主机A,B;其中A为服务器,B为客户机
- 首先,B对获得的URL进行DNS解析
注:DNS解析简单理解就是根据域名去查找相对应的IP地址(A的IP地址) - B发送信息(由请求头和消息体组成),该信息包括B的本地路由器MAC地址和A的IP地址
- B路由器收到B发送的信息,打上自己的IP地址并寄送给A的IP地址
- 到达A服务器后,读取包裹请求头里的目标数据,传递给对应的应用
- A服务器上网络服务器应用读取到数据,数据内容大致如下:
- 这是一个…请求
- 请求index.html
- 网络服务器找到对应的html文件,把它打包发给B,经过B的本地路由器传给B,B电脑的浏览器就显示出了相关网页
注:用户可以理解为两个人之间发微信,首先B要拿手机找到A微信号然后再通过手机(“路由器”)发出去,然后A看到了回给B
常用网络请求

爬虫中最常使用的是GET和POST,故不对其他三种做介绍,感兴趣可自行查阅相关文档。-
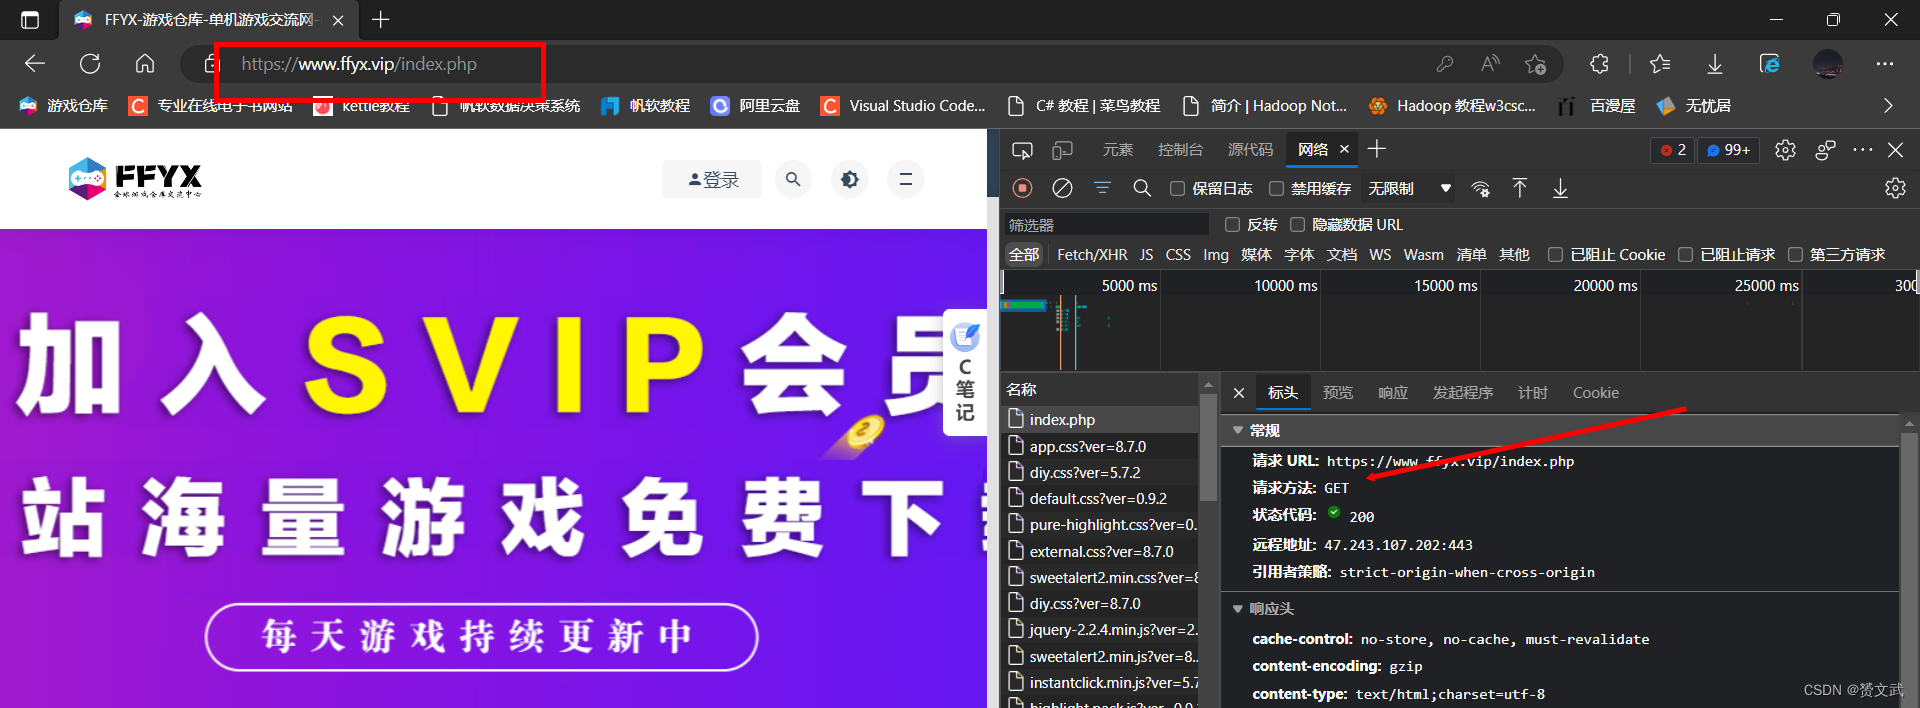
GET——人们日常在浏览器中输入相关URL后页面展示即为最常见的一个GET请求

-
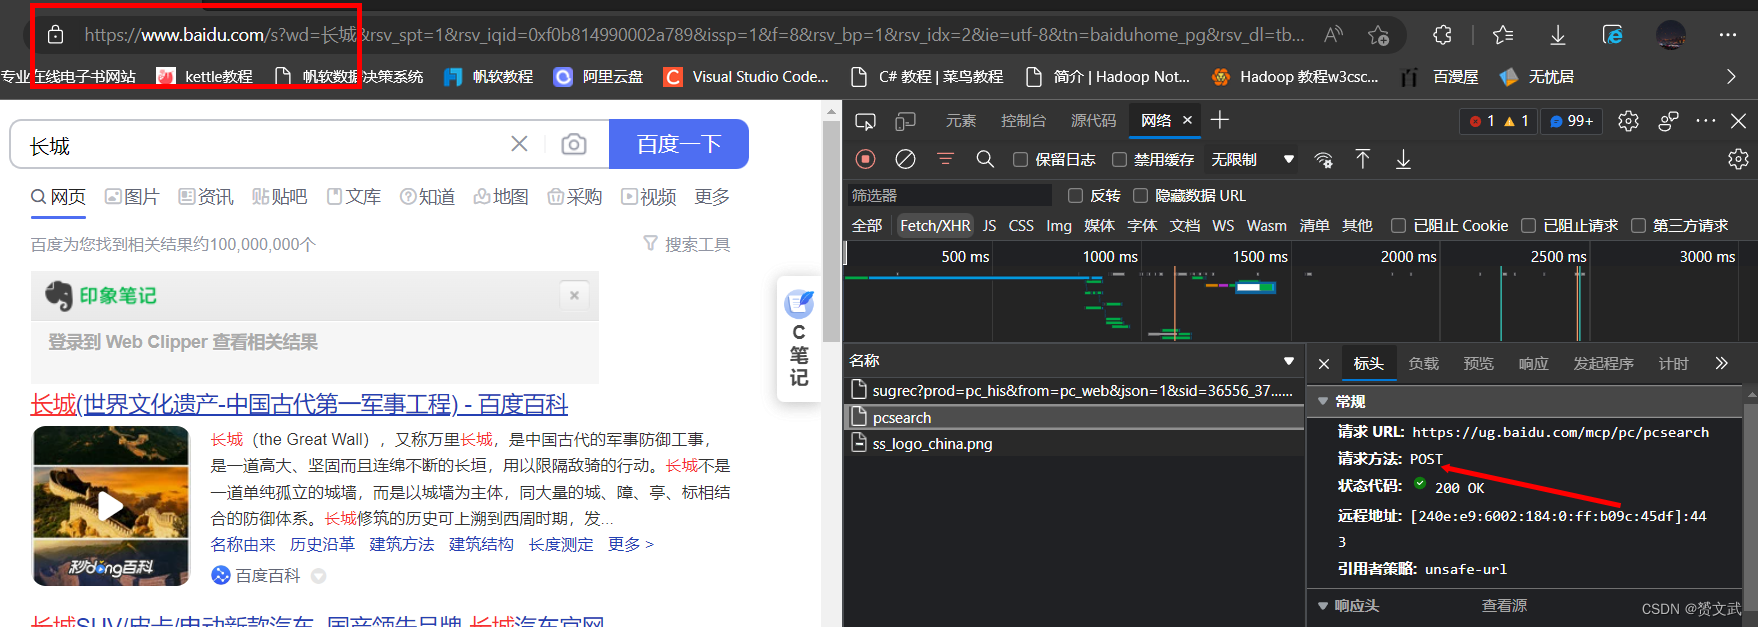
POST——人们进行用户登录注册/使用在线翻译功能/使用搜索引擎搜索时候即是一个简单的POST请求

注:edge浏览器开发模式的快捷键是F12,然后添加上网络即可;若出现网络无内容显示,尝试刷新网页即可
URL解析
URL(Uniform / Universal Resource Locator的缩写):统一资源定位符,是用于完整地描述Internet上网页和其他资源的地址的一种标识方法。
基本格式:scheme://host[:port#]/path/…/[?query-string][#anchor]
- scheme——协议;如http、https、ftp
- host——服务器IP地址或域名;例如www.baidu.com、192.168.21.138
- [:port#]——端口号,可省略省略后走默认,默认为80
- path——访问资源路径
- query-string——参数,发送给http服务器的数据;常见于数据库参数查询
- anchor——锚(跳转到网页的指定锚点位置)
下面看几个栗子:
https://cdn.haier.net/assets/bazaar/com_map.json?v20210726
https://www.shulanxt.com/datawarehouse/kettle/kettlefz
https://www.baidu.com/index.htmlHTTP常见响应状态码
-
1xx——信息
- 100 Continue 仅接受到部分,需用户继续操作
-
2xx——成功
- 200 OK 成功

- 200 OK 成功
-
3xx——重定向
- 307 Temporary Redirect 被请求的页面已经临时移至新的url
-
4xx——客户端错误
- 400 Bad Request 服务器未能理解请求
- 401 Unauthorized 被请求的页面需要用户名和密码
- 403 Forbidden 对被请求页面的访问被禁止,可能是heards信息被屏蔽或者用户IP被该网站屏蔽
- 404 Not Found 服务器上未找到请求的页面

-
5xx——服务器错误
- 503 Service Unavailable 请求未完成。服务器临时过载或宕机
相关库及其简单使用
- Requests
(1) 利用Requests模拟最基本的GET请求
#导入requests import requests #模拟get请求 response=requests.get("https://www.baidu.com") #打印get请求返回内容 print(response.text)- 1
- 2
- 3
- 4
- 5
- 6
运行效果如下图所示:
 (2)利用Requests添加查询参数
import requests #添加查询参数,数据类型必须为字典 kw={'wd':'长城'} response=requests.get("http://www.baidu.com/s?",params=kw) print('返回内容(Unicode编码):') print(response.text) print('返回内容(字节流类型):') print(response.content) print('完整url地址:') print(response.url) print('状态码:') print(response.status_code)- 1
- 2
- 3
- 4
- 5
- 6
- 7
- 8
- 9
- 10
- 11
- 12
- 13
- 14
- 15
- 16
返回内容如下:
"D:\Python Project\demo\venv\Scripts\python.exe" "D:\Python Project\demo\main.py" 返回内容(Unicode编码): <!DOCTYPE html> <html lang="zh-CN"> <head> <meta charset="utf-8"> <title>ç™¾åº¦å®‰å ¨éªŒè¯</title> <meta http-equiv="Content-Type" content="text/html; charset=utf-8"> <meta name="apple-mobile-web-app-capable" content="yes"> <meta name="apple-mobile-web-app-status-bar-style" content="black"> <meta name="viewport" content="width=device-width, user-scalable=no, initial-scale=1.0, minimum-scale=1.0, maximum-scale=1.0"> <meta name="format-detection" content="telephone=no, email=no"> <link rel="shortcut icon" href="https://www.baidu.com/favicon.ico" type="image/x-icon"> <link rel="icon" sizes="any" mask href="https://www.baidu.com/img/baidu.svg"> <meta http-equiv="X-UA-Compatible" content="IE=Edge"> <meta http-equiv="Content-Security-Policy" content="upgrade-insecure-requests"> <link rel="stylesheet" href="https://ppui-static-wap.cdn.bcebos.com/static/touch/css/api/mkdjump_c5b1aeb.css" /> </head> <body> <div class="timeout hide"> <div class="timeout-img"></div> <div class="timeout-title">网络ä¸ç»™åŠ›ï¼Œè¯·ç¨åŽé‡è¯•</div> <button type="button" class="timeout-button">返回首页</button> </div> <div class="timeout-feedback hide"> <div class="timeout-feedback-icon"></div> <p class="timeout-feedback-title">问题å馈</p> </div> <script src="https://wappass.baidu.com/static/machine/js/api/mkd.js"></script> <script src="https://ppui-static-wap.cdn.bcebos.com/static/touch/js/mkdjump_db105ab.js"></script> </body> </html> 返回内容(字节流类型): b'\n\n\n \n\xe7\x99\xbe\xe5\xba\xa6\xe5\xae\x89\xe5\x85\xa8\xe9\xaa\x8c\xe8\xaf\x81 \n \n \n \n \n \n \n \n \n \n \n\n\n \n \n\n\n\n\n' 完整url地址: https://wappass.baidu.com/static/captcha/tuxing.html?&logid=11524773033600612710&ak=c27bbc89afca0463650ac9bde68ebe06&backurl=https%3A%2F%2Fwww.baidu.com%2Fs%3Fwd%3D%25E9%2595%25BF%25E5%259F%258E&signature=e7acb04e8e0047a1c7c088c65135643b×tamp=1669116487 状态码: 200 进程已结束,退出代码0- 1
- 2
- 3
- 4
- 5
- 6
- 7
- 8
- 9
- 10
- 11
- 12
- 13
- 14
- 15
- 16
- 17
- 18
- 19
- 20
- 21
- 22
- 23
- 24
- 25
- 26
- 27
- 28
- 29
- 30
- 31
- 32
- 33
- 34
- 35
- 36
- 37
- 38
- 39
- 40
- 41
- 42
- 43
复制打印的完整URL发现,该操作与用户手动在百度搜索框输入长城搜索返回的页面一致
(3)添加headersimport requests hearders={ "User-Agent":"Mozilla/5.0 (Windows NT 10.0; Win64; x64) AppleWebKit/537.36 (KHTML, like Gecko) Chrome/107.0.0.0 Safari/537.36 Edg/107.0.1418.52" } response=requests.get('https://www.linuxcool.com/',headers=hearders) print(response.content.decode('utf-8'))- 1
- 2
- 3
- 4
- 5
- 6
- 7
User-Agent(用户代理)是网站服务器用来确定用户所使用的操作系统版本、CPU 类型、浏览器版本等信息
如何寻找User-Agent信息如下视频演示:

如果遇到403禁止访问,可尝试更改User-Agent(4)小栗子:利用request实现抓取某个网址整个页面
import requests response=requests.get('https://www.shulanxt.com/datawarehouse/kettle/kettlefz') print(response.content.decode('utf-8'))- 1
- 2
- 3
- urllib
(1)urlopen函数使用
# 导入模块 import urllib.request # url地址 url='https://youku.com/' #用户代理 headers={ "User-Agent":"Mozilla/5.0 (Windows NT 10.0; Win64; x64) AppleWebKit/537.36 (KHTML, like Gecko) Chrome/107.0.0.0 Safari/537.36 Edg/107.0.1418.52" } #模拟一个网页请求 req=urllib.request.Request(url=url,headers=headers) response=urllib.request.urlopen(req) #打印网页内容以utf-8格式解码 print(response.read().decode("utf-8"))- 1
- 2
- 3
- 4
- 5
- 6
- 7
- 8
- 9
- 10
- 11
- 12
- 13
- 14
注意:decode()函数代表解码,encode()是其逆函数因为response.read()返回的编码格式为Unicode故要转为utf-8进行解码以消除乱码
(2)urllib.error模块
- URLError——该错误一般由网络引起
- HTTPError——服务器返回错误状态码,是URLError子类即URLError包括HTTPError- BeautifulSoup之find_all
(1)导入相关库
from bs4 import BeautifulSoup- 1
(2)首先进行一个简单初始化
bs = BeautifulSoup(html.read(), 'html.parser') html为urlopen赋值给的变量名- 1
- 2
html.parser为解析器;除该参数外还有lxml、html5lib;解析器个人理解为中间翻译官以确保能读懂
(3)调用find_all变量名= bs.find_all('div', {'class':'green'})- 1
该语句会找到抓取页面上包含class="green"属性的div标签的所有内容
注:在此先对三者做简单学习,以后的文章会展开深度讲解有关该三个模块的相关内容
相关引用
- Python网络爬虫权威指南(第二版)([美]瑞安·米切尔)
综合栗子
爬取优酷页面所有该标签

# 导入模块 import urllib.request from bs4 import BeautifulSoup # url地址 url='https://youku.com/' headers={ "User-Agent":"Mozilla/5.0 (Windows NT 10.0; Win64; x64) AppleWebKit/537.36 (KHTML, like Gecko) Chrome/107.0.0.0 Safari/537.36 Edg/107.0.1418.52" } req=urllib.request.Request(url=url,headers=headers) response=urllib.request.urlopen(req) bs=BeautifulSoup(response.read(),'html.parser') Titlename=bs.find_all('a',{'class':'aplus_exp aplus_clk'}) for title in Titlename: # get_text函数会去除除文本内的所有内容 print(title.get_text())- 1
- 2
- 3
- 4
- 5
- 6
- 7
- 8
- 9
- 10
- 11
- 12
- 13
- 14
- 15
运行结果如下图所示:

- 首先,B对获得的URL进行DNS解析
-
相关阅读:
linux server设置开机自动连接WIFI
杨民道:BendDAO流动性危机对DeFi和NFT行业有何启示
sqllab第十七关通关笔记
我不得不学的反射
QT 创建多个子项目,以及调用
关于嵌入式Linux做底层还是应用,要掌握什么技能
力扣 1480. 一维数组的动态和 383. 赎金信412. Fizz Buzz
矩阵分析与计算学习记录-矩阵函数
【leetcode】重排链表
Mybatis-Plus高级之LambdaQueryWrapper,Wrappers.<实体类>lambdaQuery的使用
- 原文地址:https://blog.csdn.net/weixin_51371629/article/details/127959538
