-
Vue 路由
参考文献:Vue中的路由
一、路由理解:
- 一个路由就是一组映射关系(key,value),多个路由需要路由器(router)进行管理。
- 其中key是路径,value是组件。
- 作用:设定访问路径,并将路径和组件映射起来(就是用于局部刷新页面,不需要请求服务器来切换页面)
二、路由管理器理解:
- Vue-router是路由管理插件。主要用于管理URL,实现URL和组件的对应,及通过URL进行组件之间的切换,从而使构建单页面应用变得更加简单。
- 单页面应用(single page web application, SPA)的核心思想之一,就是更新视图而不重新请求页面,简单来说,它在加载页面时,不会重新加载整个页面,只会更新某个指定的容器中的内容(局部刷新机制)。
- vue-router可以实现当用户单击页面中的超链接A时,页面显示内容(组件)A;单击超链接B时,页面显示内容(组件)B。(局部刷新机制)
- 举个例子:


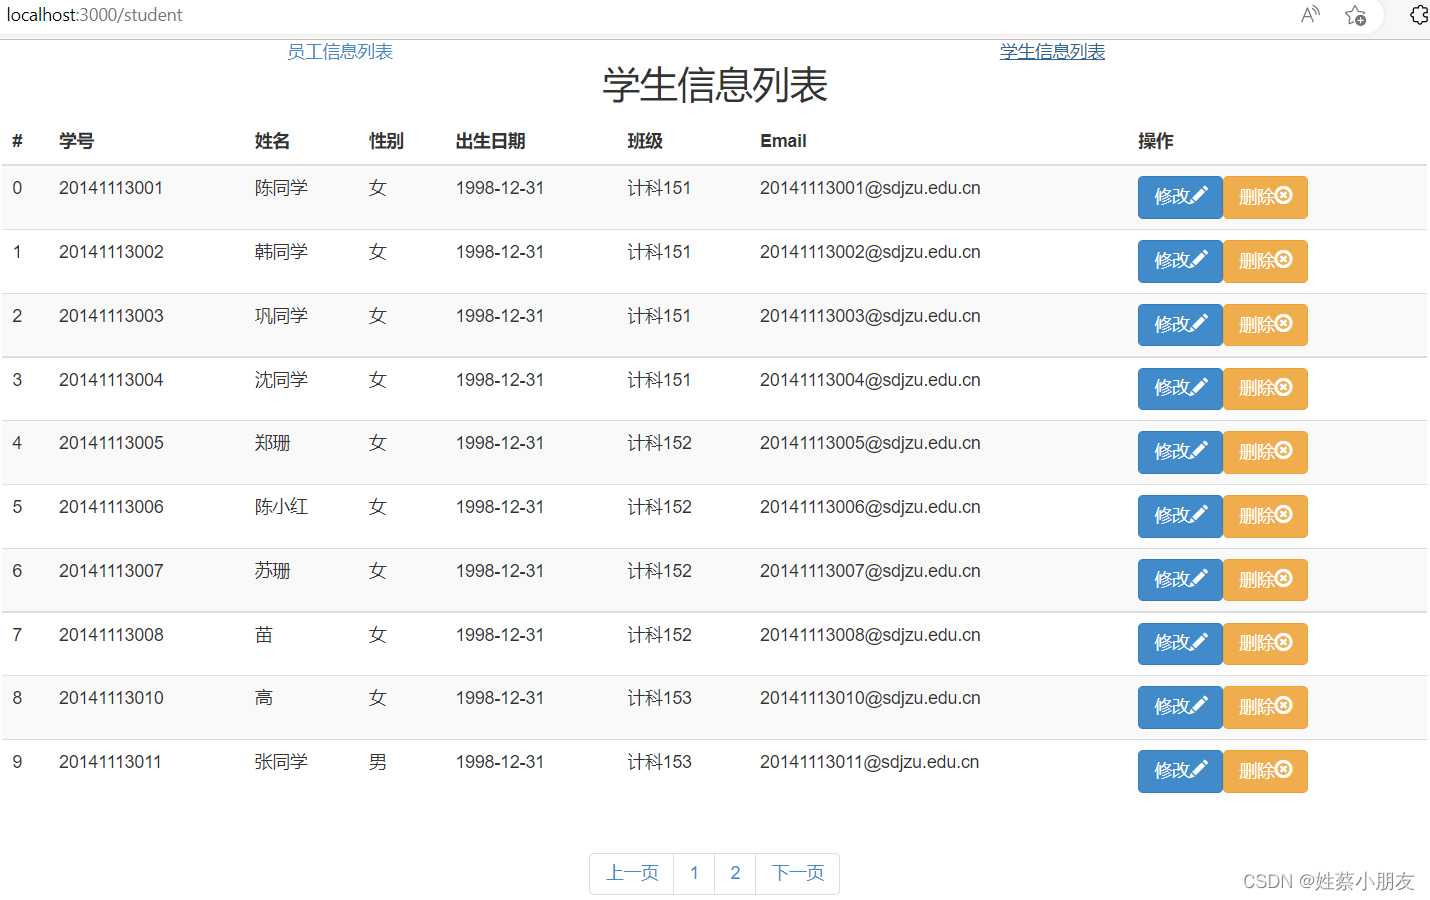
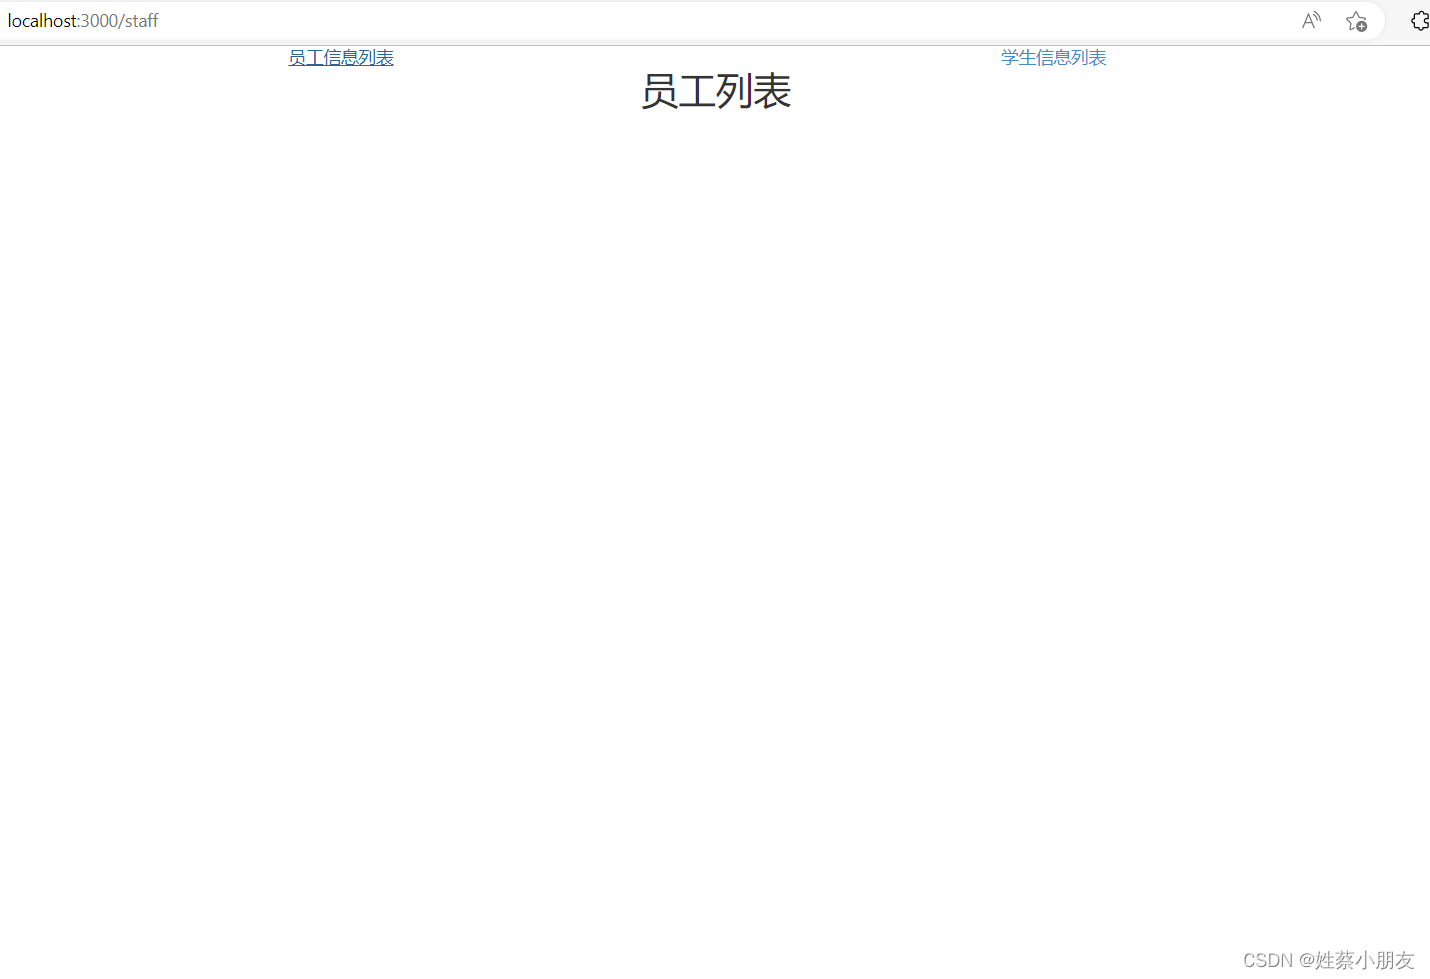
我们可以看到页面是局部刷新,导航栏并不会随着页面的切换而变化。
三、路由的使用:
- App.vue页面:
<template> <div id="app" class="container" align="center"> <router-link to="/staff" class="col-md-6">员工信息列表router-link> <router-link to="/student" class="col-md-6">学生信息列表router-link> <router-view>router-view> div> template> <script> export default { } script> <style> style>- 1
- 2
- 3
- 4
- 5
- 6
- 7
- 8
- 9
- 10
- 11
- 12
- 13
- 14
- 15
- 16
- 17
- 18
- 19
- 20
- 21
- 22
- 23
- 24
- 25
- 组件StaffList.vue:
<template> <div class="container"> <h2>这是员工列表组件h2> div> template> <script> //指定模块的默认输出对象,使用import '../views/StaffList' 时会获得该对象 export default { name:"StaffList" } script> <style> style>- 1
- 2
- 3
- 4
- 5
- 6
- 7
- 8
- 9
- 10
- 11
- 12
- 13
- 14
- 15
- 组件StudentList.vue:
<template> <div class="container"> <h2>这是学生列表组件h2> div> template> <script> //指定模块的默认输出对象,使用import '../views/StudentList' 时会获得该对象 export default { name:"StudentList" } script> <style> style>- 1
- 2
- 3
- 4
- 5
- 6
- 7
- 8
- 9
- 10
- 11
- 12
- 13
- 14
- 15
- index.js:
import Vue from 'vue'; //导入路由管理器插件 import VueRouter from 'vue-router'; //导入StaffList.vue import StaffList from '../views/StaffList'; //导入StudentList.vue import StudentList from '../views/StudentList'; //使用路由管理器插件 Vue.use(VueRouter) const routes = [//路由数组 { //单条路由 path:'/student', //指定访问哪个URL会显示该组件 name: 'StudentList',//路由名字 component: StudentList },//路由一,绑定key-value,实现访问/student会显示组件StudentList { path:'/staff', name: 'StaffList',//路由名字 component: StaffList }//路由二,绑定key-value,实现访问/staff会显示组件StaffList /* 每条路由记录为一个对象。 name:指定路由名字,用于命名路由 path:指定url路径,即访问哪个url时会显示component属性指定的组件 component:访问这条路由时要显示的组件 */ ] const router = new VueRouter({//路由管理器,用来管理路由 mode: 'history',//history模式下URL没有#,更加符合业务需要 routes:routes,//设置该路由管理器负责管理的路由数组 base: process.env.BASE_URL//base代表应用的基路径,process.env.BASE_URL是指从从环境进程中根据运行环境获取的api的base_url }) export default router;//将路由管理对象作为index.js的默认导出对象,作用:如果import './router/index' 的话会获得该router对象- 1
- 2
- 3
- 4
- 5
- 6
- 7
- 8
- 9
- 10
- 11
- 12
- 13
- 14
- 15
- 16
- 17
- 18
- 19
- 20
- 21
- 22
- 23
- 24
- 25
- 26
- 27
- 28
- 29
- 30
- 31
- 32
- 33
- main.js:
//导入vue import Vue from 'vue' import App from './App.vue' //导入我们创建的router,这个router来自index.js import router from './router/index' //使用router Vue.use(router) //创建Vue实例,并传入路由管理器对象 const app = new Vue({ router: router, render: h => h(App) }).$mount('#app')- 1
- 2
- 3
- 4
- 5
- 6
- 7
- 8
- 9
- 10
- 11
- 12
- 13
- 效果:
首先进入App.vue界面,该界面有两个router-link和一个router-view

点击员工信息列表router-link,会跳转到对应URL,然后浏览器根据URL查找路由数组获得该URL对应的组件,渲染到router-view。注意此时虽然URL变了,但是布局还是App.vue界面的布局:两个router-link和一个router-view。

点击学生信息列表也是一样的效果,router-view显示对应URL的组件信息,而不是将整个页面都渲染成router-view对应的组件信息。
四、嵌套路由:
- 多级路由用到了route的children属性,routes中的属性成为一级路由,一级路由中children属性中的路由称为二级路由,以此类推。
- 注意:除一级路由中路径要写斜杠/ 二级路由和多级路由中的路径不写斜杠/。
- 跳转多级路由时,to=“路由路径” 要写全!从一级路由开始写!(如: to=“/home/news”)
- 可以给路由配置name属性,传递参数的时候会用到,添加name属性后跳转就不用写全路径,可以直接写路由的name (:to=“{name:‘news’}”)
routes:[ { path:'/about', component:About, }, { path:'/home', component:Home, children:[ //通过children配置子级路由 { name:'news' path:'news', //此处一定不要写:/news component:News }, { name:'message' path:'message',//此处一定不要写:/message component:Message, children: [ { name:'msg' path: 'msgdata', component: Msgdata, } ] } ]- 1
- 2
- 3
- 4
- 5
- 6
- 7
- 8
- 9
- 10
- 11
- 12
- 13
- 14
- 15
- 16
- 17
- 18
- 19
- 20
- 21
- 22
- 23
- 24
- 25
- 26
- 27
五、路由传参:
1.query传参:
URL格式:
/a/b?id=666&title=你好路由路径传递数据:
<router-link :to="'/home/message/detail?id=666&title=你好' ">跳转1router-link> <router-link :to="{ path:'/home/message/detail', query:{ id:666, title:'你好' } }" >跳转2router-link> <router-view>router-view>- 1
- 2
- 3
- 4
- 5
- 6
- 7
- 8
- 9
- 10
- 11
- 12
- 13
- 14
- 15
路由接收数据并包装,传给组件:
routes:[ { path:'/about', component:About, }, { path:'/home', component:Home, children:[ //通过children配置子级路由 { name:'news' path:'news', //此处一定不要写:/news component:News }, { name:'message' path:'message',//此处一定不要写:/message component:Message, children: [ { path: 'msgdata', component: Msgdata, //在这里使用$route.query接收一下传来的参数,然后包装一下再传给Msgdata组件 props($route){ return {id:$route.query.id,title:$route.query.title} } } ] } ]- 1
- 2
- 3
- 4
- 5
- 6
- 7
- 8
- 9
- 10
- 11
- 12
- 13
- 14
- 15
- 16
- 17
- 18
- 19
- 20
- 21
- 22
- 23
- 24
- 25
- 26
- 27
- 28
- 29
- 30
组件接收包装后的数据:
<template> <div> <h3>信息编号:{{ id }}h3> <h3>信息标题:{{ title }}h3> div> template> <script> export default { name: "Msgdata", props: ["id", "title"]//一定要记得使用props接收路由传来的数据 }; script> <style> style>- 1
- 2
- 3
- 4
- 5
- 6
- 7
- 8
- 9
- 10
- 11
- 12
- 13
- 14
- 15
- 16
- 17
2. params传参:
- 使用params传参时路由路径中需要配置占位符。
URL格式:
/a/b/666/你好 (其中’666’和’你好’是参数)路由路径传递数据:
<router-link :to=" `/home/news/shownews/${n.id}/${n.name}` "> 跳转1 router-link> <router-link :to="{ //注意:用params传递参数时用到他的对象写法中不可使用 path:'路径',只能用name='路由name' name: 'shownews', params: { id: n.id, name: n.name, }, }" > 跳转2 router-link>- 1
- 2
- 3
- 4
- 5
- 6
- 7
- 8
- 9
- 10
- 11
- 12
- 13
- 14
- 15
- 16
- 17
路由接收数据并包装,传给组件:
name: 'shownews', // params 写法先在路径中占位 path: 'shownews/:id/:name', component: ShowNews, // props:true表示包装数据 props会接收所有params参数 以props的形式传递给ShowNews组件 props: true- 1
- 2
- 3
- 4
- 5
- 6
组件接收包装后的数据:
<template> <ul> <li>编号{{ id }}li> <li>姓名{{ name }}li> ul> template> <script> export default { name: "ShowNews", props: ["id", "title"]//一定要记得使用props接收路由传来的数据 }; script>- 1
- 2
- 3
- 4
- 5
- 6
- 7
- 8
- 9
- 10
- 11
- 12
- 13
- 14
六、编程式路由导航:
- 除了使用 router-link 创建 a 标签来定义导航链接,我们还可以借助 router 的实例方法,通过编写代码来实现。
- 在 Vue 实例内部,可以通过
$router访问路由实例。因此想要导航到不同的 URL可以,调用this.$router.push方法。
声名式 编程式 router.push(a/b)const userId = '123' //不带参 this.$router.push({ path: '/home' })// -> /home //1.params传参: //方法一:字符串传参 this.$router.push({ path: `/user/${userId}` }) // -> /user/123 //方法二:对象传参 //注意,如果提供了path,params会被忽略,所以使用params对象传参时要用name属性而不是path this.$router.push({ name: 'user', params: { userId }}) // -> /user/123 //2.query传参: //方法一:字符串传参: this.$router.push({ path: '/register?plan=private')// -> /register?plan=private //方法二:对象传参: this.$router.push({ path: '/register', query: { plan: 'private' }})// -> /register?plan=private- 1
- 2
- 3
- 4
- 5
- 6
- 7
- 8
- 9
- 10
- 11
- 12
- 13
- 14
七、响应路由参数变化:
- 当使用路由参数时,例如从 /user/foo 导航到 /user/bar(其中foo和bar都是参数),原来的组件实例会被复用。因为两个路由都渲染同个组件,比起销毁再创建,复用则显得更加高效。不过,这也意味着组件的生命周期钩子不会再被调用。
- 复用组件时,想对路由参数的变化作出响应的话,你可以简单地 watch (监测变化) $route 对象:
watch: { $route(to, from) { // 对路由变化作出响应... } }- 1
- 2
- 3
- 4
- 5
八、路由守卫:
-
路由守卫的作用 : 对路由进行权限管理,必须符合条件才能访问。
-
路由守卫有三种: 全局守卫、独享守卫、组件内守卫。
1.全局守卫:
在所有的路由发生改变前都执行 使用路由守卫就不能直接暴露路由实例,需要接收一下
然后调用里面的beforeEach((to,from,next)=>{})
有三个参数to:去哪个路径,from:从哪个路径里来,next:是个函数调用的时候next()放行
// 配置在实例对象外 初始化时调用,每次发生路由变化前调用 router.beforeEach((to,from,next)=>{ console.log('beforeEach',to,from) if(to.meta.isAuth){ //判断当前路由是否需要进行权限控制 if(localStorage.getItem('school') === 'atguigu'){ //权限控制的具体规则 next() //放行 }else{ alert('暂无权限查看') // next({name:'guanyu'}) } }else{ next() //放行 } }) //全局后置守卫:初始化时执行、每次路由切换后执行 router.afterEach((to,from)=>{ console.log('afterEach',to,from) if(to.meta.title){ document.title = to.meta.title //修改网页的title }else{ document.title = 'vue_test' } })- 1
- 2
- 3
- 4
- 5
- 6
- 7
- 8
- 9
- 10
- 11
- 12
- 13
- 14
- 15
- 16
- 17
- 18
- 19
- 20
- 21
- 22
- 23
- 24
2.独享守卫:
放在需要进行权限设置的路由里面,参数语法和全局一样 当访问这个路径前才执行beforeEnter()
beforeEnter(to,from,next){ console.log('beforeEnter',to,from) if(to.meta.isAuth){ //判断当前路由是否需要进行权限控制 if(localStorage.getItem('school') === 'atguigu'){ next() }else{ alert('暂无权限查看') // next({name:'guanyu'}) } }else{ next() } }- 1
- 2
- 3
- 4
- 5
- 6
- 7
- 8
- 9
- 10
- 11
- 12
- 13
3.组件守卫:
放在组件里和methods,components同级别 。
必须是通过路由规则进入该组件才可以调用。
beforeRouteEnter(),beforeRouteLeave()。//进入守卫:通过路由规则,进入该组件时被调用 beforeRouteEnter (to, from, next) { }, //离开守卫:通过路由规则,离开该组件时被调用 beforeRouteLeave (to, from, next) { }- 1
- 2
- 3
- 4
- 5
- 6
-
相关阅读:
vue补充继上一篇
【算法设计与分析】— —基础概念题(one)可作为日常联系或期末复习
Java项目:文具学习用品商城系统(java+SSM+JSP+jQuery+Mysql)
MYSQL——命令大全
Android Studio Giraffe解决gradle reload failed问题
.NET 中的表达式树
最强总结!18个机器学习核心算法模型!!
Ubuntu 20.04 上 OpenStack 学习之 OVN : L2网络 ( Logical switches 逻辑交换机)
【云原生】k8s 部署redis集群
iOS 用masonry布局Scrollview的问题,添加在scrollview的子控件约束失效
- 原文地址:https://blog.csdn.net/m0_53881899/article/details/127914993