-
@Scope与@RefreshScope注解
在SpringIOC中,我们熟知的BeanScope有单例(singleton)、原型(prototype), Bean的Scope影响了Bean的管理方式,例如创建Scope=singleton的Bean时,IOC会保存实例在一个Map中,保证这个Bean在一个IOC上下文有且仅有一个实例。SpringCloud新增了一个refresh范围的scope,同样用了一种独特的方式改变了Bean的管理方式,使得其可以通过外部化配置(.properties)的刷新,在应用不需要重启的情况下热加载新的外部化配置的值。
那么这个scope是如何做到热加载的呢?RefreshScope主要做了以下动作:
单独管理Bean生命周期创建Bean的时候如果是RefreshScope就缓存在一个专门管理的ScopeMap中,这样就可以管理Scope是Refresh的Bean的生命周期了重新创建Bean外部化配置刷新之后,会触发一个动作,这个动作将上面的ScopeMap中的Bean清空,这样,这些Bean就会重新被IOC容器创建一次,使用最新的外部化配置的值注入类中,达到热加载新值的效果下面我们深入源码,来验证我们上述的讲法。@Scope注解
Spring管理的Bean默认是单例的
@Scope (“prototype”) 通过注解可以实现多个实例的解决
Spring定义了多种作用域,可以基于这些作用域创建bean,包括:
单例( singleton):在整个应用中,只创建bean的一个实例。也就是单例
原型(prototype):每次注入或者通过Spring应用上下文获取的时候:getBean,都会创建一个新的bean实例。多例,每次getBean的时候都会创建新的对象
request表示请求,即在一次http请求中,被注解的Bean都是同一个Bean,不同的请求是不同的Bean;
session表示会话,即在同一个会话中,被注解的Bean都是使用的同一个Bean,不同的会话使用不同的Bean。创建一个Bean的时候,会去BeanFactory的doGetBean方法创建Bean,不同scope有不同的创建方式:
org.springframework.beans.factory.support.AbstractBeanFactory#doGetBeanprotected <T> T doGetBean(final String name, @Nullable final Class<T> requiredType, @Nullable final Object[] args, boolean typeCheckOnly) throws BeansException { //.... // Create bean instance. // 单例Bean的创建 if (mbd.isSingleton()) { sharedInstance = getSingleton(beanName, () -> { try { return createBean(beanName, mbd, args); } //... }); bean = getObjectForBeanInstance(sharedInstance, name, beanName, mbd); } // 原型Bean的创建 else if (mbd.isPrototype()) { // It's a prototype -> create a new instance. // ... try { prototypeInstance = createBean(beanName, mbd, args); } //... bean = getObjectForBeanInstance(prototypeInstance, name, beanName, mbd); } else { // 由上面的RefreshScope注解可以知道,这里scopeName=refresh String scopeName = mbd.getScope(); // 获取Refresh的Scope对象 final Scope scope = this.scopes.get(scopeName); if (scope == null) { throw new IllegalStateException("No Scope registered for scope name '" + scopeName + "'"); } try { // 让Scope对象去管理Bean Object scopedInstance = scope.get(beanName, () -> { beforePrototypeCreation(beanName); try { return createBean(beanName, mbd, args); } finally { afterPrototypeCreation(beanName); } }); bean = getObjectForBeanInstance(scopedInstance, name, beanName, mbd); } //... } } //... } //... }- 1
- 2
- 3
- 4
- 5
- 6
- 7
- 8
- 9
- 10
- 11
- 12
- 13
- 14
- 15
- 16
- 17
- 18
- 19
- 20
- 21
- 22
- 23
- 24
- 25
- 26
- 27
- 28
- 29
- 30
- 31
- 32
- 33
- 34
- 35
- 36
- 37
- 38
- 39
- 40
- 41
- 42
- 43
- 44
- 45
- 46
- 47
- 48
- 49
- 50
- 51
- 52
- 53
- 54
- 55
- 56
- 57
这里可以看到几件事情:
单例和原型scope的Bean是硬编码单独处理的
除了单例和原型Bean,其他Scope是由Scope对象处理的
具体创建Bean的过程都是由IOC做的,只不过Bean的获取是通过Scope对象
通过scopeName获取对应的scope实例@RefreshScope刷新bean
这里scope.get获取的Scope对象为RefreshScope,可以看到,创建Bean还是由IOC来做(createBean方法),但是获取Bean,都由RefreshScope对象的get方法去获取,其get方法在父类GenericScope中实现:
public Object get(String name, ObjectFactory<?> objectFactory) { // 将Bean缓存下来 BeanLifecycleWrapper value = this.cache.put(name, new BeanLifecycleWrapper(name, objectFactory)); this.locks.putIfAbsent(name, new ReentrantReadWriteLock()); try { // 创建Bean,只会创建一次,后面直接返回创建好的Bean return value.getBean(); } catch (RuntimeException e) { this.errors.put(name, e); throw e; } }- 1
- 2
- 3
- 4
- 5
- 6
- 7
- 8
- 9
- 10
- 11
- 12
- 13
- 14
首先这里将Bean包装起来缓存下来
这里scope.get获取的Scope对象为RefreshScope,可以看到,创建Bean还是由IOC来做(createBean方法),但是获取Bean,都由RefreshScope对象的get方法去获取,其get方法在父类GenericScope中实现。bean的生命周期也由GenericScope控制
public Object get(String name, ObjectFactory<?> objectFactory) { // 将Bean缓存下来 BeanLifecycleWrapper value = this.cache.put(name, new BeanLifecycleWrapper(name, objectFactory)); this.locks.putIfAbsent(name, new ReentrantReadWriteLock()); try { // 创建Bean,只会创建一次,后面直接返回创建好的Bean return value.getBean(); } catch (RuntimeException e) { this.errors.put(name, e); throw e; } }- 1
- 2
- 3
- 4
- 5
- 6
- 7
- 8
- 9
- 10
- 11
- 12
- 13
- 14
- 15
private final ScopeCache cache; // 这里进入上面的 BeanLifecycleWrapper value = this.cache.put(name, new BeanLifecycleWrapper(name, objectFactory)); public BeanLifecycleWrapper put(String name, BeanLifecycleWrapper value) { return (BeanLifecycleWrapper) this.cache.put(name, value); }- 1
- 2
- 3
- 4
- 5
- 6
这里的ScopeCache对象其实就是一个HashMap:
public class StandardScopeCache implements ScopeCache { private final ConcurrentMap<String, Object> cache = new ConcurrentHashMap<String, Object>(); //... public Object get(String name) { return this.cache.get(name); } // 如果不存在,才会put进去 public Object put(String name, Object value) { // result若不等于null,表示缓存存在了,不会进行put操作 Object result = this.cache.putIfAbsent(name, value); if (result != null) { // 直接返回旧对象 return result; } // put成功,返回新对象 return value; } }- 1
- 2
- 3
- 4
- 5
- 6
- 7
- 8
- 9
- 10
- 11
- 12
- 13
- 14
- 15
- 16
- 17
- 18
- 19
- 20
- 21
- 22
这里就是将Bean包装成一个对象,缓存在一个Map中,下次如果再GetBean,还是那个旧的BeanWrapper。回到Scope的get方法,接下来就是调用BeanWrapper的getBean方法:
private Object bean; public Object getBean() { if (this.bean == null) { synchronized (this.name) { if (this.bean == null) { this.bean = this.objectFactory.getObject(); } } } return this.bean; }- 1
- 2
- 3
- 4
- 5
- 6
- 7
- 8
- 9
- 10
- 11
- 12
- 13
可以看出来,BeanWrapper中的bean变量即为实际Bean,如果第一次get肯定为空,就会调用BeanFactory的createBean方法创建Bean,创建出来之后就会一直保存下来。
由此可见,RefreshScope管理了Scope=Refresh的Bean的生命周期。
重新创建RefreshBean
当配置中心刷新配置之后,有两种方式可以动态刷新Bean的配置变量值,(SpringCloud-Bus还是Nacos差不多都是这么实现的):
向上下文发布一个RefreshEvent事件
Http访问/refresh这个EndPoint
不管是什么方式,最终都会调用ContextRefresher这个类的refresh方法,那么我们由此为入口来分析一下,热加载配置的原理:// 这就是我们上面一直分析的Scope对象(实际上可以看作一个保存refreshBean的Map) private RefreshScope scope; public synchronized Set<String> refresh() { // 更新上下文中Environment外部化配置值 Set<String> keys = refreshEnvironment(); // 调用scope对象的refreshAll方法 this.scope.refreshAll(); return keys; }- 1
- 2
- 3
- 4
- 5
- 6
- 7
- 8
- 9
- 10
- 11
我们一般是使用@Value、@ConfigurationProperties去获取配置变量值,其底层在IOC中则是通过上下文的Environment对象去获取property值,然后依赖注入利用反射Set到Bean对象中去的。
那么如果我们更新Environment里的Property值,然后重新创建一次RefreshBean,再进行一次上述的依赖注入,是不是就能完成配置热加载了呢?@Value的变量值就可以加载为最新的了。
这里说的刷新Environment对象并重新依赖注入则为上述两个方法做的事情:
Set keys = refreshEnvironment();
this.scope.refreshAll();刷新Environment对象
刷新环境遍历指的的是将配置替换到当前的Environment,后面如果再根据配置创建对象就会使用新的配置设置属性。
例如org.springframework.cloud.endpoint.event.RefreshEventListener进行将配置文件刷新进入environment中的操作。ConfigurableApplicationContext addConfigFilesToEnvironment() { StandardEnvironment environment = copyEnvironment( this.context.getEnvironment()); SpringApplicationBuilder builder = new SpringApplicationBuilder(Empty.class) .bannerMode(Mode.OFF).web(WebApplicationType.NONE) .environment(environment); // Just the listeners that affect the environment (e.g. excluding logging // listener because it has side effects) builder.application() .setListeners(Arrays.asList(new BootstrapApplicationListener(), new ConfigFileApplicationListener())); capture = builder.run(); }- 1
- 2
- 3
- 4
- 5
- 6
- 7
- 8
- 9
- 10
- 11
- 12
- 13
- 14
- 15
可以看到,这里归根结底就是SpringBoot启动上下文那种方法,新做了一个Spring上下文,因为Spring启动后会对上下文中的Environment进行初始化,获取最新配置,所以这里利用Spring的启动,达到了获取最新的Environment对象的目的。然后去替换旧的上下文中的Environment对象中的配置值即可。
重新创建RefreshBean
经过上述刷新Environment对象的动作,此时上下文中的配置值已经是最新的了。思路回到ContextRefresher的refresh方法,接下来会调用Scope对象的refreshAll方法:
public void refreshAll() { // 销毁Bean super.destroy(); this.context.publishEvent(new RefreshScopeRefreshedEvent()); } public void destroy() { List<Throwable> errors = new ArrayList<Throwable>(); // 缓存清空 Collection<BeanLifecycleWrapper> wrappers = this.cache.clear(); // ... }- 1
- 2
- 3
- 4
- 5
- 6
- 7
- 8
- 9
- 10
- 11
- 12
还记得上面的管理RefreshBean生命周期那一节关于缓存的讨论吗,cache变量是一个Map保存着RefreshBean实例,这里直接就将Map清空了。
思路回到BeanFactory的doGetBean的流程中,从IOC容器中获取RefreshBean是交给RefreshScope的get方法做的:
public Object get(String name, ObjectFactory<?> objectFactory) { // 由于刚刚清空了缓存Map,这里就会put一个新的BeanLifecycleWrapper实例 BeanLifecycleWrapper value = this.cache.put(name, new BeanLifecycleWrapper(name, objectFactory)); this.locks.putIfAbsent(name, new ReentrantReadWriteLock()); try { // 在这里是新的BeanLifecycleWrapper实例调用getBean方法 return value.getBean(); } catch (RuntimeException e) { this.errors.put(name, e); throw e; } }- 1
- 2
- 3
- 4
- 5
- 6
- 7
- 8
- 9
- 10
- 11
- 12
- 13
- 14
public Object getBean() { // 由于是新的BeanLifecycleWrapper实例,这里一定为null if (this.bean == null) { synchronized (this.name) { if (this.bean == null) { // 调用IOC容器的createBean,再创建一个Bean出来 this.bean = this.objectFactory.getObject(); } } } return this.bean; }- 1
- 2
- 3
- 4
- 5
- 6
- 7
- 8
- 9
- 10
- 11
- 12
- 13
可以看到,此时RefreshBean被IOC容器重新创建一个出来了,经过IOC的依赖注入功能,@Value的就是一个新的配置值了。到这里热加载功能实现基本结束。
根据以上分析,我们可以看出只要每次我们都从IOC容器中getBean,那么拿到的RefreshBean一定是带有最新配置值的Bean。
@RefreshScope代理对象
- @Scope 的注册 AnnotatedBeanDefinitionReader#registerBean
public void registerBean(...){ ... ScopeMetadata scopeMetadata = this.scopeMetadataResolver.resolveScopeMetadata(abd); abd.setScope(scopeMetadata.getScopeName()); ... definitionHolder = AnnotationConfigUtils.applyScopedProxyMode(scopeMetadata, definitionHolder, this.registry); }- 1
- 2
- 3
- 4
- 5
- 6
- 7
- 读取@Scope元数据, AnnotationScopeMetadataResolver#resolveScopeMetadata
public ScopeMetadata resolveScopeMetadata(BeanDefinition definition) { AnnotationAttributes attributes = AnnotationConfigUtils.attributesFor( annDef.getMetadata(), Scope.class); if (attributes != null) { metadata.setScopeName(attributes.getString("value")); ScopedProxyMode proxyMode = attributes.getEnum("proxyMode"); if (proxyMode == null || proxyMode == ScopedProxyMode.DEFAULT) { proxyMode = this.defaultProxyMode; } metadata.setScopedProxyMode(proxyMode); } }- 1
- 2
- 3
- 4
- 5
- 6
- 7
- 8
- 9
- 10
- 11
- 12
- Scope实例对象通过ScopedProxyFactoryBean创建,其中通过AOP使其实现ScopedObject接口,这里不再展开
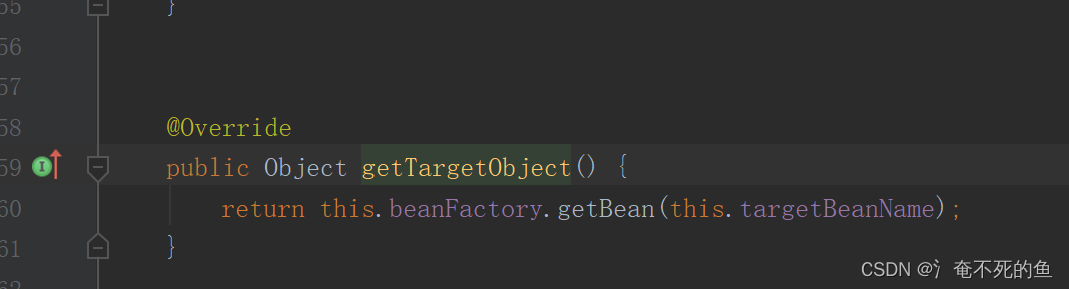
每次使用@RefreshScope的bean的get方法时都会重新通过this.beanFactory.getBean(this.targetBeanName);
如果被清空了的话,那么会重新创建bean会使用,刷新后的environment的配置注入属性,实现动态刷新。 -
相关阅读:
集成elastic-job分布式调度定时任务
Matlab滤波器设计示例
基于Springboot的特产销售平台设计与实现毕业设计源码091036
自然语言处理实验2 字符级RNN分类实验
从开源项目探讨“FPGA挖矿”的本质
camtasia 2023怎么导出mp4
Nacos的使用记录
【学习】基于深度学习的铁路道岔转辙机故障诊断(1绪)
上传ipa到appstore工具
【附源码】计算机毕业设计java智慧后勤app设计与实现
- 原文地址:https://blog.csdn.net/qq_37436172/article/details/127900354
