-
【python爬虫笔记】验证码
Index of /tesseract (uni-mannheim.de)
https://github.com/tesseract-ocr/tessdata
目录
Python 验证码
如果你是一个数据挖掘爱好者,那么验证码是你避免不过去的一个天坑,和各种验证码斗争,必然是你成长的一条道路,
本篇文章为你带来验证码的入门案例,来吧,一起 Coding 吧。
数字+字母的验证码
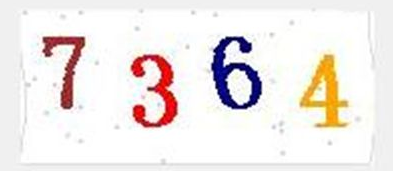
我随便在百度图片搜索了一个验证码,如下
今天要做的是验证码识别中最简单的一种办法,采用pytesseract解决,它属于 Python 当中比较简单的OCR识别库pytesseract库的安装超详细解决pytesseract.pytesseract.TesseractNotFoundError: tesseract is not installed or it's not in yo...
Tesseract OCR V5.0安装教程(Windows
使用
pytesseract之前,你需要通过 pip 安装一下对应的模块 ,需要两个pytesseract 库还有图像处理的 pillow 库了
- pip install pytesseract
- pip install pillow
如果你安装了这两个库之后,编写一个识别代码,一般情况下会报下面这个错误
pytesseract.pytesseract.TesseractNotFoundError: tesseract is not installed or it's not in your path这是由于你还缺少一部分内容
安装一个 Tesseract-OCR 软件。这个软件是由 Google 维护的开源的 OCR 软件。
下载地址 > https://github.com/tesseract-ocr/tesseract/wiki
中文包的下载地址 > https://github.com/tesseract-ocr/tessdata
选择你需要的版本进行下载即可
pillow 库
命令 释义 open() 打开一个图片
from PIL import Image
im = Image.open(“1.png”)
im.show()save() 保存文件 convert() convert() 是图像实例对象的一个方法,接受一个 mode 参数,用以指定一种色彩模式,mode 的取值可以是如下几种:
· 1 (1-bit pixels, black and white, stored with one pixel per byte)
· L (8-bit pixels, black and white)
· P (8-bit pixels, mapped to any other mode using a colour palette)
· RGB (3x8-bit pixels, true colour)
· RGBA (4x8-bit pixels, true colour with transparency mask)
· CMYK (4x8-bit pixels, colour separation)
· YCbCr (3x8-bit pixels, colour video format)
· I (32-bit signed integer pixels)
· F (32-bit floating point pixels)Filter
- from PIL import Image, ImageFilter
- im = Image.open(‘1.png’)
- # 高斯模糊
- im.filter(ImageFilter.GaussianBlur)
- # 普通模糊
- im.filter(ImageFilter.BLUR)
- # 边缘增强
- im.filter(ImageFilter.EDGE_ENHANCE)
- # 找到边缘
- im.filter(ImageFilter.FIND_EDGES)
- # 浮雕
- im.filter(ImageFilter.EMBOSS)
- # 轮廓
- im.filter(ImageFilter.CONTOUR)
- # 锐化
- im.filter(ImageFilter.SHARPEN)
- # 平滑
- im.filter(ImageFilter.SMOOTH)
- # 细节
- im.filter(ImageFilter.DETAIL)
Format
format 属性定义了图像的格式,如果图像不是从文件打开的,那么该属性值为 None;
size 属性是一个 tuple,表示图像的宽和高(单位为像素);
mode 属性为表示图像的模式,常用的模式为:L 为灰度图,RGB 为真彩色,CMYK 为 pre-press 图像。如果文件不能打开,则抛出 IOError 异常。注意安装完毕,如果还是报错,请找到模块 pytesseract.py 这个文件,对这个文件进行编辑
一般这个文件在
C:\Program Files\Python36\Lib\site-packages\pytesseract\pytesseract.py位置- 文件中 tesseract_cmd = 'tesseract' 改为自己的地址
- 例如: tesseract_cmd = 'C:\Program Files (x86)\Tesseract-OCR\tesseract.exe'
如果报下面的 BUG,请注意
Error opening data file \Program Files (x86)\Tesseract-OCR\tessdata/chi_sim.traineddata Please make sure the TESSDATA_PREFIX environment variable
解决办法也比较容易,按照它的提示,表示缺失了 TESSDATA_PREFIX 这个环境变量。你只需要在系统环境变量中添加一条即可
将 TESSDATA_PREFIX=C:\Program Files (x86)\Tesseract-OCR 添加环境变量
重启 IDE 或者重新 CMD,然后继续运行代码,这个地方注意需要用管理员运行你的 py 脚本
步骤分为
- 打开图片 Image.open()
- pytesseract 识别图片
- import pytesseract
- from PIL import Image
- def main():
- image = Image.open("1.jpg")
- text = pytesseract.image_to_string(image,lang="chi_sim")
- print(text)
- if __name__ == '__main__':
- main()
测试英文,数字什么的基本没有问题,中文简直惨不忍睹。空白比较大的可以识别出来。唉~不好用
当然刚才那个7364十分轻松的就识别出来了。带干扰的验证码识别
接下来识别如下的验证码,我们首先依旧先尝试一下。运行代码发现没有任何显示。接下来需要对这个图片进行处理
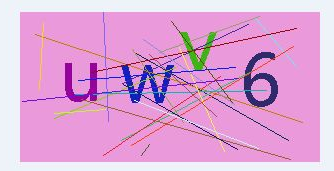
基本原理都是完全一样的- 彩色转灰度
- 灰度转二值
- 二值图像识别
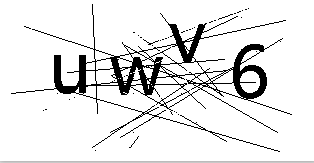
彩色转灰度
im = im.convert('L')灰度转二值,解决方案比较成套路,采用阈值分割法,threshold 为分割点
- def initTable(threshold=140):
- table = []
- for i in range(256):
- if i < threshold:
- table.append(0)
- else:
- table.append(1)
- return table
调用
- binaryImage = im.point(initTable(), '1')#像素遍历
- binaryImage.show()
调整之后
通过百度提供的接口实现验证码识别
今天你要学习的验证码采用通过第三方 AI 平台开放的 OCR 接口实现,OCR 文字识别技术目前已经比较成熟了,而且第三方比较多,今天采用的是百度的。
获取 Access Token
程序调用接口是要生成access_token
Access Token 用于基于 Token 的认证模式,允许应用访问一个资源 API。
- 先去创建一个应用
- 请求URL数据格式
向授权服务地址
https://aip.baidubce.com/oauth/2.0/token发送请求(推荐使用POST),并在URL中带上以下参数:- grant_type: 必须参数,固定为
client_credentials; - client_id: 必须参数,应用的
API Key; - client_secret: 必须参数,应用的
Secret Key;
注:
API Key、Secret Key均可在百度智能云控制台 各技术方向概览页的应用列表 处获取,若无应用请先进行创建;API Key、Secret Key用于接口调用鉴权,请务必注意保密,不可在公开文档或代码中以明文展示,否则可能导致账号被盗用。
百度官网获取access_token示例代码
- # encoding:utf-8
- import requests
- # client_id 为官网获取的API Key, client_secret 为官网获取的Secret Key
- host = 'https://aip.baidubce.com/oauth/2.0/token?grant_type=client_credentials&client_id=【官网获取的AK】&client_secret=【官网获取的SK】'
- response = requests.get(host)
- if response:
- print(response.json())
请求百度orc通用文字识别API
有了access_token之后就可以开始识别请求了。
HTTP 方法:POST
请求URL: https://aip.baidubce.com/rest/2.0/ocr/v1/general_basic
请求头: Content-Type application/x-www-form-urlencoded
请求参数:- image : 图像数据,base64编码,要求base64编码后大小不超过4M,最短边至少15px,最长边最大4096px,支持jpg/png/bmp格式,当image字段存在时url字段失效
- url : 图片完整URL,URL长度不超过1024字节,URL对应的图片base64编码后大小不超过4M,最短边至少15px,最长边最大4096px,支持jpg/png/bmp格式,当image字段存在时url字段失效
- # encoding:utf-8
- import requests
- import base64
- '''
- 通用文字识别
- '''
- request_url = "https://aip.baidubce.com/rest/2.0/ocr/v1/general_basic"
- # 二进制方式打开图片文件
- f = open('[本地文件]', 'rb')
- img = base64.b64encode(f.read())
- params = {"image":img}
- access_token = '[调用鉴权接口获取的token]'
- request_url = request_url + "?access_token=" + access_token
- headers = {'content-type': 'application/x-www-form-urlencoded'}
- response = requests.post(request_url, data=params, headers=headers)
- if response:
- print (response.json())
{'words_result': [{'words': '已只成此'}, {'words': '是生月蝶柱錦'}, {'words': '當煙明望思瑟'}, {'words': '時此珠帝無'}, {'words': '惘是追情'}, {'words': '已情有春年端'}, {'words': '惘可心莊五'}, {'words': '然當憶可'}, {'words': '然待蓝托生十'}, {'words': '成杜曉絃'}, {'words': '追日夢'}, {'words': '時待'}, {'words': '憶暖迷絃'}, {'words': '只玉海蝴'}], 'words_result_num': 14, 'direction': 0, 'log_id': 1592394631485448641}
脱离百度提供的文档自己编写:
获得access_token
- def get_accesstoken(self):
- res = requests.post(self.url.format(self.key,self.secret),headers=self.header)
- content = res.text
- if (content):
- return json.loads(content)["access_token"]
- import requests
- import json
- import base64
- import urllib.request, urllib.parse
- class GetCode(object):
- def __init__(self):
- self.url = "https://aip.baidubce.com/oauth/2.0/token?grant_type=client_credentials&client_id={}&client_secret={}"
- self.api = "https://aip.baidubce.com/rest/2.0/ocr/v1/general_basic?access_token={}"
- self.header = {
- "Content-Type":'application/json; charset=UTF-8'
- }
- self.key = "你的KEY"
- self.secret = "你的SECRET"
验证码识别阶段
普通没有干扰的验证码,我们直接识别即可,但是有的验证码还是有干扰的,在识别之前,需要对它进行基本的处理,我们采用和上篇文章类似的办法进行,对它进行灰度处理和二值化操作。
- def init_table(self,threshold=155):
- table = []
- for i in range(256):
- if i < threshold:
- table.append(0)
- else:
- table.append(1)
- return table
- def opt_image(self):
- im = Image.open("OIP-C.jpg")
- im = im.convert('L')
- im = im.point(self.init_table(), '1')#遍历每一个像素点
- im.save('OIP-C.jpg_s.png')
- return "OIP-C.jpg_s.png"
调用验证码接口
调用百度的验证码接口,不使用百度给的模块,直接编写。按照它对应的文档书写
- def get_file_content(self,file_path):
- with open(file_path, 'rb') as fp:
- base64_data = base64.b64encode(fp.read())
- s = base64_data.decode()
- data = {}
- data['image'] = s
- decoded_data = urllib.parse.urlencode(data)
- return decoded_data
- def show_code(self):
- image = self.get_file_content(self.opt_image())
- headers = {
- "Content-Type": "application/x-www-form-urlencoded"
- }
- res = requests.post(self.api.format(self.get_accesstoken()),headers=headers,data=image)
- print(res.text)
通过百度模块调用验证码识别
pip install baidu-aip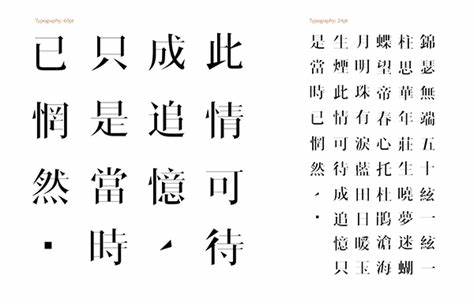
- from aip import AipOcr #baidu_aip包中的AipOCR实现图像文字识别
- # 定义常量
- APP_ID = '15736693'
- API_KEY = '你的KEY'
- SECRET_KEY = '你的SECRET'
- # 初始化文字识别
- aipOcr=AipOcr(APP_ID, API_KEY, SECRET_KEY)
- # 读取图片
- filePath = "OIP-C.jpg"
- def get_file_content(filePath):
- with open(filePath, 'rb') as fp:
- return fp.read()
- # 定义参数变量
- options = {
- 'detect_direction': 'true',
- 'language_type': 'CHN_ENG',
- }
- # 网络图片文字文字识别接口
- result = aipOcr.webImage(get_file_content(filePath),options)
- print(result)
{'words_result': [{'words': '已只成此'}, {'words': '是生月蝶柱錦'}, {'words': '當煙明望思瑟'}, {'words': '時此珠帝無'}, {'words': '惘是追情'}, {'words': '已情有春年端'}, {'words': '惘可心莊五'}, {'words': '然當憶可'}, {'words': '然待蓝托生十'}, {'words': '成杜曉絃'}, {'words': '追日夢'}, {'words': '時待'}, {'words': '憶暖迷絃'}, {'words': '只玉海蝴'}], 'words_result_num': 14, 'direction': 0, 'log_id': 1592394631485448641} -
相关阅读:
【阅读笔记】低照度图像增强-《An Integrated Neighborhood Dependent...
ASEMI-1N5819二极管的参数
Java 面试题经典 77 问(含答案)!
excel修改批量一列单价的金额并保留1位小数
英语作文写作步骤及模板例句(1)
安装php扩展XLSXWriter,解决php导入excel表格时获取日期变成浮点数的方法
sql-gen:点击生成SQL、RO、VO的工具
ios照片误删怎么恢复,iphone已经删除的照片怎么恢复
Python批量爬取简历模板
github加速方法尝试
- 原文地址:https://blog.csdn.net/m0_51933492/article/details/127855430
