-
可视化大屏的几种屏幕适配方案,总有一种是你需要的
假设我们正在开发一个可视化拖拽的搭建平台,可以拖拽生成工作台或可视化大屏,或者直接就是开发一个大屏,首先必须要考虑的一个问题就是页面如何适应屏幕,因为我们在搭建或开发时一般都会基于一个固定的宽高,但是实际的屏幕可能大小不一,接下来我们就尝试几种简单且常见的方案,并简单分析一下利弊。
demo
首先写个基础的
demo给后续使用:<script setup> import { ref } from "vue"; import Widget from "./components/Widget.vue"; import LineChart from "./components/LineChart.vue"; import BarChart from "./components/BarChart.vue"; import PieChart from "./components/PieChart.vue"; import FunnelChart from "./components/FunnelChart.vue"; // 画布宽高 const canvasWidth = ref(1920); const canvasHeight = ref(1080); // 组件宽高 const widgetWidth = ref(960); const widgetHeight = ref(540); script> <template> <div class="canvasBox"> <div class="canvas" :style="{ width: canvasWidth + 'px', height: canvasHeight + 'px' }" > <Widget :width="widgetWidth" :height="widgetHeight" :left="0" :top="0"> <LineChart>LineChart> Widget> <Widget :width="widgetWidth" :height="widgetHeight" :left="widgetWidth" :top="0"> <BarChart>BarChart> Widget> <Widget :width="widgetWidth" :height="widgetHeight" :left="0" :top="widgetHeight"> <PieChart>PieChart> Widget> <Widget :width="widgetWidth" :height="widgetHeight" :left="widgetWidth" :top="widgetHeight"> <FunnelChart>FunnelChart> Widget> div> div> template> <style scoped> .canvasBox { width: 100vw; height: 100vh; } .canvas { position: relative; } style>- 1
- 2
- 3
- 4
- 5
- 6
- 7
- 8
- 9
- 10
- 11
- 12
- 13
- 14
- 15
- 16
- 17
- 18
- 19
- 20
- 21
- 22
- 23
- 24
- 25
- 26
- 27
- 28
- 29
- 30
- 31
- 32
- 33
- 34
- 35
- 36
- 37
- 38
- 39
- 40
- 41
- 42
- 43
- 44
- 45
- 46
- 47
每个图表组件的宽高都设为
100%,然后都被Widget组件包裹,所以实际宽高是依赖Widget组件的,Widget组件为绝对定位,并且宽高、位置通过props传入,模拟我们的拖拽操作,简单起见,所有图表的宽高我们都设为了相同的。Widget组件:<script setup> const props = defineProps({ width: { type: Number, default: 0, }, height: { type: Number, default: 0, }, left: { type: Number, default: 0, }, top: { type: Number, default: 0, }, }); script> <template> <div class="widgetBox" :style="{ width: width + 'px', height: height + 'px', left: left + 'px', top: top + 'px', }" > <slot>slot> div> template> <style scoped> .widgetBox { position: absolute; } style>- 1
- 2
- 3
- 4
- 5
- 6
- 7
- 8
- 9
- 10
- 11
- 12
- 13
- 14
- 15
- 16
- 17
- 18
- 19
- 20
- 21
- 22
- 23
- 24
- 25
- 26
- 27
- 28
- 29
- 30
- 31
- 32
- 33
- 34
- 35
- 36
- 37
- 38
- 39
- 40
组件整体的容器为类名为
canvas的元素,相对定位,宽高也是动态设置的,canvas元素的父级canvasBox元素宽高设为和屏幕宽高一致。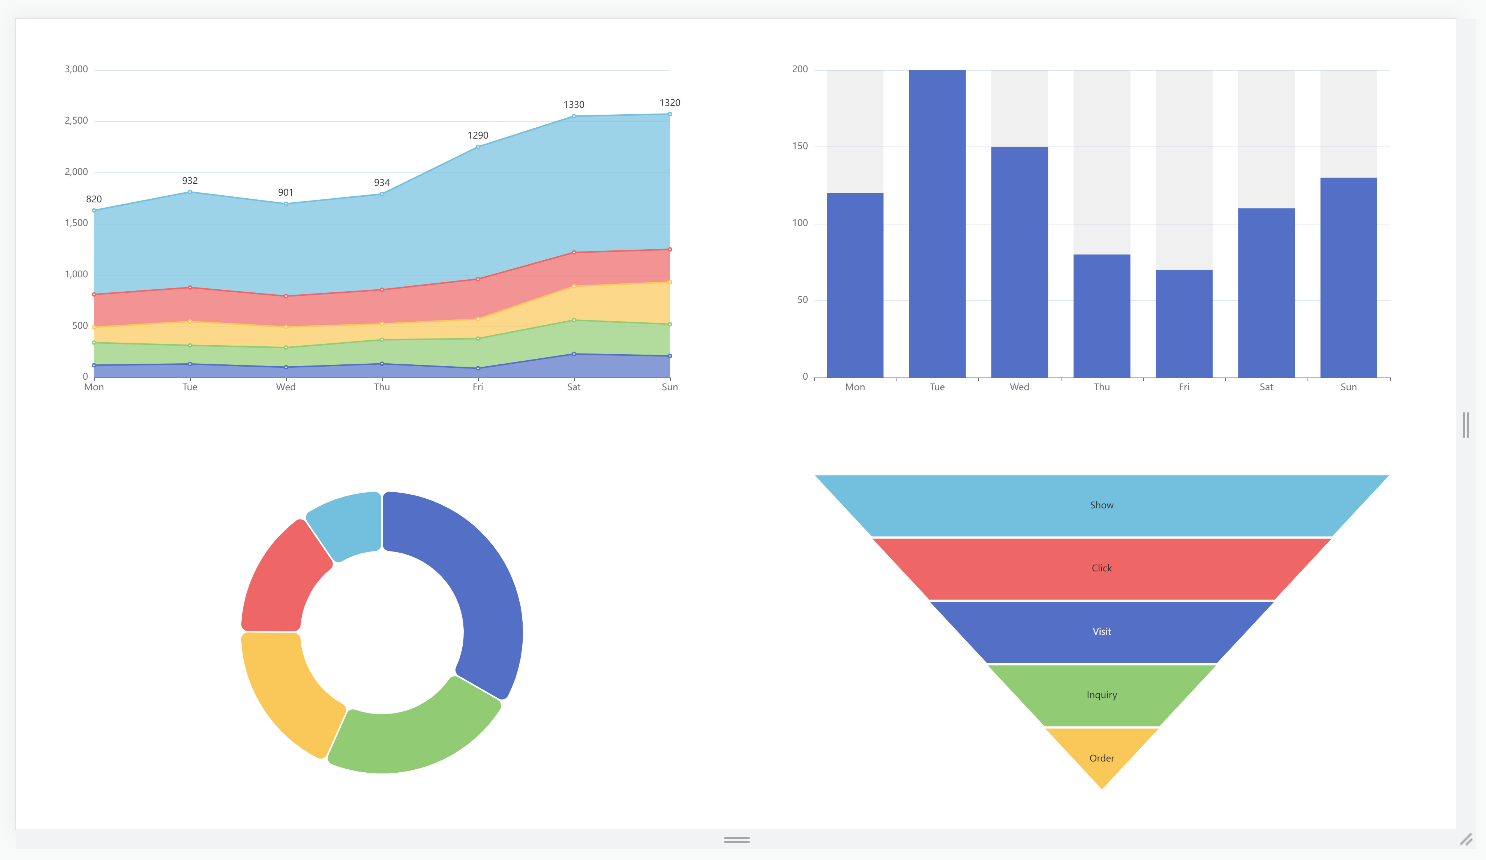
固定尺寸
即宽度、高度固定,如果宽高小于屏幕宽高则在屏幕居中。
这个是最简单的方案了,相当于不适配屏幕,画布配置了多大实际就是多大,不随屏幕的变化而变化,所以各个组件的宽高也是在配置后不会改变,一般用于尺寸固定且后期不会改变的可视化大屏。
我们前面的
demo初始就是这种方式: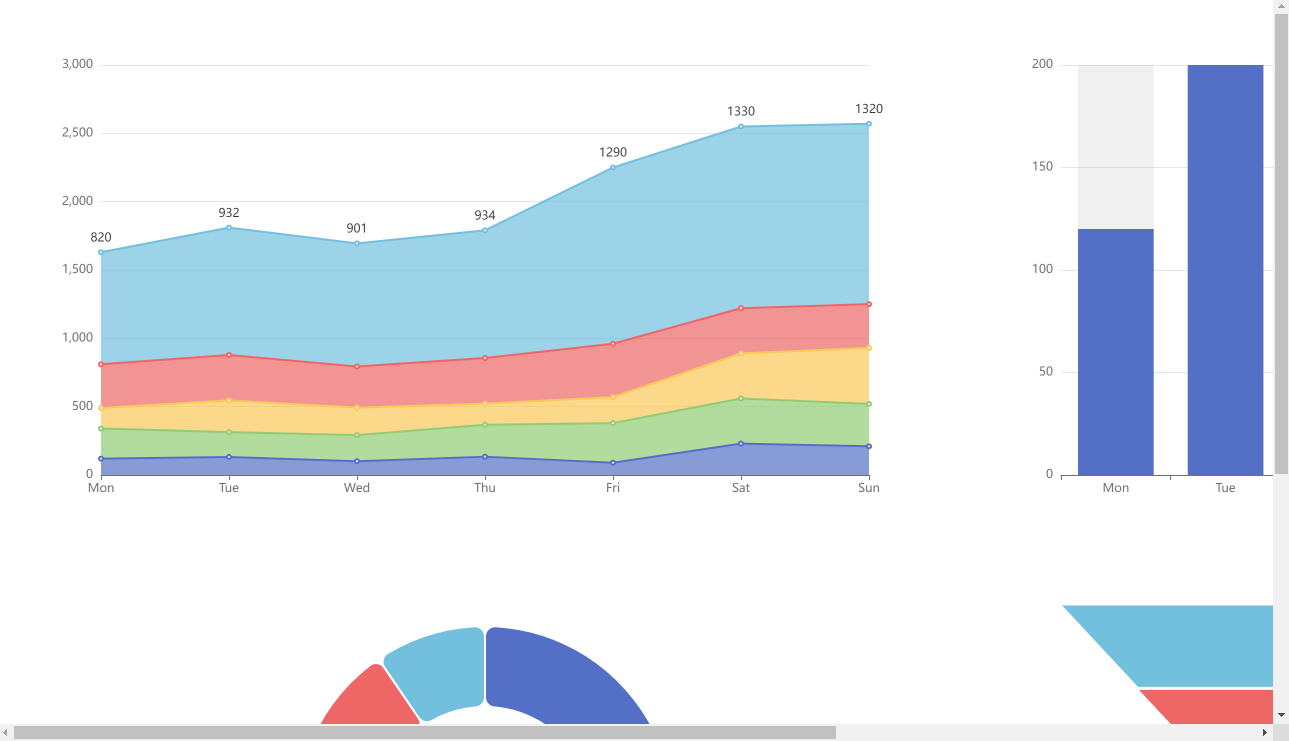
当然,如果宽高小于屏幕的话居中的逻辑需要加一下,居中的方法有很多,通过
css、js都可,根据自己的喜好来就行:// 画布的位置 const canvasLeft = ref(0); const canvasTop = ref(0); // 如果屏幕的宽或高比画布的大,那么居中显示 let windowWidth = window.innerWidth; let windowHeight = window.innerHeight; if (windowWidth > canvasWidth.value) { canvasLeft.value = (windowWidth - canvasWidth.value) / 2; } if (windowHeight > canvasHeight.value) { canvasTop.value = (windowHeight - canvasHeight.value) / 2; }- 1
- 2
- 3
- 4
- 5
- 6
- 7
- 8
- 9
- 10
- 11
- 12
<div class="canvas" :style="{ width: canvasWidth + 'px', height: canvasHeight + 'px', left: canvasLeft + 'px', top: canvasTop + 'px', }" > div>- 1
- 2
- 3
- 4
- 5
- 6
- 7
- 8
- 9
- 10
判断窗口宽度和高度是否大于画布的宽高,是的话通过
left或top来调整: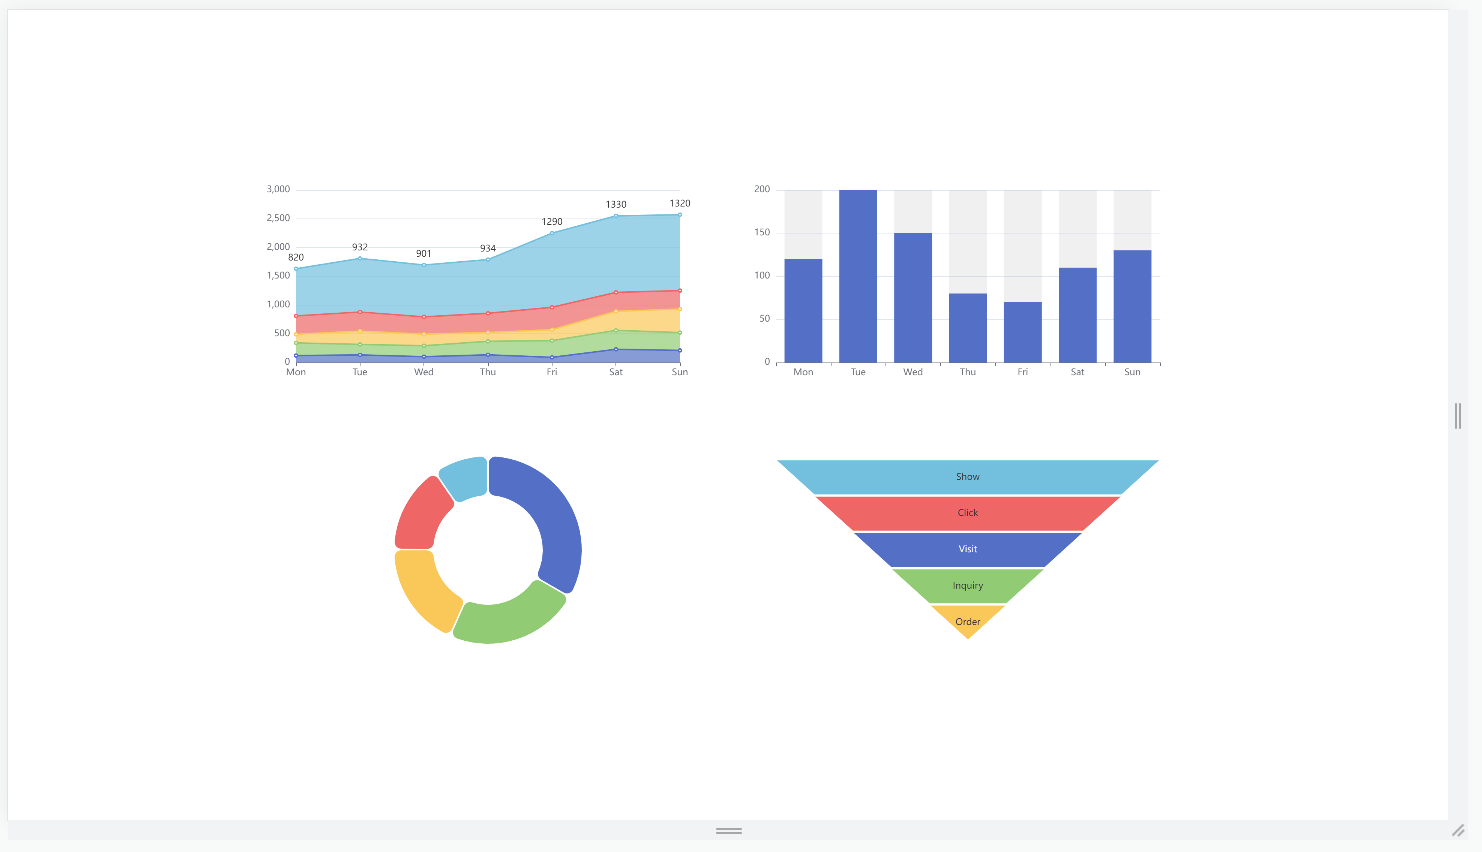
自适应宽度
即宽度适应屏幕,高度不变,这种方案的缺点是垂直方向上会出现滚动条。
比如画布设置的宽度为
1920,但是实际上屏幕的宽度为1280,那么缩小了1.5倍,那么画布和每个组件的宽度也需要同步缩小1.5倍,并且每个组件的left值也需要进行动态调整。首先实现一下容器元素
canvas的尺寸调整:// 保存原始画布的宽度 const originCanvasWidth = ref(canvasWidth.value); // 宽度缩放比例 const ratioWidth = ref(1); // 当前窗口的宽度 let windowWidth = window.innerWidth; // 将画布宽度设置为当前窗口的宽度 canvasWidth.value = windowWidth; // 计算当前宽度和原始宽度的比例 ratioWidth.value = windowWidth / originCanvasWidth.value;- 1
- 2
- 3
- 4
- 5
- 6
- 7
- 8
- 9
- 10
- 11
然后再把这个比例传给
Widget组件进行调整:<Widget :ratioWidth="ratioWidth"> <LineChart>LineChart> Widget> <Widget :ratioWidth="ratioWidth"> <BarChart>BarChart> Widget> <Widget :ratioWidth="ratioWidth"> <PieChart>PieChart> Widget> <Widget :ratioWidth="ratioWidth"> <FunnelChart>FunnelChart> Widget>- 1
- 2
- 3
- 4
- 5
- 6
- 7
- 8
- 9
- 10
- 11
- 12
在
Widget组件里我们只要把宽度和left都乘以这个比例即可,为什么是乘,很简单:newWidth / width = ratioWidth = windowWidth / originCanvasWidth newWidth = width * ratioWidth // left同样看做是一个距左侧的宽度即可- 1
- 2
- 3
- 4
<div class="widgetBox" :style="{ width: width * ratioWidth + 'px', height: height + 'px', left: left * ratioWidth + 'px', top: top + 'px', }" > <slot>slot> div>- 1
- 2
- 3
- 4
- 5
- 6
- 7
- 8
- 9
- 10
- 11
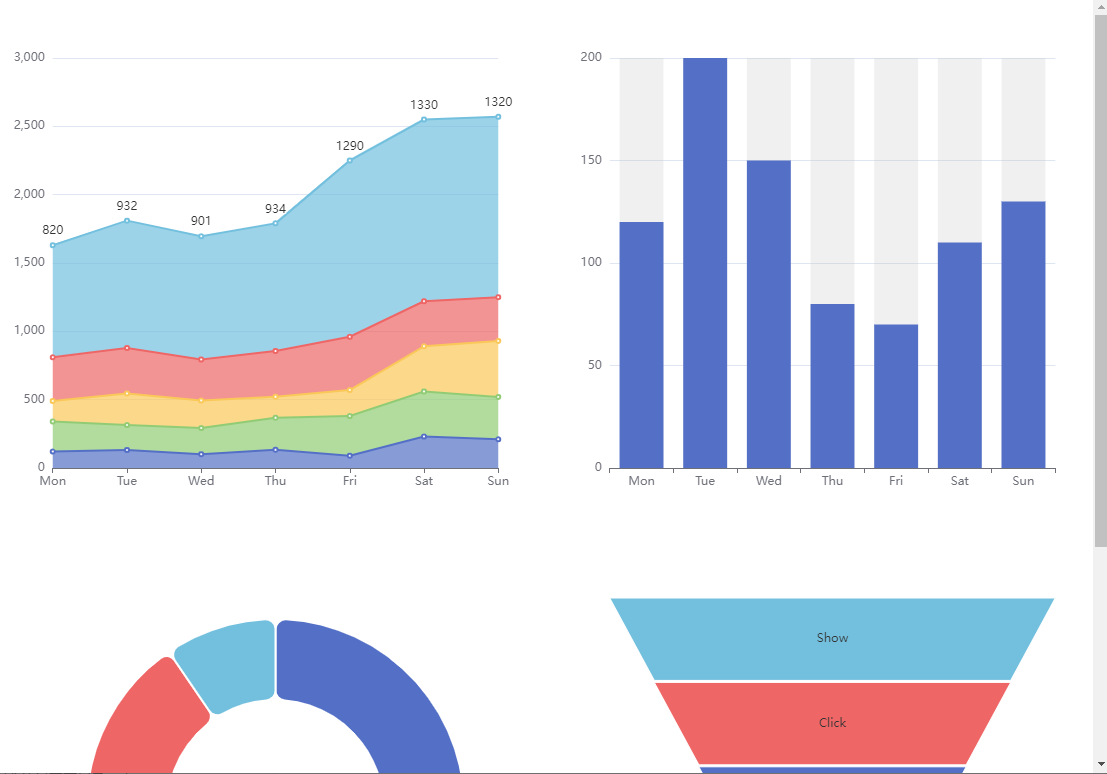
自适应屏幕
即宽高都自适应,和上一种方案相比,这种横竖都不会出现滚动条,且能完全铺满屏幕。
实现也很简单,在上一个【自适应宽度】的基础上加上高度自适应即可。
// 画布原始宽高 const originCanvasWidth = ref(canvasWidth.value); const originCanvasHeight = ref(canvasHeight.value); // 缩放比例 const ratioWidth = ref(1); const ratioHeight = ref(1); // 当前窗口的宽高 let windowWidth = window.innerWidth; let windowHeight = window.innerHeight; // 将画布宽高设置为当前窗口的宽高 canvasWidth.value = windowWidth; canvasHeight.value = windowHeight; // 计算当前宽高和原始宽高的比例 ratioWidth.value = windowWidth / originCanvasWidth.value; ratioHeight.value = windowHeight / originCanvasHeight.value;- 1
- 2
- 3
- 4
- 5
- 6
- 7
- 8
- 9
- 10
- 11
- 12
- 13
- 14
- 15
- 16
同样再把比例传给
Widget组件进行调整:<Widget :ratioWidth="ratioWidth" :ratioHeight="ratioHeight"> <LineChart>LineChart> Widget> <Widget :ratioWidth="ratioWidth" :ratioHeight="ratioHeight"> <BarChart>BarChart> Widget> <Widget :ratioWidth="ratioWidth" :ratioHeight="ratioHeight"> <PieChart>PieChart> Widget> <Widget :ratioWidth="ratioWidth" :ratioHeight="ratioHeight"> <FunnelChart>FunnelChart> Widget>- 1
- 2
- 3
- 4
- 5
- 6
- 7
- 8
- 9
- 10
- 11
- 12
<div class="widgetBox" :style="{ width: width * ratioWidth + 'px', height: height * ratioHeight + 'px', left: left * ratioWidth + 'px', top: top * ratioHeight + 'px', }" > <slot>slot> div>- 1
- 2
- 3
- 4
- 5
- 6
- 7
- 8
- 9
- 10
- 11

整体等比例缩放
即通过
css的transform属性来对组件容器canvas进行整体的缩放,保持原比例,在屏幕居中显示,当然你可以选择只缩放宽度或高度,但是这样会变形。前面的两种方案,我们的组件开发时都必须要考虑容器的宽高,即需要进行适配,但是宽高比太极限了说实话很难处理,显示效果肯定是比较差的,但是这种整体等比例适配就无需考虑这种情况。
实际项目中如果有大屏需要适应屏幕,我一般都通过这种方法,优点是简单,缺点是水平或垂直空间上可能会留白,但是背景是全屏的,所以效果也不会很差。
实现也很简单,计算一下画布原始比例,再计算一下屏幕的比例,然后再判断是宽度和屏幕一致,高度自适应,还是高度和屏幕一致,宽度自适应:
// 当前窗口宽高比例 let windowWidth = window.innerWidth; let windowHeight = window.innerHeight; let windowRatio = windowWidth / windowHeight; // 画布原始宽高比例 const canvasRatio = canvasWidth.value / canvasHeight.value; // 计算画布适应后的新宽高 let newCanvasWidth = 0; let newCanvasHeight = 0; if (canvasRatio > windowRatio) {// 画布的宽高比大于屏幕的宽高比 // 画布的宽度调整为屏幕的宽度 newCanvasWidth = windowWidth; // 画布的高度根据画布原比例进行缩放 newCanvasHeight = windowWidth / canvasRatio; } else {// 画布的宽高比小于屏幕的宽高比 // 画布的高度调整为屏幕的高度 newCanvasHeight = windowHeight; // 画布的宽度根据画布原比例进行缩放 newCanvasWidth = windowHeight * canvasRatio; } // ...- 1
- 2
- 3
- 4
- 5
- 6
- 7
- 8
- 9
- 10
- 11
- 12
- 13
- 14
- 15
- 16
- 17
- 18
- 19
- 20
- 21
假设屏幕的宽高相同,那么比例为
1。第一种情况,假设画布的宽是高的两倍,那么比例为
2,要保持原比例2适应屏幕,显然只能宽度和屏幕一致,高度自适应,因为如果高度和屏幕一致,那么宽度需要是高度的两倍,屏幕显然显示不下: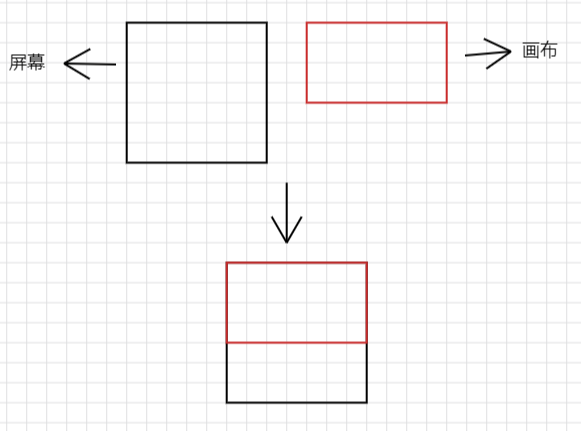
第二种情况,假设画布的高是宽的两倍,那么比例为
0.5,要保持比例为0.5适应屏幕,需要高度和屏幕一致,宽度自适应: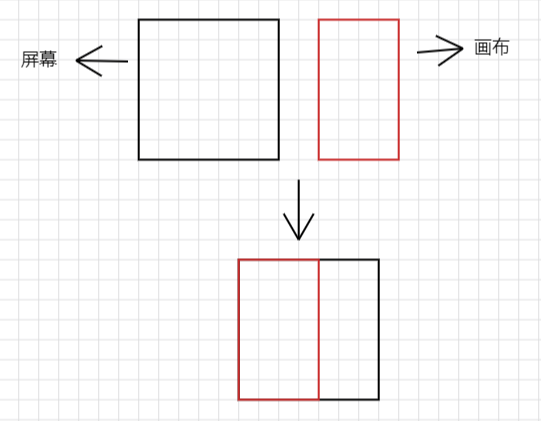
计算完了画布适应屏幕后的新宽高,接下来就可以计算它相对于画布原始宽高的缩放比例:
// ... // 相对于画布原始宽高的缩放比例 const canvasStyle = reactive({ transform: "", }); const scaleX = newCanvasWidth / canvasWidth.value; const scaleY = newCanvasHeight / canvasHeight.value; canvasStyle.transform = `scale(${scaleX}, ${scaleY})`- 1
- 2
- 3
- 4
- 5
- 6
- 7
- 8
把样式添加到容器元素
canvas上即可:<div class="canvas" :style="{ width: canvasWidth + 'px', height: canvasHeight + 'px', ...canvasStyle }" > div>- 1
- 2
- 3
- 4
- 5
- 6
- 7
- 8
- 9
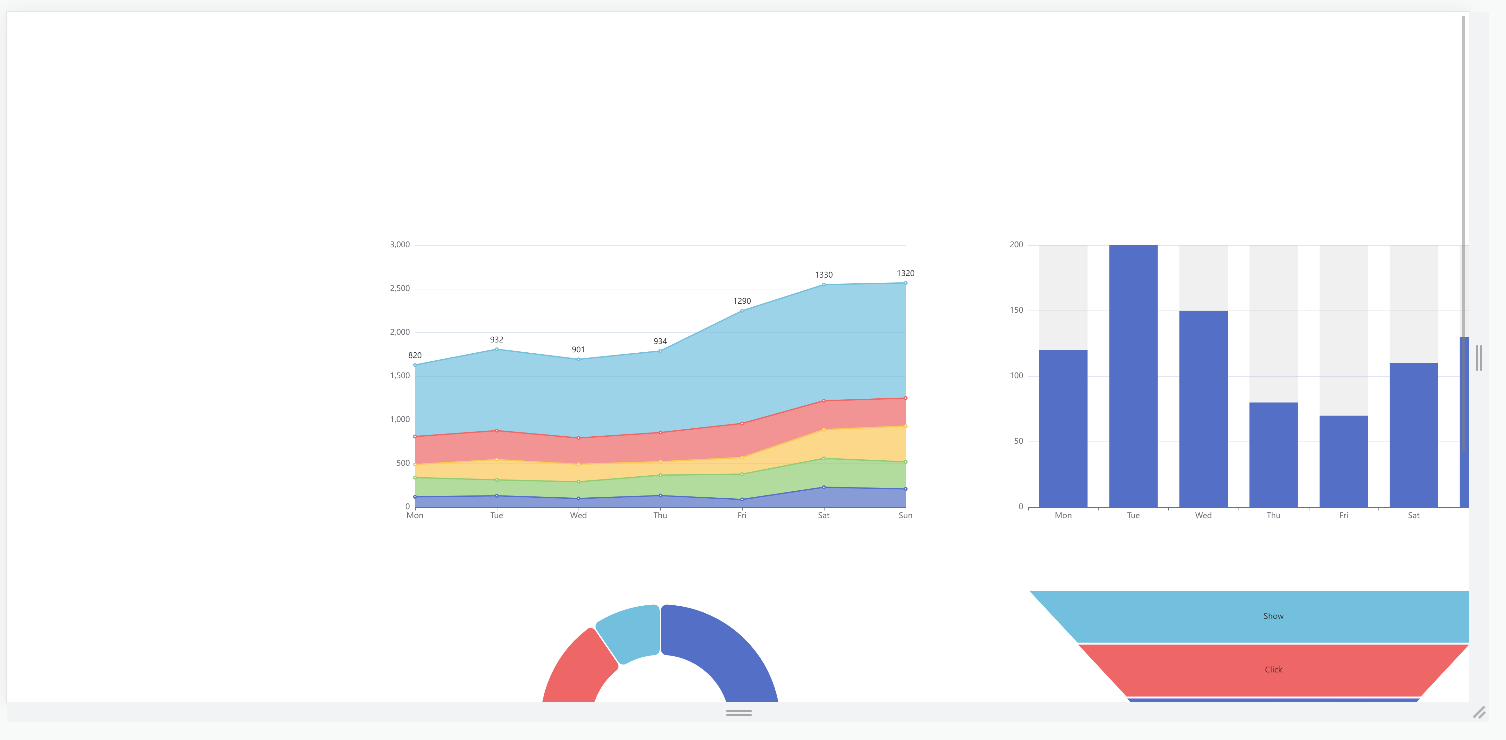
显示的位置似乎有点问题,这其实是因为默认情况下元素的变换都是以自身的中心点为原点进行变换的:
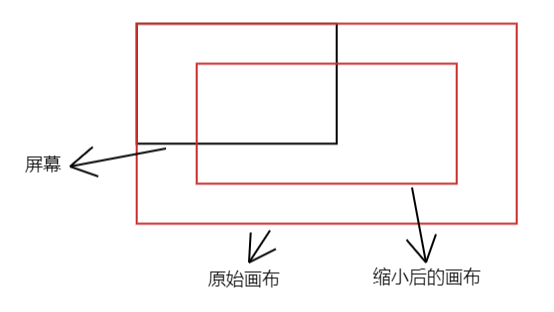
我们只要改成以左上角为原点即可:
const canvasStyle = reactive({ transform: "", transformOrigin: `left top`// 改成以左上角为变换原点 });- 1
- 2
- 3
- 4
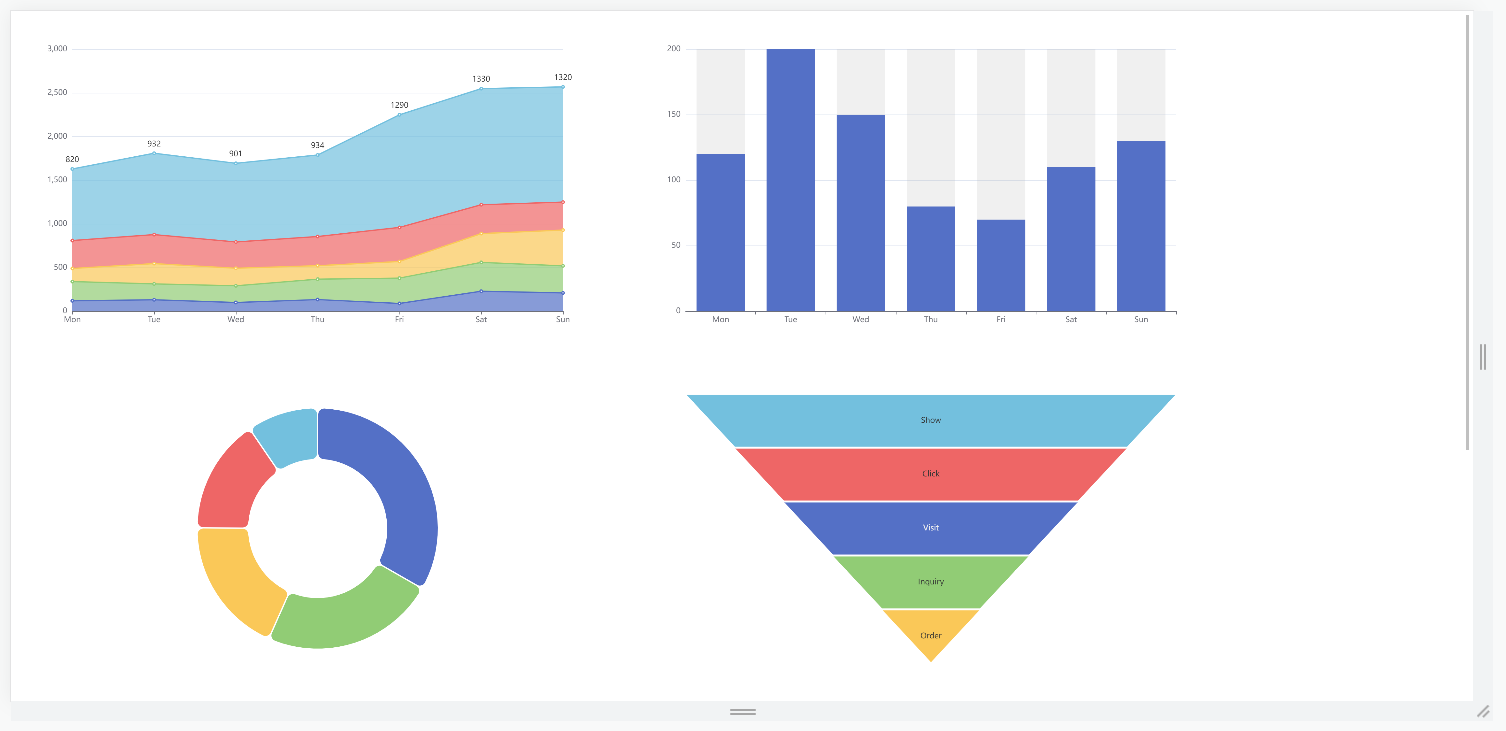
最后再来让它居中:
// 居中 const translateX = (windowWidth - newCanvasWidth) / 2 / scaleX; const translateY = (windowHeight - newCanvasHeight) / 2 / scaleY; canvasStyle.transform = `scale(${scaleX}, ${scaleY}) translate(${translateX}px, ${translateY}px)`;- 1
- 2
- 3
- 4
窗口的宽高减去画布适应后的新宽高,即剩余的空间,再除以
2进行居中显示,为什么还要除以缩放值呢,因为translate的值也会随scale进行缩放,比如translateX计算出来为100,scaleX为0.5,那么实际上最终的偏移量为100*0.5=50,这显然不对,所以我们除一个缩放值进行抵消。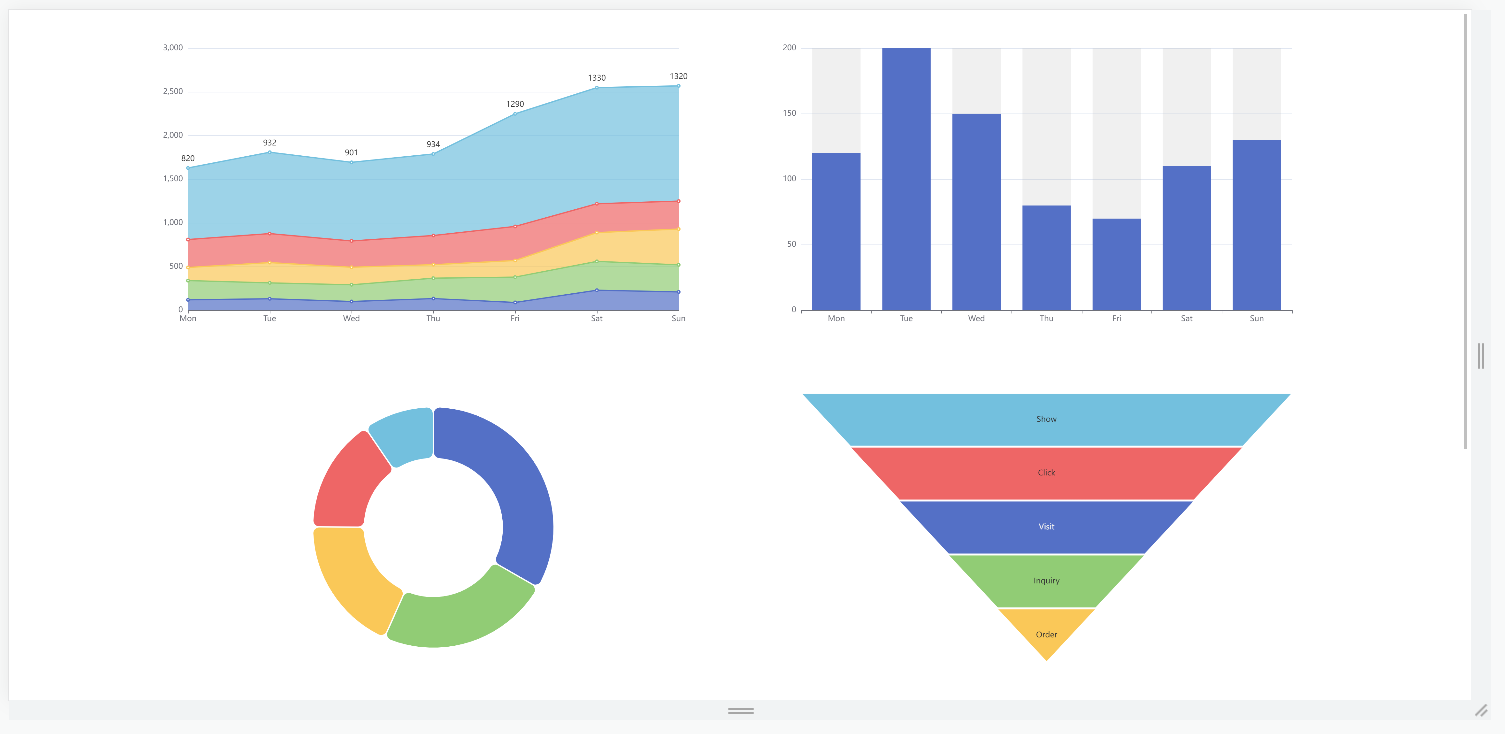
这个方案似乎很完美,那么还有没有问题呢,显然是有的,一个小问题是缩放后文字可能会模糊,这个问题不大,笔者遇到的另一个问题是如果使用了
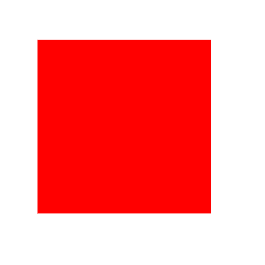
getBoundingClientRect方法获取元素信息,本意是获取元素原始的尺寸数据,但是缩放后返回的就是缩放后的数据,那么可能会和我们的原始意图出现偏差,比如有一个如下的div:<div ref="el1" style="width: 200px; height: 200px; background: red; position: absolute; left: 50px; top: 50px;">div>- 1
我们想要动态根据这个
div大小和位置复制一个div:<div ref="el2" style="background: green; position: absolute">div>- 1
const { width, height } = el1.value.getBoundingClientRect(); const { left, top } = window.getComputedStyle(el1.value); el2.value.style.width = `${width}px`; el2.value.style.height = `${height}px`; el2.value.style.left = left; el2.value.style.top = top;- 1
- 2
- 3
- 4
- 5
- 6
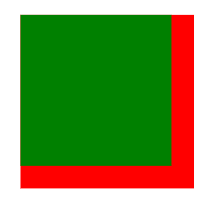
可以看到获取到的宽高比实际的小了一点,这显然不是我们需要的,解决方法是要么不要使用
getBoundingClientRect方法,使用offsetWdith等不会被缩放影响的方法或属性获取元素尺寸,要么把获取到的数据除以缩放值。当然可能还会存在其他一些属性或方法也会存在这个问题,这就需要各位在实际的开发时进行测试了。
总结
本文简单总结了一下大屏适配的几种方法,没有哪一种是最好的,也没有哪一种是非常完美的,没办法,很多时候都是需要进行一定妥协的。
demo地址:https://wanglin2.github.io/visual-drag-platform-fit-demo/demo仓库地址:https://github.com/wanglin2/visual-drag-platform-fit-demo -
相关阅读:
Apifox(1)比postman更优秀的接口自动化测试平台
Lua Table(表)
【day03】流程控制语句
eclipse项目导入教程
IT行业职场走向,哪些方向更有就业前景?——IT行业的发展现状及趋势探析
Java代码沙箱
【乐吾乐2D可视化组态编辑器】导出HTML,下载离线部署包
软件测试回归案例,什么是回归测试?
挂耳耳机十大品牌排行榜,最值得入手的五款挂耳式耳机分享
socket 到底是个啥
- 原文地址:https://blog.csdn.net/sinat_33488770/article/details/127836884
