-
JAVA线程池详解
一.简介
线程池:一种使用线程的模式,存放了很多可以复用的线程,对线程统一管理。我们可以使用new的方式去创建线程,但若是并发线程太高,每个线程执行时间不长,这样频繁的创建销毁线程是比较耗费资源的,线程池就是用来解决此问题的。
1.使用线程池的优点
(1)降低资源的消耗:线程可以重复使用,不需要在创建线程和消耗线程上浪费资源;
(2)提高响应速度:任务到达时,线程可以复用已有的线程,及时响应;
(3)可管理性:无限制的创建线程会降低系统效率,线程池可以对线程进行管理、监控、调优。
二.线程池参数说明
ThreadPoolExecutor是线程池最核心的一个类,我们来看它参数最完整的构造类,代码如下:
public ThreadPoolExecutor(int corePoolSize, int maximumPoolSize, long keepAliveTime, TimeUnit unit, BlockingQueue<Runnable> workQueue, ThreadFactory threadFactory, RejectedExecutionHandler handler)- 1
- 2
- 3
- 4
- 5
- 6
- 7
参数名 含义 解释 corePoolSize 线程池核心线程数 默认情况下,线程池中是没有线程的,当还没有一次任务到达过时,初始化的线程数为0,当有任务初次来临,直接创建corePoolSize个线程;核心线程生命周期无限,即使空闲也不会死亡。 maximumPoolSize 线程池能创建的最大线程数 当核心线程数已满,并且工作队列也已经存放满,才会去判断当前线程数是否小于maximumPoolSize,小于则继续创建线程处理任务,等于则执行拒绝策略。 keepAliveTime 闲置超时时间 当线程池中的线程数大于corePoolSize时,此值才生效,即大于corePoolSize的线程在经过keepAliveTime的时间依然没有任务执行,则销毁线程。 unit 超时时间单位 参数keepAliveTime的单位。 workQueue 工作队列 当核心线程数已满时,新提交的任务放到任务队列中(前提是任务队列没满)。 threadFactory 线程池创建新线程的工厂 创建线程,一般默认即可。 handler 线程池达到饱和之后的拒绝策略 当线程数达到最大线程maximumPoolSize后(此时队列已经存满),再有新任务提交,执行的处理策略。 三.WorkQueue工作队列说明
workQueque决定了缓存任务的排队策略,对于不同的业务场景,我们可以选择不同的工作队列。类型为BlockingQueue,我们看下源码,哪些类实现了BlockingQueue接口。

我们来说说以下常用的四种。1.SynchronousQueue
没有容量,直接提交队列,是无缓存等待队列,当任务提交进来,它总是马上将任务提交给线程去执行,如果线程已经达到最大,则执行拒绝策略;所以使用SynchronousQueue阻塞队列一般要求maximumPoolSize为无界(无限大),避免线程拒绝执行操作。从源码中可以看到容量为0:
//是否为空,直接返回的true public boolean isEmpty() { return true; } //队列大小为0 public int size() { return 0; }- 1
- 2
- 3
- 4
- 5
- 6
- 7
- 8
- 9
2.LinkedBlockingQueue
默认情况下,LinkedBlockingQueue是个无界的任务队列,默认值是Integer.MAX_VALUE,当然我们也可以指定队列的大小。从构造LinkedBlockingQueue源码中可以看出它的大小指定方式:
//默认构造函数,大小为Integer最大 public LinkedBlockingQueue() { this(Integer.MAX_VALUE); } //也可以指定大小 public LinkedBlockingQueue(int capacity) { if (capacity <= 0) throw new IllegalArgumentException(); this.capacity = capacity; last = head = new Node<E>(null); }- 1
- 2
- 3
- 4
- 5
- 6
- 7
- 8
- 9
- 10
- 11
为了避免队列过大造成机器负载,或者内存泄漏,我们在使用的时候建议手动传一个队列的大小。内部分别使用了takeLock和putLock对并发进行控制,添加和删除操作不是互斥操作,可以同时进行,这样大大提供了吞吐量。源码中有定义这两个锁:
//获取元素使用的锁 private final ReentrantLock takeLock = new ReentrantLock(); //加入元素使用的锁 private final ReentrantLock putLock = new ReentrantLock(); //获取元素时使用到takeLock锁 public E peek() { if (count.get() == 0) return null; final ReentrantLock takeLock = this.takeLock; //加锁操作 takeLock.lock(); try { //获取元素 Node<E> first = head.next; if (first == null) return null; else return first.item; } finally { //解锁 takeLock.unlock(); } } //添加元素到队列中使用putLock锁 public boolean offer(E e) { if (e == null) throw new NullPointerException(); final AtomicInteger count = this.count; if (count.get() == capacity) return false; int c = -1; Node<E> node = new Node<E>(e); final ReentrantLock putLock = this.putLock; //加锁操作 putLock.lock(); try { //队列中存放的数据小于队列设置的值 if (count.get() < capacity) { //添加元素 enqueue(node); c = count.getAndIncrement(); if (c + 1 < capacity) notFull.signal(); } } finally { //解锁 putLock.unlock(); } if (c == 0) signalNotEmpty(); return c >= 0; }- 1
- 2
- 3
- 4
- 5
- 6
- 7
- 8
- 9
- 10
- 11
- 12
- 13
- 14
- 15
- 16
- 17
- 18
- 19
- 20
- 21
- 22
- 23
- 24
- 25
- 26
- 27
- 28
- 29
- 30
- 31
- 32
- 33
- 34
- 35
- 36
- 37
- 38
- 39
- 40
- 41
- 42
- 43
- 44
- 45
- 46
- 47
- 48
- 49
- 50
- 51
- 52
- 53
- 54
- 55
3.ArrayBlockingQueue
可以理解为有界的队列,创建的时候必须要指定队列的大小,从源码可以看出构造的时候要传递值:
public ArrayBlockingQueue(int capacity) { this(capacity, false); }- 1
- 2
- 3
4.DelayQueue
是一个延迟队列,无界、队列中每个元素都有过期时间,当从队列获取元素时,只有过期的元素才会出队,而队列头部是最早过期的元素,若是没有过期,则进行等待。利用这个特性,我们可以用来处理定时任务调用的场景,例如订单过期未支付自动取消,设置一个在队列中过期的时间,过期了后,再去查询订单的状态,若是没支付,则调用取消订单的方法。
//获取元素 public E take() throws InterruptedException { final ReentrantLock lock = this.lock; lock.lockInterruptibly(); try { for (;;) { //获取元素 E first = q.peek(); if (first == null) //进入等待 available.await(); else { //获取过期时间 long delay = first.getDelay(NANOSECONDS); if (delay <= 0) //小于等于0则过期,返回此元素 return q.poll(); first = null; if (leader != null) available.await(); else { Thread thisThread = Thread.currentThread(); leader = thisThread; try { //设置还需要等待的时间 available.awaitNanos(delay); } finally { if (leader == thisThread) leader = null; } } } } } finally { if (leader == null && q.peek() != null) available.signal(); lock.unlock(); } }- 1
- 2
- 3
- 4
- 5
- 6
- 7
- 8
- 9
- 10
- 11
- 12
- 13
- 14
- 15
- 16
- 17
- 18
- 19
- 20
- 21
- 22
- 23
- 24
- 25
- 26
- 27
- 28
- 29
- 30
- 31
- 32
- 33
- 34
- 35
- 36
- 37
- 38
- 39
- 40
四.handler四种拒绝策略说明
触发任务拒接的条件:当前同时运行的线程数量达到最大线程数maximumPoolSize,并且队列也放满了任务,即触发饱和拒绝策略。ThreadPoolExecutor中定义了四个拒绝策略内部类。
1.DiscardPolicy
当任务添加到线程池中被拒绝时,直接丢弃任务,不抛出异常,源码:
public static class DiscardPolicy implements RejectedExecutionHandler { public DiscardPolicy() { } public void rejectedExecution(Runnable r, ThreadPoolExecutor e) { } }- 1
- 2
- 3
- 4
- 5
- 6
- 7
- 8
2.AbortPolicy
当任务添加到线程池中被拒绝时,直接丢弃任务,并抛出RejectedExecutionException异常,源码:
public static class AbortPolicy implements RejectedExecutionHandler { public AbortPolicy() { } //不处理,直接抛出异常 public void rejectedExecution(Runnable r, ThreadPoolExecutor e) { throw new RejectedExecutionException("Task " + r.toString() + " rejected from " + e.toString()); } }- 1
- 2
- 3
- 4
- 5
- 6
- 7
- 8
- 9
- 10
- 11
3.DiscardOldestPolicy
当任务添加到线程池中被拒绝时,判断线程池是否还在运行,然后获取队列,让队首(最久)的元素出队,直接抛弃,把当前任务添加执行,不出意外还是添加到队列中,除非当前这会好几个线程执行完,线程数小于了corePoolSize。
public static class DiscardOldestPolicy implements RejectedExecutionHandler { public DiscardOldestPolicy() { } public void rejectedExecution(Runnable r, ThreadPoolExecutor e) { //线程池还没有销毁停止 if (!e.isShutdown()) { //获取队列,并让队列头(最久)的任务出队,丢弃队头 e.getQueue().poll(); //执行新任务,新任务再添加到队列中 e.execute(r); } } }- 1
- 2
- 3
- 4
- 5
- 6
- 7
- 8
- 9
- 10
- 11
- 12
- 13
- 14
4.CallerRunsPolicy
当任务添加到线程池中被拒绝时,判断线程池是否还在运行,直接在主线程中运行此任务,即在调用execute或者submit的方法中执行,不再使用线程池来处理此任务。
public static class CallerRunsPolicy implements RejectedExecutionHandler { public CallerRunsPolicy() { } public void rejectedExecution(Runnable r, ThreadPoolExecutor e) { //线程池还在运行 if (!e.isShutdown()) { //让主进程来运行此任务 r.run(); } } }- 1
- 2
- 3
- 4
- 5
- 6
- 7
- 8
- 9
- 10
- 11
- 12
为了说明这一点,来看一个demo:
public static void main(String[] args) { //最大线程数设置为2,队列最大能存2,使用主线程执行的拒绝策略 ThreadPoolExecutor threadPoolExecutor = new ThreadPoolExecutor(2,2,10, TimeUnit.SECONDS,new LinkedBlockingQueue<>(2),new ThreadPoolExecutor.CallerRunsPolicy()); //此时有6个任务,最大线程+队列能处理4个,主线程需要处理6-4=2个 for(int i = 0; i < 6;i ++) { Runnable run = new Runnable(){ @Override public void run() { try { Thread.sleep(10); System.out.println("执行当前任务的线程:"+Thread.currentThread().getName()); } catch (InterruptedException e) { e.printStackTrace(); } } }; threadPoolExecutor.execute(run); } }- 1
- 2
- 3
- 4
- 5
- 6
- 7
- 8
- 9
- 10
- 11
- 12
- 13
- 14
- 15
- 16
- 17
- 18
- 19
- 20
执行结果:

五.线程池处理任务策略说明
1.如果当前线程池中的线程数量小于corePoolSize,则会创建一个线程执行此任务;
2.如果当前线程池中的线程数量大于corePoolSize,则会尝试将其添加到队列中,若添加成功,则该任务会排队等待线程将其取出进行执行;若队列中已达最大值,则添加失败,则会尝试创建新的线程执行这个任务;
3.如果当前线程池中的线程数量已经达到maximumPoolSize,则尝试创建新的线程结果为false,会采取任务拒绝策略;
4.如果线程池中线程数量大于corePoolSize,则当空闲时间超过keepAliveTime的线程,将会被终止,直到线程池数量不大于corePoolSize为止。
当提交一个新任务后,线程池的处理流程图:

来看当添加一个任务到线程池的源码:
public void execute(Runnable command) { //执行的任务为空,直接抛出异常 if (command == null) throw new NullPointerException(); //ctl:AtomicInteger类型,获取当前线程池中的线程数 int c = ctl.get(); //当前线程数小于核心线程数,直接创建线程执行任务 if (workerCountOf(c) < corePoolSize) { //创建线程执行任务,从wc >= (core ? corePoolSize : maximumPoolSize)可以看出,true代表创建核心线程,false代表创建非核心线程 if (addWorker(command, true)) //创建线程成功,直接返回 return; //没成功,重新获取当前线程数 c = ctl.get(); } //线程池还是运行状态、并且把任务添加到队列中成功 if (isRunning(c) && workQueue.offer(command)) { //获取下当前线程数 int recheck = ctl.get(); //若是线程池不运行了,则把当前添加的任务移出 if (! isRunning(recheck) && remove(command)) //执行拒绝策略 reject(command); //当前运行的线程数为0, else if (workerCountOf(recheck) == 0) //传递空参数,不进行创建 addWorker(null, false); } //尝试创建线程,此时传递false,wc >= (core ? corePoolSize : maximumPoolSize),则看线程的上限匹配maximumPoolSize else if (!addWorker(command, false)) //创建线程失败,执行拒绝策略 reject(command); }- 1
- 2
- 3
- 4
- 5
- 6
- 7
- 8
- 9
- 10
- 11
- 12
- 13
- 14
- 15
- 16
- 17
- 18
- 19
- 20
- 21
- 22
- 23
- 24
- 25
- 26
- 27
- 28
- 29
- 30
- 31
- 32
- 33
- 34
六.Executors四种创建线程池方式比较
Executors类(并发包)提供了4种创建线程池的方法,这些方法最终都是通过配置ThreadPoolExecutor的不同参数,来达到不同的线程管理效果。
1.newFixedThreadPool
创建一个定长的线程池,可控制最大并发数,超出的线程进行排队等待。源码如下:
public static ExecutorService newFixedThreadPool(int nThreads) { return new ThreadPoolExecutor(nThreads, nThreads, 0L, TimeUnit.MILLISECONDS, new LinkedBlockingQueue<Runnable>()); }- 1
- 2
- 3
- 4
- 5
从源码可以看出此线程池的核心线程数、最大线程数都是nThreads,线程空闲回收时间配置也没有意义了,所以闲置时间给0,队列使用LinkedBlockingQueue无界的方式,当线程数达到nThreads后,新任务放到队列中。
下面是demo:
public static void main(String[] args) { // 创建定长线程池 ExecutorService newFixedThreadPool = Executors.newFixedThreadPool(4); for (int i = 0; i < 10; i++) { //创建任务 Runnable runnable = new Runnable(){ @Override public void run() { try { Thread.sleep(3); System.out.println("当前执行的线程为:"+Thread.currentThread().getName()); } catch (InterruptedException e) { e.printStackTrace(); } } }; //任务添加到线程池 newFixedThreadPool.execute(runnable); } }- 1
- 2
- 3
- 4
- 5
- 6
- 7
- 8
- 9
- 10
- 11
- 12
- 13
- 14
- 15
- 16
- 17
- 18
- 19
- 20
- 21
缺点:因为LinkedBlockingQueue是一个无界的队列,当线程数达到核心线程数时,新提交的任务会一直放到队列中,当任务很多的时候,会造成OOM(内存不足)。
2.newSingleThreadExecutor
创建一个单线程池,它只会用唯一的工作线程来执行任务,超出的线程进行排队等待。源码如下:
public static ExecutorService newSingleThreadExecutor() { return new FinalizableDelegatedExecutorService (new ThreadPoolExecutor(1, 1, 0L, TimeUnit.MILLISECONDS, new LinkedBlockingQueue<Runnable>())); }- 1
- 2
- 3
- 4
- 5
- 6
从源码可以看出此线程池的核心线程数、最大线程数都是1,线程空闲回收时间配置也没有意义了,所以闲置时间给0,队列使用LinkedBlockingQueue无界的方式,当线程数达到1后,新任务放到队列中。
下面是demo:
public static void main(String[] args) { // 创建单线程-线程池,任务依次执行 ExecutorService newSingleThreadExecutor = Executors.newSingleThreadExecutor(); for (int i = 0; i < 6; i++) { //创建任务 Runnable runnable = new Runnable(){ @Override public void run() { System.out.println("当前执行的线程为:"+Thread.currentThread().getName()); } }; //任务添加到线程池 newSingleThreadExecutor.execute(runnable); } }- 1
- 2
- 3
- 4
- 5
- 6
- 7
- 8
- 9
- 10
- 11
- 12
- 13
- 14
- 15
缺点:因为LinkedBlockingQueue是一个无界的队列,当线程数达到核心线程数时,新提交的任务会一直放到队列中,当任务很多的时候,会造成OOM(内存不足)。
3.newCachedThreadPool
创建一个可缓存的线程池,如果线程池长度大于处理需要,则根据线程空闲时间大于60s的会进行销毁;新任务添加进来,若是没有空闲的线程复用,则会立马创建一个线程来处理,因为使用的是无缓存队列。源码如下:
public static ExecutorService newCachedThreadPool(ThreadFactory threadFactory) { return new ThreadPoolExecutor(0, Integer.MAX_VALUE, 60L, TimeUnit.SECONDS, new SynchronousQueue<Runnable>(), threadFactory); }- 1
- 2
- 3
- 4
- 5
- 6
从源码可以看出此线程池的核心线程数为0、最大线程数为无界Integer.MAX_VALUE,线程空闲回收时间60S,队列使用SynchronousQueue无缓存的方式,当有任务添加,能复用之前线程则复用,没有空闲线程则创建新线程。
下面是demo:
public static void main(String[] args) { // 创建可缓存线程池 ExecutorService newCachedThreadPool = Executors.newCachedThreadPool(); for (int i = 0; i < 6; i++) { //创建任务 Runnable runnable = new Runnable(){ @Override public void run() { try { Thread.sleep(6); System.out.println("当前执行的线程为:"+Thread.currentThread().getName()); } catch (InterruptedException e) { e.printStackTrace(); } } }; //任务添加到线程池 newCachedThreadPool.execute(runnable); } }- 1
- 2
- 3
- 4
- 5
- 6
- 7
- 8
- 9
- 10
- 11
- 12
- 13
- 14
- 15
- 16
- 17
- 18
- 19
- 20
- 21
- 22
缺点:因为最大线程数为无界,当任务很多的时候,会创建大量线程,造成OOM(内存不足)。
4.newScheduledThreadPool
创建支持定时、周期任务的线程池。源码如下:
//Executors类中 public static ScheduledExecutorService newScheduledThreadPool(int corePoolSize) { return new ScheduledThreadPoolExecutor(corePoolSize); } //ScheduledThreadPoolExecutor类中 public ScheduledThreadPoolExecutor(int corePoolSize) { super(corePoolSize, Integer.MAX_VALUE, 0, NANOSECONDS, new DelayedWorkQueue()); }- 1
- 2
- 3
- 4
- 5
- 6
- 7
- 8
- 9
- 10
- 11
从源码可以看出此线程池的核心线程数为corePoolSize、最大线程数为无界Integer.MAX_VALUE,线程空闲回收时间0S,当线程数大于corePoolSize时,有线程处理完任务后,接下来就进行销毁。队列使用DelayedWorkQueue延迟队列,可以设置延时时间,当元素达到延时时间,才从队列出队。
下面是demo:
public static void main(String[] args) { // 创建支持定时线程池 ScheduledExecutorService newScheduledThreadPool = Executors.newScheduledThreadPool(2); for (int i = 0; i < 5; i++) { //创建任务 Runnable runnable = new Runnable(){ @Override public void run() { System.out.println("当前执行的线程为:"+Thread.currentThread().getName()); } }; //任务添加到线程池,延迟2秒后才能从队列中出队 newScheduledThreadPool.schedule(runnable, 2, TimeUnit.SECONDS); } }- 1
- 2
- 3
- 4
- 5
- 6
- 7
- 8
- 9
- 10
- 11
- 12
- 13
- 14
- 15
- 16
缺点:因为最大线程数为无界,当任务很多的时候,会创建大量线程,造成OOM(内存不足)。
七.ThreadPoolExecutor方式创建线程池
为了解决Executors提供的四种快速创建线程池出现的OOM(内存不足)问题,推荐使用ThreadPoolExecutor的方式,按业务、按需创建线程池。设置合理的corePoolSize、maximumPoolSize、keepAliveTime、workQueue、handler。
如果我们设置的线程池数量太小的话,如果同一时间有大量任务需要处理,可能会导致大量任务在队列中等待,甚至出现OOM(内存不足),但是此时cpu没有得到充分的利用;如果我们设置的线程数太大,大量线程可能会存在同时挣抢CPU的情况,导致大量的上下文切换,影响CPU的执行效率。
我们可以从这两点去考虑线程池的配置:
(1)cpu密集型任务,需要线程长时间进行复杂的运算,这种类型的任务需要少创建线程,过多的线程将会频繁引起上下文切换,降低任务处理速度。
(2)io密集型任务,由于线程并不是一直在运行,可能大部分时间在等待io读取/写入数据,增加线程数量可以提高并发度,尽可能多处理任务。
下面是demo:
public static void main(String[] args) { //最大线程数设置为2,队列最大能存2,使用主线程执行的拒绝策略 ThreadPoolExecutor threadPoolExecutor = new ThreadPoolExecutor(2,2,0, TimeUnit.SECONDS,new LinkedBlockingQueue<>(2),new ThreadPoolExecutor.CallerRunsPolicy()); //此时有6个任务,最大线程+队列能处理4个,主线程需要处理6-4=2个 for(int i = 0; i < 6;i ++) { Runnable run = new Runnable(){ @Override public void run() { try { Thread.sleep(10); System.out.println("执行当前任务的线程:"+Thread.currentThread().getName()); } catch (InterruptedException e) { e.printStackTrace(); } } }; threadPoolExecutor.execute(run); } }- 1
- 2
- 3
- 4
- 5
- 6
- 7
- 8
- 9
- 10
- 11
- 12
- 13
- 14
- 15
- 16
- 17
- 18
- 19
- 20
八.单例方式创建复用线程池
我们使用单例方式创建可复用的线程池,这样一次创建后,后续业务都使用此线程池,此线程池不关闭销毁,直到系统服务停止才销毁。来看使用内部静态类单例模式创建线程池:
public class MyThreadPool { //内部静态类构造 private static class ThreadPoolHolder{ private static ExecutorService threadPool = new ThreadPoolExecutor(6, 10, 30, TimeUnit.SECONDS, new LinkedBlockingQueue<>(), Executors.defaultThreadFactory(), new ThreadPoolExecutor.AbortPolicy()); } public MyThreadPool(){ } public static ExecutorService getInstance(){ return ThreadPoolHolder.threadPool; } }- 1
- 2
- 3
- 4
- 5
- 6
- 7
- 8
- 9
- 10
- 11
- 12
- 13
- 14
- 15
- 16
- 17
- 18
- 19
- 20
- 21
业务代码中直接使用:
//从单例中获取到线程池资源 ExecutorService threadPoolExecutor = MyThreadPool.getInstance(); for(int i = 0; i < 6;i ++) { Runnable run = new Runnable(){ @Override public void run() { try { Thread.sleep(10); System.out.println("执行当前任务的线程:"+Thread.currentThread().getName()); } catch (InterruptedException e) { e.printStackTrace(); } } }; threadPoolExecutor.execute(run); }- 1
- 2
- 3
- 4
- 5
- 6
- 7
- 8
- 9
- 10
- 11
- 12
- 13
- 14
- 15
- 16
九.任务是否需要返回值
执行的任务是否需要返回值,有些业务场景下,我们需要接收线程处理后的结果返回值。当不需要返回值的时候我们使用Runnable来创建一个任务,重写run方法,当需要接收返回值的时候,我们使用Callable来创建任务,重写call方法。具体来看看源码:
@FunctionalInterface public interface Runnable { //没有返回值,也不抛出异常 public abstract void run(); } @FunctionalInterface public interface Callable<V> { //有返回结果,处理有问题时抛出异常 V call() throws Exception; }- 1
- 2
- 3
- 4
- 5
- 6
- 7
- 8
- 9
- 10
- 11
- 12
在把任务添加到线程池中也需要做区分,当不需要返回值时,直接使用execute方法添加任务;当需要接收返回值时,使用submit方法提交任务。具体来看源码:
//execute没有返回值 public void execute(Runnable command) {} //submit使用泛型来接收返回值 <T> Future<T> submit(Callable<T> task);- 1
- 2
- 3
- 4
- 5
没有返回值的demo:
public static void main(String[] args) { //最大线程数设置的为2,队列最大能存2,使用主线程执行的拒绝策略 ThreadPoolExecutor threadPoolExecutor = new ThreadPoolExecutor(2,2,10, TimeUnit.SECONDS,new LinkedBlockingQueue<>(2),new ThreadPoolExecutor.CallerRunsPolicy()); //此时有6个任务,最大线程+队列能处理4个,主线程需要处理6-4=2个 for(int i = 0; i < 6;i ++) { Runnable run = new Runnable(){ @Override public void run() { try { Thread.sleep(10); System.out.println("执行当前任务的线程:"+Thread.currentThread().getName()); } catch (InterruptedException e) { e.printStackTrace(); } } }; threadPoolExecutor.execute(run); } }- 1
- 2
- 3
- 4
- 5
- 6
- 7
- 8
- 9
- 10
- 11
- 12
- 13
- 14
- 15
- 16
- 17
- 18
- 19
- 20
有返回值的demo:
public static void main(String[] args) throws ExecutionException, InterruptedException { ThreadPoolExecutor threadPoolExecutor = new ThreadPoolExecutor(2,2,10, TimeUnit.SECONDS,new LinkedBlockingQueue<>(2),new ThreadPoolExecutor.CallerRunsPolicy()); List<Future<String>> result = new ArrayList<Future<String>>(); for(int i = 0; i < 6;i ++) { Callable call = new Callable(){ @Override public String call() throws Exception { try { Thread.sleep(10); } catch (InterruptedException e) { e.printStackTrace(); } return "执行当前任务的线程:"+Thread.currentThread().getName(); } }; Future<String> objectFuture = threadPoolExecutor.submit(call); //此处不能直接等着输出返回值,若是直接在此处输出结果值,则线程池就变成串行化的了 //System.out.println(objectFuture.get()); //需要使用一个集合来接收各个线程的处理结果值 result.add(objectFuture); } for(int i = 0;i < result.size() ;i++) { System.out.println(result.get(i).get()); } }- 1
- 2
- 3
- 4
- 5
- 6
- 7
- 8
- 9
- 10
- 11
- 12
- 13
- 14
- 15
- 16
- 17
- 18
- 19
- 20
- 21
- 22
- 23
- 24
- 25
- 26
- 27
注意:有返回值的情况,返回的结果值需要定义一个集合来接收,不能在submit提交任务后就等着输出返回值,或者调用返回值,若是有这样的操作,会使多线程的执行变成串行化,因为线程一提交完,程序就等着输出线程一的返回值,此时线程二提交,需要排队在线程一执行完输出结果后才会去执行。
十.判断线程池是否执行完毕
在很多场景下,我们都需要判断线程池是否已经执行完所有的任务,只有执行完所有的任务,我们再接着往下执行其他处理,例如需要对线程池处理的所有数据进行二次计算或者汇总,都是需要判断线程池是否已经处理完任务。例如下面代码就是存在线程池还没有处理完,就执行了主线程的后续代码:
public static void main(String[] args) throws ExecutionException, InterruptedException { ThreadPoolExecutor threadPoolExecutor = new ThreadPoolExecutor(2, 2, 10, TimeUnit.SECONDS, new LinkedBlockingQueue<>(2), new ThreadPoolExecutor.CallerRunsPolicy()); for(int i = 0; i < 6;i ++) { Runnable call = new Runnable(){ @Override public void run() { try { Thread.sleep(10); System.out.println("执行当前任务的线程:"+Thread.currentThread().getName()); } catch (InterruptedException e) { e.printStackTrace(); } } }; threadPoolExecutor.execute(call); } System.out.println("所有任务执行完成"); }- 1
- 2
- 3
- 4
- 5
- 6
- 7
- 8
- 9
- 10
- 11
- 12
- 13
- 14
- 15
- 16
- 17
- 18
- 19
- 20
- 21
- 22
- 23
- 24
- 25
程序输出结果:

1.isTerminated 我们可以使用线程池的终止状态(TERMINATED)来判断线程池的任务是否已经全部执行完,想让线程池的状态发生变化,我们需要调用关闭线程池shutdown的方法,不然线程池会一直处于RUNNING运行状态。
来看一个demo:
public static void main(String[] args) throws ExecutionException, InterruptedException { ThreadPoolExecutor threadPoolExecutor = new ThreadPoolExecutor(2, 2, 10, TimeUnit.SECONDS, new LinkedBlockingQueue<>(2), new ThreadPoolExecutor.CallerRunsPolicy()); for(int i = 0; i < 6;i ++) { Runnable call = new Runnable(){ @Override public void run() { try { Thread.sleep(10); System.out.println("执行当前任务的线程:"+Thread.currentThread().getName()); } catch (InterruptedException e) { e.printStackTrace(); } } }; threadPoolExecutor.execute(call); } //关闭线程池 threadPoolExecutor.shutdown(); while(!threadPoolExecutor.isTerminated()){ //如果没有中断就一直cas自旋等待 } System.out.println("所有任务执行完成"); }- 1
- 2
- 3
- 4
- 5
- 6
- 7
- 8
- 9
- 10
- 11
- 12
- 13
- 14
- 15
- 16
- 17
- 18
- 19
- 20
- 21
- 22
- 23
- 24
- 25
- 26
- 27
- 28
- 29
分析之前先来看ThreadPoolExecutor中定义的线程池5个状态:
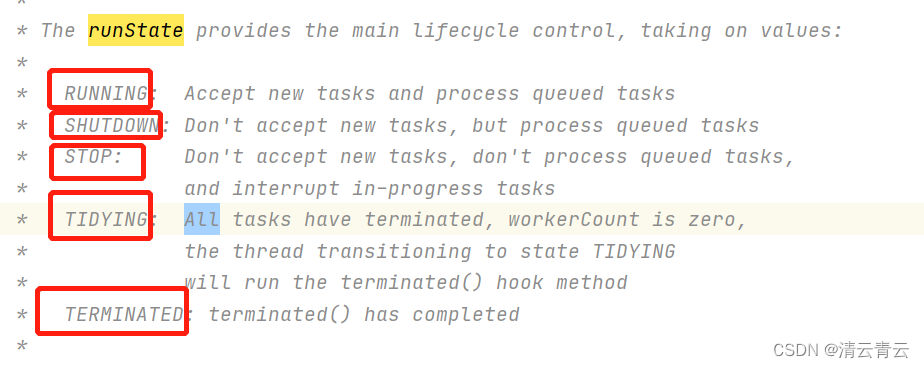
RUNNING:运行状态,可以处理任务;SHUTDOWN:关闭状态,此时线程池不能接受新的任务,他会等待所有排队任务执行完毕;
STOP:阻断状态,此时线程不接受新的任务,不处理排队任务,并且尝试终止正在执行的任务;
TIDYING:整理状态,此时工作的线程为0,尝试执行终止线程池的钩子函数;
TERMINATED:终止状态,已完成线程池终止。
当执行线程池的shutdown()方法时,则线程池处于SHUTDOWN状态,此时线程池不能接受新的任务,它会等待所有的排队任务执行完毕;当调用了shutdownNow()方法时,则线程池处于STOP,此时线程池不能接受新的任务,并且会去尝试终止正在执行的任务。
2.getCompletedTaskCount
可以通过获取线程池的计划执行数、已执行完成数来判断线程池是否已执行完所有任务,如果计划执行数=已执行完成数,则线程池已经执行完成,否则未执行完成。
来看demo:
public static void main(String[] args) throws ExecutionException, InterruptedException { ThreadPoolExecutor threadPoolExecutor = new ThreadPoolExecutor(2, 2, 10, TimeUnit.SECONDS, new LinkedBlockingQueue<>(2), new ThreadPoolExecutor.CallerRunsPolicy()); for(int i = 0; i < 6;i ++) { Runnable call = new Runnable(){ @Override public void run() { try { Thread.sleep(10); System.out.println("执行当前任务的线程:"+Thread.currentThread().getName()); } catch (InterruptedException e) { e.printStackTrace(); } } }; threadPoolExecutor.execute(call); } //判断计划执行任务数与已经执行完任务数是否相等来控制 while(threadPoolExecutor.getTaskCount() != threadPoolExecutor.getCompletedTaskCount()){ } System.out.println("所有任务执行完成"); }- 1
- 2
- 3
- 4
- 5
- 6
- 7
- 8
- 9
- 10
- 11
- 12
- 13
- 14
- 15
- 16
- 17
- 18
- 19
- 20
- 21
- 22
- 23
- 24
- 25
- 26
- 27
- 28
getTaskCount():获取计划执行的任务总数,因为线程和任务总是动态变化的,有可能在调用此方法的时候并发新加入了任务,因此返回的值只是一个近似值;
getCompletedTaskCount():获取已经完成任务的总数,因为线程和任务总是动态变化的,有可能在调用此方法的时候并发完成了任务,因此返回的值只是一个近似值。
3.CountDownLatch
相当于计数器,我们创建一个包含N个任务的计数器,当有任务完成时,计数器减1,直到计数器减为0时,代表所有任务都执行完成了。CountDownLatch创建之后,只能使用一次,不能重复使用。
来看demo:
public static void main(String[] args) throws ExecutionException, InterruptedException { ThreadPoolExecutor threadPoolExecutor = new ThreadPoolExecutor(2, 2, 10, TimeUnit.SECONDS, new LinkedBlockingQueue<>(2), new ThreadPoolExecutor.CallerRunsPolicy()); //创建一个计数器 CountDownLatch countDownLatch = new CountDownLatch(6); for(int i = 0; i < 6;i ++) { Runnable call = new Runnable(){ @Override public void run() { try { Thread.sleep(10); System.out.println("执行当前任务的线程:"+Thread.currentThread().getName()); //计数器减1 countDownLatch.countDown(); } catch (InterruptedException e) { e.printStackTrace(); } } }; threadPoolExecutor.execute(call); } //阻塞等待,计数器的数量为0,才往下执行 countDownLatch.await(); System.out.println("所有任务执行完成"); }- 1
- 2
- 3
- 4
- 5
- 6
- 7
- 8
- 9
- 10
- 11
- 12
- 13
- 14
- 15
- 16
- 17
- 18
- 19
- 20
- 21
- 22
- 23
- 24
- 25
- 26
- 27
- 28
- 29
- 30
countDownLatch.countDown():计数器减去1;
countDownLatch.await():阻塞等待,计数器的数量为0,才往下执行,其它处理业务代码可以在await()方法之后执行。
4.CyclicBarrier
与CountDownLatch类似,可以理解为一个可以重复使用的循环计数器,可以调用reset方法将自己重置为初始状态。
来看demo:
public static void main(String[] args) throws ExecutionException, InterruptedException, BrokenBarrierException { ThreadPoolExecutor threadPoolExecutor = new ThreadPoolExecutor(10, 10, 10, TimeUnit.SECONDS, new LinkedBlockingQueue<>(10), new ThreadPoolExecutor.CallerRunsPolicy()); //创建一个计数器 CyclicBarrier cyclicBarrier = new CyclicBarrier(6, new Runnable() { @Override public void run() { System.out.println("所有任务执行完成"); } }); for(int i = 0; i < 6;i ++) { Runnable call = new Runnable(){ @Override public void run() { try { Thread.sleep(1); System.out.println("执行当前任务的线程:"+Thread.currentThread().getName()); cyclicBarrier.await(); } catch (InterruptedException | BrokenBarrierException e) { e.printStackTrace(); } } }; threadPoolExecutor.execute(call); } }- 1
- 2
- 3
- 4
- 5
- 6
- 7
- 8
- 9
- 10
- 11
- 12
- 13
- 14
- 15
- 16
- 17
- 18
- 19
- 20
- 21
- 22
- 23
- 24
- 25
- 26
- 27
- 28
- 29
- 30
- 31
构造方法可以传递两个参数,第一个是计数器的数量,第二个是当计数器为0时,执行的事件回调方法;调用await方法时,计数器减1,线程阻塞,当计数器减为0后,才放这些线程继续往下执行,同一批次通过栅栏。
十一.项目实战使用案例
根据查询到需要处理数据的条数,来建立合适的线程池,使用CountDownLatch标识数据是否处理完。
- service层
private Object getItemList(DoravisPages doravisPages) throws Exception { List<xx> itemIdList = doravisPages.getItemIdList(); //条目id集合 int itemNum = itemIdList.size(); int corePoolSize = 15; int maximumPoolSize = corePoolSize; BlockingQueue<Runnable> workQueue = null; if(itemNum < corePoolSize) { //数量小于核心线程数 corePoolSize = itemNum; maximumPoolSize = itemNum; workQueue = new SynchronousQueue<Runnable>(); //无缓存队列 } else { workQueue = new LinkedBlockingDeque<>(itemNum-corePoolSize); //指定缓冲队列大小,大小为item数量-核心线程数 } //拒接策略都是主线程执行(不能丢数据),上面的配置要求不会存在拒接的情况 ThreadPoolExecutor threadPoolExecutor = new ThreadPoolExecutor(corePoolSize, maximumPoolSize, 60, TimeUnit.SECONDS, workQueue, new ThreadPoolExecutor.CallerRunsPolicy()); List<Future<bb>> results = new ArrayList<Future<bb>>(itemNum); // 单次计数器 CountDownLatch countDownLatch = new CountDownLatch(itemNum); for(int i = 0;i < itemIdList.size();i++) { //这些service都是使用@Autowired注入的service类,传递过去,作为参数在线程类中查询数据使用 OutPutTheadPoolService task = new OutPutTheadPoolService(itemIdList.get(i).getId(),countDownLatch,itemService,interaEventService,apiService,itemChildService); //接收返回结果值 Future<bb> data = threadPoolExecutor.submit(task); //结果值添加到集合中 results.add(data); } countDownLatch.await(); //等待线程执行完毕 threadPoolExecutor.shutdown(); //关闭线程池 List<bb> itemList = new ArrayList<bb>(itemNum); for(int k = 0; k < results.size();k++) { itemList.add(results.get(k).get()); } return itemList; }- 1
- 2
- 3
- 4
- 5
- 6
- 7
- 8
- 9
- 10
- 11
- 12
- 13
- 14
- 15
- 16
- 17
- 18
- 19
- 20
- 21
- 22
- 23
- 24
- 25
- 26
- 27
- 28
- 29
- 30
- 31
- 32
- 33
- 34
- 35
- 36
- 37
- 38
- 39
- 40
2.线程处理类,实现Callable接口
public class OutPutTheadPoolService implements Callable<bb> { private final Integer itemId; private CountDownLatch countDownLatch; private final ItemService itemService; private final InteraEventService interaEventService; private final ApiService apiService; private final ItemChildService itemChildService; //接收参数 public OutPutTheadPoolService(Integer itemId,CountDownLatch countDownLatch,ItemService itemService,InteraEventService interaEventService,ApiService apiService,ItemChildService itemChildService) { this.itemId = itemId; this.countDownLatch = countDownLatch; this.doravisPageItemService = doravisPageItemService; this.doravisInteraEventService = doravisInteraEventService; this.doravisApiService = doravisApiService; this.doravisPageItemChildService = doravisPageItemChildService; } @Override public bb call() throws Exception { bb bb = new bb(); //查询item信息 aa aa = doravisPageItemService.getPageItemById(itemId); BeanUtils.copyProperties(aa,bb); String json = "{itemId:"+itemId+"}"; //查询事件集合 List<cc> eventList = interaEventService.getPreviewEventListByItemId(json); bb.setEventList(eventList); if(2 == bb.getAssessType() && null != bb.getApiId()) { Api api = apiService.getDoravisApiById(bb.getApiId()); bb.setDoravisApi(api); } //执行完一个任务,计数器减1 countDownLatch.countDown(); return bb; } }- 1
- 2
- 3
- 4
- 5
- 6
- 7
- 8
- 9
- 10
- 11
- 12
- 13
- 14
- 15
- 16
- 17
- 18
- 19
- 20
- 21
- 22
- 23
- 24
- 25
- 26
- 27
- 28
- 29
- 30
- 31
- 32
- 33
- 34
- 35
- 36
- 37
- 38
- 39
- 40
-
相关阅读:
使用Xposed对软件进行破解
数组的子集不能累加出的最小正数
CentOS 7 下将 MySQL 5.6 升级为MySQL 5.7
如果用nodejs开发一个网站
python 文件加密
操作系统 day10(调度的概念、层次、七状态模型)
ECCV 2022 | FPN:You Should Look at All Objects
2023-2028年中国硫酸钇市场发展态势及前景预测报告
码神之路项目总结(一)
我的两周年创作纪念日
- 原文地址:https://blog.csdn.net/ZHANGLIZENG/article/details/127833510