-
element-plus组件库的使用

一、安装
https://element-plus.gitee.io/zh-CN/guide/installation.html
方法一:使用vue ui命令
方式二:打开命令行,进入项目目录中,执行命令
npm install element-plus --save npm install @element-plus/icons-vue- 1
- 2
第一步:打开命令行 输入vue ui 进入可视化的界面管理工具
C:\Users\Lenovo>vue ui � Starting GUI... � Ready on http://localhost:8000- 1
- 2
- 3
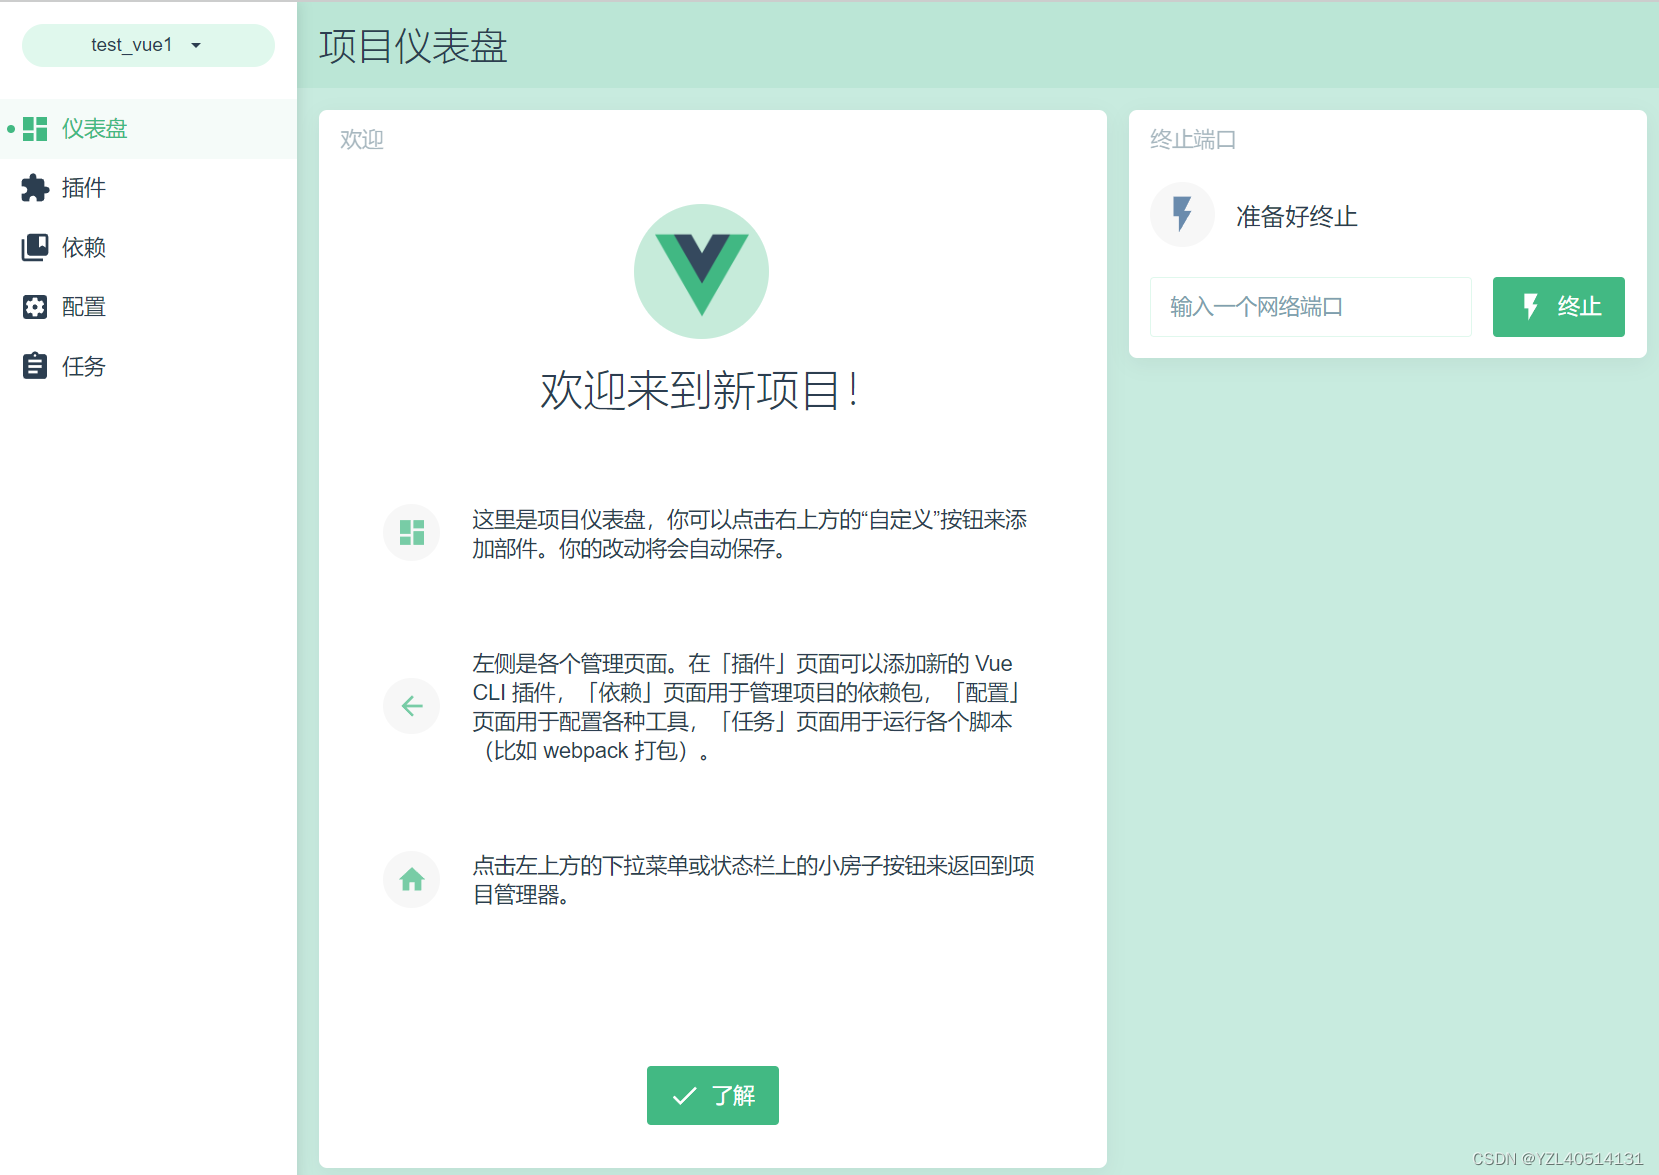
第二步:点击依赖安装,搜索 element-plus,选中安装

第三步:项目中配置element-plus和icons-vue(开发项目直接copy就可以)
import { createApp } from 'vue' //导入安装的element-plus import ElementPlus from 'element-plus' import 'element-plus/dist/index.css' import * as ElementPlusIconsVue from '@element-plus/icons-vue' import App from './App.vue' import zhCn from 'element-plus/dist/locale/zh-cn.mjs' const app = createApp(App) //注册element-plus app.use(ElementPlus,{ locale: zhCn, }) //注册图标库 for (const [key, component] of Object.entries(ElementPlusIconsVue)) { app.component(key, component) } app.mount('#app')- 1
- 2
- 3
- 4
- 5
- 6
- 7
- 8
- 9
- 10
- 11
- 12
- 13
- 14
- 15
- 16
- 17
- 18
- 19
- 20
- 21
- 22
二、使用
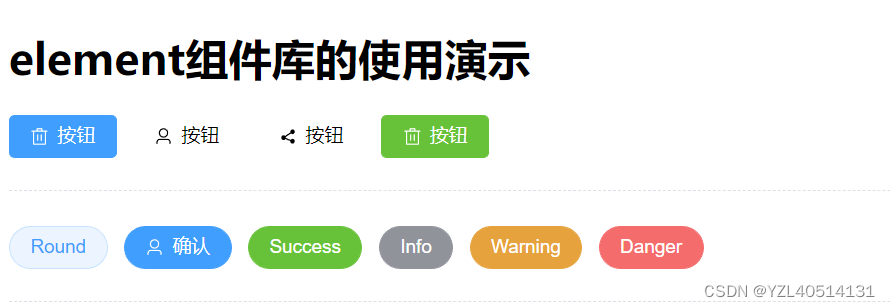
1、按钮组件的使用
<template> <h1>element组件库的使用演示h1> <el-button icon='Delete' type="primary">按钮el-button> <el-button icon='User' color="#fff">按钮el-button> <el-button color="#fff" icon="Share">按钮el-button> <el-button icon='Delete' type="success">按钮el-button> <el-divider border-style="dashed" /> <el-row class="mb-4"> <el-button round>Roundel-button> <el-button icon="User" type="primary" round>确认el-button> <el-button type="success" round>Successel-button> <el-button type="info" round>Infoel-button> <el-button type="warning" round>Warningel-button> <el-button type="danger" round>Dangerel-button> el-row> template>- 1
- 2
- 3
- 4
- 5
- 6
- 7
- 8
- 9
- 10
- 11
- 12
- 13
- 14
- 15
- 16
- 17
- 18
- 19
- 20
- 21
- 22
2、图标组件的使用
单独使用图标组件
<el-icon color="#ff007f" size="100px"><StarFilled />el-icon> <el-icon color="#0000ff" size="100px"><Message />el-icon>- 1
- 2

按钮中使用图标组件
<el-row class="mb-4"> <el-button round>Roundel-button> <el-button icon="User" type="primary" round>确认el-button> <el-button icon="Share" type="success" round>Successel-button> <el-button icon="Platform" type="info" round>Infoel-button> <el-button icon="Football" type="warning" round>Warningel-button> <el-button icon="Comment" type="danger" round>Dangerel-button> el-row>- 1
- 2
- 3
- 4
- 5
- 6
- 7
- 8

3、分割线组件
<template> <h1>分割线组件h1> <el-divider> <el-icon><star-filled />el-icon> el-divider> <el-divider content-position="right">分割线el-divider> template>- 1
- 2
- 3
- 4
- 5
- 6
- 7
- 8
4、页面布局组件
<el-container> <el-header style="background: burlywood;">Headerel-header> <el-container> <el-aside width="200px"> <div style="height:800px;background: antiquewhite;">左侧div> el-aside> <el-main> <div style="height:800px;background: mediumaquamarine;">右侧div> el-main> el-container> el-container>- 1
- 2
- 3
- 4
- 5
- 6
- 7
- 8
- 9
- 10
- 11
- 12
- 13
5、单行布局组件
<el-row :gutter="20"> <el-col :span="6"> <div class="box">div1div> el-col> <el-col :span="6"> <div class="box">div2div> el-col> <el-col :span="6"> <div class="box">div3div> el-col> <el-col :span="6"> <div class="box">div4div> el-col> el-row>- 1
- 2
- 3
- 4
- 5
- 6
- 7
- 8
- 9
- 10
- 11
- 12
- 13
- 14

5、数据展示组件
<template> <el-table :data="tableData" stripe style="width: 100%"> <el-table-column prop="date" label="日期" width="180" /> <el-table-column label="名字" width="180"> <template #default="scope"> {{scope.row}} template> el-table-column> <el-table-column prop="address" label="地址" width="180" /> <el-table-column label="操作"> <template #default="scope"> <div v-if="scope.$index%2===0"> <el-button icon="Delete" type="danger">删除el-button> <el-button icon="Edit" type="primary" >编辑el-button> div> <div v-else> <el-button icon="Delete" type="success">删除el-button> <el-button icon="Edit" type="warning" >编辑el-button> div> template> el-table-column> el-table> template>- 1
- 2
- 3
- 4
- 5
- 6
- 7
- 8
- 9
- 10
- 11
- 12
- 13
- 14
- 15
- 16
- 17
- 18
- 19
- 20
- 21
- 22
- 23
- 24
<script> export default{ data(){ return{ tableData:[ { date:'123', name:'324', address:'454' }, { date:'123', name:'324', address:'454' },], items:[ { type: 'success', label: 'Tag 2' }, ] } } } script>- 1
- 2
- 3
- 4
- 5
- 6
- 7
- 8
- 9
- 10
- 11
- 12
- 13
- 14
- 15
- 16
- 17
- 18
- 19
- 20
- 21
- 22
- 23
- 24
- 25
- 26

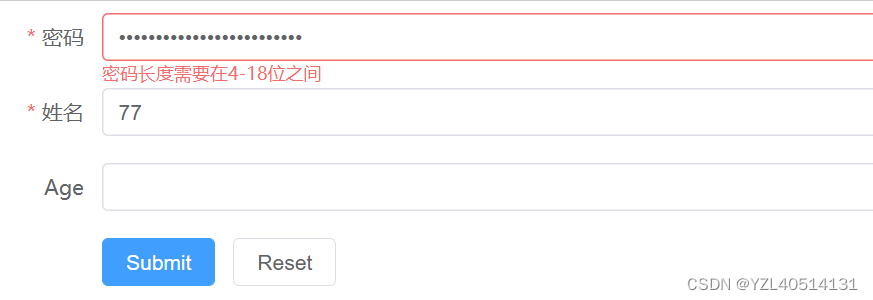
6、表单组件
<template> <el-form :model="loginForm" :rules="FormRules" label-width="120px" class="demo-ruleForm"> <el-form-item label="密码" prop="password"> <el-input v-model="loginForm.password" type="password" /> el-form-item> <el-form-item label="姓名" prop="username"> <el-input type="text" v-model="loginForm.username"/> el-form-item> <el-form-item label="Age" > <el-input v-model="age" /> el-form-item> <el-form-item> <el-button type="primary" @click="submitForm(ruleFormRef)">Submitel-button> <el-button @click="resetForm(ruleFormRef)">Resetel-button> el-form-item> el-form> template> <script> export default{ data(){ return{ loginForm:{ username:"", password:"", status:false, }, // 登录表单的校验规则 FormRules:{ // username的校验规则 username:[ { required: true, message: '用户名不能为空', trigger: 'blur' }, ], // password的校验规则 password:[ { required: true, message: '密码不能为空', trigger: 'blur' }, { min: 4,max: 18, message: '密码长度需要在4-18位之间', trigger: 'blur' }, ] } } }, methods:{ } } script> <style scoped> .dialog-footer button:first-child { margin-right: 10px; } style>- 1
- 2
- 3
- 4
- 5
- 6
- 7
- 8
- 9
- 10
- 11
- 12
- 13
- 14
- 15
- 16
- 17
- 18
- 19
- 20
- 21
- 22
- 23
- 24
- 25
- 26
- 27
- 28
- 29
- 30
- 31
- 32
- 33
- 34
- 35
- 36
- 37
- 38
- 39
- 40
- 41
- 42
- 43
- 44
- 45
- 46
- 47
- 48
- 49
- 50
- 51
- 52
- 53
- 54
- 55
- 56
- 57
- 58
- 59
- 60
效果图:

-
相关阅读:
带你初识JavaScript基础语法
java高级篇 Mybatis-Plus
工厂综合能源管理系统
Java-IO流之字节流(上篇)
2345安全卫士卸载不了怎么办?
C++ - 包装器
Charles 抓包工具教程(二) Charles 抓包HTTPS请求
天天写SQL,这些神奇的特性你知道吗?
Linux学习笔记4 - 基础命令
练习3-7 成绩转换
- 原文地址:https://blog.csdn.net/YZL40514131/article/details/127723290
