-
C++Qt开发——绘图系统
1. Qt绘图
Qt中提供了强大的2D绘图系统,可以使用相同的API在屏幕和绘图设备上进行绘制,它主要基于QPainter、QPaintDevice和QPaintEngine这三个类。其中QPainter用来执行绘图操作;QPaintDevice提供绘图设备,它是一个二维空间的抽象,可以使用QPainter在其上进行绘制;QPaintEngine提供了一些接口,可以用于QPainter在不同的设备上进行绘制。除了创建自定义的绘图设备类型,一般不需要使用该类。
在绘图系统中由QPainter来完成具体的绘制操作,QPainter类提供了大量高度优化的函数来完成GUI编程所需要的大部分绘制工作。QPainter可以绘制一切想要的图形,从最简单的一条直线到其他任何复杂的图形,它还可以用来绘制文本和图片。QPainter可以在继承自QPaintDevice类的任何对象上进行绘制操作。
QPainter一般在一个部件的重绘事件(Paint Event)的处理函数paintEvent()中进行绘制,首先要创建QPainter对象,然后进行图形的绘制,最后销毁QPainter对象。
2. 基本绘制和填充
QPainter中提供了一些便捷函数来绘制常用的图形,还可以设置线条、边框的画笔以及进行填充的画刷。
所有对控件的绘图操作都要放进函数 paintEvent() 中,否则绘图无法显示。
本文福利,莬费领取Qt开发学习资料包、技术视频,内容包括(C++语言基础,Qt编程入门,QT信号与槽机制,QT图像绘制,QT网络,QT数据库编程,QT项目实战,QT嵌入式开发,Quick模块等等)↓↓↓↓↓↓见下面↓↓文章底部点击莬费领取↓↓
2.1 画图的基本操作
需要重写paintEvent()事件,此事件在QPaintDevicewindows类下。
(1). 需要先创建一个画家对象,即使用QPainter的构造函数,构造函数的参数是所画设备的对象。使用画家调用画图或者写字函数,即可完成画图过程。
(2). 可以更换画笔风格。例如创建画笔对象QPen对象的构造函数,设置笔的宽度setWidth,设置画笔风格setStyle。设置完画笔的各种参数,需要让画家使用画笔,即画家调用setPen()函数。
(3). 还可以设置画刷,画刷其实就是对封闭的图形的填充。使用QBrush构造函数构造画刷对象,设置画刷的风格setStyle(),需要让画家使用画刷,即画家调用setBrush()。
(4). 画各种形状。如,画家调用画线函数drawLine(),画家调用画椭圆函数drawEllipse(),画家调用画矩形函数drawRect(),画家调用写字函数drawText()。
示例:
- //类内声明
- //添加画图事件
- //在类QPaintDeviceWindows下
- void paintEvent(QPaintEvent *event);
- //类外实现
- void Widget:: paintEvent(QPaintEvent *event)
- {
- //*********************画图的基本操作**************************************
- //实例化一个画家,this指定的是绘图的设备,利用画家进行一个操作
- QPainter painter(this);
- //定义画笔对象和设置笔的颜色
- QPen pen(QColor(255,0,0));
- //设置画笔宽度
- pen.setWidth(3);
- //设置画笔风格
- pen.setStyle(Qt::DashLine);
- //让画家使用这个画笔
- painter.setPen(pen); //笔要在画的动作之前
- //定义画刷对象和设置画刷颜色
- QBrush brush(Qt::cyan);
- //设置画刷风格
- brush.setStyle(Qt::BDiagPattern);
- //画家使用画刷
- painter.setBrush(brush);
- //画线
- painter.drawLine(QPoint(0,0),QPoint(100,100));
- //画椭圆,长轴等于纵轴时,是圆
- painter.drawEllipse(QPoint(100,100),100,50);
- //画矩形
- painter.drawRect(QRect(20,20,50,50)); //Rect参数分别是左顶点横纵、坐标、矩形长、宽
- //写字
- painter.drawText(QRect(10,200,150,50),"好好学习,天天向上");
- }
运行后的效果:

2.2 使用画笔
如果需要对绘制的线条设置不同的颜色,那么我们就需要给painter设置一个画笔QPen。
Pen有样式(style),宽度(width), 颜色(brush), 笔帽样式(capStyle)和(连接样式)joinStyle。
- style使用Qt::PenStyle定义线条类型。默认是Qt::PenStyle::SolidLine
- brush用于填充画笔笔生成的笔触。 使用QBrush类来指定画笔的颜色。
- capStyle帽样式决定了可以使用QPainter绘制的线结束帽,
- joinStyle连接样式描述了如何绘制两条线之间的连接。
通过使用相应的setStyle(), settwidth (), setBrush(), setCapStyle()和setJoinStyle()函数,可以很容易地修改各种设置(注意,当改变画笔的属性时,画家的画笔必须重置)。
画笔风格种类 Qt::PenStyle

- //定义画笔对象和设置笔的颜色
- QPen pen(QColor(255,0,0));
- //设置画笔宽度
- pen.setWidth(3);
- //设置画笔风格
- pen.setStyle(Qt::DashLine)
- //让画家使用这个画笔
- painter.setPen(pen); //笔要在画的动作之前
2.3 使用画刷
QBrush类提供了画刷来对图形进行填充,一个画刷使用它的颜色和风格(比如它的填充模式)来定义。
Brush有样式(style)、颜色(color)、渐变gradient和纹理(texture)。
- style使用Qt::BrushStyle定义填充模式。 默认的笔刷样式是Qt::NoBrush
- color定义填充图形的颜色
- gradient()定义当前样式为Qt::LinearGradientPattern, Qt::RadialGradientPattern或Qt::ConicalGradientPattern时使用的渐变填充。 当创建QBrush时,通过给QGradient作为构造函数参数来创建渐变笔刷。 Qt提供三个不同的梯度:QLinearGradient, QConicalGradient,和QRadialGradient -所有继承QGradient。
画刷风格种类 Qt::BrushStyle

- //定义画刷对象和设置画刷颜色
- QBrush brush(Qt::blue);
- //设置画刷风格
- brush.setStyle(Qt::BDiagPattern);
- //画家使用画刷
- painter.setBrush(brush);
画笔和画刷的区别:画刷是对区域进行面积上涂画。画笔是对线条图形进行绘制。
2.4 渐变类型
Qt目前支持三种类型的渐变填充:
- 线性渐变(QLinearGradient)在开始点和结束点之间插入颜色。
- 径向渐变(QRadialGradient)在围绕它的圆上的焦点和端点之间插入颜色。
- 锥形渐变(QConicalGradient)在中心点周围插值颜色。
可以使用type()函数检索渐变的类型。 每一种类型都由QGradient的一个子类表示
线性渐变(QLinearGradient)
QLinearGradient 显示从起点到终点的渐变

- void Widget::paintEvent(QPaintEvent *event)
- {
- QPainter painter(this);
-
- //创建线性渐变,并设置开始点和结束点
- QLinearGradient gradient(QPoint(100,100),QPoint(250,50));
-
- //用给定的位置(比例:0~1)和颜色设置过度点,在哪里切换颜色
- gradient.setColorAt(0,Qt::blue);
- gradient.setColorAt(0.3,Qt::green);
- gradient.setColorAt(0.6,Qt::yellow);
- gradient.setColorAt(1,Qt::cyan);
-
- //设置显示模式:指定这个渐变应该使用的扩展方法。只对线性和径向渐变有效
- gradient.setSpread(QLinearGradient::Spread::PadSpread);
-
- //把渐变色设置给画刷
- painter.setBrush(gradient);
-
- //绘制矩形
- painter.drawRect(100,100,250,50);
- }
QLinearGradient 构造函数的第一个参数指定起点,第二个参数指定终点,然后显示渐变。函数setColorAt() 用于设置起点和终点之间要显示的颜色,setSpread() 可以设置起点和终点区域之外的显示模式。
径向渐变(QRadialGradient)
QRadialGradient 类以圆心为中心显示渐变。(cx, cy) 是中点,半径(radius)是以中点为圆心的圆的半径,(fx, fy) 是渐变的起点。

- void MainWindow::paintEvent(QPaintEvent *event)
- {
- QPainter painter(this);
-
- // 反走样
- painter.setRenderHint(QPainter::Antialiasing, true);
-
- // 设置渐变色
- QRadialGradient radial(110, 110, 50, 130, 130);
- radial.setColorAt(0, Qt::black);
- radial.setColorAt(1, Qt::white);
-
- // 设置显示模式
- radial.setSpread(QGradient::ReflectSpread );
-
- // 设置画笔颜色、宽度
- painter.setPen(QPen(QColor(0, 160, 230), 2));
-
- // 设置画刷填充
- painter.setBrush(radial);
-
- // 绘制矩形
- painter.drawRect(QRect(40, 40, 180, 180));
- }
QRadialGradient 构造函数的第一个参数和第二个参数是 (cx, cy) 坐标,第三个参数是半径,第四个和第五个参数是 (fx, fy) 坐标。
锥形渐变(QConicalGradient)
QConicalGradient 在 (cx, cy) 坐标上以角度 (angle) 为中心显示渐变

本文福利,莬费领取Qt开发学习资料包、技术视频,内容包括(C++语言基础,Qt编程入门,QT信号与槽机制,QT图像绘制,QT网络,QT数据库编程,QT项目实战,QT嵌入式开发,Quick模块等等)↓↓↓↓↓↓见下面↓↓文章底部点击莬费领取↓↓
- void MainWindow::paintEvent(QPaintEvent *event)
- {
- QPainter painter(this);
-
- // 反走样
- painter.setRenderHint(QPainter::Antialiasing, true);
-
- // 设置渐变色
- QConicalGradient conical(110, 110, 45);
- conical.setColorAt(0, Qt::black);
- conical.setColorAt(1, Qt::white);
-
- // 设置画笔颜色、宽度
- painter.setPen(QPen(QColor(0, 160, 230), 2));
-
- // 设置画刷填充
- painter.setBrush(conical);
-
- // 绘制矩形
- painter.drawRect(QRect(40, 40, 180, 180));
- }
3. 坐标变换
QTransform 用于指定坐标系的 2D 转换 - 平移、缩放、扭曲(剪切)、旋转或投影坐标系。绘制图形时,通常会使用。
QTransform 与 QMatrix 不同之处在于,它是一个真正的 3x3 矩阵,允许视角转换,QTransform 的 toAffine() 方法允许将 QTransform 转换到 QMatrix。如果视角转换已在矩阵指定,则转换将导致数据丢失。
3.1 正常
先来看下正常的使用(可用void QTransform::reset() 重置所有设置)
- void Widget::paintEvent(QPaintEvent *event)
- {
- QPainter painter(this);
-
- painter.drawPixmap(QPoint(0,0),QPixmap("://images/zay.png"));
- }

3.2 平移
translate(qreal dx, qreal dy):平移 - 对坐标系沿着 x 轴移动 dx、沿 y 轴移动 dy
- void Widget::paintEvent(QPaintEvent *event)
- {
- QPainter painter(this);
- //平移
- painter.translate(120,50);
- painter.drawPixmap(QPoint(0,0),QPixmap("://images/zay.png").scaled(150,150));
- }
这里,将坐标原点由 (0, 0) 变为 (120, 50)。

3.3 缩放
scale(qreal sx, qreal sy):缩放 - 通过水平的 sx 和垂直的 sy 缩放坐标系
- void Widget::paintEvent(QPaintEvent *event)
- {
- QPainter painter(this);
- painter.setRenderHint(QPainter::RenderHint::Antialiasing);
- //平移
- painter.translate(120,50);
- //缩放
- painter.scale(1.3,1.3);
- painter.drawPixmap(QPoint(0,0),QPixmap("://images/zay.png").scaled(150,150));
- }
这里,使绘制的图像缩小到原来的1.3倍。

3.4 旋转
rotate(qreal angle, Qt::Axis axis = Qt::ZAxis):旋转 - 对指定的轴用给定的角度逆时针旋转坐标系统
- void Widget::paintEvent(QPaintEvent* event)
- {
- QPainter painter(this);
- painter.setRenderHint(QPainter::RenderHint::Antialiasing);
- static double angle = 0;
- QTransform transform;
- //平移
- transform.translate(120, 50);
- //缩放
- transform.scale(1.3, 1.3);
- //旋转
- //transform.rotate(angle++,Qt::Axis::ZAxis);
- //transform.rotate(angle++,Qt::Axis::XAxis);
- transform.rotate(angle--,Qt::Axis::YAxis);
- //图像中心旋转 1
- //transform.translate(-75, 0); //75为图片宽度的一半
- painter.setTransform(transform);
- painter.drawPixmap(QPoint(0, 0), QPixmap("./images/zay.png").scaled(150, 150));
- //图像中心旋转 2
- //QPixmap pixmap = QPixmap("./images/zay.png").scaled(150, 150);
- //painter.drawPixmap(QPoint(-pixmap.width()/2, 0), pixmap);
- }

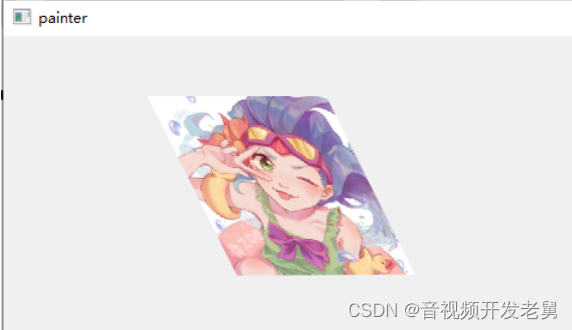
3.5 扭曲
shear(qreal sh, qreal sv):扭曲 - 通过水平的 sh 和垂直的 sv 扭曲坐标系,前面的参数实现横向变形,后面的参数实现纵向变形。当它们的值为 0 时,表示不扭曲。
- void Widget::paintEvent(QPaintEvent* event)
- {
- QPainter painter(this);
- painter.setRenderHint(QPainter::RenderHint::Antialiasing);
- QTransform transform;
- //平移
- transform.translate(120, 50);
- transform.shear(0.5, 0);
- painter.setTransform(transform);
- painter.drawPixmap(QPoint(0,0), QPixmap("./images/zay.png").scaled(150, 150));
- }
4. 绘图函数
除了绘制简单的线条以外,QPainter还提供了一些绘制其他常用图形的函数,其中最常用的几个如下标所示。
函数
功能
函数
功能
drawArc
绘制圆弧
drawPoint
绘制点
drawChord
绘制弦
drawPolygon
绘制多边形
drawConvexPolygon
绘制凸多边形
drawPolyline
绘制折线
drawElipse
绘制椭圆
drawRect
绘制矩形
drawLine
绘制线条
drawRoundedRect
绘制圆角矩形
drawPie
绘制扇形
fillRect
绘制填充矩形
4.1 绘制线条
- void drawLine(const QLineF &line)
- void drawLine(const QLine &line)
- void drawLine(int x1, int y1, int x2, int y2)
- void drawLine(const QPoint &p1, const QPoint &p2)
- void drawLine(const QPointF &p1, const QPointF &p2)
- void drawLines(const QLineF *lines, int lineCount)
- void drawLines(const QVector<QLineF> &lines)
- void drawLines(const QPointF *pointPairs, int lineCount) //注意:lineCount是线的数量,不是点的数量 两个点绘制一条线
- void drawLines(const QVector<QPointF> &pointPairs)
- void drawLines(const QLine *lines, int lineCount)
- void drawLines(const QVector<QLine> &lines)
- void drawLines(const QPoint *pointPairs, int lineCount)
- void drawLines(const QVector<QPoint> &pointPairs)
4.2 绘制点
- void drawPoint(const QPointF &position)
- void drawPoint(const QPoint &position)
- void drawPoint(int x, int y)
- void drawPoints(const QPointF *points, int pointCount)
- void drawPoints(const QPolygonF &points)
- void drawPoints(const QPoint *points, int pointCount)
- void drawPoints(const QPolygon &points)
4.3 绘制矩形
普通矩形
给定矩形左上角的坐标和矩形的长、宽就可以绘制矩形了
- void drawRect(const QRectF &rectangle)
- void drawRect(int x, int y, int width, int height)
- void drawRect(const QRect &rectangle)
- void drawRects(const QRectF *rectangles, int rectCount)
- void drawRects(const QVector
&rectangles) - void drawRects(const QRect *rectangles, int rectCount)
- void drawRects(const QVector
&rectangles)
圆角矩形
绘制圆角矩形使用 drawRoundedRect(),需要给定圆角矩形左上角的坐标、长、宽、圆角的半径。
当最后一个个参数Qt::SizeMode mode 为 Qt::AbsoluteSize (默认)时,表示圆角半径的单位是像素。为 Qt::RelativeSize 时,表示圆角半径的单位是百分比,取值范围是 [0, 100],其实底层是用这个百分比和对应边长的一半相乘得到圆角的半径(单位是像素)。
有意思的是,在 QSS 中圆角半径大于对应边长的一半,圆角效果就没了,但是使用 drawRoundedRect() 时,圆角的半径大于对应边长的一半时,圆角效果仍然有效,个人认为这个是 QSS 的 bug,但是已经存在很久了。
- void drawRoundedRect(const QRectF &rect, qreal xRadius, qreal yRadius, Qt::SizeMode mode = Qt::AbsoluteSize)
- void drawRoundedRect(int x, int y, int w, int h, qreal xRadius, qreal yRadius, Qt::SizeMode mode = ...)
- void drawRoundedRect(const QRect &rect, qreal xRadius, qreal yRadius, Qt::SizeMode mode = ...)
填充矩形
- void fillRect(const QRectF &rectangle, const QBrush &brush)
- void fillRect(int x, int y, int width, int height, const QBrush &brush)
- void fillRect(const QRect &rectangle, const QBrush &brush)
- void fillRect(const QRectF &rectangle, const QColor &color)
- void fillRect(int x, int y, int width, int height, const QColor &color)
- void fillRect(const QRect &rectangle, const QColor &color)
- void fillRect(int x, int y, int width, int height, Qt::GlobalColor color)
- void fillRect(const QRect &rectangle, Qt::GlobalColor color)
- void fillRect(const QRectF &rectangle, Qt::GlobalColor color)
- void fillRect(int x, int y, int width, int height, Qt::BrushStyle style)
- void fillRect(const QRect &rectangle, Qt::BrushStyle style)
- void fillRect(const QRectF &rectangle, Qt::BrushStyle style)
- void fillRect(int x, int y, int width, int height, QGradient::Preset preset)
- void fillRect(const QRect &rectangle, QGradient::Preset preset)
- void fillRect(const QRectF &rectangle, QGradient::Preset preset)
4.4 绘制椭圆
- void drawEllipse(const QRectF &rectangle)
- void drawEllipse(const QRect &rectangle)
- void drawEllipse(int x, int y, int width, int height)
- void drawEllipse(const QPointF ¢er, qreal rx, qreal ry)
- void drawEllipse(const QPoint ¢er, int rx, int ry)
绘制扇形、圆弧、弦把这三个函数放在一起介绍,因为它们的参数都一样,而且 arc, chord, pie 外形也有很多相似之处

- rectangle: 包围矩形
- startAngle: 开始的角度,单位是十六分之一度(即弧度),如果要从 45 度开始画,则 startAngle 为 45 * 16
- spanAngle: 跨越的角度,单位是十六分之一度
- 绘制圆心为包围矩形的正中心,0 度在圆心的 X 轴正方向上
- 角度的正方向为逆时针方向
绘制扇形
- void drawPie(const QRectF &rectangle, int startAngle, int spanAngle)
- void drawPie(const QRect &rectangle, int startAngle, int spanAngle)
- void drawPie(int x, int y, int width, int height, int startAngle, int spanAngle)
绘制圆弧
- void drawArc(const QRectF &rectangle, int startAngle, int spanAngle)
- void drawArc(const QRect &rectangle, int startAngle, int spanAngle)
- void drawArc(int x, int y, int width, int height, int startAngle, int spanAngle)
绘制弦
- void drawChord(const QRectF &rectangle, int startAngle, int spanAngle)
- void drawChord(const QRect &rectangle, int startAngle, int spanAngle)
- void drawChord(int x, int y, int width, int height, int startAngle, int spanAngle)
4.5 绘制多边形
使用当前画笔和画刷绘制由第一个点定义的多边形。第一个点隐式连接到最后一个点,多边形用当前Brush填充。
绘制凸多边形
如果提供的多边形不是凸的,即它包含至少一个大于180度的角,结果是未定义的 (测试过也能画出来)
- void drawConvexPolygon(const QPointF *points, int pointCount)
- void drawConvexPolygon(const QPolygonF &polygon)
- void drawConvexPolygon(const QPoint *points, int pointCount)
- void drawConvexPolygon(const QPolygon &polygon)
绘制多边形
- void drawPolygon(const QPointF *points, int pointCount, Qt::FillRule fillRule = Qt::OddEvenFill)
- void drawPolygon(const QPolygonF &points, Qt::FillRule fillRule = Qt::OddEvenFill)
- void drawPolygon(const QPoint *points, int pointCount, Qt::FillRule fillRule = Qt::OddEvenFill)
- void drawPolygon(const QPolygon &points, Qt::FillRule fillRule = Qt::OddEvenFill)
Example
- QPolygon polygon;
- polygon1<<QPoint(50,50)<<QPoint(100,50)<<QPoint(70,100)
- <<QPoint(150,100)<<QPoint(150,130)<<QPoint(40,130);
- painter.drawConvexPolygon(polygon);
- painter.translate(200,0); //平移坐标系,把200,0设置为坐标原点
- painter.drawPolygon(polygon);
4.6 绘制折线
和绘制多边形类型,就是最后没有连接起来,形成封闭的形状
- void drawPolyline(const QPointF *points, int pointCount)
- void drawPolyline(const QPolygonF &points)
- void drawPolyline(const QPoint *points, int pointCount)
- void drawPolyline(const QPolygon &points)
4.7 绘制文字
- void drawStaticText(const QPointF &topLeftPosition, const QStaticText &staticText)
- void drawStaticText(const QPoint &topLeftPosition, const QStaticText &staticText)
- void drawStaticText(int left, int top, const QStaticText &staticText)
- void drawText(const QRectF &rectangle, int flags, const QString &text, QRectF *boundingRect = nullptr)
- void drawText(const QPointF &position, const QString &text)
- void drawText(const QPoint &position, const QString &text)
- void drawText(int x, int y, const QString &text)
- //把文字绘制在矩形区域,boundingRect返回实际包含文本的矩形区域
- void drawText(const QRect &rectangle, int flags, const QString &text, QRect *boundingRect = nullptr)
- void drawText(int x, int y, int width, int height, int flags, const QString &text, QRect *boundingRect = nullptr)
- void drawText(const QRectF &rectangle, const QString &text, const QTextOption &option = QTextOption())
4.8 绘制图片
QPixmap
- 将给定像素映射的矩形部分源绘制到绘图设备中的给定目标中。 如果像素映射和矩形大小不一致,像素映射将缩放以适应矩形。
- void drawPixmap(const QRectF &target, const QPixmap &pixmap, const QRectF &source)
- void drawPixmap(const QRect &target, const QPixmap &pixmap, const QRect &source)
- void drawPixmap(int x, int y, int w, int h, const QPixmap &pixmap, int sx, int sy, int sw, int sh)
- void drawPixmap(int x, int y, const QPixmap &pixmap, int sx, int sy, int sw, int sh)
- void drawPixmap(const QPointF &point, const QPixmap &pixmap, const QRectF &source)
- void drawPixmap(const QPoint &point, const QPixmap &pixmap, const QRect &source)
Example
- QPixmap pixmap("://images/shoot.jpg");
- static int i = 0;
- QRect rectArea(i*20,0,20,50);
- painter.drawPixmap(QRect(0,0,20,50),pixmap,rectArea);
- painter.drawPixmap(QPoint(30,0),pixmap,rectArea);
- painter.drawPixmap(60,0,30,60,pixmap,i*20,0,20,50);
- i = (i+1)%10;
- 将给定像素映射绘制到指定位置
- void drawPixmap(const QPointF &point, const QPixmap &pixmap)
- void drawPixmap(const QPoint &point, const QPixmap &pixmap)
- void drawPixmap(int x, int y, const QPixmap &pixmap)
- void drawPixmap(const QRect &rectangle, const QPixmap &pixmap)
- void drawPixmap(int x, int y, int width, int height, const QPixmap &pixmap)
- 绘制pixmap,或pixmap的子矩形,在不同的比例,旋转和不透明度的多个位置。 fragments是一个fragmentCount元素数组,指定用于绘制每个像素映射片段的参数。 hint参数可用于传递绘图提示。 这个函数可能比多次调用drawPixmap()更快,因为后端可以优化状态更改。
void drawPixmapFragments(const QPainter::PixmapFragment *fragments, int fragmentCount, const QPixmap &pixmap, QPainter::PixmapFragmentHints hints = PixmapFragmentHints())Example
- QPainter::PixmapFragment fragment[3]={
- QPainter::PixmapFragment::create(QPoint(100,0),QRect(0,0,20,50)),
- QPainter::PixmapFragment::create(QPoint(120,0),QRect(20,0,20,50)),
- QPainter::PixmapFragment::create(QPoint(150,0),QRect(40,0,20,50))
- };
- painter.drawPixmapFragments(fragment,3,pixmap);
- 在给定的矩形内绘制一个平铺的像素地图。 调用drawTiledPixmap()类似于多次调用drawPixmap()来填充(平铺)一个区域。
- void drawTiledPixmap(const QRectF &rectangle, const QPixmap &pixmap, const QPointF &position = QPointF())
- void drawTiledPixmap(int x, int y, int width, int height, const QPixmap &pixmap, int sx = 0, int sy = 0)
- void drawTiledPixmap(const QRect &rectangle, const QPixmap &pixmap, const QPoint &position = ...)
Example:
painter.drawTiledPixmap(this->rect(),pixmap);QImage
- void drawImage(const QRectF &target, const QImage &image, const QRectF &source, Qt::ImageConversionFlags flags = Qt::AutoColor)
- void drawImage(const QRect &target, const QImage &image, const QRect &source, Qt::ImageConversionFlags flags = Qt::AutoColor)
- void drawImage(const QPointF &point, const QImage &image, const QRectF &source, Qt::ImageConversionFlags flags = ...)
- void drawImage(const QPoint &point, const QImage &image, const QRect &source, Qt::ImageConversionFlags flags = ...)
- void drawImage(const QRectF &rectangle, const QImage &image)
- void drawImage(const QRect &rectangle, const QImage &image)
- void drawImage(const QPointF &point, const QImage &image)
- void drawImage(const QPoint &point, const QImage &image)
- void drawImage(int x, int y, const QImage &image, int sx = 0, int sy = 0, int sw = -1, int sh = -1, Qt::ImageConversionFlags flags = Qt::AutoColor)
QPicture
Picture以独立于平台的格式将画家命令序列化到 IO 设备。 它们有时被称为元文件。 Qt Picture使用专有的二进制格式。 与许多窗口系统上的原生图片(元文件)格式不同,Qt Picture对其内容没有限制。 可以在小部件或像素图上绘制的所有内容(例如,字体、像素图、区域、转换后的图形等)也可以存储在Picture中。
- void drawPicture(const QPointF &point, const QPicture &picture)
- void drawPicture(int x, int y, const QPicture &picture)
- void drawPicture(const QPoint &point, const QPicture &picture)
4.9 绘制路径
- void drawPath(const QPainterPath &path) //绘制轮廓,也可以绘制填充颜色(设置画刷就可以)
- void strokePath(const QPainterPath &path, const QPen &pen) //只绘制轮廓
- void fillPath(const QPainterPath &path, const QBrush &brush) //只绘制填充色,不绘制轮廓
5 QPaintDevice
绘图设备是指继承QPainterDevice的子类。Qt一共提供了四个这样的类,分别是QPixmap、QBitmap、QImage和 QPicture。其中,
- QPixmap专门为图像在屏幕上的显示做了优化
- QBitmap是QPixmap的一个子类,它的色深限定为1,可以使用 QPixmap的isQBitmap()函数来确定这个QPixmap是不是一个QBitmap。
- QImage专门为图像的像素级访问做了优化。
- QPicture则可以记录和重现QPainter的各条命令。
5.1 QPixmap
QPixmap继承了QPaintDevice,因此,你可以使用QPainter直接在上面绘制图形。QPixmap也可以接受一个字符串作为一个文件的路径来显示这个文件,比如你想在程序之中打开png、jpeg之类的文件,就可以使用 QPixmap。使用QPainter的drawPixmap()函数可以把这个文件绘制到一个QLabel、QPushButton或者其他的设备上面。QPixmap是针对屏幕进行特殊优化的,因此,它与实际的底层显示设备息息相关。注意,这里说的显示设备并不是硬件,而是操作系统提供的原生的绘图引擎。所以,在不同的操作系统平台下,QPixmap的显示可能会有所差别。
(1). 创建绘图设备QPixmap对象
(2). 设置绘图设备QPixmap对象的属性,例如填充颜色
(3). 创建画家对象QPainter对象,以所创建的QPixmap对象为绘图空间
(4). 进行一些属性的设置,如画笔QPen、画刷QBrush
(5). 进行绘画
(6). 保存图片,用save方法。QPixmap对象的save方法与QPainter的save方法不同,此方法是保存文件到磁盘中,QPainter的save方法是保存画家的状态,需要使用restore放法来恢复状态。- //Pximap绘图设备,可以保存到磁盘,专门为平台做了显示的优化
- QPixmap pix(300,300); //设定宽和高
- //填充颜色,这里是设置的整个背景的颜色
- pix.fill(Qt::blue);
- //声明画家
- QPainter painter(&pix); //参数为所画地址
- //设置画笔
- painter.setPen(QPen(Qt::green));
- painter.drawEllipse(QPoint(150,105),100,100); //画一个椭圆
- //保存到D盘
- pix.save("D:\\pxi.png");
5.2 QImage
QImage使用独立于硬件的绘制系统,实际上是自己绘制自己,因此提供了像素级别的操作,并且能够在不同系统之上提供一个一致的显示形式。也就是说QImage能进行像素级别的操作。
(1). 创建绘图设备QImage对象
(2). 设置绘图设备QImage对象的属性,例如填充颜色
(3). 创建画家对象QPainter对象,以所创建的QImage对象为绘图空间
(4). 进行一些属性的设置,如画笔QPen、画刷QBrush
(5). 进行绘画
(6). 保存图片,用save方法。QImage对象的save方法与QPainter的save方法不同,此方法是保存文件到磁盘中,QPainter的save方法是保存画家的状态,需要使用restore放法来恢复状态。- //QImage绘图设备 与QPixmap的流程大致一致,但是多了可以对像素进行操作
- QImage img(300,300,QImage::Format_RGB32); //第三个参数是格式
- img.fill(Qt::black); //填充白色
- QPainter painter(&img);
- painter.setPen(QPen(Qt::blue));
- painter.drawEllipse(QPoint(150,150),100,100);
- //保存
- img.save("D:\\img.png");
QImage对象可以进行像素级别的操作。(1). 创建画家对象QPainter
(2). 创建绘图设备QImage
(3). 绘图设备装载图片QImage对象的方法load()加载图片,此时QImage对象这时代表就是一张图片
(4). 使用QImage对象的setPixel设置像素点
(5). 将修改后的QImage图片显示出来- void Widget::paintEvent(QPaintEvent * event)
- {
- //创建画家对象
- QPainter painter(this); //向当前窗口画图
- //利用QImage对象对像素进行修改
- QImage image;
- image.load(":/Luffy.png"); //加载图片
- //修改像素点
- for(int i = 50;i<100;i++)
- {
- for(int j = 0;j<100;j++)
- {
- QRgb value = qRgb(255,0,0); //创建QRgb对象
- image.setPixel(i,j,value); //修改像素点的值
- }
- }
- }
5.3 QPicture
QPicture是一个可以记录和重现QPainter命令的绘图设备。 QPicture将QPainter的命令序列化到一个IO设备,保存为一个平台独立的文件格式。这种格式有时候会是“元文件(meta- files)”。Qt的这种格式是二进制的,不同于某些本地的元文件,Qt的pictures文件没有内容上的限制,只要是能够被QPainter绘制的元素,不论是字体还是pixmap,或者是变换,都可以保存进一个picture中。
QPicture是平台无关的,因此它可以使用在多种设备之上,比如svg、pdf、ps、打印机或者屏幕。回忆下我们这里所说的QPaintDevice,实际上是说可以有QPainter绘制的对象。QPicture使用系统的分辨率,并且可以调整 QPainter来消除不同设备之间的显示差异。
如果我们要记录下QPainter的命令,首先要使用QPainter::begin()函数,将QPicture实例作为参数传递进去,以便告诉系统开始记录,记录完毕后使用QPainter::end()命令终止。(1). 创建绘图设备QPicture类对象
(2). 创建画家QPainter类对象
(3). 画家调用QPainter类中的方法begin(),绑定函数
(4). 设置画笔、画刷等属性,将属性加载到画家对象上
(5). 调用画家对象的方法end()结束画画
(6). 调用QPicture类的对象的方法save保存图片- //QPicture 绘图设备 可以记录和重现绘图指令
- QPicture pic; //创建绘图设备
- QPainter painter; //创建画家对象
- painter.begin(&pic); //开始画画
- painter.setPen(QPen(Qt::blue)); //设置画笔
- painter.drawEllipse(QPoint(50,50),50,50);
- painter.end(); //结束画画
- pic.save("D:\\pic.ld"); //保存的文件中含有所有指令
读取QPicture类的图片(1). 创建QPicture用来保存图片数据
(2). 使用QPicture类中的方法load()来读取Picture数据
(3). 创建画家类QPainter对象
(4). 画家对象调用drawPicture方法,还原图片- //重现pic的绘图指令
- QPicture pic;
- pic.load("D:\\pic.ld"); //加载绘图指令
- QPainter painter(this);
- painter.drawPicture(100,100,pic); //绘图加载绘图指令
本文福利,莬费领取Qt开发学习资料包、技术视频,内容包括(C++语言基础,Qt编程入门,QT信号与槽机制,QT图像绘制,QT网络,QT数据库编程,QT项目实战,QT嵌入式开发,Quick模块等等)↓↓↓↓↓↓见下面↓↓文章底部点击莬费领取↓↓
-
相关阅读:
yo!这里是c++中的多态
苹果macOS无法给App麦克风授权解决办法
JDK1.7和JDK1.8版本的新特性
Acwing.143 最大异或对(trie树)
C# 处理TCP数据的类(服务端)
PAT(乙级)1091 N-自守数(JAVA)
用three.js做一个3D汉诺塔游戏(上)
程序设计思路-球连球组成的群
【Ubuntu】树莓派4B安装Ubuntu18.04(超详细)
Unity3D热更设计:一款基于 HybridCLR的C#热更方案
- 原文地址:https://blog.csdn.net/m0_60259116/article/details/127824419
