-
vite+vue3+ts项目集成vue-router、axios封装、sass、element-plus及icon(新增在线预览地址)
在线预览
一、根据vite+vue3+ts项目搭建的项目,此时的目录结构如下:
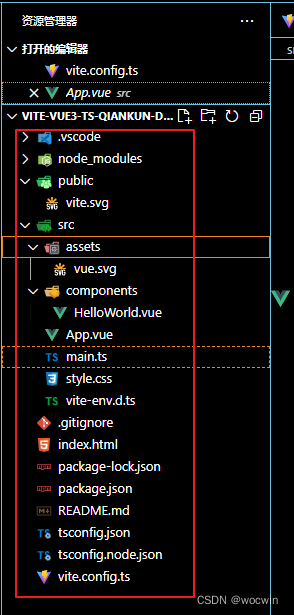
二、集成vue-router、axios封装、sass、element-plus及icon
一、配置别名(先安装@types/node)
npm i @types/node -D- 1
1、vite.config.ts 配置别名,代码如下
import { resolve } from 'path' resolve: { // 配置别名 alias: { '@': resolve(__dirname, 'src'), components: resolve(__dirname, 'src/components') }, // 类型: string[] 导入时想要省略的扩展名列表。 extensions: ['.js', '.ts', '.jsx', '.tsx', '.json', '.vue', '.mjs'] }- 1
- 2
- 3
- 4
- 5
- 6
- 7
- 8
- 9
- 10
二、安装vue-router(也可以用yarn)
npm i vue-router@4- 1
1、在src目录新建views文件夹,新建index.vue文件,代码如下:
<template> <h1>欢迎vite+vue3+ts+pinia+element-plus+qiankun项目h1> template>- 1
- 2
- 3
2、在src目录新建router文件夹,新建index.ts文件,代码如下:
import { createRouter, createWebHistory, RouteRecordRaw } from 'vue-router' import Home from '@/views/index.vue' const routes: Array<RouteRecordRaw> = [ { path: '/', name: 'Home页面', component: Home } ] const router = createRouter({ history: createWebHistory(), routes }) export default router- 1
- 2
- 3
- 4
- 5
- 6
- 7
- 8
- 9
- 10
- 11
- 12
- 13
- 14
3、在main.ts文件中引入
import { createApp } from 'vue' import App from './App.vue' import router from './router' const app = createApp(App) // 注册路由 app.use(router) app.mount('#app')- 1
- 2
- 3
- 4
- 5
- 6
- 7
4、在App.vue文件改造如下
<template> <router-view /> template>- 1
- 2
- 3
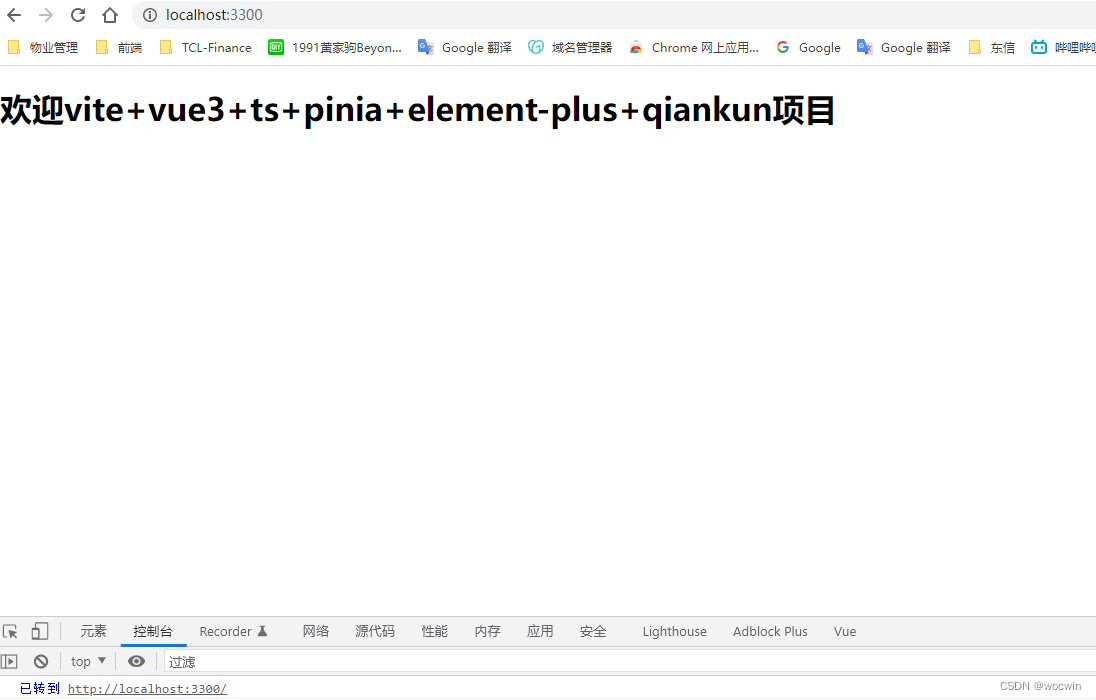
5、最终效果
三、安装element-plus/icon
npm install element-plus @element-plus/icons-vue --save- 1
1、在main.ts文件中引入
我这是全量引入;若是按需引入需要unplugin-vue-components插件,请自行配置
import ElementPlus from 'element-plus' import 'element-plus/dist/index.css' import locale from 'element-plus/lib/locale/lang/zh-cn'// 因element-plus默认是英文,我们指定一下默认中文 // 图标并进行全局注册 import * as ElementPlusIconsVue from '@element-plus/icons-vue' // 注册ElementPlus app.use(ElementPlus, { locale // 语言设置 // size: Cookies.get('size') || 'medium' // 设置默认尺寸 }) // 注册所有图标 for (const [key, component] of Object.entries(ElementPlusIconsVue)) { app.component(key, component) }- 1
- 2
- 3
- 4
- 5
- 6
- 7
- 8
- 9
- 10
- 11
- 12
- 13
- 14
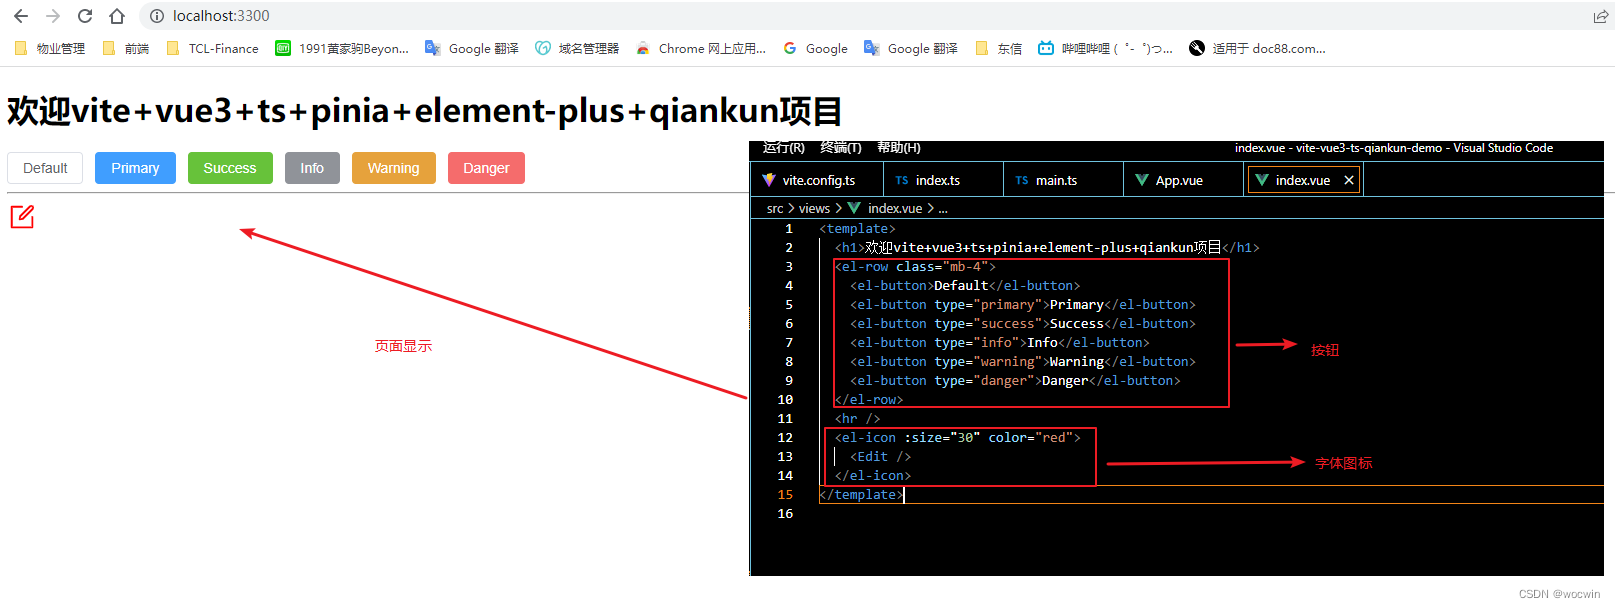
2、在页面使用
四、安装css 预处理器sass
npm install -D sass sass-loader- 1
1、页面使用
- 1
- 2
- 3
- 4
- 5
- 6
五、安装axios及api封装
npm install axios --save- 1
1、封装axiso前先配置环境变量新建4个文件.env.dev/sit/uat/prod
VITE_APP_ENV='dev' // /sit/uat/prod # import.meta.env.{参数名} # api地址 VITE_APP_BASE_API = '' // sit-api/uat-api/prod-api- 1
- 2
- 3
- 4
2、根据环境变量构建不同环境包(package.json文件的修改)
"scripts": { "serve": "vite --mode dev", "dev": "vue-tsc --noEmit && vite build --mode dev", "sit": "vue-tsc --noEmit && vite build --mode sit", "uat": "vue-tsc --noEmit && vite build --mode uat", "prod": "vue-tsc --noEmit && vite build --mode prod", "preview": "vite preview" },- 1
- 2
- 3
- 4
- 5
- 6
- 7
- 8
3、存储token安装 @types/js-cookie js-cookie (也可以不用插件)
npm i @types/js-cookie js-cookie -D- 1
4、在src目录新建utils文件夹,新建request.ts文件,代码如下:
import axios from 'axios' import Message from '@/utils/message' // 防止重复点击重复弹出message弹框 import { ElMessageBox } from 'element-plus' import { getToken } from '@/utils/cookies' export default (config: any) => { // 创建axios实例 const service: any = axios.create({ baseURL: import.meta.env.VITE_APP_BASE_API as string, // 超时 timeout: 50000 }) // 请求拦截器 service.interceptors.request.use( (config: any) => { config.headers['Authorization'] = getToken() || '' config.headers['Content-Type'] = config.headers['Content-Type'] || 'application/json' // 8080 if (config.type == 'file') { config.headers['content-type'] = 'application/multipart/form-data' } else if (config.type == 'form') { config.headers['Content-type'] = 'application/x-www-form-urlencoded' } if (config.method && config.method.toLowerCase() === 'get') { config.data = true } return config }, (error: any) => { return Promise.reject(error) } ) // 响应拦截器 service.interceptors.response.use( (response: any) => { const code = response.data.code if (code === 401) { ElMessageBox.confirm( '登录状态已过期,您可以继续留在该页面,或者重新登录', '系统提示', { confirmButtonText: '重新登录', cancelButtonText: '取消', type: 'warning' } ).then(() => { // 调用退出登录接口 }) } else if (code !== 200) { Message({ message: response.data.msg, type: 'error', duration: 5 * 1000 }) return Promise.reject('error') } else { return response.data } }, (error: any) => { Message({ message: error.message, type: 'error', duration: 5 * 1000 }) return Promise.reject(error) } ) return service(config) }- 1
- 2
- 3
- 4
- 5
- 6
- 7
- 8
- 9
- 10
- 11
- 12
- 13
- 14
- 15
- 16
- 17
- 18
- 19
- 20
- 21
- 22
- 23
- 24
- 25
- 26
- 27
- 28
- 29
- 30
- 31
- 32
- 33
- 34
- 35
- 36
- 37
- 38
- 39
- 40
- 41
- 42
- 43
- 44
- 45
- 46
- 47
- 48
- 49
- 50
- 51
- 52
- 53
- 54
- 55
- 56
- 57
- 58
- 59
- 60
- 61
- 62
- 63
- 64
- 65
- 66
- 67
- 68
- 69
- 70
- 71
5、在src目录新建api文件夹,新建index.ts文件,代码如下:
import request from '@/utils/request' import * as masterData from './mes/masterData' // 业务接口 // 数据字典-查询 公共api export const getDicts = (dictType: any) => { return request({ url: `/system/dict/data/type/${dictType}`, method: 'GET' }) } export default { getDicts, ...masterData }- 1
- 2
- 3
- 4
- 5
- 6
- 7
- 8
6、在main.ts文件定义全局api方法,代码如下:
// 所有业务api接口 import api from './api' // 注册全局api方法 app.config.globalProperties.$api = api- 1
- 2
- 3
- 4
- 5
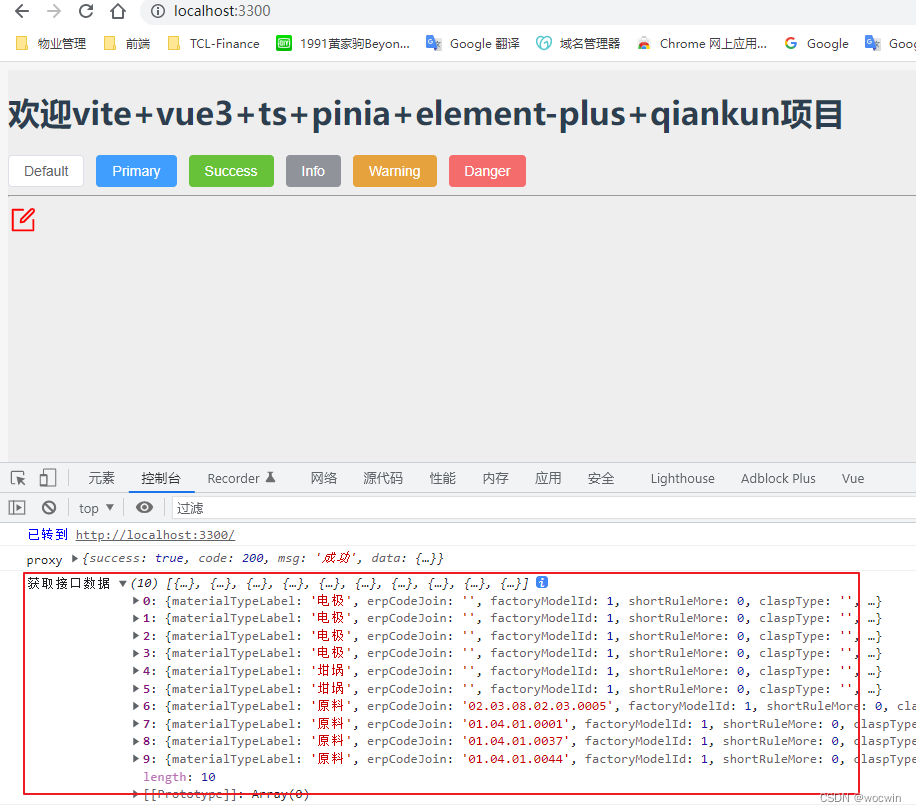
7、页面使用
<script setup lang="ts"> import { getCurrentInstance } from 'vue' const { proxy } = getCurrentInstance() as any // 获取列表数据 const getList = async () => { const res = await proxy.$api.materialList() console.log('proxy', res) if (res.success) { console.log('获取接口数据', res.data.records) } } getList() </script>- 1
- 2
- 3
- 4
- 5
- 6
- 7
- 8
- 9
- 10
- 11
- 12
- 13
8、效果
六、目前的目录结构
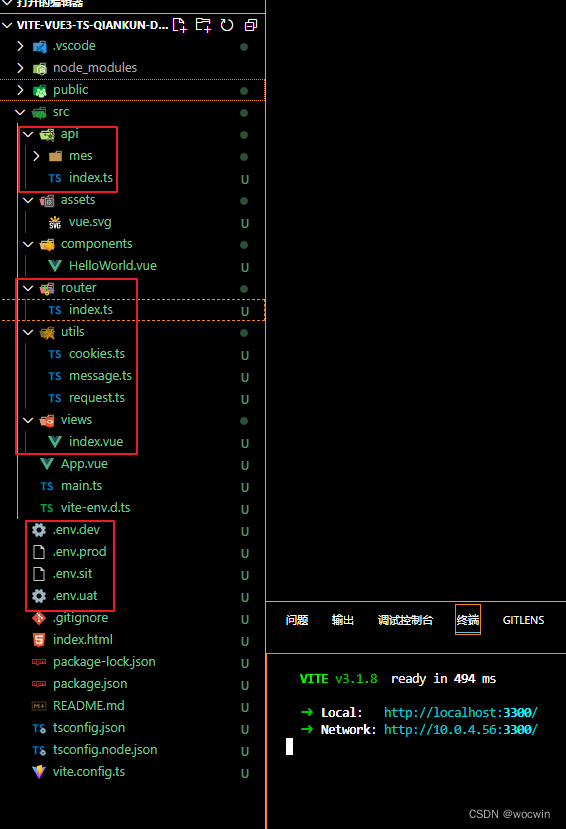
Ts报错解决
找不到模块“@/xxxxxx”或其相应的类型声明。
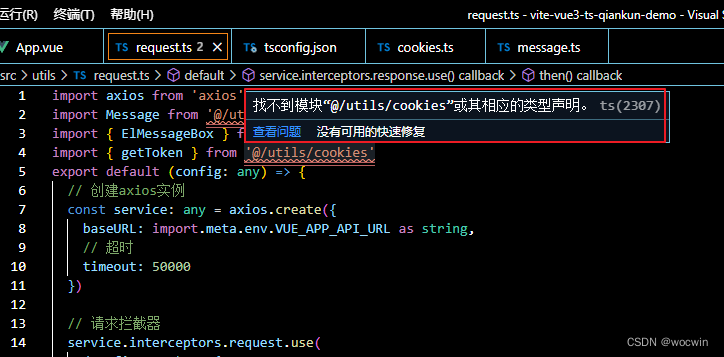
解决:在tsconfig.json文件compilerOptions下添加以下代码
// 解析非相对模块名的基准目录 "baseUrl": "./", // 模块名到基于 baseUrl的路径映射的列表。 "paths": { "@": [ "src" ], "@/*": [ "src/*" ] },- 1
- 2
- 3
- 4
- 5
- 6
- 7
- 8
- 9
- 10
- 11
组件地址
相关文章
-
相关阅读:
第七章:基于敏捷模式S公司质量搭建的第一阶段
#Primavera Unifier:关于零代码/低代码平台特点【2/3】
【数据结构初阶】九、排序的讲解和实现(直接插入 \ 希尔 \ 直接选择 \ 堆 \ 冒泡 -- C语言)
设计模式。
读写锁ReentrantReadWriteLock
直接安装WSL2及安装Ubuntu到F盘
数据结构 | 图
MybatisPlus多表连接查询一对多分页查询数据
2023年【N1叉车司机】考试试卷及N1叉车司机考试技巧
MySQL缓存策略详解
- 原文地址:https://blog.csdn.net/cwin8951/article/details/127314953