好家伙,本篇介绍如何实现"改"
我们先来看看效果吧
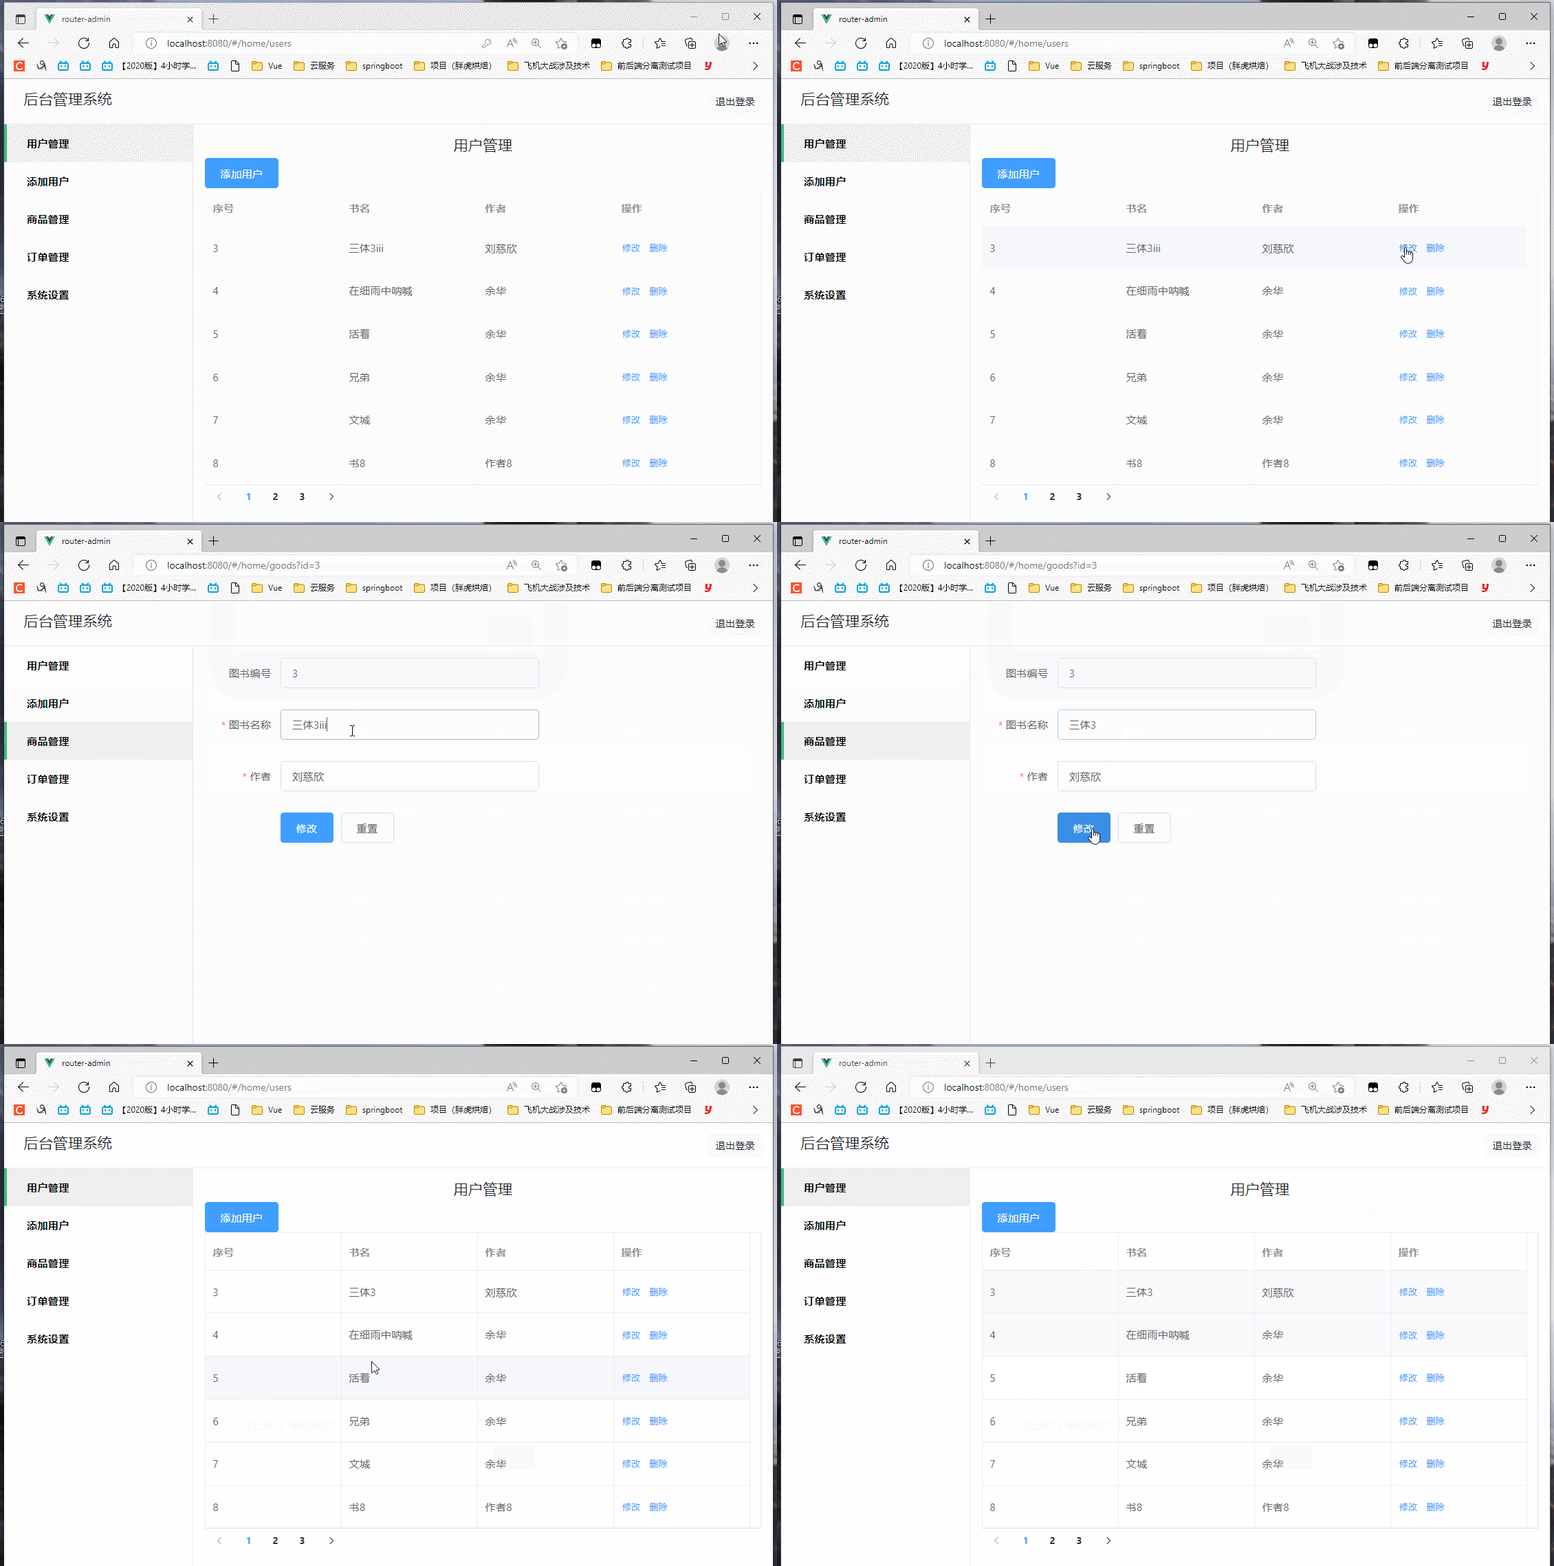
(这可不是假数据哟,这是真数据哟)

(忘记录鼠标了,这里是点了一下刷新)
First Of All
我们依旧先来理一下思路:
首先在"管理"页面中,我能看到所有的书本信息,
随后,在每一个信息后都有对应的"修改按钮"
当我点击这个按钮时,我要①拿到这个这条数据的id($router传参)
然后②跳转到"信息修改界面",(这个界面会像书本添加的那个界面一样,有两个输入框,一个提交按钮,一个重置按钮)
这时,我向后端③请求到当前这条"id"的相关数据(举例:{id:1,name:三体1,auther:刘慈欣})
将它展示到"信息修改界面"的输入框中,随后,你可以将这些数据根据你想要的形状进行修改
最后点击修改数据,④发送axios请求到后端提交更新后的数据
思路清晰,开干
目录如下:
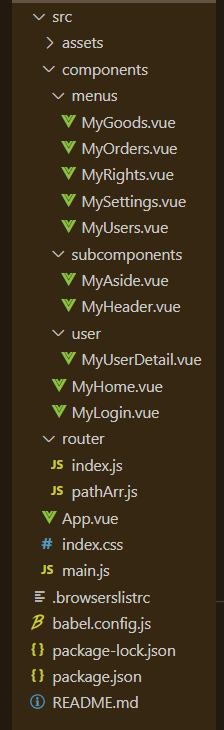
这里我们只需用到MyUsers.vue组件(书本管理页)和MyGoods.vue组件(书本修改页),
当然了,我们要先把这个信息修改界面写(CV)出来
MyGoods组件如下
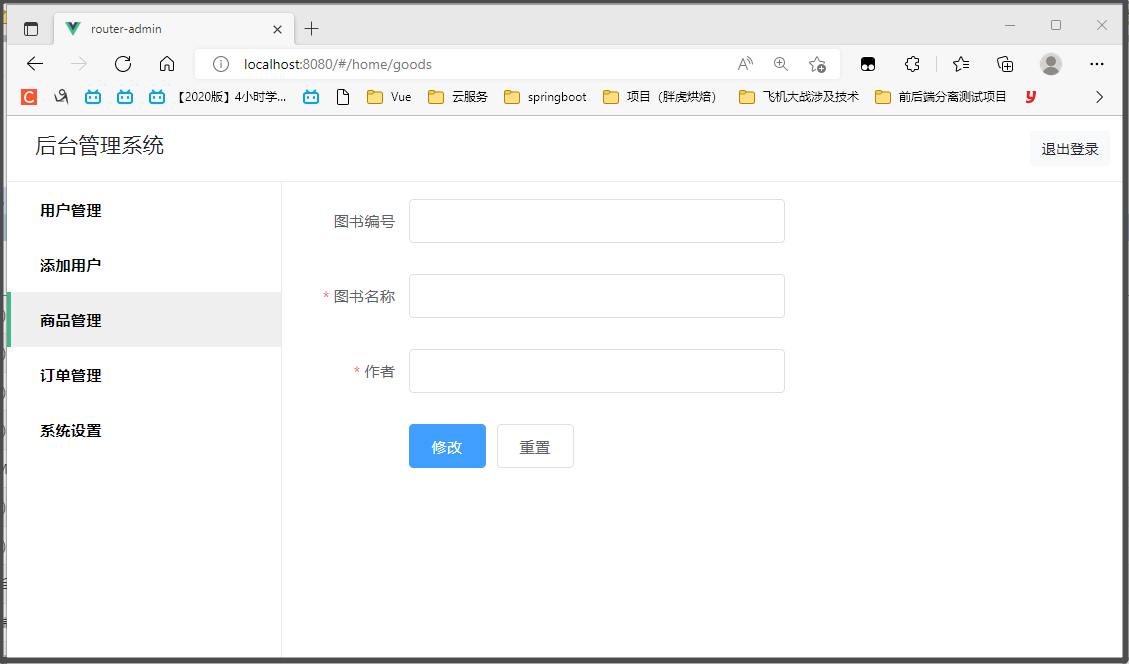
这里我们选择让id只读,不允许修改
MyGoods.vue代码如下:

<template>
  <el-form style="width: 60%" :model="ruleForm" :rules="rules" ref="ruleForm" label-width="100px" class="demo-ruleForm">

      <el-form-item label="图书编号" prop="id">
          <el-input v-model="ruleForm.id" readonly="">el-input>
      el-form-item>

      <el-form-item label="图书名称" prop="name">
          <el-input v-model="ruleForm.name">el-input>
      el-form-item>

      <el-form-item label="作者" prop="author">
          <el-input v-model="ruleForm.author">el-input>
      el-form-item>

      <el-form-item>
          <el-button type="primary" @click="submitForm('ruleForm')">修改el-button>
          <el-button @click="resetForm('ruleForm')">重置el-button>
      el-form-item>

  el-form>
template>

<script>
import axios from 'axios'
  export default {
      data() {
          return {
              ruleForm: {
                  id: '',
                  name: '',
                  author: ''
              },
              rules: {
                  name: [
                      { required: true, message: '图书名称不能为空', trigger: 'blur' }
                  ],
                  author:[
                      { required: true, message: '作者不能为空', trigger: 'blur' }
                  ]
              }
          };
      },
      methods: {
          submitForm(formName) {
              const _this = this
              this.$refs[formName].validate((valid) => {
                  if (valid) {
                      axios.put('http://localhost:8011/book/update',this.ruleForm).then(function(resp){
                          if(resp.data == 'success'){
                              _this.$alert('《'+_this.ruleForm.name+'》修改成功!', '消息', {
                                  confirmButtonText: '确定',
                                  callback: action => {
                                      _this.$router.push('/home/users')
                                  }
                              })
                          }
                      })
                  } else {
                      return false;
                  }
              });
          },
          resetForm(formName) {
              this.$refs[formName].resetFields();
          }
      },
      created(){
        const _this=this
        alert(this.$route.query.id)
        axios.get('http://localhost:8011/book/findById/'+this.$route.query.id).then(function(resp){
          _this.ruleForm =resp.data
        })

  }
}
script>
MyUsers.vue代码如下:
<template>
  <div>

    <h4 class="text-center">用户管理h4>

    <el-col :span="4">
      <el-button type="primary" @click="addDialogVisible = true">添加用户el-button>
    el-col>

    <el-table :data="tableData" border style="width: 100%">
      <el-table-column prop="id" label="序号" width="180">
      el-table-column>
      <el-table-column prop="name" label="书名" width="180">
      el-table-column>
      <el-table-column prop="author" label="作者" width="180">

      el-table-column>
      <el-table-column label="操作" width="180">
        <template slot-scope="scope">
          <el-button @click="handleClick(scope.row)" type="text" size="small">修改el-button>
          <el-button @click="Bookdelete(scope.row)" type="text" size="small">删除el-button>
        template>
      el-table-column>

    el-table>
    <el-pagination :page-size="6" :pager-count="11" layout="prev, pager, next" :total="total" @current-change="page">
    el-pagination>

  div>
template>

<script>
import axios from 'axios'

export default {
  name: 'MyUser',
  data() {
    return {
      total: null,
      // 用户列表数据
      tableData: [
        { id: '1', name: '三体1', author: '大刘' },
        { id: '2', name: '三体2', author: '大刘' },
      ],
      addDialogVisible: false, //控制添加用户对话框的显示与隐藏
      addUserForm: {},
      //添加表单的验证规则对象
      addUserFormRules: {
        // username: [{required:true,message:'请输入用户名',trigger:'blur'},
        // {min:3,max:10,message:'用户名长度在3~10个字符',trigger:'blur'}],
        // password: [{required:true,message:'请输入密码',trigger:'blur'},
        // {min:6,max:15,message:'密码长度在6~15个字符',trigger:'blur'}],
        // email: [{required:true,message:'请输入邮箱',trigger:'blur'}],
        // mobile: [{required:true,message:'请输入手机号',trigger:'blur'}]
      }
    }
  },
  methods: {
    //书本删除方法
    Bookdelete(row) {
      const _this = this
      axios.delete('http://localhost:8011/book/deleteById/' + row.id).then(() => {
        _this.$alert('《' + row.name + '》删除成功!', '消息', {
          confirmButtonText: '确定',
          callback: action => {
            window.location.reload()
          }
        })
      })
    },
    //页面点击修改按钮
    handleClick(row) {
      console.log(row);
      this.$router.push({
        path: "goods",
        query: {
          id: row.id
        }
      })
    },
    //分页方法
    page(currentPage) {
      const _this = this;
      axios.get('http://localhost:8011/book/findAll/' + currentPage + '/6').then(function (resp) {
        _this.tableData = resp.data.content
        _this.total = resp.data.totalElements

        console.log(resp.data)
      })
    }

  },
  created() {
    const _this = this;
    axios.get('http://localhost:8011/book/findAll/1/6').then(function (resp) {
      _this.tableData = resp.data.content
      _this.total = resp.data.totalElements

      console.log(resp.data)
    })
  }

}
script>

<style lang="less" scoped>

style>
(别忘了配路由,你已经是个成熟的cv程序员了,要学会自己配路由)
后端的接口:
package com.example.demo2.controller;

import com.example.demo2.entity.Book;
import com.example.demo2.repository.BookRepository;
import org.springframework.beans.factory.annotation.Autowired;
import org.springframework.data.domain.Page;
import org.springframework.data.domain.PageRequest;
import org.springframework.web.bind.annotation.*;

@RestController
@RequestMapping("/book")
public class BookHandler {
    @Autowired
    private BookRepository bookRepository;

    @GetMapping("/findAll/{page}/{size}")
    public Page findAll(@PathVariable("page") Integer page, @PathVariable("size") Integer size){
        PageRequest request = PageRequest.of(page-1,size);
        return bookRepository.findAll(request);
    }

    @PostMapping("/save")
    public String save(@RequestBody Book book){
        Book result = bookRepository.save(book);
        if(result != null){
            return "success";
        }else{
            return "error";
        }
    }

    @GetMapping("/findById/{id}")
    public Book findById(@PathVariable("id") Integer id){
        return bookRepository.findById(id).get();
    }

    @PutMapping("/update")
    public String update(@RequestBody Book book){
        Book result = bookRepository.save(book);
        if(result != null){
            return "success";
        }else{
            return "error";
        }
    }

    @DeleteMapping("/deleteById/{id}")
    public void deleteById(@PathVariable("id") Integer id){
        bookRepository.deleteById(id);
    }
}
来吧
1.拿到这个这条数据的id
<template slot-scope="scope">
          <el-button @click="handleClick(scope.row)" type="text" size="small">修改el-button>
          <el-button @click="Bookdelete(scope.row)" type="text" size="small">删除el-button>
template>
对应方法:
//页面点击修改按钮
    handleClick(row) {
      console.log(row);
      this.$router.push({
        path: "goods",
        query: {
          id: row.id
        }
      })
    },
2.跳转到"信息修改界面"
this.$router.push({
        path: "goods",
        query: {
          id: row.id
        }
      })
query:用来传参的一个属性
3.请求到当前这条"id"的相关数据,并将它展示到"信息修改界面"的输入框中
created(){
        const _this=this
        alert(this.$route.query.id)
        axios.get('http://localhost:8011/book/findById/'+this.$route.query.id).then(function(resp){
          _this.ruleForm =resp.data
        })

  }
4.发送axios请求到后端提交更新后的数据
submitForm(formName) {
              const _this = this
              this.$refs[formName].validate((valid) => {
                  if (valid) {
                      axios.put('http://localhost:8011/book/update',this.ruleForm).then(function(resp){
                          if(resp.data == 'success'){
                              _this.$alert('《'+_this.ruleForm.name+'》修改成功!', '消息', {
                                  confirmButtonText: '确定',
                                  callback: action => {
                                      _this.$router.push('/home/users')
                                  }
                              })
                          }
                      })
                  } else {
                      return false;
                  }
              });
          },
注意此处用的是put请求
搞定啦!(激动)