-
【MyBatis框架】关联映射
1. 关联映射概述
在关系型数据库中,多表之间存在着三种关联关系,分别为一对一,一对多和多对多,如图
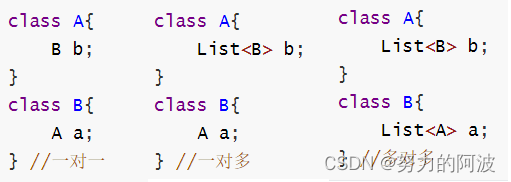
- 一对一的关系:就是在本类中定义对方类型的对象,如A类中定义B类类型的属性b,B类中定义A类类型的属性a。
- 一对多的关系:就是一个A类类型对应多个B类类型的情况,需要在A类中以集合的方式引入B类类型的对象,在B类中定义A类类型的属性a。
- 多对多的关系:在A类中定义B类类型的集合,在B类中定义A类类型的集合。
2. 环境搭建
创建t_emp表

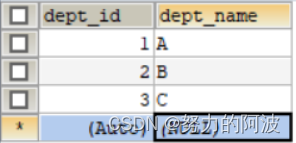
t_dept表
实体类Dept
package com.atguigu.mybatis.pojo; import java.util.List; public class Dept { private Integer deptId; private String deptName; private List<Emp> emps; public Dept() { } public Dept(Integer deptId, String deptName) { this.deptId = deptId; this.deptName = deptName; } public Integer getDeptId() { return deptId; } public void setDeptId(Integer deptId) { this.deptId = deptId; } public String getDeptName() { return deptName; } public void setDeptName(String deptName) { this.deptName = deptName; } public List<Emp> getEmps() { return emps; } public void setEmps(List<Emp> emps) { this.emps = emps; } @Override public String toString() { return "Dept{" + "deptId=" + deptId + ", deptName='" + deptName + '\'' + ", emps=" + emps + '}'; } }- 1
- 2
- 3
- 4
- 5
- 6
- 7
- 8
- 9
- 10
- 11
- 12
- 13
- 14
- 15
- 16
- 17
- 18
- 19
- 20
- 21
- 22
- 23
- 24
- 25
- 26
- 27
- 28
- 29
- 30
- 31
- 32
- 33
- 34
- 35
- 36
- 37
- 38
- 39
- 40
- 41
- 42
- 43
- 44
- 45
- 46
- 47
- 48
- 49
- 50
- 51
- 52
- 53
- 54
实体类Emp
package com.atguigu.mybatis.pojo; public class Emp { private Integer empId; private String empName; private Integer age; private String gender; private Dept dept; public Emp() { } public Emp(Integer empId, String empName, Integer age, String gender) { this.empId = empId; this.empName = empName; this.age = age; this.gender = gender; } public Integer getEmpId() { return empId; } public void setEmpId(Integer empId) { this.empId = empId; } public String getEmpName() { return empName; } public void setEmpName(String empName) { this.empName = empName; } public Integer getAge() { return age; } public void setAge(Integer age) { this.age = age; } public String getGender() { return gender; } public void setGender(String gender) { this.gender = gender; } @Override public String toString() { return "Emp{" + "empId=" + empId + ", empName='" + empName + '\'' + ", age=" + age + ", gender='" + gender + '\'' + ", dept=" + dept + '}'; } public Dept getDept() { return dept; } public void setDept(Dept dept) { this.dept = dept; } }- 1
- 2
- 3
- 4
- 5
- 6
- 7
- 8
- 9
- 10
- 11
- 12
- 13
- 14
- 15
- 16
- 17
- 18
- 19
- 20
- 21
- 22
- 23
- 24
- 25
- 26
- 27
- 28
- 29
- 30
- 31
- 32
- 33
- 34
- 35
- 36
- 37
- 38
- 39
- 40
- 41
- 42
- 43
- 44
- 45
- 46
- 47
- 48
- 49
- 50
- 51
- 52
- 53
- 54
- 55
- 56
- 57
- 58
- 59
- 60
- 61
- 62
- 63
- 64
- 65
- 66
- 67
- 68
- 69
- 70
- 71
- 72
- 73
- 74
- 75
- 76
- 77
3.处理字段名和属性名不一致的情况
SQL语句

接口:
public interface EmpMapper { Emp getEmpById(@Param("empId") Integer empId); }- 1
- 2
- 3
测试方法:
public void test(){ SqlSessionUtils sqlSessionUtils = new SqlSessionUtils(); SqlSession sqlSession = sqlSessionUtils.getSqlSession(); EmpMapper mapper = sqlSession.getMapper(EmpMapper.class); Emp empById = mapper.getEmpById(1); System.out.println(empById.toString()); }- 1
- 2
- 3
- 4
- 5
- 6
- 7
- 8
执行测试方法后会得到如下结果:

可以看到,我们的SQl语句并没有问题,但为什么查询出的结果会有NUll出现呢,这就是因为我们的数据库中的字段名于
Emp实体类的属性名不一致,因此出现了无法对应的情况。解决办法:
1.可以通过为字段起别名的方式,保证和实体类中的属性名保持一致
select emp_id empId,emp_name empName,age,gender from t_emp where emp_id = #{empId};- 1
再次执行尝试:

2.可以在MyBatis的核心配置文件中设置一个全局配置信息mapUnderscoreToCamelCase,
此属性可以在查询表中数据时,自动将_类型的字段名,即下划线转换为驼峰
举个栗子:
例如:字段名
user_id,设置了mapUnderscoreToCamelCase,此时字段名就会转换为userId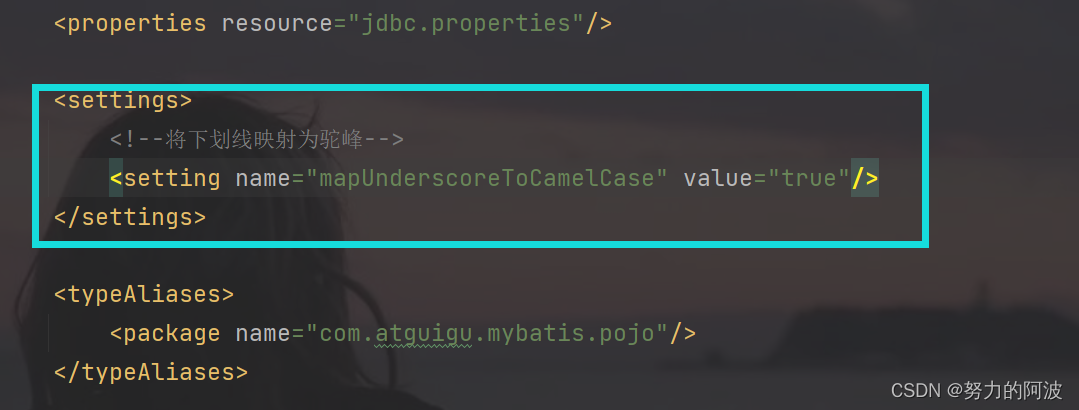
<settings> <setting name="mapUnderscoreToCamelCase" value="true"/> settings>- 1
- 2
- 3
4. 处理一对一映射
调节数据库字段与实体类的属性对应需要标签
resultMap,如上文那个简单的查询例子就可以这样写:<resultMap id="empResultMap" type="Emp"> <id property="empId" column="emp_id">id> <result property="empName" column="emp_name">result> <result property="age" column="age">result> <result property="gender" column="gender">result> resultMap> <select id="getEmpById" resultMap="empResultMap"> select * from t_emp where emp_id = #{empId}; select>- 1
- 2
- 3
- 4
- 5
- 6
- 7
- 8
- 9
- 10
属性:
-
id:表示自定义映射的唯一标识
-
type:查询的数据要映射的实体类的类型
子标签:
-
id:设置主键的映射关系
-
result:设置普通字段的映射关系
-
association :设置多对一的映射关系
-
collection:设置一对多的映射关系
-
属性:
-
property:设置映射关系中实体类中的属性名
-
column:设置映射关系中表中的字段名
-
5. 处理多对一映射
5.1 级联方式处理
<resultMap id="empAndDeptResultMap" type="Emp"> <id column="emp_id" property="empId">id> <result column="emp_name" property="empName">result> <result column="age" property="age">result> <result column="gender" property="gender">result> <result column="dept_id" property="dept.deptId">result> <result column="dept_name" property="dept.deptName">result> resultMap> <select id="getEmpAndDeptById" resultMap="empAndDeptResultMap"> SELECT t_emp.*,t_dept.* FROM t_emp LEFT JOIN t_dept ON t_emp.dept_id=t_dept.dept_id where t_emp.emp_id=#{empId} select>- 1
- 2
- 3
- 4
- 5
- 6
- 7
- 8
- 9
- 10
- 11
- 12
- 13
- 14
- 15
- 16
- 17
- 18
- 19
- 20
接口:
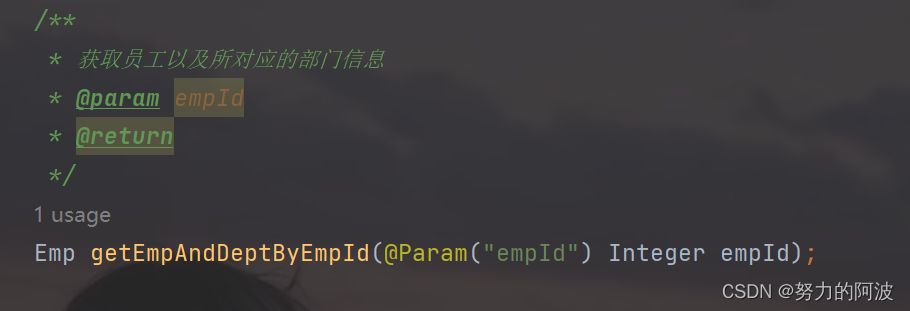
测试方法:
public void test(){ SqlSessionUtils sqlSessionUtils = new SqlSessionUtils(); SqlSession sqlSession = sqlSessionUtils.getSqlSession(); EmpMapper mapper = sqlSession.getMapper(EmpMapper.class); Emp empAndDeptById = mapper.getEmpAndDeptById(1); System.out.println(empAndDeptById); }- 1
- 2
- 3
- 4
- 5
- 6
- 7
查询结果:

5.2 使用association处理映射关系
<resultMap id="empAndDeptResultMap" type="Emp"> <id column="emp_id" property="empId">id> <result column="emp_name" property="empName">result> <result column="age" property="age">result> <result column="gender" property="gender">result> <association property="dept" javaType="Dept"> <id column="dept_id" property="deptId">id> <result column="dept_name" property="deptName">result> association> resultMap>- 1
- 2
- 3
- 4
- 5
- 6
- 7
- 8
- 9
- 10
- 11
5.3 分步查询
第一步:查询员工信息

<resultMap id="empAndDeptByStepResultMap" type="Emp"> <id column="emp_id" property="empId">id> <result column="emp_name" property="empName">result> <result column="age" property="age">result> <result column="gender" property="gender">result> <association property="dept" select="com.atguigu.mybatis.mapper.DeptMapper.getDeptByStep" column="dept_id"> association> resultMap> <select id="getEmpAndDeptByStep" resultMap="empAndDeptByStepResultMap"> select * from t_emp where emp_id=#{empId}; select>- 1
- 2
- 3
- 4
- 5
- 6
- 7
- 8
- 9
- 10
- 11
- 12
- 13
- 14
注意:
select:设置分步查询,查询某个属性的值的sql的标识(namespace.sqlid)
column:将sql以及查询结果中的某个字段设置为分步查询的条件
第二步:根据员工所对应的部门 id 查询部门信息

<select id="getDeptByStep" resultType="com.atguigu.mybatis.pojo.Dept"> select * from t_dept where dept_id=#{deptId}; select>- 1
- 2
- 3
测试方法:
public void test(){ SqlSessionUtils sqlSessionUtils = new SqlSessionUtils(); SqlSession sqlSession = sqlSessionUtils.getSqlSession(); EmpMapper mapper = sqlSession.getMapper(EmpMapper.class); Emp empAndDeptByStep = mapper.getEmpAndDeptByStep(1); System.out.println(empAndDeptByStep); }- 1
- 2
- 3
- 4
- 5
- 6
- 7
- 8
执行结果:

分步查询的优点:
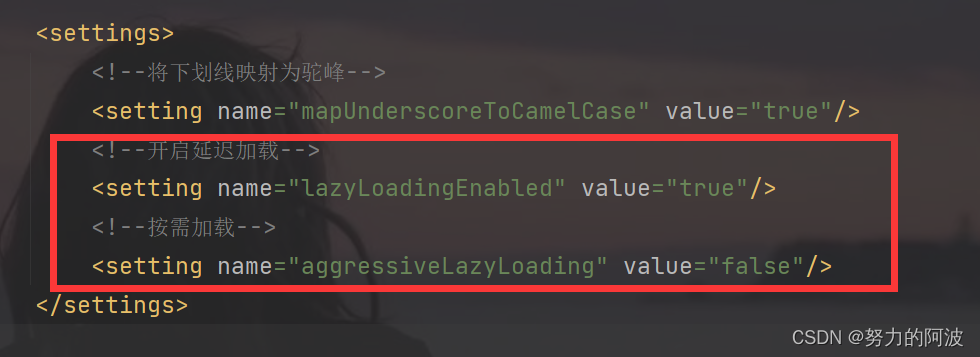
可以实现延迟加载
但是必须在核心配置文件中设置全局配置信息:lazyLoadingEnabled:延迟加载的全局开关。当开启时,所有关联对象都会延迟加载aggressiveLazyLoading:当开启时,任何方法的调用都会加载该对象的所有属性。否则,每个属性会按需加载
此时就可以实现按需加载,获取的数据是什么,就只会执行相应的 sql 。- 此时可通 association和 collection 中的
fetchType属性设置当前的分步查询是否使用延迟加载, fetchType=“lazy(延迟加载) | eager(立即加载)”
6. 处理一对多查询
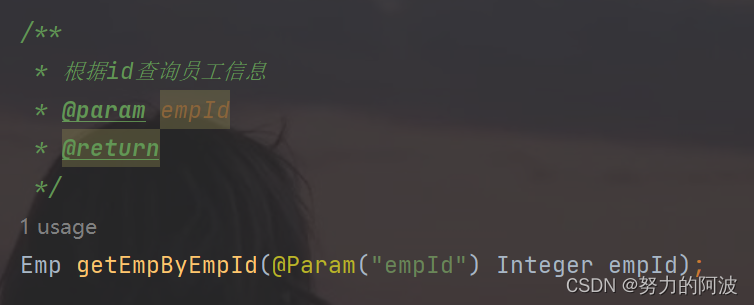
接口:
使用
collection处理-
collection :设置一对多的映射关系
-
ofType :设置 collection 标签所处理的集合属性中存储数据的类型
<resultMap id="DeptAndEmpByDeptIdResultMap" type="Dept"> <id column="dept_id" property="deptId">id> <result column="dept_name" property="deptName">result> <collection property="emps" ofType="Emp"> <id column="emp_id" property="empId">id> <result column="emp_name" property="empName">result> <result column="age" property="age">result> <result column="gender" property="gender">result> collection> resultMap> <select id="getDeptAndEmpByDeptId" resultMap="DeptAndEmpByDeptIdResultMap"> SELECT t_emp.*,t_dept.* FROM t_dept LEFT JOIN t_emp ON t_emp.dept_id=t_dept.dept_id WHERE t_dept.dept_id=#{deptId} select>- 1
- 2
- 3
- 4
- 5
- 6
- 7
- 8
- 9
- 10
- 11
- 12
- 13
- 14
- 15
- 16
- 17
- 18
- 19
- 20
- 21
- 22
测试:
public void test4(){ SqlSessionUtils sqlSessionUtils = new SqlSessionUtils(); SqlSession sqlSession = sqlSessionUtils.getSqlSession(); DeptMapper mapper = sqlSession.getMapper(DeptMapper.class); Dept deptAndEmpByDeptId = mapper.getDeptAndEmpByDeptId(1); System.out.println(deptAndEmpByDeptId); }- 1
- 2
- 3
- 4
- 5
- 6
- 7
执行结果:

7. 小结
关系映射主要处理复杂的SQl查询,如子查询,多表联查等复杂查询,应用此种需求时可以考虑使用。
-
相关阅读:
微服务开发平台 Spring Cloud Blade 部署实践
JAVA毕设项目web实验室课表管理系统(Vue+Mybatis+Maven+Mysql+sprnig+SpringMVC)
【Java】判断语句if.....&选择语句switch......
使用CyberController来将旧手机改造成电脑外挂------手机交互翻译、人脸解锁、语音识别....各个功能等你来探索
【云原生Kubernetes】二进制搭建Kubernetes集群(中)——部署node节点
Telink泰凌微TLSR8258蓝牙开发笔记(二)
Spring MVC的执行流程
div css网页html成品学生作业包含10个html页面——动漫主题海贼王
常见的23种设计模式总结
独家 | 是时候和pd.read_csv(), pd.to_csv()说再见了
- 原文地址:https://blog.csdn.net/m0_64102491/article/details/127619980
